background image

Troubleshooting

_ 63

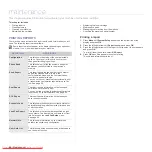
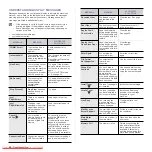
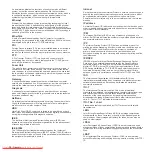
Printing problems

CONDITION

POSSIBLE 

CAUSE

SUGGESTED SOLUTIONS

The machine 
does not 
print.

The machine is not 

receiving power.

Check the power cord 

connections. Check the power 

switch and the power source.

The machine is not 

selected as the 

default printer.

Select Samsung SCX-4x25 

Series as your default printer in 

your Windows.

• Check the machine for the following:

• The front cover is not closed. Close the cover.

• Paper is jammed. Clear the paper jam. See page 57.

• No paper is loaded. Load paper. See page 32.

• The toner cartridge is not installed. Install the toner 

cartridge.

• If a system error occurs, contact your service 

representative.

The connection 

cable between the 

computer and the 

machine is not 

connected properly.

Disconnect the printer cable and 

reconnect it.

The connection 

cable between the 

computer and the 

machine is 

defective.

If possible, attach the cable to 

another computer that is working 

properly and print a job. You can 

also try using a different printer 

cable.

The port setting is 

incorrect.

Check the Windows printer setting 

to make sure that the print job is 

sent to the correct port. If the 

computer has more than one port, 

make sure that the machine is 

attached to the correct one.

The machine may 

be configured 

incorrectly. 

Check the printer properties to 

ensure that all of the print settings 

are correct. 

The printer driver 

may be incorrectly 

installed.

Repair the printer software. See 

the 

Software section

.

The machine is 

malfunctioning.

Check the display message on 

the control panel to see if the 

machine is indicating a system 

error.

The document size 

is so big that the 

hard disk space of 

the computer is not 

enough to access 

the print job.

Get more hard disk space and 

print the document again.

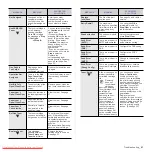
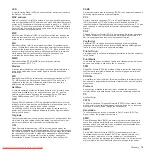
The machine 
selects print 
materials 
from the 
wrong paper 
source.

The paper source 

selection in the 

printer properties 

may be incorrect.

For many software applications, 

the paper source selection is 

found under the 

Thin Paper

 tab 

within the printer properties. 

Select the correct paper source. 

See the printer driver help screen.

A print job is 
extremely 
slow.

The job may be very 

complex.

Reduce the complexity of the 

page or try adjusting the print 

quality settings.

Half the page 
is blank.

The page orientation 

setting may be 

incorrect.

Change the page orientation in 

your application. See the printer 

driver help screen.

The paper size and 

the paper size 

settings do not 

match.

Ensure that the paper size in the 

printer driver settings matches the 

paper in the tray.

Or, ensure that the paper size in 

the printer driver settings matches 

the paper selection in the 

software application settings you 

use.

The machine 
prints, but 
the text is 
wrong, 
garbled, or 
incomplete.

The printer cable is 

loose or defective.

Disconnect the printer cable and 

reconnect. Try a print job that you 

have already printed successfully. 

If possible, attach the cable and 

the machine to another computer 

and try a print job that you know 

works. Finally, try a new printer 

cable.

The wrong printer 

driver was selected.

Check the application’s printer 

selection menu to ensure that 

your machine is selected.

The software 

application is 

malfunctioning.

Try printing a job from another 

application.

The operating 

system is 

malfunctioning.

Exit Windows and reboot the 

computer. Turn the machine off 

and then back on again.

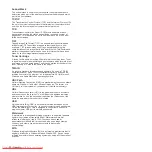
Pages print, 
but are blank.

The toner cartridge 

is defective or out of 

toner.

Redistribute the toner, if 

necessary. See page 52.

If necessary, replace the toner 

cartridge.

The file may have 

blank pages.

Check the file to ensure that it 

does not contain blank pages.

Some parts, such as 

the controller or the 

board, may be 

defective.

Contact a service representative.

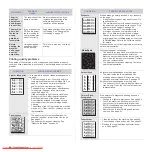
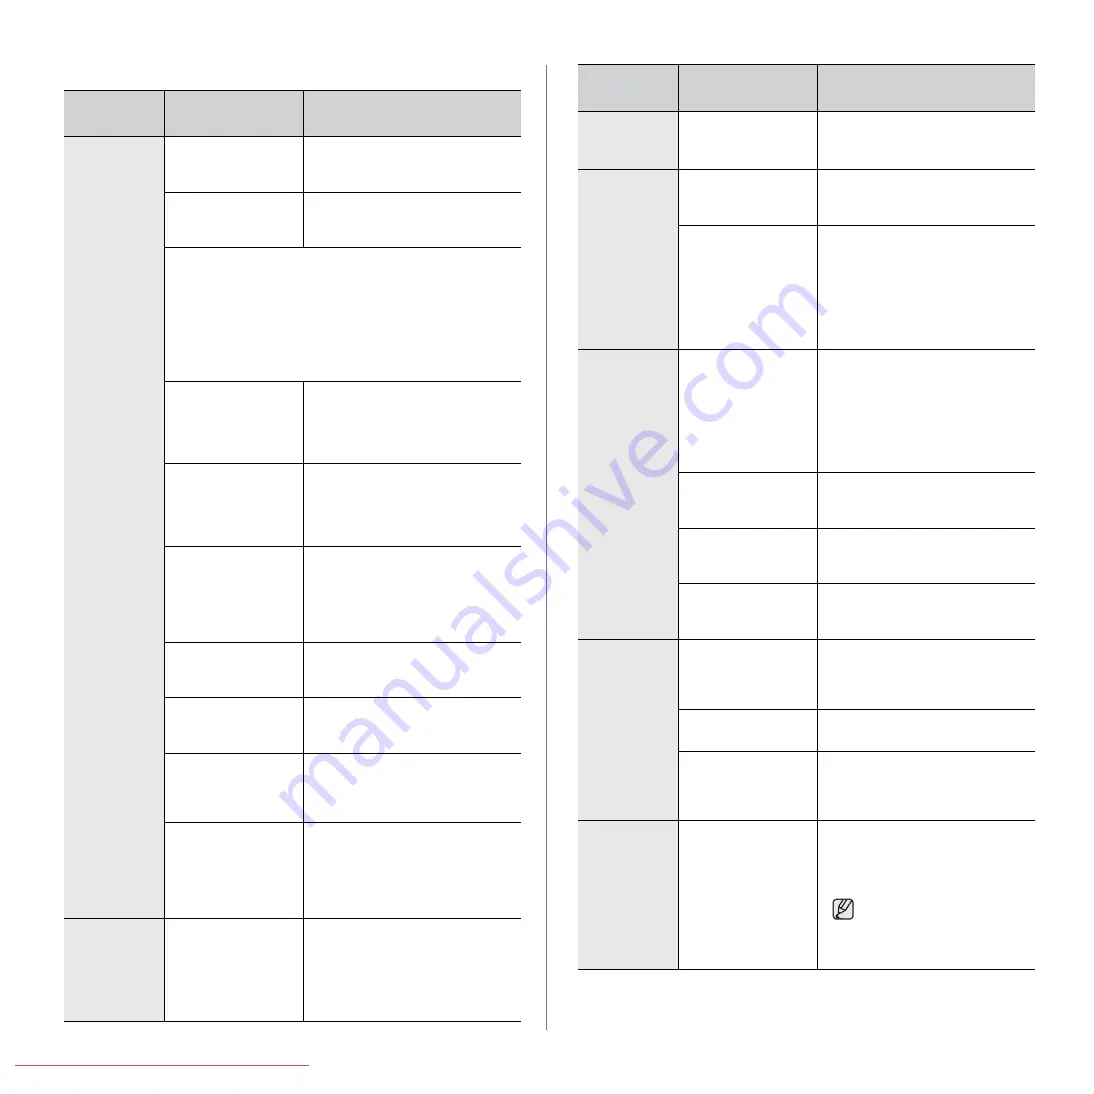
The printer 
does not 
print PDF file 
correctly. 
Some parts 
of graphics, 
text, or 
illustrations 
are missing.

Incompatibility 

between the PDF 

file and the Acrobat 

products.

Printing the PDF file as an image 

may solve this problem. Turn on 

Print As Image

 from the Acrobat 

printing options.

It will take longer to print 

when you print a PDF file 

as an image.

CONDITION

POSSIBLE 

CAUSE

SUGGESTED SOLUTIONS

Downloaded From ManualsPrinter.com Manuals

Summary of Contents for SCX-4x25 Series

Page 1: ...SCX 4x25 Series Multi Functional Printer User s Guide imagine the possibilities Thank you for purchasing a Samsung product Downloaded From ManualsPrinter com Manuals ...

Page 2: ...To save paper you can print on both sides of the paper double sided printing See Software section Expand your machine s capacity Your machine has an extra memory slot to expand their memory Page 71 Zoran IPS Emulation compatible with PostScript 3 PS enables PS printing Print in various environments You can print with Windows 2000 and Windows XP 2003 Vista as well as Linux and Macintosh systems You...

Page 3: ...owing table offers the conventions of this guide FEATURES SCX 4825FN USB 2 0 ADF Automatic Document Feeder Network Interface Enthernet 10 100 Base TX wired LAN Duplex 2 sided printing FAX CONVENTION DESCRIPTION EXAMPLE Bold Used for texts on the display or actual prints on the machine Start Note Used to provide additional information or detailed specification of the machine function and feature Th...

Page 4: ...hine troubleshooting and installing accessories This user s guide also contains a Software section to provide you with information on how to print documents with your machine in various operating systems and how to use the included software utilities Printer Driver Help Provides you with help information on printer driver properties and instructions for setting up the properties for printing To ac...

Page 5: ...ting instruction If you cannot resolve the conflict contact your sales or service representative for assistance 5 Unplug the machine from the AC wall socket and or telephone jack before cleaning Do not use liquid or aerosol cleaners Use only a damp cloth for cleaning 6 Do not place the machine on an unstable cart stand or table It may fall causing serious damage 7 Your machine should never be plac...

Page 6: ...wing conditions When any part of the power cord plug or connecting cable is damaged or frayed If liquid has been spilled into the machine If the machine has been exposed to rain or water If the machine does not operate properly after instructions have been followed If the machine has been dropped or the cabinet appears damaged If the machine exhibits a sudden and distinct change in performance 14 ...

Page 7: ...am see http www energystar gov RECYCLING Recycle or dispose of the packaging material for this product in an environmentally responsible manner CORRECT DISPOSAL OF THIS PRODUCT WASTE ELECTRICAL ELECTRONIC EQUIPMENT Applicable in the European Union and other European countries with separate collection systems This marking on the product accessories or literature indicates that the product and its e...

Page 8: ...aration between the equipment and receiver Connect the equipment into an outlet on a circuit different from that to which the receiver is connected Consult the dealer or experienced radio TV technician for help Canadian Radio Interference Regulations This digital apparatus does not exceed the Class B limits for radio noise emissions from digital apparatus as set out in the interference causing equ...

Page 9: ...you may experience transmission and reception problems with all the equipment It is recommended that no other equipment except for a regular telephone share the line with your machine If your area experiences a high incidence of lightning or power surges we recommend that you install surge protectors for both the power and the telephone lines Surge protectors can be purchased from your dealer or t...

Page 10: ...TTE Directive 1999 5 EC The declaration of conformity may be consulted at www samsung com printer go to Support Download center and enter your printer MFP name to browse the EuDoC January 1 1995 Council Directive 73 23 EEC Approximation of the laws of the member states related to low voltage equipment January 1 1996 Council Directive 89 336 EEC 92 31 EEC approximation of the laws of the Member Sta...

Page 11: ...his library is free for commercial and non commercial use as long as the following conditions are aheared to The following conditions apply to all code found in this distribution be it the RC4 RSA lhash DES etc code not just the SSL code The SSL documentation included with this distribution is covered by the same copyright terms except that the holder is Tim Hudson tjh cryptsoft com Copyright rema...

Page 12: ... and time 25 Changing the clock mode 25 Changing the default mode 26 Setting sounds 26 Entering characters using the number keypad 27 Using the save modes 27 Setting print job timeout 27 Changing the font setting LOADING ORIGINALS AND PRINT MEDIA 28 28 Loading originals 28 On the scanner glass 28 In the ADF 29 Selecting print media 30 Specifications on print media 31 Media sizes supported in each ...

Page 13: ...fax automatically 42 Sending a fax manually 42 Confirming a transmission 42 Automatic redialing 42 Redialing the last number 42 Receiving a fax 42 Selecting the paper tray 42 Changing receiving modes 43 Receiving automatically in Fax mode 43 Receiving manually in Tel mode 43 Receiving manually using an extension telephone 43 Receiving automatically in Ans Fax mode 43 Receiving faxes using DRPD mod...

Page 14: ... Web Service 55 Checking the machine s serial number TROUBLESHOOTING 56 56 Tips for avoiding paper jams 56 Clearing document jams 56 Input Misfeed 57 Exit misfeed 57 Roller misfeed 57 Clearing paper jams 57 In the paper feed area 58 In the manual tray 58 In the toner cartridge area 58 In the paper exit area 58 In the duplex unit area 59 In the optional tray 60 Understanding display messages 62 Sol...

Page 15: ...stalling accessories 72 Upgrading a memory module 72 Installing a memory module SPECIFICATIONS 73 73 Hardware specifications 73 Environmental specifications 73 Electrical specifications GLOSSARY 74 INDEX 78 CONTACT SAMSUNG WORLDWIDE 80 Downloaded From ManualsPrinter com Manuals ...

Page 16: ...cument output tray 2 ADF cover 10 Paper level indicator 3 Control panel 11 Optional tray 2 4 Output support 12 Toner cartridge 5 Front cover 13 Manual tray paper width guides 6 Manual tray 14 Scanner lid 7 Tray 1 15 Scanner glass 8 Document input tray 1 Telephone line socket 6 Handle 2 Extension telephone socket EXT 7 Control board cover 3 USB port 8 Rear cover 4 Network port 9 Power receptacle 5 ...

Page 17: ...nu level 12 Number keypad Dials a number or enters alphanumeric characters See page 26 13 Address Book Allows you to store frequently used fax numbers in memory or search for stored fax numbers or email addresses 14 Redial Pause In ready mode redials the last number or in Edit mode inserts a pause into a fax number 15 On Hook Dial Engages the telephone line 16 Stop Clear Stops an operation at any ...

Page 18: ...2 a Estimated cartridge life means the expected or estimated toner cartridge life which indicates the average capacity of print outs and is designed pursuant to ISO OEC 19752 See Specifications on page 73 The number of pages may be affected by operating environment printing interval media type and media size Some amount of toner may remain in the cartridge even when Toner Exhausted appears and the...

Page 19: ...Reduce Enlarge Darkness Original Type Layout Normal 2 Up 4 Up ID Copy Poster Copy Clone Copy Adjust Bkgd Copy Setup Duplex Print Change Default Copies Copy Collation Reduce Enlarge Darkness Original Type System Setup Machine Setup Machine ID Machine Fax No Date Time Clock Mode Language Default Mode Power Save Timeout Job Timeout Altitude Adj Toner Save System Setup Continued Paper Setup Paper Size...

Page 20: ...et your machine s TCP IP addresses a Allows you to edit a scanned image in many ways using a powerful image editor and to send the image by email You can also open another image editor program like Adobe Photoshop from SmarThru For details refer to the onscreen help supplied on the SmarThru program Linux Printer driver Use this driver to take full advantage of your printer s features SANE Use this...

Page 21: ...ng quality may be affected 2 Unpack the machine and check all the enclosed items 3 Remove the tape holding the machine tightly 4 Install the toner cartridge 5 Load paper See Loading paper on page 32 6 Make sure that all the cables are connected to the machine 7 Turn the machine on SYSTEM REQUIREMENTS Before you begin ensure that your system meets the following requirements Windows Your machine sup...

Page 22: ... 2006 2007 2008 2009 32 64bit Ubuntu 6 06 6 10 7 04 7 10 8 04 8 10 32 64bit SuSE Linux Enterprise Desktop 9 10 32 64bit Debian 3 1 4 0 5 0 32 64bit CPU Pentium IV 2 4GHz IntelCore2 RAM 512 MB 1024 MB Free HDD space 1 GB 2GB It is necessary to claim swap partition of 300 MB or larger for working with large scanned images The Linux scanner driver supports the optical resolution at maximum Please vis...

Page 23: ...grams Samsung Network Printer Utilities SetIP SetIP 3 Click in the SetIP window to open the TCP IP configuration window 4 Enter the network card s MAC address IP address subnet mask default gateway and then click Apply 5 Click OK then the machine prints the network information Confirm all the settings are correct 6 Click Exit to close the SetIP program Contact the network administrator if you are ...

Page 24: ... verify your machine s IP address or the MAC address print a Network Configuration page See Printing reports on page 49 To find a shared network printer UNC Path select Shared Printer UNC and enter the shared name manually or find a shared printer by clicking the Browse button 6 After the installation is finished a window appears asking you to print a test page and to register yourself as a user o...

Page 25: ...ad Month 01 to 12 Day 01 to 31 Year requires four digits Hour 01 to 12 12 hour mode 00 to 23 24 hour mode Minute 00 to 59 You can also use the left right arrow to move the cursor under the digit you want to correct and enter a new number 5 To select AM or PM for 12 hour format press the or button or any number button When the cursor is not under the AM or PM indicator pressing the or button immedi...

Page 26: ...ng names Entering alphanumeric characters 1 When you are prompted to enter a letter locate the button labeled with the character you want Press the button until the correct letter appears on the display For example to enter the letter O press 6 labeled with MNO Each time you press 6 the display shows a different letter M N O m n o and finally 6 You can enter special characters such as space plus s...

Page 27: ...hine handles incoming data as a single job if it comes in within the specified time When an error occurs while processing data from the computer and the data flow stops the machine waits the specified time and then cancels printing if data flow does not resume 1 Press Menu until System Setup appears on the bottom line of the display and press OK 2 Press OK when Machine Setup appears 3 Press the le...

Page 28: ... 50 sheets of paper 75 g m2 20 lb bond for one job When you use the ADF Do not load paper smaller than 142 x 148 mm 5 6 x 5 8 inches or larger than 216 x 356 mm 8 5 x 14 inches Do not attempt to load the following types of paper carbon paper or carbon backed paper coated paper onion skin or thin paper wrinkled or creased paper curled or rolled paper torn paper Remove all staples and paper clips be...

Page 29: ...size and weight of the print media for your machine are described later in this section Desired outcome The print media you choose should be appropriate for your project Brightness Some print media are whiter than others and produce sharper more vibrant images Surface smoothness The smoothness of the print media affects how crisp the printing looks on the paper Dust on the ADF glass may cause blac...

Page 30: ...87 x 7 5 inches 75 to 90 g m2 20 to 24 lb bond 1 sheet in the manual tray Envelope No 10 105 x 241 mm 4 12 x 9 5 inches Envelope DL 110 x 220 mm 4 33 x 8 66 inches Envelope C5 162 x 229 mm 6 37 x 9 01 inches Envelope C6 114 x 162 mm 4 48 x 6 38 inches Transparency Letter A4 Refer to the Plain paper section 138 to 146 g m2 1 sheet in the manual tray Labels Letter Legal US Folio A4 JIS B5 ISO B5 Exe...

Page 31: ...ng over the area where the envelope s seams meet Labels To avoid damaging the machine use only labels designed for use in laser machines When selecting labels consider the following factors Adhesives The adhesive material should be stable at your machine s fusing temperature Check your machine s specification to view the fusing temperature see page 73 Arrangement Only use labels with no exposed ba...

Page 32: ...d plain paper You can purchase an optional tray and attach it below the standard tray to load an additional 250 sheets of paper See Ordering supplies and accessories on page 71 1 To load paper pull and open the paper tray and place paper with the side you want to print facing down 2 After loading paper set the paper type and size for the tray 1 See Software section for PC printing 1 Paper length g...

Page 33: ... problems See Selecting print media on page 29 Flatten any curl on postcards envelopes and labels before loading them into the tray 1 Open the manual tray 2 Load the paper with the side to be printed on facing up 3 When you print in application start the print menu 4 Before you print open printer properties 5 Press the Paper tab in printer properties and select an appropriate paper type 6 Select M...

Page 34: ...E After loading paper in the paper tray you need to set the paper size and type using the control panel buttons These settings will apply to Copy and Fax modes For PC printing you need to select the paper size and type in the application program you use on your PC 1 Press Menu until System Setup appears on the bottom line of the display and press OK 2 Press the left right arrow until Paper Setup a...

Page 35: ... OK 3 Press the left right arrow until the setup option you want appears and press OK 4 Press the left right arrow until the setting you want appears and press OK 5 Repeat steps 3 through 4 as needed 6 Press Stop Clear to return to ready mode Darkness If you have an original containing faint markings and dark images you can adjust the brightness to make a copy that is easier to read Light Works we...

Page 36: ...pying USING SPECIAL COPY FEATURES You can use the following copy features Collation You can set the machine to sort the copy job For example if you make 2 copies of a 3 page original one complete 3 page document will print followed by a second complete document 1 Press Copy 2 Load originals face up into the ADF or place a single original face down on the scanner glass For details about loading an ...

Page 37: ...riginal face down on the scanner glass For details about loading an original see page 28 3 Press Menu until Copy Feature appears on the bottom line of the display and press OK 4 Press the left right arrow until Adjust Bkgd appears and press OK 5 Press the left right arrow until the binding option you want appears Off Does not use this feature Auto Optimizes the background Enhance Lev 1 2 The highe...

Page 38: ...ormation in Samsung Scan Manager on page 39 Scanned images can be saved as BMP JEPG TIFF PDF files Scanning to application programs 1 Make sure that your machine and computer are turned on and properly connected to each other 2 Load originals face up into the ADF or place a single original face down on the scanner glass For details about loading an original see page 28 3 Press Scan Ready to Scan a...

Page 39: ...lows you to change the saving destination and scan settings add or delete application program and format files You can change the scanning machine by using Change Port Local or Network 5 Press OK after setting is done Scanned image is saved in computer s My Documents My Pictures Samsung folder You can use Tawin driver to scan quickly in Samsung Scan Manager program You can also scan by pressing Wi...

Page 40: ...ting in a print queue or print spooler such as the printer group in Windows delete the job as follows 1 Click the Windows Start menu 2 For Windows 2000 select Settings and then Printers For Windows XP 2003 select Printers and Faxes For Windows Vista select Control Panel Hardware and Sound Printers 3 Double click the Samsung SCX 4x25 Series icon 4 From the Document menu select Cancel You can also c...

Page 41: ...top Clear to return to ready mode Recommended resolution settings for different original document types are described in the table below Darkness You can select the default contrast mode to fax your originals lighter or darker 1 Press Fax 2 Press Menu until Fax Feature appears on the bottom line of the display and press OK You cannot use this machine as a fax via the internet phone For more inform...

Page 42: ...ings When the display shows Retry Redial press OK to redial the number without waiting To cancel the automatic redialing press Stop Clear To change the time interval between redials and the number of redial attempts See page 46 Redialing the last number To redial the number you called last 1 Press Redial Pause 2 When an original is loaded in the ADF the machine automatically begins to send If an o...

Page 43: ...e Before using the DRPD option Distinctive Ring service must be installed on your telephone line by the telephone company To set up DRPD you will need another telephone line at your location or someone available to dial your fax number from outside To set up the DRPD mode 1 Press Fax 2 Press Menu until Fax Setup appears on the bottom line of the display and press OK 3 Press the left right arrow un...

Page 44: ... numbers You can enter Group Dial Number using Address Book Button For details see page 47 7 Enter the second fax number and press OK The display asks you to enter another fax number to send the document 8 To enter more fax numbers press OK when Yes appears and repeat steps 6 and 7 You can add up to 10 destinations 9 When you have finished entering fax numbers press the left right arrow to select ...

Page 45: ...glass select Yes to add another page Load another original and press OK When you have finished select No at the Another Page prompt The machine shows the number being dialed and begins sending the fax Forwarding faxes You can forward your incoming and outgoing faxes to another fax machine or email address Forwarding sent faxes to another fax machine You can set the machine to send copies of all ou...

Page 46: ... times the machine rings before answering an incoming call Stamp RCV Name This option allows the machine to automatically print the page number and the date and time of reception at the bottom of each page of a received fax RCV Start Code This code allows you to initiate fax reception from an extension phone plugged into the EXT socket on the back of the machine If you pick up the extension phone ...

Page 47: ... Fax 2 Press Address Book until New Edit appears on the bottom line of the display and press OK 3 Press OK when Speed Dial appears 4 Enter a speed dial number between 0 and 199 and press OK If an entry is already stored in the number you choose the display shows the name to allow you to change it To start over with another speed dial number press Back 5 Enter the name you want and press OK For det...

Page 48: ...g Address Book for an entry There are two ways to search for a number in memory You can either scan from A to Z sequentially or you can search by entering the first letters of the name associated with the number Searching sequentially through the memory 1 If necessary press Fax 2 Press Address Book until Search Dial appears on the bottom line of the display and press OK 3 Press the left right arro...

Page 49: ...options You may print this list to confirm your changes after changing settings Phone Book This list shows all of the fax numbers and email addresses currently stored in the machine s memory Send Report This report shows the fax number the number of pages the elapsed time of the job the communication mode and the communication results for a particular fax job You can set up your machine to automat...

Page 50: ...ions or models If so it is not applicable to your machine OPTIONS DESCRIPTION All Settings Clears all of the data stored in memory and resets all of your settings to the factory default Fax Setup Restores all of the fax options to the factory default Copy Setup Restores all of the copy options to the factory default Scan Setup Restores all of the scan options to the factory default System Setup Re...

Page 51: ... the scan unit Keeping the scan unit clean helps ensure the best possible copies We suggest that you clean the scan unit at the start of each day and during the day as needed 1 Slightly dampen a soft lint free cloth or paper towel with water 2 Open the scanner lid 3 Wipe the surface of the scanner glass and ADF glass until it is clean and dry 4 Wipe the underside of the scanner lid and white sheet...

Page 52: ...msung brand toner cartridges in your printer including generic store brand refilled or remanufactured toner cartridges Estimated cartridge life Estimated cartridge life the life of the toner cartridge yield depends on the amount of toner that print jobs require The actual print out number may vary depending on the print density of the pages you print on operating environment printing interval medi...

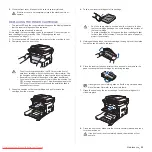
Page 53: ...licks into place 8 Close the front cover Make sure the cover is securely latched and then turn the machine on If the front cover is not completely closed the machine will not operate Do not touch the green surface the OPC drum or the front of each toner cartridge with your hands or any other material Use the handle on each cartridge in order to avoid touching this area Be careful not to scratch th...

Page 54: ... the left right arrow until Supplies Life appears and press OK 4 Press the left right arrow until the item you want appears and press OK Supplies Info Prints the supply information page Total Displays the total number of pages printed ADF Scan Displays the number of pages scanned using the ADF Platen Scan Displays the number of pages scanned using the scanner glass 5 If you selected to print a sup...

Page 55: ...1 Start a web browser such as Internet Explorer from Windows 2 Enter the machine IP address http xxx xxx xxx xxx in the address field and press the Enter key or click Go Your machine s embedded website opens CHECKING THE MACHINE S SERIAL NUMBER When you call for service or register as a user on the Samsung website the machine s serial number may be required You can check the serial number by takin...

Page 56: ...ecommended print media See Setting the paper size and type on page 34 Ensure that the recommended side of the print media is facing down in the tray or facing up in the manual tray CLEARING DOCUMENT JAMS When an original jams while passing through the ADF Document Jam appears on the display Input Misfeed 1 Remove any remaining pages from the ADF 2 Open the ADF cover 3 Rotate the bushing on the rig...

Page 57: ...low the next steps to release the jammed paper 1 Pull the tray open 2 Remove the jammed paper by gently pulling it straight out as shown below If the paper does not move when you pull or if you do not see the paper in this area check In the toner cartridge area MESSAGE LOCATION OF JAM GO TO Paper Jam 0 Open Close Door In the paper feed area or inside the machine Page 57 Page 58 Paper Jam 1 Open Cl...

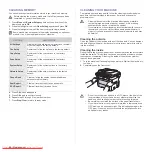
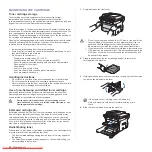
Page 58: ...ridge and close the front cover Printing automatically resumes In the paper exit area If paper is jammed in the paper exit area follow the next steps to release the jammed paper 1 If a long portion of the paper is visible pull it straight out Open and close the front cover firmly The machine will resume printing If you cannot find the jammed paper or if there is any resistance removing the paper s...

Page 59: ... cover Printing automatically resumes In the optional tray If paper is jammed in the optional Tray follow the next steps to release the jammed paper 1 Pull the optional tray open 2 If you see the jammed paper remove the paper from the machine by gently pulling it straight out as shown below If you cannot find the jammed paper or if there is any resistance removing the paper stop pulling and go to ...

Page 60: ...y stored press the OK button to accept No You should send the remaining pages later when memory is available Connection Error Connection with the SMTP server failed Check the server settings and the network cable Document Jam The loaded original has jammed in the ADF Clear the jam See page 56 Door Open The front cover is not securely latched Close the cover until it locks into place Duplex Jam 0 C...

Page 61: ...oner cartridge Replace Toner T This message appears between Toner Empty and Toner Low status Replace the toner cartridge with a new one See page 53 MESSAGE MEANING SUGGESTED SOLUTIONS Replace xxx Soon The life of the part expires soon See page 54 and call for service Retry Redial The machine is waiting for a specified time interval to redial a previously busy station You can press OK to immediatel...

Page 62: ...Paper sticks together Ensure there is not too much paper in the tray The tray can hold up to 250 sheets of paper depending on the thickness of your paper Make sure that you are using the correct type of paper See page 34 Remove paper from the tray and flex or fan the paper Humid conditions may cause some paper to stick together Multiple sheets of paper do not feed Different types of paper may be s...

Page 63: ... Paper tab within the printer properties Select the correct paper source See the printer driver help screen A print job is extremely slow The job may be very complex Reduce the complexity of the page or try adjusting the print quality settings Half the page is blank The page orientation setting may be incorrect Change the page orientation in your application See the printer driver help screen The ...

Page 64: ...AUSE SUGGESTED SOLUTIONS AaBbCc AaBbCc AaBbCc AaBbCc AaBbCc Dropouts If faded areas generally rounded occur randomly on the page A single sheet of paper may be defective Try reprinting the job The moisture content of the paper is uneven or the paper has moist spots on its surface Try a different brand of paper See page 29 The paper lot is bad The manufacturing processes can cause some areas to rej...
Page 65: ...acters are improperly formed and producing a wavy effect the scanner unit may need service For service contact a service representative Page skew Ensure that the paper is loaded properly Check the paper type and quality See page 29 Ensure that the paper or other material is loaded correctly and the guides are not too tight or too loose against the paper stack CONDITION SUGGESTED SOLUTIONS A AaBbCc...

Page 66: ... Printer tab in printer driver s properties See page 25 CONDITION SUGGESTED SOLUTIONS Copies are too light or too dark Use Darkness to darken or lighten the background of the copies Smears lines marks or spots appears on copies If defects are on the original use Darkness to lighten the background of your copies If no defects are on the original clean the scan unit See page 51 Copy image is skewed ...
Page 67: ...ck your operating system Supporting operating systems are Windows 2000 XP Vista CONDITION SUGGESTED SOLUTIONS The machine is not working there is no display and the buttons are not working Unplug the power cord and plug it in again Ensure that there is power to the electrical outlet No dial tone sounds Check that the phone line is connected properly Check that the phone socket in the wall is worki...

Page 68: ...printer should be restored The stopped status might be activated when some problems in printing occurred For instance this could be an attempt to print document when port is claimed by a scanning application Check if the port is not busy Since functional components of MFP printer and scanner share the same I O interface port the situation of simultaneous access of different consumer application to...

Page 69: ...f the problem you should open ports configuration and select the port assigned to your scanner port s symbol dev mfp0 corresponds to LP 0 designation displayed in the scanners options dev mfp1 relates to LP 1 and so on USB ports start at dev mfp4 so scanner on USB 0 relates to dev mfp4 respectively and so forth sequentially In the Selected port pane you can see if the port is occupied by some othe...

Page 70: ...s not disappeared from the spooler in Mac OS 10 3 2 Update your Mac OS to OS 10 3 3 or higher Some letters are not displayed normally during the Cover page printing This problem is caused because Mac OS cannot create the font during the Cover page printing English alphabet and numbers are displayed normally at the Cover page When printing a document in Macintosh with Acrobat Reader 6 0 or higher c...

Page 71: ...PART NUMBER Standard yield toner cartridge Average cartridge yield 2 000 standard pages MLT D209S Region Ab MLT D2092S b Region A Albania Austria Belgium Bosnia Bulgaria Croatia Cyprus Czech Republic Denmark Finland France Germany Greece Hungary Italy Macedonia Netherlands Norway Poland Portugal Romania Serbia Slovakia Slovenia Spain Sweden Switzerland UK High yield toner cartridge Average cartrid...

Page 72: ...all additional memory When you are expanding the memory capacity you can add a memory module to the vacant memory slot Your machine has 128 MB memory and you can add a 256 MB memory module Order information is provided for optional memory module see Memory module on page 71 Installing a memory module 1 Turn the machine off and unplug all cables from the machine 2 Open the control board cover 3 Tak...

Page 73: ...evela a Sound Pressure Level ISO 7779 Configuration tested machine basic installation A4 paper simplex printing Ready mode Less than 26 dBA Printing mode Less than 49 dBA Temperature Operation 10 to 32 C 50 to 89 6 F Storage 20 to 40 C 4 to 104 F Humidity Operation 20 to 80 RH Storage 10 to 90 RH Power requirements are based on the country region where the device is sold Do not convert operating v...

Page 74: ...ocument Feeder DADF is a mechanism that will automatically feed and flip over an original sheet of paper so that the machine can scan on both sides of the paper Default The value or setting that is in effect when taking a printer out of its box state reset or initialized DHCP A Dynamic Host Configuration Protocol DHCP is a client server networking protocol A DHCP server provides configuration para...

Page 75: ...pecific connector type on the end of the parallel cable that attaches to the peripheral for example a printer Intranet A private network that uses Internet Protocols network connectivity and possibly the public telecommunication system to securely share part of an organization s information or operations with its employees Sometimes the term refers only to the most visible service the internal web...

Page 76: ...OSI offers a standard modular approach to network design that divides the required set of complex functions into manageable self contained functional layers The layers are from top to bottom Application Presentation Session Transport Network Data Link and Physical PABX A private automatic branch exchange PABX is an automatic telephone switching system within a private enterprise PCL Printer Comman...

Page 77: ... for scanners and software By using a TWAIN compliant scanner with a TWAIN compliant program a scan can be initiated from within the program an image capture API for Microsoft Windows and Apple Macintosh operating systems UNC Path Uniform Naming Convention UNC is a standard way to access network shares in Window NT and other Microsoft products The format of a UNC path is servername sharename Addit...

Page 78: ...s 45 receiving faxes 42 sending faxes 42 Forwarding 45 G Group dial numbers set 48 I ID card special copy 36 ID copy 17 J jam clearing paper from the tray1 57 tips for avoiding paper jams 56 jam clear document 56 job timeout set 27 K key sound 26 L LED Status 18 Linux problems 68 loading originals ADF 28 scanner glass 28 M machine ID set 41 Maintenance maintenance parts 54 toner cartridge 52 memor...

Page 79: ... ringer 26 S scanner glass cleaning 51 loading documents 28 secure receiving mode 43 sending a fax automatically 42 setting font 27 sounds set 26 speaker sound 26 speaker volume 26 special copy features 36 speed dial numbers set 47 supplies checking life 54 T Tel mode receiving mode 43 toner cartridge replacing 54 toner save mode 27 tray adjusting the width and length 32 U using SetIP 23 V volume ...

Page 80: ...ANY 01805 SAMSUNG 726 7864 0 14 min www samsung de GUATEMALA 1 800 299 0013 www samsung com latin HONDURAS 800 7919267 www samsung com latin HONG KONG 3698 4698 www samsung com hk HUNGARY 06 80 SAMSUNG 726 7864 www samsung com hu INDIA 3030 8282 1800 110011 1800 3000 8282 www samsung com in INDONESIA 0800 112 8888 www samsung com id ITALIA 800 SAMSUNG 726 7864 www samsung com it JAMAICA 1 800 234 ...

Page 81: ...0 329 999 www samsung com tw THAILAND 1800 29 3232 02 689 3232 www samsung com th TRINIDAD TOBAGO 1 800 SAMSUNG 726 7864 www samsung com latin TURKEY 444 77 11 www samsung com tr U A E 800 SAMSUNG 726 7864 8000 4726 www samsung com ae U K 0845 SAMSUNG 726 7864 www samsung com uk U S A 1 800 SAMSUNG 7267864 www samsung com us UKRAINE 8 800 502 0000 www samsung ua UZBEKISTAN 8 10 800 500 55 500 www ...

Page 82: ... Co Ltd PCL and PCL 6 are trademarks of Hewlett Packard Company Microsoft Windows and Windows Vista are either registered trademarks or trademarks of Microsoft Corporation PostScript 3 is a trademark of Adobe System Inc UFST and MicroType are registered trademarks of Monotype Imaging Inc TrueType LaserWriter and Macintosh are trademarks of Apple Computer Inc All other brand or product names are tr...

Page 83: ...Samsung Printer Software section Downloaded From ManualsPrinter com Manuals ...

Page 84: ... 12 Printing to a file PRN 13 Printer Settings 13 Layout Tab 14 Paper Tab 14 Graphics Tab 15 Extras Tab 16 About Tab 17 Printer Tab 17 Using a Favorite Setting 17 Using Help 17 Chapter 3 ADVANCED PRINTING Printing Multiple Pages on One Sheet of Paper N Up Printing 18 Printing Posters 19 Printing Booklets 19 Printing on Both Sides of Paper 20 Printing a Reduced or Enlarged Document 20 Fitting Your ...

Page 85: ...r 23 Chapter 5 SCANNING Scanning Using Samsung SmarThru Office 24 Using Samsung SmarThru Office 24 Uninstalling Samsung SmarThru Office 25 Using Onscreen Help File 25 Scanning Process with TWAIN enabled Software 25 Scanning Using the WIA Driver 26 Windows XP 26 Windows Vista 26 Chapter 6 USING SMART PANEL Understanding Smart Panel 27 Opening the Troubleshooting Guide 28 Using Printer Settings Util...

Page 86: ... Properties 33 Printing a Document 33 Printing from Applications 33 Printing Files 34 Scanning a Document 34 Using the Image Manager 35 Chapter 8 USING YOUR PRINTER WITH A MACINTOSH Installing Software 37 Setting Up the Printer 38 For a Network connected 38 For a USB connected 38 Printing 39 Printing a Document 39 Changing Printer Settings 39 Printing Multiple Pages on One Sheet of Paper 41 Duplex...

Page 87: ...s attached to a network skip this step and go to Installing Software for Network Printing on page 7 You can install the printer software using the typical or custom method NOTE If the New Hardware Wizard window appears during the installation procedure click in the upper right corner of the box to close the window or click Cancel Typical Installation This is recommended for most users All componen...

Page 88: ...ormation from Samsung select the checkbox and click Finish You are now sent to the Samsung web site Otherwise just click Finish NOTE After setup is complete if your printer driver doesn t work properly reinstall the printer driver See Reinstalling Printer Software on page 10 Custom Installation You can choose individual components to install 1 Make sure that the printer is connected to your comput...

Page 89: ...ay differ depending on the printer and interface in use 6 Select the components to be installed and click Next NOTE You can change the desired installation folder by clicking Browse 7 After the installation is finished a window asking you to print a test page appears If you choose to print a test page select the checkbox and click Next Otherwise just click Next and skip to step 9 8 If the test pag...

Page 90: ... CD ROM drive The CD ROM should automatically run and an installation window appears If the installation window does not appear click Start and then Run Type X Setup exe replacing X with the letter which represents your drive and click OK If you use Windows Vista click Start All programs Accessories Run and type X Setup exe If the AutoPlay window appears in Windows Vista click Run Setup exe in Ins...

Page 91: ... windows firewall and set this option unactivated For other operating system refer to its on line guide 6 After the installation is finished a window appears asking you to print a test page and to register yourself as a user of Samsung Printers in order to receive information from Samsung If you so desire select the corresponding checkbox es and click Finish Otherwise just click Finish NOTE After ...

Page 92: ...ne in network please turn off the firewall and click Update For Windows operating system Start Control Panel and start windows firewall and set this option unactivated For other operating system refer to its on line guide TIP If you want to set a specific IP address on a specific network printer click the Set IP Address button The Set IP Address window appears Do as follows a Select a printer to b...

Page 93: ... page 10 Reinstalling Printer Software You can reinstall the software if installation fails 1 Start Windows 2 From the Start menu select Programs or All Programs your printer driver name Maintenance 3 Select Repair and click Next 4 The list of printers available on the network appears Select the printer you want to install from the list and then click Next If you do not see your printer on the lis...

Page 94: ...lect your printer driver name the window asking you to print a test page appears Do as follows a To print a test page select the check box and click Next b If the test page prints out correctly click Yes If it doesn t click No to reprint it 6 When the reinstallation is done click Finish Removing Printer Software 1 Start Windows 2 From the Start menu select Programs or All Programs your printer dri...

Page 95: ...on due to the machineís setting or environment The following procedure describes the general steps required for printing from various Windows applications The exact steps for printing a document may vary depending on the application program you are using Refer to the User s Guide of your software application for the exact printing procedure 1 Open the document you want to print 2 Select Print from...

Page 96: ...e printer in use If you access printer properties through the Printers folder you can view additional Windows based tabs refer to your Windows User s Guide and the Printer tab see Printer Tab on page 17 NOTES Most Windows applications will override settings you specify in the printer driver Change all print settings available in the software application first and change any remaining settings usin...

Page 97: ...ppear your printer does not have this feature For details see Printing on Both Sides of Paper on page 20 Landscape Portrait Paper Tab Use the following options to set the basic paper handling specifications when you access the printer properties See Printing a Document on page 12 for more information on accessing printer properties Click the Paper tab to access various paper properties Copies Copi...

Page 98: ...have this feature Scaling Printing Scaling Printing allows you to automatically or manually scale your print job on a page You can choose from None Reduce Enlarge and Fit to Page For details see Printing a Reduced or Enlarged Document on page 20 For details see Fitting Your Document to a Selected Paper Size on page 20 Graphics Tab Use the following Graphic options to adjust the print quality for y...

Page 99: ...s for your document See Printing a Document on page 12 for more information about accessing the printer properties Click the Extras tab to access the following feature Watermark You can create a background text image to be printed on each page of your document For details see Using Watermarks on page 21 Overlay Overlays are often used to take the place of preprinted forms and letterhead paper For ...

Page 100: ...ize the print quality for those circumstances Using a Favorite Setting The Favorites option which is visible on each properties tab allows you to save the current properties settings for future use To save a Favorites item 1 Change the settings as needed on each tab 2 Enter a name for the item in the Favorites input box 3 Click Save When you save Favorites all current driver settings are saved To ...

Page 101: ...ges on One Sheet of Paper N Up Printing You can select the number of pages to print on a single sheet of paper To print more than one page per sheet the pages will be reduced in size and arranged in the order you specify You can print up to 16 pages on one sheet 1 To change the print settings from your software application access printer properties See Printing a Document on page 12 2 From the Lay...

Page 102: ... the paper source size and type 5 Click OK and print the document You can complete the poster by pasting the sheets together 0 15 inches 0 15 inches Printing Booklets This printer feature allows you to print your document on both sides of the paper and arranges the pages so that the paper can be folded in half after printing to produce a booklet 1 To change the print settings from your software ap...

Page 103: ...he printing job manually The printer prints every other page of the document first After printing the first side of your job the Printing Tip window appears Follow the on screen instructions to complete the printing job Long Edge Short Edge 2 5 3 2 5 3 2 5 3 2 5 3 Printing a Reduced or Enlarged Document You can change the size of a page s content to appear larger or smaller on the printed page 1 T...

Page 104: ...he preview window When the First Page Only box is checked the watermark prints on the first page only 4 Select watermark options You can select the font name style size or grayscale level from the Font Attributes section and set the angle of the watermark from the Message Angle section 5 Click Add to add a new watermark to the list 6 When you have finished editing click OK and start printing To st...

Page 105: ...ORLD BEST Using a Page Overlay After an overlay has been created it is ready to be printed with your document To print an overlay with a document 1 Create or open the document you want to print 2 To change the print settings from your software application access printer properties See Printing a Document on page 12 3 Click the Extras tab 4 Select the desired overlay from the Overlay drop down list...

Page 106: ...st Computer 1 Start Windows 2 From the Start menu select Printers and Faxes 3 Double click your printer driver icon 4 From the Printer menu select Sharing 5 Check the Share this printer box 6 Fill in the Shared Name field and then click OK Setting Up a Client Computer 1 Right click the Windows Start button and select Explore 2 Select My Network Places and then right click Search for Computers 3 Fi...

Page 107: ...u Office 1 Make sure that your machine and computer are turned on and properly connected to each other 2 Place your photograph or page on the document glass or DADF or ADF 3 Once you have installed Samsung SmarThru Office you will see the SmarThru Office icon on your desktop Double click the SmarThru Office icon The SmarThru Office window opens Tool bar Allows you to use shortcut icons which activ...

Page 108: ...ck to start scanning within that program Refer to Scanning chapter in user s guide Scan Settings Allows you to customize settings for Image type Resolution Scan Size Paper Source Scan To Allows you to customize settings for File Name File Format OCR Language 5 To start scanning click Scan NOTE If you want to cancel the scan job click Cancel Uninstalling Samsung SmarThru Office NOTE Before beginnin...

Page 109: ...e click your scanner driver icon The Scanner and Camera Wizard launches 4 Choose your scanning preferences and click Preview to see how your preferences affect the picture 5 Click Next 6 Enter a picture name and select a file format and destination to save the picture 7 Follow the on screen instructions to edit the picture after it is copied to your computer Windows Vista 1 Load the document s fac...

Page 110: ...ndows user from the Start menu select Programs or All Programs your printer driver name Smart Panel NOTES If you have already installed more than one Samsung printer first select the printer model you want in order to use the corresponding Smart Panel Right click in Windows or Linux or click in Mac OS X the Smart Panel icon and select your printer name The Smart Panel window and its contents shown...

Page 111: ...r Settings Utility you can configure and check print settings 1 Right click in Windows or Linux or click in Mac OS X the Smart Panel icon and select Printer Setting 2 Change the settings 3 To send the changes to the printer click the Apply button NOTES If your printer is connected to a network the SyncThru Web Service window appears instead of the Printer Settings Utility window Using Onscreen Hel...

Page 112: ...r additional components that might be necessary for the Unified Linux Driver software all required packages will be carried onto your system and installed automatically this is possible on a wide set of the most popular Linux clones Installing the Unified Linux Driver Installing the Unified Linux Driver 1 Make sure that you connect your machine to your computer Turn both the computer and the machi...

Page 113: ...hen you wan to uninstall the driver follow the installation instruction above but type root localhost Linux uninstall sh on the terminal screen Uninstalling the Unified Linux Driver 1 When the Administrator Login window appears type in root in the Login field and enter the system password NOTE You must log in as a super user root to install the printer software If you are not a super user ask your...

Page 114: ...on window You can use the onscreen help by clicking Help 3 After changing the configurations click Exit to close the Unified Driver Configurator Printers Configuration button Scanners Configuration button Ports Configuration button Printers Configuration Printers configuration has the two tabs Printers and Classes Printers Tab You can see the current system s printer configuration by clicking on t...

Page 115: ...rts Between Printers and Scanners Your machine may be connected to a host computer via the parallel port or USB port Since the MFP device contains more than one device printer and scanner it is necessary to organize proper access of consumer applications to these devices via the single I O port The Samsung Unified Linux Driver package provides an appropriate port sharing mechanism that is used by ...

Page 116: ...t another printer driver By clicking Options you can set the default device options Jobs shows the list of print jobs Click Cancel job to cancel the selected job and select the Show completed jobs check box to see previous jobs on the job list Classes shows the class that your printer is in Click Add to Class to add your printer to a specific class or click Remove from Class to remove the printer ...

Page 117: ...t any document file 1 Type lpr file_name from the Linux shell command line and press Enter The LPR GUI window appears When you type only lpr and press Enter the Select file s to print window appears first Just select any files you want to print and click Open 2 In the LPR GUI window select your printer from the list and change the printer and print job properties For details about the properties w...

Page 118: ...ut editing an image see page 35 Drag the pointer to set the image area to be scanned 10When you are finished click Save on the toolbar 11Select the file directory where you want to save the image and enter the file name 12Click Save Adding Job Type Settings You can save your scan option settings to retrieve for a later scanning To save a new Job Type setting 1 Change the options from the Scanner P...

Page 119: ... selected image area Zooms the image out Zooms the image in Allows you to scale the image size you can enter the size manually or set the rate to scale proportionally vertically or horizontally Allows you to rotate the image you can select the number of degrees from the drop down list Allows you to flip the image vertically or horizontally Allows you to adjust the brightness or contrast of the ima...

Page 120: ...ler folder 5 Double click the Installer icon 6 Enter the password and click OK 7 The Samsung Installer window opens Click Continue 8 Select Easy Install and click Install Easy Install is recommended for most users All components necessary for printer operations will be installed If you select Custom Install you can choose individual components to install 9 The message which warns all application w...

Page 121: ... MAC OS 10 3 if Auto Select does not work properly select Samsung in Printer Model and your printer name in Model Name For MAC OS 10 4 if Auto Select does not work properly select Samsung in Print Using and your printer name in Model For MAC OS 10 5 10 6 if Auto Select does not work properly select Select a driver to use and your printer name in Print Using Your printer s IP address appears on the...

Page 122: ...ou finish setting the options Mac OS 10 5 Make sure that your printer is selected Changing Printer Settings You can use advanced printing features when using your printer From your Macintosh application select Print from the File menu The printer name which appears in the printer properties window may differ depending on the printer in use Except for the name the composition of the printer propert...

Page 123: ... you want to print This will let you get the best quality printout If you load a different type of print material select the corresponding paper type Mac OS 10 5 Mac OS 10 5 Printer Settings Select Printer Settings from the list to access the following features Toner Save Mode Selecting this option extends the life of your toner cartridge and reduces your cost per page without a significant reduct...

Page 124: ... document The binding options are Long edge binding Which is the conventional layout used in book binding Short edge binding Which is the type often used with calendars 1 From your Macintosh application select Print from the File menu 2 Select the Layout 3 Select a binding orientation from Two Sided option 4 Click Print and the printer prints on both sides of the paper CAUTION If you have selected...

Page 125: ... For Mac OS X 10 4 select your machine in Twain devices option Make sure that Use TWAIN software checkbox is checked and click Connect If a warning message appears click Change Port to select port If TWAIN UI appears from the Preference tab click Change Port to select port NOTE Refer to Scan Manager for Change Port use See your Printer User s Guide For Mac OS X 10 5 10 6 make sure that Connected c...

Page 126: ... 29 N n up printing Macintosh 41 Windows 18 O orientation print 34 Windows 14 overlay create 22 delete 22 print 22 P Paper properties set 14 paper size set 14 print 34 paper source set 34 Windows 14 paper type set print 34 poster print 19 print document 12 fit to page 20 from Macintosh 39 from Windows 12 N up Macintosh 41 Windows 18 overlay 22 poster 21 PRN 13 scaling 20 watermark 21 print resolut...

Page 127: ...n 15 software install Macintosh 37 Windows 4 reinstall Windows 10 system requirements Macintosh 37 uninstall Macintosh 37 Windows 11 status monitor use 27 T toner save set 15 40 TWAIN scan 25 U uninstall software Macintosh 37 Windows 11 uninstalling MFP driver Linux 30 W watermark create 21 delete 21 edit 21 print 21 WIA scan 26 Downloaded From ManualsPrinter com Manuals ...

Page 128: ...Rev 1 01 Downloaded From ManualsPrinter com Manuals ...

Reviews: