


Disassembly and Reassembly
Service Manual
3-3
Samsung Electronics
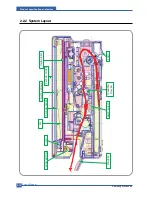
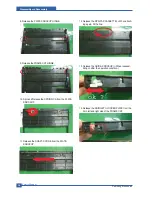
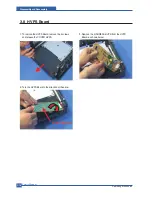
3. Unlatch the latch(2 EA) from the rear bottom of the
SET, as shown below.
4. Take out the Toner Cartridge.
5. To Remove the COVER-FUSER DUMMY, remove
the two screws and then release the COVER-FUSER
DUMMY.
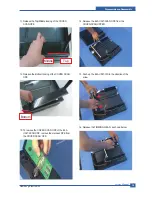
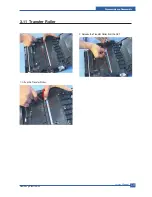
6. To remove the COVER-LEFT, Unlatch the latch(3 EA)
of the COVER-LEFT, as shown below.
7. Following 6. procedure, unlatch the rear latch of the
COVER-LEFT.
8. Release the COVER-LEFT.
Summary of Contents for SCX-4500 Series
Page 56: ...Adjustment and Troubleshooting Service Manual 4 3 Samsung Electronics OPE Design ...
Page 60: ...Adjustment and Troubleshooting Service Manual 4 7 Samsung Electronics LED Display Interaction ...
Page 61: ...Service Manual Adjustment and Troubleshooting 4 8 Samsung Electronics LED Display Interaction ...
Page 62: ...Adjustment and Troubleshooting Service Manual 4 9 Samsung Electronics LED Display Interaction ...
Page 115: ...Samsung Electronics Service Manual Exploded Views Parts List 5 6 5 3 OPE Unit 0 1 2 3 4 5 ...