background image

Using Your Printer with a Macintosh

31

8

Using Your Printer with 

a Macintosh

Your printer supports Macintosh systems with a built-in USB 
interface or 10/100 Base-TX network interface card. When you 
print a file from a Macintosh computer, you can use the CUPS driver 
by installing the PPD file. 

N

OTE

: 

Some printers do not support a network 

interface. Make sure that your printer supports a 
network interface by referring to Printer Specifications 
in your Printer User’s Guide.

This chapter includes:
• Installing Software
• Setting Up the Printer
• Printing
• Scanning

Installing Software

The CD-ROM that came with your printer provides you with the 
PPD file that allows you to use the CUPS driver or Apple 
LaserWriter driver 

(only available when you use a printer 

which supports the PostScript driver)

, for printing on a 

Macintosh computer. 
Also, it provides you with the Twain driver for scanning on a 
Macintosh computer.

Printer driver

Installing the Printer driver

1

Make sure that you connect your printer to the computer. 
Turn on your computer and printer.

2

Insert the CD-ROM which came with your printer into the 
CD-ROM drive.

3

Double-click CD-ROM icon that appears on your 
Macintosh desktop.

4

Double-click the MAC_Installer folder.

5

Double-click the Installer icon.

6

Enter the password and click OK.

7

The Samsung Installer window opens. Click Continue.

8

Select Easy Install and click InstallEasy Install is 
recommended for most users. All components necessary 
for printer operations will be installed. 
If you select Custom Install, you can choose individual 
components to install.

9

The message which warns all application will close on your 
computer appears, Click Continue.

10

After the installation is finished, click Quit.

N

OTE

:

• If you have installed scan driver, click Restart.
• After installation, you need to set up the connection between 

the printer and your computer. See “Setting Up the Printer” 

on page 32.

Uninstalling the Printer driver

Uninstall is required if you are upgrading the software, or if 
installation fails.

1

Make sure that you connect your printer to the computer. 
Turn on your computer and printer.

2

Insert the CD-ROM which came with your printer into the 
CD-ROM drive.

3

Double-click CD-ROM icon that appears on your 
Macintosh desktop.

4

Double-click the MAC_Installer folder.

5

Double-click the Installer icon.

6

Enter the password and click OK.

7

The Samsung Installer window opens. Click Continue

8

Select Uninstall and then click Uninstall.

9

The message which warns all application will close on your 
computer appears, Click Continue.

10

When the uninstallation is done, click Quit.

Summary of Contents for SCX-4300 - SCX 4300 B/W Laser

Page 1: ...SCX 4300 Series Multi Functional Printer User s Guide imagine the possibilities Thank you for purchasing a Samsung product...

Page 2: ......

Page 3: ...e trademarks of Samsung Electronics Co Ltd IBM and IBM PC are trademarks of International Business Machines Corporation PCL and PCL 6 are trademarks of Hewlett Packard company Microsoft Windows Window...

Page 4: ...1805 SAMSUNG 726 7864 0 14 min www samsung de GUATEMALA 1 800 299 0013 www samsung com latin HONDURAS 800 7919267 www samsung com latin HONG KONG 3698 4698 www samsung com hk www samsung com hk_en HUN...

Page 5: ...500 TAIWAN 0800 329 999 www samsung com tw THAILAND 1800 29 3232 02 689 3232 www samsung com th TRINIDAD TOBAGO 1 800 SAMSUNG 726 7864 www samsung com latin TURKEY 444 77 11 www samsung com tr U A E 8...

Page 6: ...verview Supplied printer software 2 7 Printer driver features 2 7 System requirements 2 8 3 Loading original documents and paper Loading document 3 1 Selecting print materials 3 2 Loading paper 3 5 Se...

Page 7: ...onsumable and replacement parts 8 4 9 Troubleshooting Clearing paper jams 9 1 Understanding the Status LED 9 3 Understanding display messages 9 4 Solving other problems 9 5 10 Specifications General s...

Page 8: ...understood the operating instruction If you cannot resolve the conflict contact your sales or service representative for assistance 5 Unplug the machine from the AC wall socket and or telephone jack b...

Page 9: ...nnel under the following conditions When any part of the power cord plug or connecting cable is damaged or frayed If liquid has been spilled into the machine If the machine has been exposed to rain or...

Page 10: ...ronmentally safe recycling Business users should contact their supplier and check the terms and conditions of the purchase contract This product should not be mixed with other commercial wastes for di...

Page 11: ...lling several types of equipment on the same telephone line may result in problems making and receiving telephone calls especially ringing when your line is called The sum of all Ringer Equivalence Nu...

Page 12: ...nsulted at www samsung com printer go to Support Download center and enter your printer name to browse the EuDoC January 1 1995 Council Directive 73 23 EEC Approximation of the laws of the member stat...

Page 13: ...11_Safety information...

Page 14: ...nd heavy paper The paper input tray supports 250 sheets of A4 letter sized paper Create professional documents Print Watermarks You can customize your documents with words such as Confidential See the...

Page 15: ...omponents of your machine Front view 1 document cover 6 manual feeder guides 2 document glass 7 paper input tray 3 control panel 8 manual feeder 4 front cover 9 output tray 5 toner cartridge 10 scan u...

Page 16: ...available menus 4 Scroll through the options available in the selected menu 5 OK Confirms the selection on the display 6 Back Sends you back to the upper menu level 7 Copies Allows you to enter the nu...

Page 17: ...tructions in the guide to get the machine ready Online User s Guide Provides you with step by step instructions for using your machine s full features and contains information for maintaining your mac...

Page 18: ...ion Right 100 mm enough space for ventilation Left 100 mm enough space for ventilation Installing the toner cartridge 1 Open the front cover 2 Remove the toner cartridge from its bag Do not use a knif...

Page 19: ...grooves within the machine will guide the toner cartridge into the correct position until it locks into place completely 7 Close the front cover Make sure that the front cover is securely closed 1 Gro...

Page 20: ...the settings on the control panel Changing the size of the paper in the paper input tray To load longer sizes of paper such as Legal sized paper you need to adjust the paper guides to extend the paper...

Page 21: ...provides two USB modes Fast and Slow Fast is the default mode Some PC users may experience poor USB function in the default mode If this occurs select Slow mode to achieve successful results For deta...

Page 22: ...save modes Toner save mode Toner save mode allows your machine to use less toner on each page Activating this mode extends the life of the toner cartridge beyond what one would experience in the norma...

Page 23: ...software for your multifunctional machine Allows you to edit a scanned image in many ways using a powerful image editor and to send the image by email You can also open another image editor program in...

Page 24: ...for DirectX 9 graphics with 128 MB memory to enable the Aero theme DVD R W Drive Windows Server 2008 R2 Pentium IV 1 GHz x86 or 1 4GHz x64 processors 2GHz or faster 512 MB 2048MB 10 GB Macintosh Linu...

Page 25: ...open the document cover 2 Place the document face down on the document glass and align it with the registration guide at the top left corner of the glass 3 Close the document cover Be careful not to...

Page 26: ...factory results This may be the result of improper handling unacceptable temperature and humidity levels or other variables over which Samsung has no control Before purchasing large quantities of pape...

Page 27: ...oading paper envelopes or other print materials keep these guidelines in mind Always use paper and other materials that conform with the specifications listed on page 3 2 Attempting to print on damp c...

Page 28: ...cies used in the machine must be able to withstand 208 C 406 4 F the machine s fusing temperature Place them on a flat surface after removing them from the machine Do not leave them in the paper tray...

Page 29: ...versely affect printer rollers Forms and letterhead should be sealed in a moisture proof wrapping to prevent changes during storage Before you load preprinted paper such as forms and letterhead verify...

Page 30: ...appears on the top line of the display 2 Press OK when Paper Size appears 3 Press the scroll button or to select the paper tray you want to use and press OK 4 Press the scroll button or to find the p...

Page 31: ...TES If you continuously print many pages the surface of the output tray may become hot Be careful not to touch the surface and especially keep children away from the surface The output tray can hold u...

Page 32: ...documents from the document glass To select from the predefined copy sizes 1 Press Menu then Reduce Enlarge appears 2 Press the scroll button or to select the size setting you want and press OK To fin...

Page 33: ...pying This feature automatically reduces or enlarges the original image to fit on the paper currently loaded in the machine NOTE When the size of the document you want to copy is not same as the size...

Page 34: ...You can paste the printed pages together to make one poster sized document 1 Place the document to be copied on the document glass and close the cover 2 Press Menu until Special Copy appears on the t...

Page 35: ...000 select Settings and then Printers For Windows XP 2003 select Printers and Faxes For Windows Vista 2008 select Control Panel Hardware and Sound Printers For Windows 7 select Control Panel Hardware...

Page 36: ...asics Your machine offers the following ways to scan an image From TWAIN compliant software You can use other software including Adobe Photoshop From the Windows Images Acquisition WIA driver Your mac...

Page 37: ...ailer where you purchased your machine or visit www samsungprinter com and select your country region for information on calling for technical support Type Yielda a Declared yield value in accordance...

Page 38: ...cleared 5 Repeat steps 3 through 4 to clear another setting 6 Press Stop Clear to return to Standby mode Cleaning your machine To maintain print and scan quality follow the cleaning procedures below...

Page 39: ...C drum of the toner cartridge may require cleaning 1 Before starting the cleaning procedure make sure that paper is loaded in the machine 2 Press Menu until Maintenance appears on the top line of the...

Page 40: ...direction this can cause internal damage and toner spillage Use of non Samsung and refilled toner cartridge Samsung Electronics does not recommend or approve the use of non Samsung brand toner cartrid...

Page 41: ...r 6 items to distribute the toner evenly inside the toner cartridge Thoroughly rolling the toner cartridge will assure maximum copies per toner cartridge 4 Remove the paper protecting the toner cartri...

Page 42: ...icating which item needs to be replaced To purchase consumable and replacement parts contact your Samsung dealer or the retailer where you bought your machine We strongly recommend that these items be...

Page 43: ...does not exit continue to step 2 2 Pull the paper input tray out Message Location of Jam Go to Paper Jam 0 Open Close Door In the paper input tray below and page 9 1 Paper Jam 1 Open Close Door In th...

Page 44: ...ot exit continue to step 2 2 Gently pull the paper out of the output tray Skip to step 9 If you cannot see the jammed paper in the output tray continue to the next step 3 Lift the scan unit 4 Pull the...

Page 45: ...r machine s status Status Description Off The machine is off line The machine is in Power Save mode When data is received or any button is pressed it switches to on line automatically Green On The mac...

Page 46: ...dd Paper The paper in the paper input tray has run out Load paper in the paper input tray See page 2 3 Open Heat Error There is a problem in the fuser unit Unplug the power cord and plug it back in If...

Page 47: ...and remove the debris Transparenciesstick together in the paper exit Use only transparencies specifically designed for laser printers Remove each transparency as it exits from the machine Envelopes s...

Page 48: ...nted successfully If possible attach the cable and the machine to another computer and try a print job that you know works Finally try a new printer cable The wrong printer driver was selected Check t...

Page 49: ...rent kind or brand of paper If these steps do not correct the problem contact a service representative AaBbCc AaBbCc AaBbCc AaBbCc AaBbCc AaBbCc AaBbCc AaBbCc AaBbCc AaBbCc AaBbCc AaBbCc AaBbCc AaBbCc...

Page 50: ...paper curl See page 3 2 Turn over the stack of paper in the tray Also try rotating the paper 180 in the tray Try printing to the rear cover Condition Suggested solutions A AaBbCc AaBbCc AaBbCc AaBbCc...

Page 51: ...sary Ensure that the paper is the proper paper weight 80 g m2 20 lb bond paper is recommended Check for copy paper or pieces of copy paper remaining in the machine after a paper jam has been cleared S...

Page 52: ...r system Open MFP configurator and switch to the Printers tab in Printers configuration window to look at the list of available printers Make sure that your machine is displayed on the list If not ple...

Page 53: ...LP 0 designation displayed in the scanners options dev mfp1 relates to LP 1 and so on USB ports start at dev mfp4 so scanner on USB 0 relates to dev mfp4 respectively and so forth sequentially In the...

Page 54: ...ake sure that you are using a high quality cable Your product not listed at Product List Window after you click Add and Select USB Make sure that the cables are connected correctly and the machine is...

Page 55: ...toner cartridge Memory 8 MB Non expandable External dimension W x D x H 409 x 375 x 231 mm 16 1 x 14 8 x 9 1 inches Scanner and copier specifications Weight 9 65 Kg including consumables Package weigh...

Page 56: ...ecting method media type media size and job complexity Up to 18 ppm in A4 19 ppm in Letter First print out time 11 seconds From Ready Print resolution Up to 600 x 600 dpi Printer language SPL Samsung...

Page 57: ...quirements 2 8 Linux problems 9 10 loading documents document galss 3 1 loading paper in the manual feeder 3 5 in the paper input tray 2 3 M Macintosh requirements 2 8 Macintosh problems 9 12 manual f...

Page 58: ...general 10 1 paper 3 2 printer 10 2 scanner and copier 10 1 Status LED 9 3 system requirements Windows 2 8 T toner cartridge installing 2 2 maintaining 8 3 order information 7 1 redistributing 8 3 re...

Page 59: ...REV 4 00...
Page 60: ...Samsung Printer Software section...

Page 61: ...s 8 Layout Tab 9 Paper Tab 9 Graphics Tab 10 Extras Tab 11 About Tab 11 Printer Tab 11 Using a Favorite Setting 12 Using Help 12 Chapter 3 ADVANCED PRINTING Printing Multiple Pages on One Sheet of Pap...

Page 62: ...gs 19 Chapter 6 SCANNING Scanning Using Samsung SmarThru 20 Uninstalling Samsung SmarThru 20 Using Samsung SmarThru 20 Using Onscreen Help File 21 Scanning Process with TWAIN enabled Software 22 Scann...

Page 63: ...Printing Files 28 Scanning a Document 28 Using the Image Manager 29 Chapter 8 USING YOUR PRINTER WITH A MACINTOSH Installing Software 31 Setting Up the Printer 32 For a Network connected 32 For a USB...

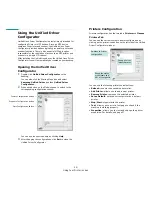
Page 64: ...the installation procedure click in the upper right corner of the box to close the window or click Cancel This is recommended for most users All components necessary for printer operations will be ins...

Page 65: ...f the installation The installation window that appears in this User s Guide may differ depending on the printer and interface in use 5 After the installation is finished a window asking you to print...

Page 66: ...ding on the printer and interface in use 4 Select the components you want to reinstall and click Next If you you select your printer driver name and reinstall the printer software for local printing t...

Page 67: ...nnot select that option due to the machine s setting or environment The following procedure describes the general steps required for printing from various Windows applications The exact steps for prin...

Page 68: ...ffer depending on the printer in use If you access printer properties through the Printers folder you can view additional Windows based tabs refer to your Windows User s Guide and the Printer tab see...

Page 69: ...ape Portrait Paper Tab Use the following options to set the basic paper handling specifications when you access the printer properties See Printing a Document on page 7 for more information on accessi...

Page 70: ...the following Graphic options to adjust the print quality for your specific printing needs See Printing a Document on page 7 for more information on accessing printer properties Click the Graphic tab...

Page 71: ...e drop down list Normal 1 2 3 Your printer prints all pages from the first page to the last page Reverse All Pages 3 2 1 Your printer prints all pages from the last page to the first page Print Odd Pa...

Page 72: ...em from the Favorites drop down list The printer is now set to print according to the Favorites setting you selected To delete a Favorites item select it from the list and click Delete You can also re...

Page 73: ...on One Sheet of Paper N Up Printing You can select the number of pages to print on a single sheet of paper To print more than one page per sheet the pages will be reduced in size and arranged in the o...

Page 74: ...d or Enlarged Document You can change the size of a page s content to appear larger or smaller on the printed page 1 To change the print settings from your software application access printer properti...

Page 75: ...message displays in the preview window When the First Page Only box is checked the watermark prints on the first page only 4 Select watermark options You can select the font name style size or graysca...

Page 76: ...T Dear ABC Regards WORLD BEST Using a Page Overlay After an overlay has been created it is ready to be printed with your document To print an overlay with a document 1 Create or open the document you...

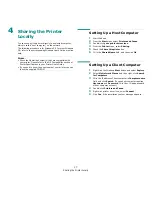
Page 77: ...ROM Setting Up a Host Computer 1 Start Windows 2 From the Start menu select Printers and Faxes 3 Double click your printer driver icon 4 From the Printer menu select Sharing 5 Check the Share this pr...

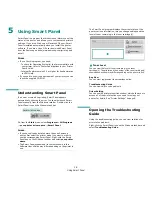
Page 78: ...nel NOTES If you have already installed more than one Samsung printer first select the printer model you want in order to use the corresponding Smart Panel Right click the Smart Panel icon on the Wind...

Page 79: ...Using Smart Panel 19 Changing the Smart Panel Program Settings Right click the Smart Panel icon on the Windows task bar and select Options Select the settings you want from the Options window...

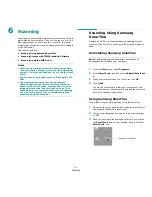
Page 80: ...what you are scanning you may not be able to scan at certain resolutions especially using enhanced dpi Scanning Using Samsung SmarThru Samsung SmarThru is the accompanying software for your machine Wi...

Page 81: ...ail Scanning an image and emailing it Allows you to scan an image preview it and email it NOTE To send an image by e mail you must have a mail client program like Outlook Express which has been set up...

Page 82: ...desktop window select Settings Control Panel and then Scanners and Cameras 3 Double click your scanner driver icon The Scanner and Camera Wizard launches 4 Choose your scanning preferences and click P...

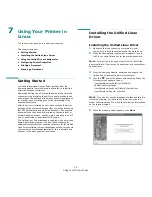
Page 83: ...with a smart and flexible installation program You don t need to search for additional components that might be necessary for the Unified Linux Driver software all required packages will be carried on...

Page 84: ...in the text mode Follow the step 1 to 3 then type root localhost Linux install sh than follow the instruction on the terminal screen Then the installation completes When you wan to uninstall the drive...

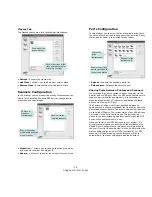
Page 85: ...sponding configuration window You can use the onscreen help by clicking Help 3 After changing the configurations click Exit to close the Unified Driver Configurator Printers Configuration button Scann...

Page 86: ...ected port Sharing Ports Between Printers and Scanners Your machine may be connected to a host computer via the parallel port or USB port Since the MFP device contains more than one device printer and...

Page 87: ...you to view or select another printer driver By clicking Options you can set the default device options Jobs shows the list of print jobs Click Cancel job to cancel the selected job and select the Sho...

Page 88: ...To print any document file 1 Type lpr file_name from the Linux shell command line and press Enter The LPR GUI window appears When you type only lpr and press Enter the Select file s to print window a...

Page 89: ...r further details about editing an image see page 29 Drag the pointer to set the image area to be scanned 10When you are finished click Save on the toolbar 11Select the file directory where you want t...

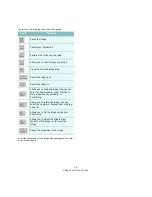
Page 90: ...h the image Crops the selected image area Zooms the image out Zooms the image in Allows you to scale the image size you can enter the size manually or set the rate to scale proportionally vertically o...

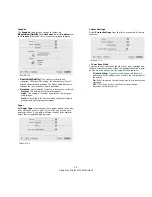
Page 91: ...click the MAC_Installer folder 5 Double click the Installer icon 6 Enter the password and click OK 7 The Samsung Installer window opens Click Continue 8 Select Easy Install and click Install Easy Ins...

Page 92: ...lt queue first 8 For MAC OS 10 3 if Auto Select does not work properly select Samsung in Printer Model and your printer name in Model Name For MAC OS 10 4 if Auto Select does not work properly select...

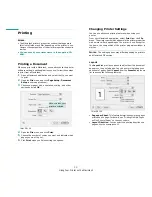
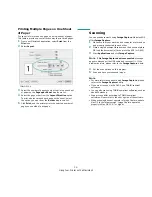
Page 93: ...6 Click Print when you finish setting the options Mac OS 10 4 Make sure that your printer is selected Changing Printer Settings You can use advanced printing features when using your printer From your...

Page 94: ...s and lighter gray scale images Paper Set Paper Type to correspond to the paper loaded in the tray from which you want to print This will let you get the best quality printout If you load a different...

Page 95: ...re that your machine and computer are turned on and properly connected to each other 2 Place a single document face down on the document glass OR load the document s face up into the ADF or DADF 3 Sta...

Page 96: ...acintosh 35 Windows 13 O orientation print 28 Windows 9 overlay create 16 delete 16 print 16 P Paper properties set 9 paper size set 9 print 28 paper source set 28 Windows 9 paper type set print 28 po...

Page 97: ...install Macintosh 31 Windows 4 reinstall Windows 6 system requirements Macintosh 31 uninstall Macintosh 31 Windows 6 status monitor use 18 T toner save set 10 34 TWAIN scan 22 U uninstall software Ma...

Reviews: