Samsung Electronics
3-26
Adjustment and Adjustment
6. AUTO WHITE BALANCE (indoor)
1) Camera mode & 3100˚ K/5100˚ K gray scale chart
2) Connect a video output terminal to a vec-
torscope and a TV.
3) Press the FF(Mode Up)/REW(Mode Down)
button so that OSD shows "265 XX XX".
4) E n s u re that camera picks up image 40µs on
3100˚K gray scale chart precisely and the illumi-
nation is 1500-2000 Lux.
5) Press the START/STOP (Confirm) button to
ensure that white spot on a vectorscope is mov-
ing in the middle of screen.
6) There's is a flicker on screen after finishing the
adjustment.
7. AUTO WHITE BALANCE (outdoor)
1) Camera mode & 3100˚ K/5100˚ K gray scale chart
2) Connect a video output terminal to a
vectorscope and a TV.
3) Press the FF(Mode Up)/REW(Mode Down)
button so that OSD shows "266 XX XX".
4) Ensure that camera picks up image 40 on 5100
gray scale chart (3100 gray scale chart + C16 fil-
ter) precisely and the illumination is 1500-2000
Lux.
5) Press the START/STOP (Confirm) button to
ensure that white spot on a vectorscope is mov-
ing in the middle of screen.
6) There's is a flicker on screen after finishing the
adjustment.
8. R-Y POSITIVE GAIN
1) Camera mode & 3100˚ K gray scale chart
2) Connect a video output terminal to a vec-
torscope and a TV.
3) Press the FF(Mode Up)/REW(Mode Down)
button so that OSD shows "70 XX XX".
4) Ensure that camera picks up image on 3100˚ K
color bar chart precisely and the illumination is
1500-2000 Lux.
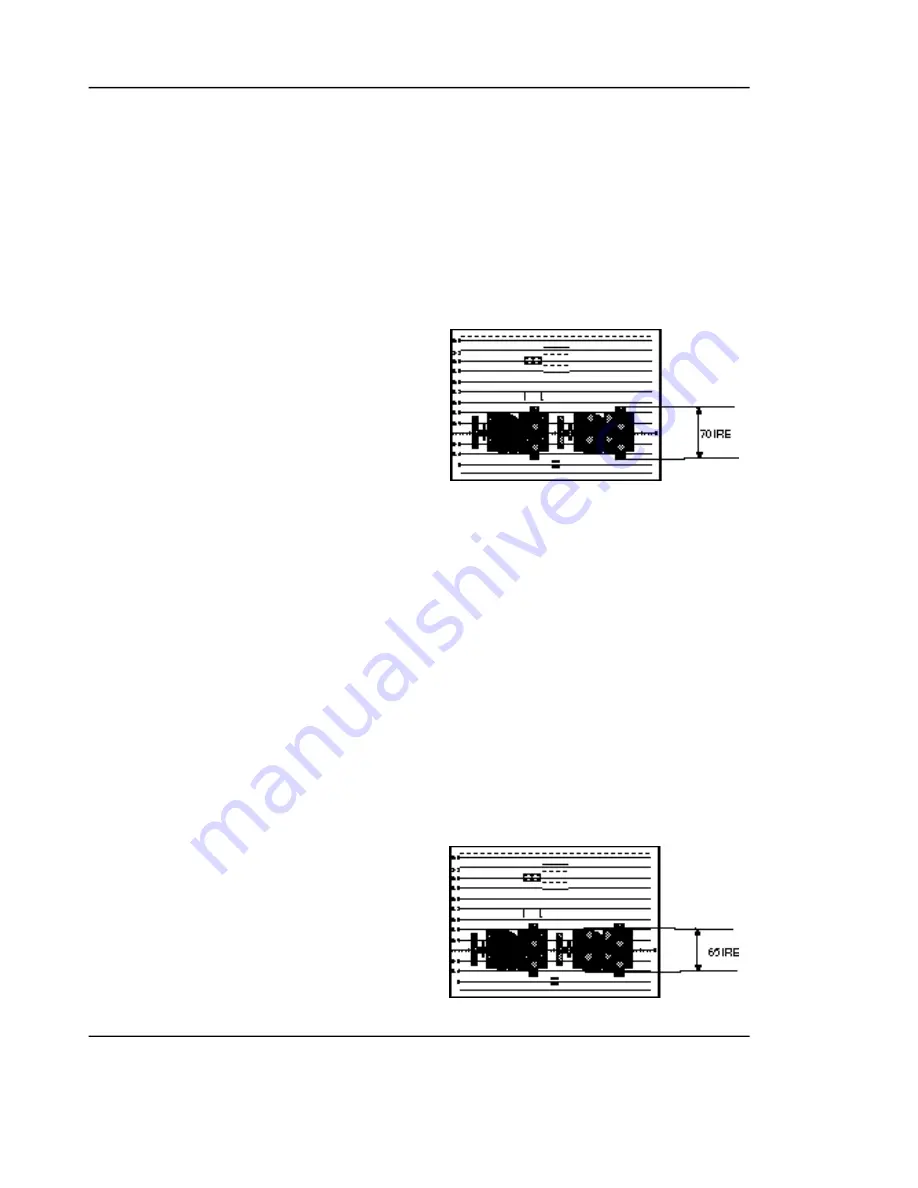
5) Press the PLAY (Data Up)/STOP (Data Down)
so that the red level is 70IRE.
6) Press the START/STOP (Confirm) button to
store data.
7) There's is a flicker on screen after finishing the
adjustment.
9. R-Y NEGATIVE GAIN)
1) Camera mode & 3100˚ K gray scale chart
2) Connect a video output terminal to a vec-
torscope and a TV.
3) Press the FF(Mode Up)/REW(Mode Down)
button so that OSD shows "71 XX XX".
4) Ensure that camera picks up image on 3100˚ K
color bar chart precisely and the illumination is
1500-2000 Lux.
5) Press the PLAY (Data Up)/STOP (Data Down)
so that the cyan level is 65IRE.
6) Press the START/STOP (Confirm) button to
store data.
7) There's is a flicker on screen after finishing the
adjustment.
Summary of Contents for SC-D70
Page 5: ...Product Specifications 1 4 Samsung Electronics MEMO ...
Page 57: ...Exploded View and Parts List 4 2 Samsung Electronics 4 1 ASSY FRONT ...
Page 59: ...Exploded View and Parts List 4 4 Samsung Electronics 4 2 ASSY RIGHT ...
Page 61: ...Exploded View and Parts List 4 6 Samsung Electronics 4 3 COVER HOUSING ...
Page 63: ...Exploded View and Parts List 4 8 Samsung Electronics 4 5 CASE LEFT ASSY ...
Page 65: ...Exploded View and Parts List 4 10 Samsung Electronics 4 6 LCD ASSY ...
Page 67: ...Exploded View and Parts List 4 12 Samsung Electronics 4 6 CAMERA ASSY MAIN PCB ...
Page 69: ...Exploded View and Parts List 4 14 Samsung Electronics 4 7 REAR ASSY ...
Page 71: ...Exploded View and Parts List 4 16 Samsung Electronics 4 8 EVF CVF ASSY ...
Page 73: ...Exploded View and Parts List 4 18 Samsung Electronics 4 9 MECHANICAL PARTS 1 MAIN CHASSIS ...
Page 75: ...Exploded View and Parts List 4 20 Samsung Electronics 4 10 MECHANICAL PARTS 2 SUB CHASSIS ...
Page 77: ...Exploded View and Parts List Samsung Electronics 4 22 MEMO ...
Page 89: ...PCB Diagrams 7 2 Samsung Electronics 7 1 Main Component Side ...
Page 90: ...PCB Diagrams Samsung Electronics 7 3 Conductor Side ...
Page 91: ...PCB Diagrams 7 4 Samsung Electronics 7 2 Rear Component Side Conductor Side ...
Page 92: ...PCB Diagrams Samsung Electronics 7 5 7 3 Function Component Side Conductor Side ...
Page 93: ...PCB Diagrams Samsung Electronics 7 6 7 4 EVF Component Side Conductor Side ...
Page 94: ...PCB Diagrams 7 7 Samsung Electronics 7 5 LCD Component Side Conductor Side ...
Page 95: ...PCB Diagrams Samsung Electronics 7 8 7 6 PRE AMP Component Side ...
Page 96: ...Samsung Electronics 6 1 6 Wiring Diagram ...
Page 98: ...Schematic Diagrams 8 2 Samsung Electronics 8 1 EVF ...
Page 99: ...Schematic Diagrams Samsung Electronics 8 3 8 2 Audio ...
Page 100: ...Schematic Diagrams 8 4 Samsung Electronics 8 3 Camera ...
Page 101: ...Schematic Diagrams Samsung Electronics 8 5 8 4 Camera A F ...
Page 102: ...Schematic Diagrams 8 6 Samsung Electronics 8 5 CCD ...
Page 103: ...Schematic Diagrams Samsung Electronics 8 7 8 6 Channel ...
Page 104: ...Schematic Diagrams 8 8 Samsung Electronics 8 7 Codec ...
Page 105: ...Schematic Diagrams Samsung Electronics 8 9 8 8 Rear ...
Page 106: ...Schematic Diagrams 8 10 Samsung Electronics 8 9 DC DC ...
Page 107: ...Schematic Diagrams Samsung Electronics 8 11 8 10 Function ...
Page 108: ...Schematic Diagrams 8 12 Samsung Electronics 8 11 IEEE 1394 ...
Page 109: ...Schematic Diagrams Samsung Electronics 8 13 8 12 Main_Micom ...
Page 110: ...Schematic Diagrams 8 14 Samsung Electronics 8 13 Prml ...
Page 111: ...Schematic Diagrams Samsung Electronics 8 15 8 14 Servo ...
Page 112: ...Schematic Diagrams 8 16 Samsung Electronics 8 15 Timer Micom ...
Page 113: ...Schematic Diagrams Samsung Electronics 8 17 8 16 Video ...
Page 114: ...Schematic Diagrams 8 18 Samsung Electronics 8 17 LCD ...
Page 115: ...Schematic Diagrams Samsung Electronics 8 19 8 18 Pre Amp ...


