background image

74

_ English

CLEANING AND MAINTAINING THE CAMCORDER

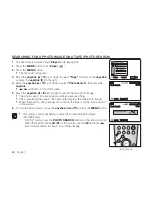
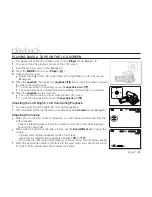
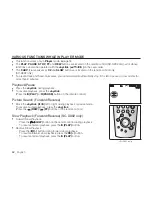
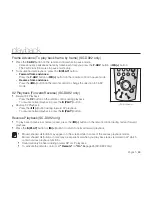
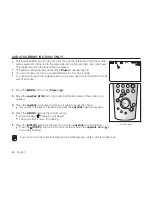
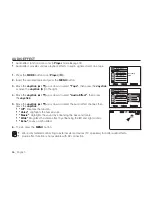
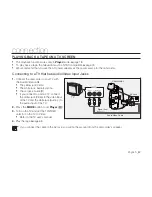
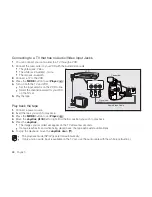
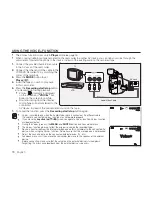
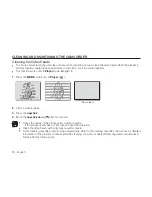
Cleaning the Video Heads

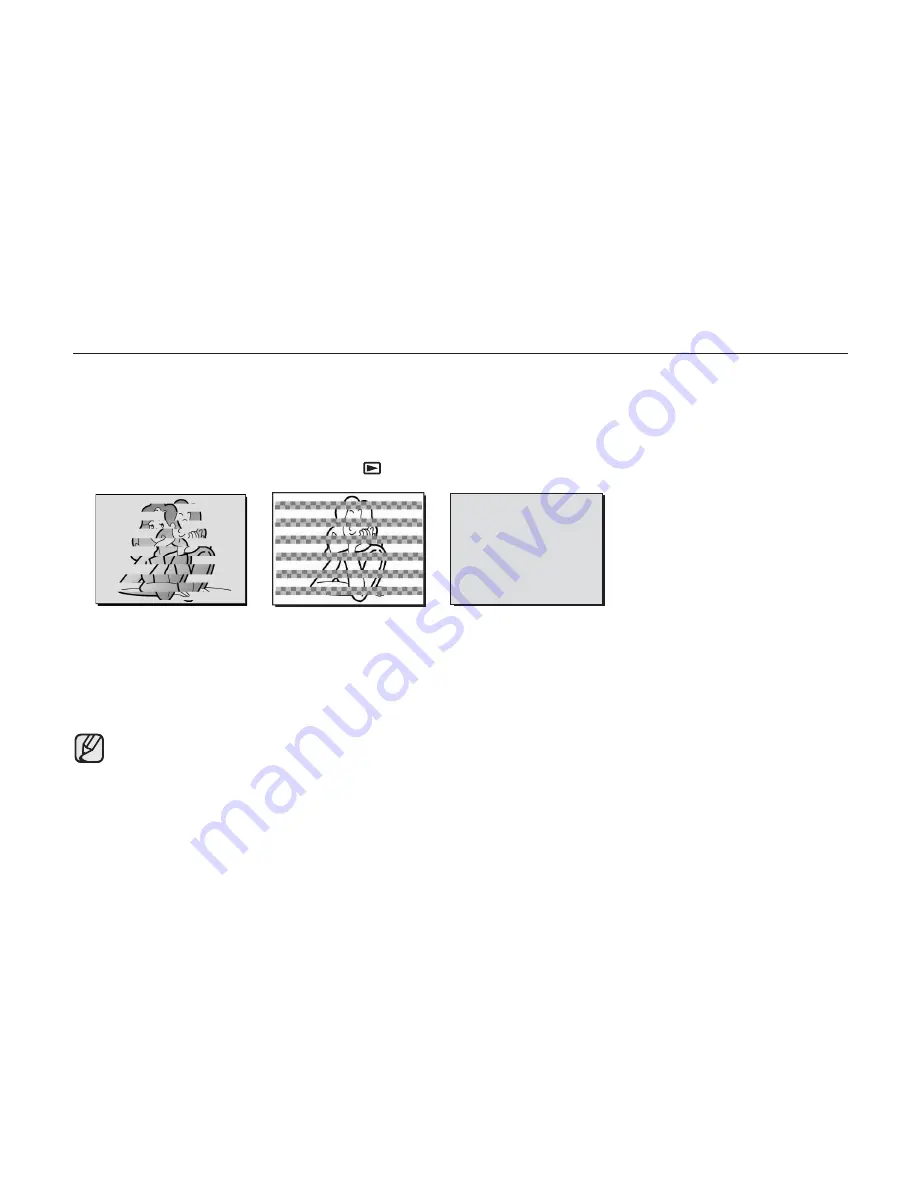
To ensure normal recording and clear pictures when recording on tape, clean the video heads when the playback 
pictures display square block-shaped noise or distortion, or a blue screen appears.
This function works only in 

Player

 mode. 

page 18

1.

 Press the 

MODE

 button to set 

Player

 ( 

 ).

2.

  Insert a cleaning tape.

3.

 Press the 

Joystick

.

4.

 Move the 

Joystick 

down

 (

)

 after 10 seconds.

Check the quality of the picture using a video cassette.
- If the picture quality has not improved, repeat the operation.
Clean the video heads with a dry type cassette cleaner.
Some cleaning cassette products stop automatically. Refer to the cleaning cassette’s instructions for detailed 
information. If the problem continues after the cleaning, consult your nearest Samsung dealer or Authorized 
Service Center. (blue screen)

(blue screen)

Summary of Contents for SC-D391

Page 1: ...ideo Camcorder user manual SC D391 SC D392 imagine the possibilities Thank you for purchasing this Samsung product To receive more complete service please register your product at www samsung com global register ...

Page 2: ... your recordings immediately 1200x Digital Zoom Allows you to magnify an image up to 1200 times its original size Audio Enhancement Provides more powerful sound with the Real Stereo and Audio Effect features Digital Image Stabilizer DIS The DIS compensates for any hand shaking reducing unstable images particularly at high magnification Various Visual Effects The Visual Effects allow you to give yo...

Page 3: ...safety instructions Warning To Reduce The Risk Of Fire Or Electric Shock Do Not Expose This Apparatus To Rain Or Moisture Caution Apparatus shall not be exposed to dripping or splashing and no objects filled with liquids such as vases shall be placed on the apparatus To disconnect the apparatus from the mains the plug must be pulled out from the mains socket therefore the mains plug shall be readi...

Page 4: ...he cart stand tripod bracket or table specified by the manufacturer or sold with the apparatus When a cart is used use caution when moving the cart apparatus combination to avoid injury from tip over 13 Unplug this apparatus during lightning storms or when unused for long periods of time 14 Refer all servicing to qualified service personnel Servicing is required when the apparatus has been damaged...

Page 5: ...ere they exit from the unit 20 OUTDOOR ANTENNA GROUNDING CAMCORDER be sure the antenna or cable system is grounded to provide some protection against voltage surges and built up static charges Section 810 of the National Electrical Code ANSI NFPA No 70 1984 provides information with respect to proper grounding of the mast and supporting structure grounding of the lead in wire and supporting struct...

Page 6: ...E Unplug this CAMCORDER from the wall outlet and refer servicing to qualified service personnel under the following conditions a When the power supply cord or plug is damaged b If any liquid has been spilled onto or objects have fallen into the CAMCORDER c If the CAMCORDER has been exposed to rain or water d If the CAMCORDER does not operate normally by following the operating instructions adjust ...

Page 7: ...mits for a Class B digital device pursuant to part 15 of the FCC Rules These limits are designed to provide reasonable protection against harmful interference in a residential installation This equipment generates uses and can radiate radio frequency energy and if not installed and used in accordance with the instructions may cause harmful interference to radio communications However there is no g...

Page 8: ...mcorder with your finger 2 Rotate it to the best angle to record or play If you rotate the LCD screen 180 degrees so it is facing forward you can close the LCD screen with the display facing out This is convenient during playback operations Refer to page 31 to adjust brightness and color of the LCD screen ADJUSTING THE LCD SCREEN AV DV BATT MENU W T MODE POWER CHG notes and safety instructions pre...

Page 9: ...e to exposure to liquids cannot be repaired A sudden rise in atmospheric temperature may cause condensation to form inside the camcorder When you move the camcorder from a cold location to a warm location e g from outside to inside during the winter When you move the camcorder from a cool location to a hot location e g from inside to outside during the summer If the DEW protection feature is activ...

Page 10: ...g the battery pack 17 Connecting a power source 18 Basic miniDV camcorder operation 19 Screen indicators in Camera Player modes 20 Using the display button 21 Using the joystick 22 Handling quick menus with the joystick 23 Setting the clock Clock set 24 Setting the wireless remote control acceptance Remote SC D392 only 25 Setting the beep sound Beep Sound 27 Selecting the OSD language Language 28 ...

Page 11: ...392 only 39 Reviewing and searching a recording 40 Using the fade on and off 41 Auto focus manual focus 42 Setting the shutter speed exposure 43 Selecting the record mode audio mode Rec Mode Audio Mode 44 Cutting wind noise WindCut Plus 45 Selecting the real stereo function Real Stereo 46 Setting the program ae Program AE 48 Setting the white balance White Balance 50 Applying visual effects Visual...

Page 12: ...mode 64 Audio dubbing SC D392 only 65 Dubbed audio playback Audio Select 66 Audio effect 67 Playing back a tape on a TV screen 69 Copying a camcorder tape onto a video tape 70 Using the VOICE function 71 Transferring ieee1394 I Link DV standard data connections 74 After finishing a recording 74 Usable cassette tapes 75 Cleaning and maintaining the camcorder 76 Using your miniDV camcorder abroad 1 ...

Page 13: ...77 Troubleshooting 79 Setting menu items 81 TROUBLESHOOTING 77 SPECIFICATIONS English _05 ...

Page 14: ...ay vary depending on the sales region Parts and accessories are available at your local Samsung dealer getting to know your miniDV camcorder Battery Pack IA BP80WA AD43 00186A AC Power Adapter AA E9 type AD44 00116B Audio Video Cable AD39 00001A User Manual CD AD46 00230A Quick Start Guide AD68 02563A Button type Battery for Remote Control Type CR2025 SC D392 only AD43 10130H Remote Control SC D39...

Page 15: ...ns 5 EASY Q button page 35 2 Remote sensor SC D392 only 6 Display button 3 Light SC D392 only 7 TFT LCD screen 4 OPEN switch 8 Internal microphone Be careful not to cover the internal microphone and lens during recording CAUTION OPEN ...

Page 16: ...ting to know your miniDV camcorder 1 MENU button 2 Joystick Select W T page 21 3 Recording start stop button 4 Jack cover AV DV jack 5 Built in speaker 6 Battery pack 7 Battery release BATT switch AV DV BATT MENU W T MODE POWER CHG ...

Page 17: ... _09 RIGHT TOP VIEW 1 Zoom W T Volume VOL lever 5 Jack cover DC IN jack 2 PHOTO button pages 59 6 Cassette compartment cover 3 Recording start stop button 7 Hand strap 4 POWER switch MODE AV DV POWER CHG V O L ...

Page 18: ...mcorder REAR BOTTOM VIEW 1 AV jack 2 MODE button 3 Mode indicator Camera Player mode 4 DC IN Jack 5 DV IEEE1394 jack 6 Charging CHG indicator 7 Tripod receptacle 10_ English AV MODE DC IN DV POWER CHG Jacks SC D391 D392 AV DV DC IN ...

Page 19: ...0 Direction button page 63 2 START STOP button 11 Display button 3 SELF TIMER button page 38 12 W T Zoom button 4 ZERO MEMORY button page 37 13 X2 button page 63 5 PHOTO SEARCH button page 60 14 DATE TIME button 6 A DUB button page 64 15 SLOW button 7 FF button 16 PAUSE button 8 REW button 17 STOP button 9 PLAY button 18 F ADV button page 63 START STOP DISPLAY ...

Page 20: ... the hand strap and adjust its length for your convenience 3 Close the hand strap Lens Cover Attaching the Lens Cover 4 Hook up the lens cover with the lens cover strap as illustrated 5 Hook up the lens cover strap to the hand strap and adjust it following the steps as described for the hand strap 6 Close the hand strap Installing the Lens Cover after Operation Press buttons on both sides of the l...

Page 21: ... replaced Replace only with the same or equivalent type Do not pick up the battery using tweezers or other metal tools This will cause a short circuit Do not recharge disassemble heat or immerse the battery in water to avoid the risk of explosion Keep the button type Battery out of reach of children Should a battery be swallowed seek medical attention immediately WARNING ATTACHING THE CORE FILTER ...

Page 22: ...pack from the miniDV camcorder Charging the Battery Pack 1 Slide the POWER switch downwards to turn off the power 2 Insert the battery pack to the camcorder 3 Open the jack cover and connect the AC power adaptor to the DC IN jack 4 Connect the AC power adaptor to a wall socket 5 Once charged disconnect the AC power adaptor from the DC IN jack on your camcorder Even with the power switched off the ...

Page 23: ...measured using a fully charged battery pack at 25 C 77 F As the environmental temperature and conditions vary the remaining battery time may differ from the approximate continuous recording times given in the instructions Charging time Recording time IA BP80WA Approx 1hr 20min Approx 1hr 20min Battery Time Charging indicator The color of the LED indicates the power or charging state If the battery...

Page 24: ...tery pack a Fully charged b 20 40 used c 40 80 used d 80 95 used e Completely used Blinking The Camcorder will turn off soon change the battery as soon as possible Battery Pack Management The battery pack should be recharged in an environment between 0 C 32 F and 40 C 104 F The life and capacity of the battery pack will be reduced if it is used in temperatures below 0 C 32 F or left in temperature...

Page 25: ...en fully discharged Fully discharging a battery pack damages the internal cells To preserve battery power keep your camcorder turned off when you are not operating it If your camcorder is in Camera mode and it is left in STBY mode without being operated for more than 5 minutes with a tape inserted it will automatically turn itself off to protect against unnecessary battery discharge Do not drop th...

Page 26: ...lect switch before operating any functions Press the MODE button to set Camera or Player Each press of the MODE button toggles between the Camera mode and Player mode Camera mode To record movie or photo images on a tape page 19 Player mode To play movie or photo images on a tape page 19 The operating modes are determined by the position of the MODE button and Select switch Mode Name Camera Mode P...

Page 27: ...e Time page 31 19 Manual Focus page 41 20 Manual Exposure page 42 21 Shutter Speed page 42 22 White Balance page 48 23 Program AE page 46 24 DIS page 54 25 Visual Effects Mode page 50 EASY Q page 35 16 9 Wide page 52 2 OSD in Camera Mode 60min 60min 10Sec 10Sec 0 00 00 0 00 00 C Nite 1 30 C Nite 1 30 SP Art Art 16Bit 16Bit No Tape No Tape STBY STBY 12 00 AM JAN 1 2008 12 00 AM JAN 1 2008 S W T 19 ...

Page 28: ...mode All information will appear Minimum display mode Only operating status indicators will appear Checking the remaining battery Press and hold the Display button while charging with the power off After a while the charging status will be displayed on the LCD screen for 7 seconds The battery charge status is given as reference and is an estimation It may differ depending on the battery capacity a...

Page 29: ...ng the Exposure in Camera mode 1 Press the Joystick Quick menu is displayed 2 Press the Joystick to control the setting Moving the Joystick up toggles between Auto Exposure and Manual Exposure 3 Press the Joystick to confirm your selection Press the Joystick button to exit the quick menu according to the selected mode There are some functions you cannot activate simultaneously when using Joystick ...

Page 30: ...OP PLAY PAUSE FF REW Exposure Focus STOP STOP STOP STOP Shutter REW REW REW REW REW Fade FF FF FF FF FF OK Return Selection Exit the menu PLAY PAUSE PLAY PLAY PLAY Quick Menu In Camera Player modes HANDLING QUICK MENUS WITH THE JOYSTICK Input Status ...

Page 31: ...Joystick after setting the minutes The message Complete is displayed 8 To exit press the MENU button You can set the year up to 2037 Turning the date and time display on off To switch the date and time display on or off access the menu and change the date time display mode page 31 SETTING THE CLOCK CLOCK SET initial setting system menu setting Display illustrations in this manual OSD illustrations...

Page 32: ...press the Joystick 5 Move the Joystick up or down to select On or Off then press the Joystick 6 To exit press the MENU button If you set the Remote to Off in the menu and try to use it the remote control indicator will blink for 3 seconds on the LCD screen and then disappear SETTING THE WIRELESS REMOTE CONTROL ACCEPTANCE REMOTE SC D392 only Mov Move Sele lect Exi Exit Remote Beep Sound Language De...

Page 33: ...layer 2 Press the MENU button The menu list will appear 3 Move the Joystick up or down to select System then press the Joystick or move the Joystick to the right SETTING THE BEEP SOUND BEEP SOUND initial setting system menu setting AV DV BATT MENU W T MOD E POWE R CHG Mov Move Sele lect Exi Exit Remote Beep Sound Language Demonstration Camera Mode MENU System System Clock Set On On English On MODE...

Page 34: ...o select On or Off then press the Joystick 6 To exit press the MENU button SETTING THE BEEP SOUND BEEP SOUND initial setting system menu setting When beep sound is set to off the power on off sound is off Mov Move Sele lect Exi Exit Remote Beep Sound Language Demonstration Camera Mode MENU System System Clock Set Off On ...

Page 35: ...ñol Deutsch Italiano Português Polski Nederlands Magyar Svenska Iran Русский Українська Suomi Türkçe Norwegian Danish Czech Slovakia 5 Move the Joystick up or down to select the desired OSD language then press the Joystick The OSD language is refreshed in the selected language 6 To exit press the MENU button Language options may be changed without prior notice initial setting system menu setting M...

Page 36: ...s the Joystick 6 Press the MENU button The demonstration will begin 7 To quit the demonstration press the MENU button The demonstration function is automatically activated when the camcorder is left idle for more than 10 minutes after switching to the Camera mode if no tape is inserted in the camcorder If you press other buttons MENU Joystick EASY Q during the demonstration mode the demonstration ...

Page 37: ...hen press the Joystick Settings Contents On screen display Off Disables the function None Cross Enables you to center the subject for proper recording Grid Enables you to place the subject in the center square fo r proper positioning Safety Zone Enables you to place the subject within a safety zone which prevents it being cut when editing in 4 3 mode for left and right and 2 35 1 for top and botto...

Page 38: ...lect Display then press the Joystick or move the Joystick to the right 4 Move the Joystick up or down to select LCD Bright or LCD Color then press the Joystick 5 Move the Joystick up or down to adjust the value of the selected item LCD Bright or LCD Color then press the Joystick You can set values for LCD Bright and LCD Color between 0 and 35 6 To exit press the MENU button Adjusting the LCD scree...

Page 39: ...attached The rechargeable battery will be fully discharged in about 3 months if you do not use your camcorder at all Use your camcorder after charging the built in rechargeable battery If the built in rechargeable battery is not charged any data that you have input will not be backed up and the date time appears on the screen as 12 00 AM JAN 1 2008 when Date Time display is set to On The date time...

Page 40: ...n The menu list will appear 3 Move the Joystick up or down to select Display then press the Joystick or move the Joystick to the right 4 Move the Joystick up or down to select TV Display then press the Joystick 5 To activate TV Display function move the Joystick up or down to select On or Off then press the Joystick 6 To exit press the MENU button Mov Move Sele lect Exi Exit LCD Bright LCD Color D...

Page 41: ...sette out 3 Press the area marked PUSH on the cassette compartment cover until it clicks into place The cassette is loaded automatically 4 Close the cassette compartment cover INSERTING EJECTING A CASSETTE basic recording VARIOUS RECORDING TECHNIQUES In some situations different recording techniques may be required 1 General recording 2 Downward recording Making a recording with a top view of the ...

Page 42: ...tes that there is enough remaining power for your expected recording time You can select a record mode of your choice page 43 4 To start recording press the Recording start stop button REC is displayed on the LCD screen To stop recording press the Recording start stop button again STBY is displayed on the LCD screen Eject the battery pack when you finish the recordings to prevent unnecessary batte...

Page 43: ... start stop button to start recording Recording will begin using the basic automatic settings To cancel the EASY Q mode Press the EASY Q button again The EASY Q and DIS indicators disappear from the screen Almost all the settings will return to the settings that were set prior to activating EASY Q mode You cannot cancel the EASY Q mode during recording Menu button unavailable during EASY Q operati...

Page 44: ...our finger off the Zoom lever the operation sound of the Zoom lever may be also recorded Focusing may become unstable during zooming In this case set the zoom before recording and lock the focus by using the manual focus then zoom in or out during recording page 41 The minimum possible distance between camcorder and subject while maintaining sharp focus is about 1 cm about 0 39 inch for wide angle...

Page 45: ... tape in stop mode The tape stops automatically when it reaches the zero position When you have finished recording press the MODE button to set Player and press the REW button The tape stops automatically when it reaches the zero position 5 The tape counter with the zero memory indicator disappears from the display and the tape counter is changed to the time code In the following situations zero m...

Page 46: ...cording indicator blinks with a beep sound At the last second of the countdown recording starts automatically If you want to cancel the self timer function before recording press the SELF TIMER button again Do not obstruct the remote control sensor by putting obstacles between the remote control and miniDV camcorder The remote control maximum range is 4 to 5m 13 to17 ft The effective remote contro...

Page 47: ...e the Joystick to the left While you press and hold the Joystick the selected images will be played in reverse order Press and release the Joystick to play the images in reverse order for 3 seconds before resetting the play order to normal To perform the normal search Move the Joystick to the right While you press and hold the Joystick the selected images will be played in normal order To resume r...

Page 48: ...utton and at the same time release the Fade function Recording starts and the picture and sound gradually appear Fade In To Stop Recording 4 When you want to stop recording with fade out press the Joystick then move the Joystick to the right Move the Joystick to the right fade function to select Fade On 5 Press the Recording start stop button to stop recording The picture and sound gradually disap...

Page 49: ...to the camcorder others further away b A person enveloped in fog or surrounded by snow c Very shiny or glossy surfaces like a car d People or objects moving constantly or quickly like an athlete or a crowd Setting the Focus 1 Press the MODE button to set Camera 2 Press the Joystick Quick menu will appear 3 Move the Joystick down to select the Manual Focus mode You can toggle between Auto Focus and...

Page 50: ...ick to switch the mode to manual You can also toggle between Auto Exposure and Manual Exposure by moving up the Joystick 4 Move the Joystick left or right to select the desired exposure value then press the Joystick Exposure value can be set between 00 to 29 5 To exit press the Joystick Selected settings are displayed Manual exposure is recommended in situations listed below When shooting using re...

Page 51: ...t Rec Mode or Audio Mode then press the Joystick 5 Move the Joystick up or down to select the desired record mode or audio mode then press the Joystick Rec mode can be set to SP or LP Audio mode can be set to 12Bit or 16Bit 6 To exit press the MENU button The selected indicator is displayed When 12Bit is selected no indicator is displayed We recommend that you use this camcorder to play back any t...

Page 52: ...ick up or down to select WindCut Plus then press the Joystick 5 To activate the windcut plus function move the Joystick up or down to select the windcut plus type then press the Joystick Off Disables the function Auto Minimizes the wind noise while preserving voices On Removes the low pitched wind noise 6 To exit press the MENU button WindCut Plus On or Auto indicator is displayed Make sure windcu...

Page 53: ...then press the Joystick 5 To activate the Real Stereo function move the Joystick up or down to select On then press the Joystick If you do not want to use the Real Stereo function set the Real Stereo menu to Off 6 To exit press the MENU button Real Stereo indicator is displayed SELECTING THE REAL STEREO FUNCTION REAL STEREO advanced recording S AV DV BATT MENU W T MOD E POWE R CHG Mov Move Sele le...

Page 54: ...stick up or down to select Program AE then press the Joystick The available options are listed 5 Move the Joystick up or down to select the desired program AE option then press the Joystick 6 To exit press the MENU button The indicator of the selected mode is displayed When the Auto mode is selected no indicator is displayed AV DV BATT MENU W T MOD E POWE R CHG Mov Move Sele lect Exi Exit White Ba...

Page 55: ...appears against a softened background The portrait mode is most effective when used outdoors The shutter speed is automatically adjusted from 1 60 to 1 1000 per second Spotlight Prevents overexposure of subject s face etc when strong light strikes the subject as in a wedding or on stage Sand Snow Prevents underexposure of subject s face etc in a place where reflection of light is intense such as a...

Page 56: ... right 4 Move the Joystick up or down to select White Balance then press the Joystick The available options are listed 5 Move the Joystick up or down to select the desired white balance mode then press the Joystick 6 To exit press the MENU button The indicator of the selected mode is displayed When the Auto mode is selected no indicator is displayed AV DV BATT MENU W T MOD E POWE R CHG Mov Move Se...

Page 57: ...alance are displayed 2 Frame a white object such as a piece of paper so that it fills the screen Use an object that is not transparent If the object that fills the screen is not focused correct the focus using Manual Focus page 41 3 Press the Joystick The white balance setting will be applied and indicator is displayed The White Balance function will not operate in EASY Q mode It is recommended th...

Page 58: ...k or move the Joystick to the right 4 Move the Joystick up or down to select Visual Effect then press the Joystick The available options are listed 5 Move the Joystick up or down to select the desired visual effect option then press the Joystick The display mode is set to the selected mode 6 To exit press the MENU button APPLYING VISUAL EFFECTS VISUAL EFFECT MODE AV DV BATT MENU W T MOD E POWE R C...

Page 59: ...embossing on surrounding area of an image Pastel1 This mode applies a pale pastel drawing effect to an image Pastel2 This mode applies a pale pastel drawing effect to the surrounding area of an image Mirror mode is not available in the 16 9 Wide mode Release the 16 9 Wide mode first to set Mirror mode page 52 Visual Effect modes are not available while EASY Q is in use The Mosaic Mirror Emboss2 Pa...

Page 60: ...r down to select On then press the Joystick If you do not want to use the 16 9 wide function set the 16 9 Wide menu to Off 6 To exit press the MENU button 16 9 wide indicator is displayed You cannot set the following functions in the 16 9 Wide mode If you want to use the following functions set the 16 9 Wide menu to Off first Mirror Visual Effect C Nite 1 30 C Nite 1 30 S 10Sec 10Sec W T No Tape N...

Page 61: ...s displayed When recording in Tele Macro mode the focus speed may be slow When you operate the zoom function in the Tele Macro mode the recording subject may be out of focus Use a tripod not supplied to prevent hand shake in the Tele Macro mode Avoid shadows when recording in the Tele Macro mode As the distance to the subject decreases focusing area narrows When you can not achieve proper focus us...

Page 62: ...the Joystick If you do not want to use the DIS function set the DIS menu to Off 6 To exit press the MENU button DIS indicator is displayed EASY Q mode automatically sets the DIS to On You cannot set the following functions in the DIS mode Mosaic Mirror Emboss2 Pastel1 Pastel2 C Nite Digital Zoom Setting the DIS function in 16 9 Wide mode may produce lower quality than in normal mode It is recommen...

Page 63: ...move the Joystick X to the right 4 Move the Joystick up or down to select BLC then press the Joystick 5 Move the Joystick up or down to select On then press the Joystick If you do not want to use the BLC function set the BLC menu to Off 6 To exit press the MENU button BLC indicator will be displayed This function will be set to Off in the EASY Q mode USING BACK LIGHT COMPENSATION MODE BLC BLC On B...

Page 64: ...own or move the Zoom lever to use the digital zoom The digital zoom indicator appears Maximum digital zooming may result in lower picture quality You cannot set the Digital Zoom mode in the following modes Please release these functions first to set the Digital Zoom mode EASY Q Mosaic Mirror Emboss2 Pastel1 Pastel2 DIS The Digital Zoom mode does not work in the following situations Tape Photo Reco...

Page 65: ...icator is displayed When using C Nite the image takes on a slow motion like effect When using C Nite the focus adjusts slowly and white dots may appear on the screen This is not a defect The C Nite function does not work in the following situations When DIS or EASY Q is set While using the C Nite function you can not use the following functions Program AE Mosaic Mirror Emboss2 Pastel1 Pastel2 BLC ...

Page 66: ...ff 6 To exit press the MENU button Light indicator will be displayed The light can become extremely hot Do not touch it while in operation or soon after turning it off otherwise serious injury may occur Do not place the camcorder into the carrying case immediately after using the light since it remains extremely hot for some time Do not use near flammable or explosive materials Color N 1 15 WARNIN...

Page 67: ... During the seven seconds you cannot record another photo image During the Tape Photo Recording do not shake your camcorder Mosaic pattern noise may appear on the image During the Tape Photo Recording you can not set the following functions Visual Effect DIS Digital Zoom C Nite 16 9 Wide After tape photo recording most functions return to the previous mode Tape Photo Recording does not work in the...

Page 68: ... photo images recorded on the tape it will be fully rewound or forwarded 6 To stop the photo search move the Joystick down or press the MENU button The remote control will help you search for a desired photo image SC D392 only In STOP mode press the PHOTO SEARCH button on the remote control When the indictor blinks on the screen use the rewind or fast forward button to search for a desired image 1...

Page 69: ...djust the LCD bright LCD color during playback The adjustment method is the same procedure as used in Camera mode page 31 Adjusting the Volume When you use the LCD screen for playback you can hear recorded sound from the built in speaker Take the following steps to lower the volume or mute the sound while playing a tape on the camcorder When sound is heard once the tape is in play use the Zoom VOL...

Page 70: ...o resume playback press the Joystick Press the X PLAY or PAUSE button on the remote control Picture Search Forward Reverse Move the Joystick W X left or right during playback or pause mode To resume normal playback press the Joystick Press the REW FF buttons on the remote control Slow Playback Forward Reverse SC D392 only Forward Slow Playback Press the SLOW button on the remote control during pla...

Page 71: ...button on the remote control during playback To resume normal playback press the X PLAY button Reverse X2 Playback Press the W button during forward X2 playback To resume normal playback press the X PLAY button Reverse Playback SC D392 only To play back in reverse at normal speed press the W button on the remote control during normal forward playback Press the X PLAY button or X button to return t...

Page 72: ... 2 Move the Joystick W X left or right and find the time frame of the scene to be dubbed 3 Press the Joystick to playback and press it again to pause the scene If you want to resume to playback just press the Joystick again on playback 4 Press the A DUB button on the remote control Audio dubbing indicator is displayed The camcorder is ready for dubbing 5 Press the X PLAY button on the remote contr...

Page 73: ...he Joystick Sound 1 Plays the original sound Sound 2 Plays the dubbed sound MIX 1 2 Plays back sound 1 and 2 equally mixed 6 To exit press the MENU button 7 Press the Joystick to play back the dubbed tape To stop the dubbed audio playback move the Joystick down When you play back added sound Sound 2 or MIX 1 2 you may experience a loss of sound quality Mov Move Sele lect Exi Exit Audio Select Audi...

Page 74: ...ick Off Disables the function Voice Highlights the human voice Music Highlights the sound by enhancing the bass and treble Wide Magnifies the stereo effect by enhancing the left and right sounds Echo Gives an echo effect 6 To exit press the MENU button We recommended connecting to external stereo devices TV speakers for better audio effects Audio effect function is not available with DV connection...

Page 75: ...Video cable The yellow jack Video The white jack Audio L mono The red jack Audio R If you connect to a mono TV connect the yellow jack Video to the video input of the TV and the white jack Audio L to the audio input of the TV 2 Press the MODE button to set Player 3 Turn on the TV and set the TV VIDEO selector on the TV to Video Refer to the TV user s manual 4 Play the tape page 68 If you connect t...

Page 76: ...e Play back the tape 1 Connect a power source 2 Insert the tape you wish to play back 3 Press the MODE button to set Player 4 Move the Joystick W X left or right find the first position you wish to play back 5 Press the Joystick The images you recorded will appear on the TV after a few seconds If a tape reaches its end while being played back the tape will rewind automatically 6 To stop the playba...

Page 77: ...o R 5 Press the Record button on your VCR to start recording 6 Play the tape on your camcorder Please refer to page 69 to see how to play a tape if you do not want to copy the screen display set the TV Display to Off in the menu page 32 When Copying is Complete Stop recording on your VCR then move the Joystick down on your camcorder If you operate the camcorder while connected to another device al...

Page 78: ...lable only when the Audio Video cable is connected If a different cable DV cable is connected Voice function may not operate properly If you move the Joystick S T W X when you operate Voice function Voice function will be deactivated During the Voice process the MENU and PHOTO button functions do not work The Voice function does not affect the original sound on the recorded tape Sound is transferr...

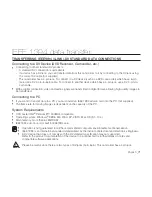
Page 79: ...want to transmit data to a PC you must install an IEEE 1394 add on card into the PC not supplied The frame rate for moving images is dependent on the capacity of the PC System Requirements CPU faster Intel Pentium III 450MHz compatible Operating system Windows 98SE ME 2000 XP VISTA Mac OS 9 1 10 4 Main memory more than 64 MB RAM IEEE1394 add on card or built in IEEE1394 card Operation is not guara...

Page 80: ...ot work If this occurs please reconnect the DV cable or turn the power OFF and ON again Do not use another DV device when using IEEE1394 The IEEE1394 cable DV cable is sold separately Moving image software is commercially available Most DV enabled PCs have a 6 pin jack In this case a 6pin 4pin cable is required for the connection Most DV enabled notebooks and Laptops have a 4 pin socket Use a 4pin...

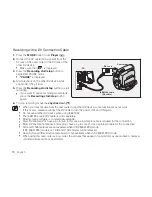
Page 81: ...iniDV camcorder off 4 Disconnect the power source or remove the battery pack Open the LCD panel of the camcorder and slide down the BATT Release switch on the left side of the body to remove the battery with a click maintenance USABLE CASSETTE TAPES When you have recorded something that you wish to keep you can protect it so that it will not be accidentally erased a Protecting a tape Push the safe...

Page 82: ...utton to set Player 2 Insert a cleaning tape 3 Press the Joystick 4 Move the Joystick down after 10 seconds Check the quality of the picture using a video cassette If the picture quality has not improved repeat the operation Clean the video heads with a dry type cassette cleaner Some cleaning cassette products stop automatically Refer to the cleaning cassette s instructions for detailed informatio...

Page 83: ...ecordings on a TV or to copy it to an external device it must be an NTSC system based TV or an external device and have the appropriate Audio Video jacks Otherwise you may need to use a separate video format transcoder NTSC PAL format converter NTSC compatible countries regions Bahamas Canada Central America Japan Korea Mexico Philippines Taiwan United States of America etc PAL compatible countrie...

Page 84: ...e remaining time on the tape is about 2 minutes Prepare a new one Tape end no The tape reached its end Change to a new one No Tape slow There is no tape in camcorder Insert a tape Protection slow The tape is protected from recording If you want to record release the protection D L C R slow The camcorder has some mechanical fault 1 Eject the tape 2 Turn the camcorder off 3 Eject the battery pack 4 ...

Page 85: ...re recording in bright surroundings page 55 Auto focus does not work Check the Manual Focus menu Auto focus does not work in the Manual Focus mode page41 FF or REW Play function Joystick W X does not work Press the MODE button to set Player You have reached the beginning or end of the cassette You see a mosaic pattern during playback search This is normal operation and it is not a failure or defec...

Page 86: ...gital Zoom 56 C Nite Selecting the Color Nite 57 Light c Selecting the Light 58 Tape Photo Search Searching pictures recorded on a tape 60 Audio Select Selecting the Audio playback channel 65 Audio Effect Selecting the Audio Effect 66 Record Rec Mode Selecting the recording speed 43 Audio Mode Selecting Sound Quality for recording 43 WindCut Plus Minimizing wind noise 44 Real Stereo Selecting the ...

Page 87: ...only d SC D392 only troubleshooting SETTING MENU ITEMS ABOUT THIS USER MANUAL This user manual covers models SC D391 SC D392 Although the external appearances of SC D391 SC D392 are different they operate in the same way Illustrations of model SC D392 are used in this user manual The displays in this user manual may not be exactly the same as those you see on the LCD screen Designs and specificati...

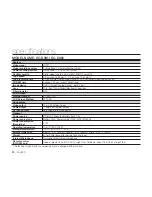
Page 88: ...ize dot number 2 7inch 112K LCD Screen Method TFT LCD Connectors Video output 1Vp p 75Ω terminated Audio output 7 5dBs 600Ω terminated DV input output 4pin special in out connector General Power source DC 8 4V Lithium Ion Battery Pack 7 4V Power source type Battery Pack Power supply 100V 240V 50 60Hz Power consumption Recording 3 7W Operating temperature 0 40 C 32 F 104 F Storage temperature 20 C ...

Page 89: ...t must be presented to the authorized service center EXCLUSIONS WHAT IS NOT COVERED This warranty does not cover damage due to accident fire flood and or other acts of God misuse incorrect line voltage improper installation improper or unauthorized repairs commercial use or damage that occurs in shipping Exterior and interior finish lamps and glass are not covered under this warranty Customer adju...

Page 90: ...e the 6 hazardous materials Cadmium Cd Lead Pb Mercury Hg Hexavalent Chromium Cr 6 Poly Brominated Biphenyls PBBs Poly Brominated Diphenyl Ethers PBDEs in our products If you have any questions or comments relating to Samsung products please contact the SAMSUNG customer care center Samsung Electronics America inc 1 800 SAMSUNG 726 7864 www samsung com us ...

Reviews: