background image

English - 5

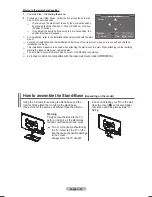
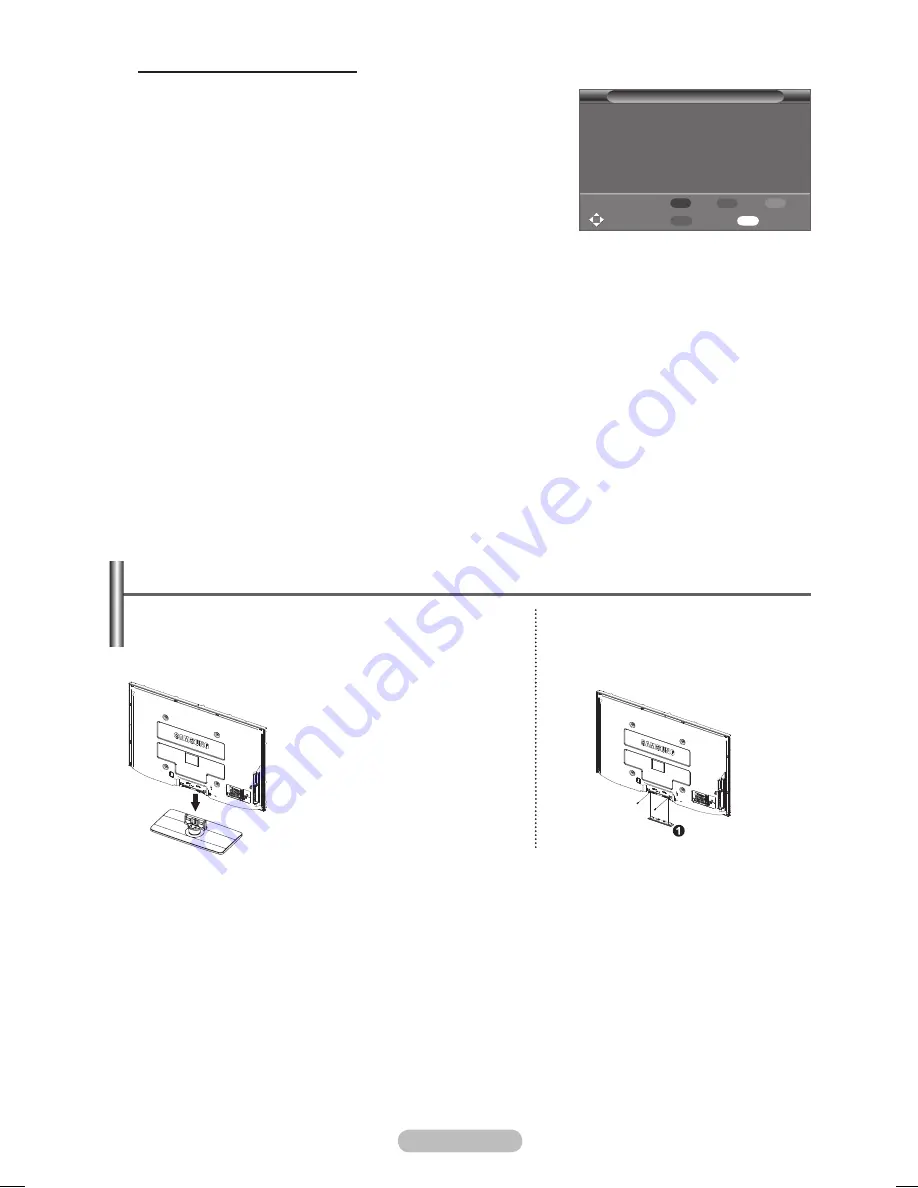
How to assemble the Stand-Base 

(depending on the model)

Using the 6 screws for securing the stand base and the 

monitor, firmly attach the monitor to the stand base.  

(The exterior of the set may be different than the picture.)

In case of installing your TV on the wall, 

close the cover (

1

) on the stand-base 

connection part using two screws for 

hiding.

Warning

Firmly secure the stand to the TV

before moving it, as the stand may

fall and could cause serious injury.

 

Two or more people should carry 

the TV. Never lay the TV on the 

floor because of possible damage 

to the screen. 

Always store the TV upright.

Moving to the remembered position

Complete Step 1 of 

Entering the menu

.


Pressing a Color (Red, Green, Yellow) button moves the auto wall 

mount to the saved position.

  You can move the wall mount to one of the 3 pre-set positions 

by pressing the Red (Position 1), Green (Position 2) or Yellow 

(Position 3) buttons.

  If you adjust the positon after moving to a pre-set position, the 

position display will disappear.

  For installation, refer to the Installation Manual provided with the wall 

mount.

  For product installation and the installation and moving of the wall mount, make sure to consult a specialized 

installation company.

  This installation manual is to be used when attaching the wall mount to a wall. When attaching to other building 

materials, please contact your nearest dealer.

  The auto wall mount will not work when  or WISELINK is operating.

  42 inches model is not compatible with the older wall mount model (WMN5090A).

Auto Wall-Mount

Adjust

Save

Position

1

2

3

Center

INFO

Position 1

BN68-01427D-Eng.indb   59

2008-03-10   오후 3:25:09

Summary of Contents for PS50A556S2F

Page 1: ...ur product at www samsung com global register Model Serial No Contact SAMSUNG WORLD WIDE If you have any questions or comments relating to Samsung products please contact the SAMSUNG customer care cen...

Page 2: ...atures below 5 C 41 F A still image displayed too long may cause permanent damage to the PDP Panel Watching the PDP TV in 4 3 format for a long period of time may leave traces of borders displayed on...

Page 3: ...ol Sound Features 23 Selecting the Sound Mode depending on the model 24 Connecting Headphones Sold separately 24 Function Description Time Features 25 Language Light Effect Melody Entertainment Energy...

Page 4: ...bles PC Cable Scart Cable PC Audio Cable HDMI Cable HDMI DVI Cable Ferrite Core Power Cord S Video Component The ferrite cores are used to shield the cables from interference When connecting a cable o...

Page 5: ...rease the volume In the on screen menu use the buttons as you would use the and buttons on the remote control 4 Press to change channels In the on screen menu use the buttons as you would use the and...

Page 6: ...eo game device or video disc players Input Output Specification Connector Input Output Video Audio L R RGB Video Audio L R EXT 1 Only TV or DTV output is available EXT 2 Output you can choose 5 DIGITA...

Page 7: ...may vary depending on the model Side Panel or 1 COMMON INTERFACE Slot Insert CI Common Interface card into the slot refer to page 42 When CI Card isn t inserted in some channels Scramble Signal is di...

Page 8: ...enables you to view and play photo JPEG and audio files MP3 from an external device See page 45 JPEG 48 MP3 Returns to the previous menu a Exit the on screen menu b Picture size selection c Use this...

Page 9: ...press the POWER button on the remote control to switch the television on The channel that you were watching last is re selected automatically If you have not yet stored any channels no clear picture a...

Page 10: ...home environment Store Demo mode is only intended for use in retail environments If the unit is accidentally set to Store Demo mode and you want to return to Home Use Standard Press the Volume button...

Page 11: ...o stop the search before it has finished press the ENTER button with Stop selected 13 Press the ENTER button to start search the digital channels The digital channel search will start and end automati...

Page 12: ...number required Using the TOOLS Button You can use the TOOLS button to select your frequently used functions quickly and easily The Tools menu changes depending on which external input mode you are v...

Page 13: ...button to select Channel then press the ENTER button 3 Press the ENTER button again The available countries are listed 4 Select your country by pressing the or button then press the ENTER button Even...

Page 14: ...l to be stored Press the or button to select C Air channel or S Cable channel Press the button then press the or button to select the required number You can also select the channel number directly by...

Page 15: ...ng unsuitable programmes by muting out video and audio 6 Press the or button to select Child Lock then press the ENTER button 7 Select On by pressing the or button then press the ENTER button 8 Press...

Page 16: ...mode Channel names will be assigned automatically when channel information is broadcast These names can be changed allowing you to assign new names 1 Press the MENU button to display the menu 2 Press...

Page 17: ...et by pressing the or button Press the ENTER button 5 Press the EXIT button to exit LNA Low Noise Amplifier This function is very useful in the situation that the TV is used in weak signal LNA amplifi...

Page 18: ...ENTER button to select Picture 3 Press the ENTER button again to select Mode 4 Select the required mode by pressing the or button then press the ENTER button Available modes Dynamic Standard Movie Th...

Page 19: ...on program sources Native Native Colour Space offers deep and rich colour tone Custom Adjusts the colour range to suit your preference see Customizing the Colour Space Customizing the Colour Space Co...

Page 20: ...n left and right Reset Press the or button to select Reset then press the ENTER button You can initialize the setting With the HDMI Just Scan picture size depending on the AV devices the screen may be...

Page 21: ...ement and white enhancement New image compensation Algorithm gives brighter clearer more detailed image to you DNIeTM technology will fit every signal into your eyes This function is not available in...

Page 22: ...ime Side Gray When you watch TV with the screen ratio of 4 3 the screen is prevented from any damage by adjusting the white balance on both extreme left and right sides Dark When you set the screen ra...

Page 23: ...select SRS TS XT 3 Press the or button to select Off or On Auto Volume Off On Each broadcasting station has its own signal conditions and so it is not easy to adjust the volume every time the channel...

Page 24: ...Dual I Dual II Stereo Stereo Mono Forced mono If the receiving conditions deteriorate listening will be easier if the mode is set to Mono If the stereo signal is weak and automatic switching occurs s...

Page 25: ...or button to select the minute then press the ENTER button Timer 1 Timer 2 Timer 3 You can set the On Off timers so that the television will switch on or off automatically at the time you select You...

Page 26: ...High The TV power on off melody sound can be adjusted When the Melody does not play When no sound is output from the TV because the MUTE button has been pressed When no sound is output from the TV bec...

Page 27: ...me or monitor the video input from any connected devices PIP On Off You can activate or deactivate the PIP function Table of PIP Settings Main Picture Sub Picture Component HDMI1 2 3 PC TV DTV Ext1 Ex...

Page 28: ...se on the Windows Desktop then click on Properties The Display Properties will be displayed 2 Click on Settings tab then set the Display Mode with reference to the Display Modes Table You do not need...

Page 29: ...75 000 60 317 72 188 75 000 60 004 70 069 75 029 60 020 75 025 60 015 60 000 25 175 31 500 31 500 40 000 50 000 49 500 65 000 75 000 78 750 108 000 135 000 85 500 162 000 CVT 1920 x 1080RB 66 587 59...

Page 30: ...adjust the frequency as best as possible coarse and Fine tune again After the noise has been reduced re adjust the picture so that it is aligned on the center of screen 1 Press the or button to selec...

Page 31: ...select Digital Menu then press the ENTER button Guide Now Next Guide Full Guide Scheduled List Default Guide Now Next Full Guide Digital Channel Country Auto Store Manual Store Edit Favourite Channel...

Page 32: ...onal information about the current programme may be displayed While viewing a programme press the INFO button The programme information is displayed The information is displayed Parental Rating Video...

Page 33: ...it has finished the number of scanned services will be displayed The existing favourite channel list will not be deleted when the channel list is updated To stop the scan before it has finished press...

Page 34: ...ly selected channel s Press the CH LIST button to display the favourite channel list Renumber depending on the Country In the Edit Favourite Channels menu press the or button to select the required ch...

Page 35: ...ilable Now Next Guide For the six channels indicated in the left hand column displays the Current programme and the Next programme information Full Guide Displays the programme information as time ord...

Page 36: ...amme select a programme by pressing the or button then press the green button If necessary select the programme to be deleted by pressing the or button then press the blue button When watching analog...

Page 37: ...message will be displayed and you will not be able to change the channel even if you press the ENTER button When the No Data message appears and you cannot change the channel press the channel number...

Page 38: ...ing the Audio Language Subtitle Language and the Teletext Language of the Language menu refer to page 37 are automatically changed to the selected language The Audio Language Subtitle Language and the...

Page 39: ...try again message is displayed Press the ENTER button Press the or button to select the age rating you want to lock out then press the ENTER button If you want to change the PIN code press the or butt...

Page 40: ...Description This is an auxiliary audio function that provides an additional audio track for visually challenged persons This function handles the Audio Stream for the AD Audio Description when it is s...

Page 41: ...scrambled signal channel You can install the CAM anytime whether the TV is ON or OFF Application Info This contains information on CAM inserted in the CI slot and displays it Press the ENTER button t...

Page 42: ...e power of the unit is turned on internally the screen may be on slightly for the PDP product This phenomenon may continue for more than 1 hour until the software upgrade is completed Reset You can re...

Page 43: ...s Bulk Only Transport device Examples of MSC are Thumb drives and Flash Card Readers Both USB HDD and HUB are not supported Before connecting your device to the TV please back up your files to prevent...

Page 44: ...ess the ENTER button 2 Press the or button to select WISELINK then press the ENTER button 3 Press the or button to select the corresponding USB Memory Device then press the ENTER button The WISELINK m...

Page 45: ...r button will let you see another photo image in the same folder Press the PLAY PAUSE button when a Photo icon is selected to start a Slide Show Photos without EXIT information may not be displayed as...

Page 46: ...xit WISELINK mode press the W LINK button on the remote control When selecting a photo file the photo file information is displayed on the left side of the TV screen such as the resolution the date mo...

Page 47: ...l size X2 Zoom in to a photo x2 X4 Zoom in to a photo x4 To pan up down left right in the zoomed in photo press the INFO button to remove option menu then press the and buttons The Rotate Start Slide...

Page 48: ...he same USB device The selected file is displayed on the top with its playing time To adjust the music volume press the or button on the remote control To mute the sound press the MUTE button on the r...

Page 49: ...can select Fast Normal or Slow Background Music Select to determine whether to play an MP3 file during a slide show You can select Music Off or Music On Background Music Setting While a slide show is...

Page 50: ...time before the screen saver appears The screensaver will appear when no button is pressed for 1 5 or 10 minutes Move Enter Return Slide Show Speed Fast Background Music On Background Music Setting R...

Page 51: ...Digital Audio Out Optical on your TV and Digital Audio Input on the receiver Connect only one receiver You can listen to 5 1 channel sound through the home theatre s speakers Otherwise you can only li...

Page 52: ...tton 3 Press the or button to select Select Device then press the ENTER button 4 Press the or button to select to a particular device and press the ENTER button It is switched to the selected device 5...

Page 53: ...Device with built in Tuner After switching to the device when you are watching a TV programme P W LINK W LINK button Audio Device When a Receiver is activated W LINK W LINK button MUTE button The Any...

Page 54: ...at a certain condition Searching channels When connecting or removing the HDMI 1 3 cable please make sure to search devices again or restart your TV Check if the Anynet Function of Anynet device is s...

Page 55: ...ded and can be selected by pressing the coloured buttons Press one of them corresponding to the required The page is displayed with other coloured information that can be selected in the same way To d...

Page 56: ...t page number or search indications Date and time Text Status information FASTEXT information Teletext information is often divided between several pages displayed in sequence which can be accessed by...

Page 57: ...an the standard dimension as they may cause damage to the inside of the TV set For wall mounts that do not comply with the VESA standard screw specifications the length of the screws may differ depend...

Page 58: ...n the TV screen the Adjustment screen appears Press the INFO button to reset Press the or button to select Yes then press the ENTER button The position is initialized to the default setting 3 Press th...

Page 59: ...lor Red Green Yellow button moves the auto wall mount to the saved position You can move the wall mount to one of the 3 pre set positions by pressing the Red Position 1 Green Position 2 or Yellow Posi...

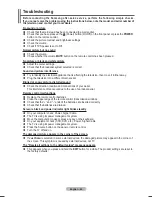
Page 60: ...t Blurred or snowy picture distorted sound Check the direction location and connections of your aerial This interference often occurs due to the use of an indoor aerial Remote control malfunctions Rep...

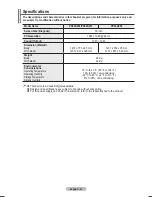
Page 61: ...1231 x 770 x 95 mm 1231 x 831 x 320 mm 1231 x 762 x 95 mm 1231 x 831 x 320 mm Weight Body With stand 38 Kg 42 Kg Environmental Considerations Operating Temperature Operating Humidity Storage Temperat...

Page 62: ...To avoid electric shock never touch the inside of this apparatus Only a qualified technician should open this apparatus Make sure to plug the power cord in until it is firmly inserted When removing t...

Page 63: ...UK Only United Kingdom This Samsung product is warranted for a period of twelve 12 months from the original date of purchase against defective materials and workmanship In the event that warranty serv...

Page 64: ...This page is intentionally left blank...

Page 65: ...r human health from uncontrolled waste disposal please separate this from other types of wastes and recycle it responsibly to promote the sustainable reuse of material resources Household users should...

Reviews: