background image

47

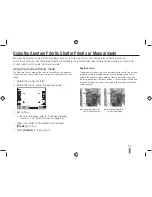
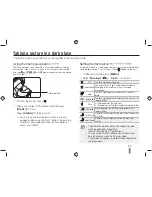
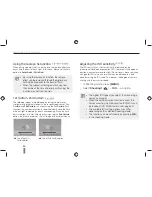
Adjusting the amount of flash light 

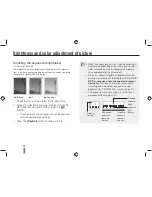
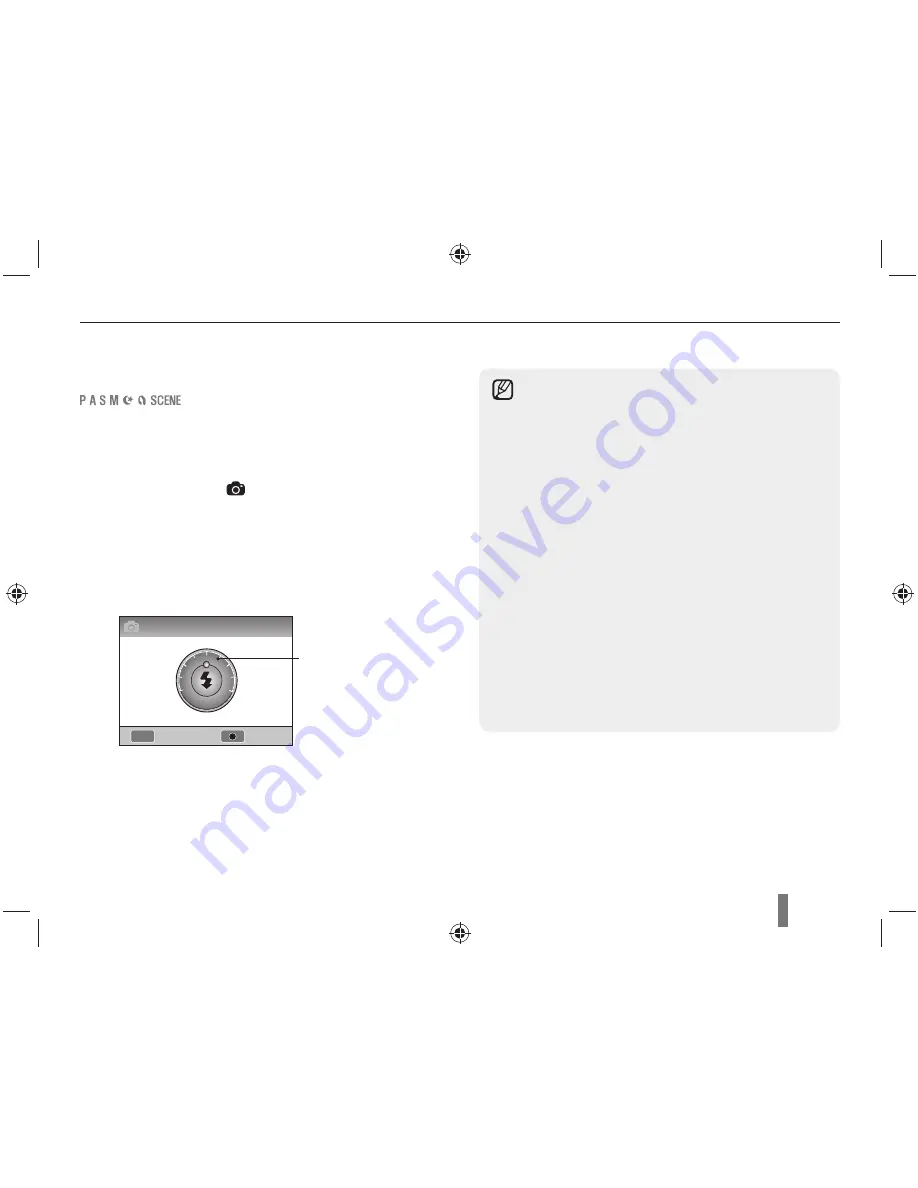
When setting the flash option, you can adjust the desired amount 
of flash light.  

1

  In Shooting mode, press 

[MENU]

.

2

 Select

 Shooting 2 

(

2


Flash

.

3

 Press the 

[Fn]

 button after selecting a desired item.

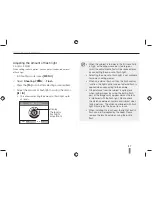
4

  Adjust the amount of flash light by using the dial or  

[


]

UÊ /…ˆÃÊ>œÜÃÊ>`ÕÃ̈˜}Ê̅iÊ>“œÕ˜ÌʜvÊy>Åʏˆ}…ÌÊÕ«Ê̜Ê

´ÓʏiÛiÃ°

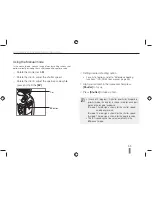
Taking a picture in a dark place

UÊ 7…i˜Ê̅iÊÃÕLiVÌʈÃÊ̜œÊVœÃi]Ê̅iÊ-"ÊÃi˜ÃˆÌˆÛˆÌÞÊ

is high, or the exposure value is too large or 
small, the adjustment effect will be reduced even 
by controlling the amount of flash light. 

UÊ `ÕÃ̈˜}Ê̅iÊ>“œÕ˜ÌʜvÊy>Åʏˆ}…ÌʈÃʘœÌÊ>Û>ˆ>LiÊ

for some shooting modes.

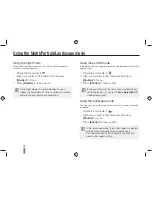
UÊ 7…i˜Ê>˜ÊiÝÌiÀ˜>Êy>ÅÊ՘ˆÌʅ>ÃÊ̅iÊy>ÅÊVœ˜ÌÀœÊ

function, the light control value of external flash is 
applied when connecting to the camera. 

UÊ vÊ̅iÊ`ˆÃÌ>˜ViÊvÀœ“Ê̅iÊÃÕLiVÌʈÃʵՈÌiÊVœÃiÊ

when taking images by using the built-in flash, 
part of the images may appear dark as the lens 
is interfered with the flash light. Please check 
the distance between camera and subject when 
taking pictures. The distance interfered with flash 
light may vary by the type of lens in use.

UÊ 7…i˜Êˆ˜ÃÌ>ˆ˜}Ê̅iʏi˜Ãʅœœ`]Ê̅iʏˆ}…ÌʜvÊLՈÌ‡ˆ˜Ê

flash can be intercepted by the hood. Please 
remove the lens hood when using the built-in 
flash.

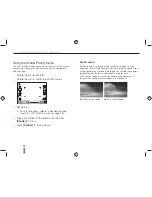
MENU

1

Display 
the level of 
flash light 
adjustment 

Flash Exposure Value

Reset

Back

-2

-1

+1

+2

0

Summary of Contents for NX10

Page 1: ...unctions and features of your device Please read the Quick Start Manual and User Manual carefully to ensure safe and correct use For more information refer to the User Manual included on the supplied...

Page 2: ...local regulations U when disposing of used batteries Never place batteries or cameras on or in heating devices U such as microwave ovens stoves or radiators Batteries may explode when overheated Hand...

Page 3: ...th a soft clean debris free lens cloth Allow only quali ed personnel to service your camera Do not allow unquali ed personnel to service the camera or attempt to service the camera yourself Any damage...

Page 4: ...ting mode dial The diagram below shows the status has been changed to Directional Keys in the User s Manual When explaining the steps needed for navigating the menu the up down left and right directio...

Page 5: ...y when selecting a menu or option within the step Example Select Shooting 1 1 Quality represents select Shooting 1 1 and then Quality Comment explaining symbols Abbreviations used in this manual Abbre...

Page 6: ...nimal or still life Background the objects around the subject Composition the combination of a subject and background Subject Background Composition Exposure Brightness The amount of light that enters...

Page 7: ...your subject from being out of focus 27 Setting the automatic manual focus function 28 Zooming 28 Optical Image Stabilization OIS 29 Using the OIS in the menu option 29 Depth preview 30 Using the Smar...

Page 8: ...hooting method and timer setup 54 Special effect photo retouching 55 Picture wizard 55 Finding more about the extended shooting function 56 Play picture movie 58 Viewing pictures in the play mode 58 V...

Page 9: ...192A Strap AD63 04468A Software installation CD including user s manual AD46 00298A Quick Start Manual AD68 04529A Charger AD44 00157A AC power cable AD81 00681A The image of components or optional pa...

Page 10: ...adjustment dial Green button Drive mode button Use the green button The following setup values are initialized if the button is pushed once in the standby state for shooting Program shift Detailed set...

Page 11: ...ton Tripod mount Use of eye sensor Because the eye sensor enables the automatic conversion between the display and the electronic view finder EVF the shooting information is shown on the viewfinder of...

Page 12: ...view Eye cup Removal of Eye cup When the camera is shipped the eyecup is attached to the viewfinder Push the Eye cup up as shown in the figure for removal Eyesight adjustment dial Status lamp In the c...

Page 13: ...models compatible for use U This user manual was prepared based on the U SAMSUNG 18 55mm F3 5 5 6 OIS lens Please refer to the lens user manual for more information about the lens Lens contacts Lens h...

Page 14: ...g status Red Charging Green Fully charged Turned off or Yellow Charging error To remove the battery from the charger lift slightly in U the direction of the arrow Please use designated charger or batt...

Page 15: ...nstalling the battery When taking out the battery slightly pull down on the lock lever The battery may then be removed 2 Lock lever 1 Open by pushing in the direction of the arrow 3 Close by pushing d...

Page 16: ...you can remove it U by slightly pushing in the direction of insertion Please do not remove the memory card or battery U while the status indicator lamp is blinking It may cause loss or data or product...

Page 17: ...ing or dismounting the lens while the camera is powered off is desirable to ensure the stable operation of the lens SAMSUNG is not responsible for any accident damage or trouble caused by using other...

Page 18: ...18 Preparations before shooting Connecting the strap By connecting the strap to the body the user can conveniently carry the camera...

Page 19: ...language option and then press U i V ii i i i i iV i 3 Press to select Date and then press 4 Press to set desired date and then press MENU Exit Change OK 2 Date Time Zone Time Language 2009 1 1 00 00...

Page 20: ...again to disable 8 Press to save 9 Press to select Time and then press 10 Set desired time by pressing and then press 11 Press MENU to nish setting MENU OK 2 Date Time Zone Time Language 2009 1 1 00...

Page 21: ...shots Battery information Displays no insertion of memory card Warning of camera shake 12 00AM 2010 01 01 Time date and year info Focus indicator Spot metering area AF zone Histogram Grid display B Sh...

Page 22: ...cture in the shutter speed priority mode this allows you to quickly adjust the desired shutter speed Example Using the dial in the S mode 1 Set the mode dial to S 2 Adjust the shutter speed by turning...

Page 23: ...he Fn button on the body of camera 3 Select Flash by using the or dial 4 Press 5 Set the ash menu option by using the or dial 6 Press 7 Set the amount of ash light by using the or dial U i v y levels...

Page 24: ...ISO le in play and total number of les saved Setting user display You can set or remove the shooting information display 1 Press MENU in the shooting mode 2 Select User setup 1 User Display an option...

Page 25: ...4 Press Shutter to take a photo Simple picture taking method The user can take a picture conveniently by minimizing the need of user setup Please refer to the Tips for getting a clearer photo U p 26...

Page 26: ...you press the shutter half way down the focus and exposure will be adjusted automatically Tips for getting a clearer photo Showing the shutter speed and aperture value being set Focus frame If green...

Page 27: ...alf of the shutter the screen comes back to normal screen in the state of adjusted focus Preventing your subject from being out of focus Under the following circumstances it may be dif cult to get you...

Page 28: ...ng you can enlarge telephoto angle or reduce wide angle the size of an image by changing the focal length value of the camera lens Adjust it to the desired size and take the picture 1 Turn the zoom ri...

Page 29: ...well in the following U cases When taking a picture while tracing a moving object When a big vibration occurs beyond the range of stabilization When the shutter speed is too slow due to a circumstanc...

Page 30: ...there is a range in which objects closer and further away will also be in focus This focused range is called the depth of eld The wider the wide angle lens the higher the aperture value the greater t...

Page 31: ...t with various colors Close up portrait shot After xing to a xture like tripod proceed with the shot under the condition that the subject does not move for a while Taking pictures under the condition...

Page 32: ...take a photo What is the program shift method If this function is used desired shutter speed and aperture value can be selected while maintaining the same brightness The shutter speed and aperture va...

Page 33: ...r speed 1 Rotate the mode dial to A 2 Rotate the dial to adjust the aperture value 3 Set options U v ivi i i functions CD ROM User manual page 49 4 Align your subject in the frame and half press Shutt...

Page 34: ...focus 5 Press Shutter to take a photo Shutter speed Shutter speed is the length of time the shutter is open You can enjoy many interesting effects by adjusting the shutter speed A low shutter speed bl...

Page 35: ...ption U v ivi i i functions CD ROM User manual page 49 5 Align your subject in the frame and half press Shutter to focus 6 Press Shutter to take a photo Using the Aperture Priority Shutter Priority or...

Page 36: ...pe mode This mode can be useful when a clear focus for a natural landscape is needed 1 Rotate the mode dial to 2 Align your subject in the frame and half press Shutter to focus 3 Press Shutter to take...

Page 37: ...frame and half press Shutter to focus 4 Press Shutter to take a photo MENU OK 1 Beauty Shot When the camera is set to standby mode while the mode dial is set to you can directly select a desired scene...

Page 38: ...ne appear lighter 6 Select Shooting3 3 Face Retouch 7 Set options Select a higher setting to make skin tone appear lighter 8 Align your subject in the frame and half press Shutter to focus 9 Press Shu...

Page 39: ...ecord the voice 7 Press Shutter to start recording 8 Press Shutter again to stop recording Pause while recording a movie By using the pause function you can shoot only desired scenes into one le witho...

Page 40: ...case the recording can be continued by starting new recording When formatting a memory card it is always U recommended to format by using this camera When the format is run in other product or PC it i...

Page 41: ...perture value when taking a movie Program Aperture Priority 47 To fade out the screen You can make the movie screen darker or brighter gradually in recording by using the fader function Off In Out In...

Page 42: ...oping in the maximum size of A3 2M 1920 x 1280 3 2 When developing in the maximum size of A5 4592 x 2584 16 9 When outputting to HDTV or developing in the A1 size 16 9 3872 x 2176 16 9 When outputting...

Page 43: ...RAW le at the same time Setting the quality of movie The recorded movies are saved as normal or high quality 1 In Shooting mode press MENU 2 Select Shooting 1 2 Quality an option Normal Set normal qu...

Page 44: ...time by using the dial or U 9 V i iV i i i i i v H seconds 5 The shot is taken automatically after the time being set has passed by pressing Shutter Using the timer function The function can be set d...

Page 45: ...ash light doesn t operate SMART Smart Flash The amount of ash light is adjusted automatically according to the exposure in the surrounding environment Auto The ash light operates automatically in the...

Page 46: ...Curtain option Adjusting the ISO sensitivity The ISO sensitivity as the lm sensitivity established by the international standards organization ISO represents the degree of reaction when camera receiv...

Page 47: ...mount of ash light U i v y L i for some shooting modes U 7 i i i y i y V function the light control value of external ash is applied when connecting to the camera U v i Vi v i L iV i V i when taking i...

Page 48: ...the selected area Multi AF Shows all the places that the focus is set correctly in the display Face Detection AF Shows the areas that the focus is correctly set in the display Self Portrait AF When th...

Page 49: ...s MENU to return to the previous mode 4 In Shooting mode press 5 Press to move the focus area 6 Adjust the size of focus area by using the dial 7 Align your subject in the frame and half press Shutter...

Page 50: ...Vi i iV Li ivviV i i When the subject is too far When it is too bright or dark When the subject is not facing to the front When part of the face is hidden by an object like sunglasses When one makes a...

Page 51: ...up shot possible If the face is detected in the center it rings a sound to take a shot 1 In Shooting mode press MENU 2 Select Shooting 2 2 AF Area Self Portrait AF 3 Press Shutter if having an info s...

Page 52: ...der and display 3 Press the Shutter button to take a picture U When the exposure value is set it may be excessively bright or dark depending on the shooting environment Adjust and take a picture by ch...

Page 53: ...itable for outdoor shot on a clear day Cloudy Suitable for shadows on a cloudy day Fluorescent White Daylight uorescent lamp suitable especially for the white uorescent light with the color temperatur...

Page 54: ...consecutive shots the original th next one step darker and the last one step lighter WB BKT When the shutter is pressed the camera will take 3 consecutive shots the original and 2 more with different...

Page 55: ...Shooting mode press MENU 2 Select Shooting 1 1 Picture Wizard an option 3 Adjust the detailed items of picture wizard that were selected by using U 9 V V i V i contrast 4 Set to a desired value U i V...

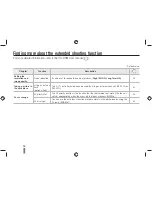
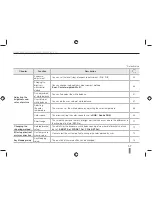
Page 56: ...ng an external ash unit SEF 20A or SEF 42A 57 Focus change AF priority shot The AF priority function is the function that the shutter does not work if the focus is not set appropriately when the user...

Page 57: ...sting the color temperature 68 Color space This allows setting the color space to use sRGB Adobe RGB 69 Smart range This smoothly corrects the loss of bright part that can occur due to the differences...

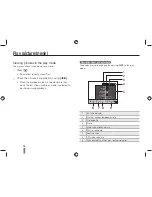
Page 58: ...lay information appears by pressing DISP in the play mode 1 RAW le indicator 2 File that includes development info 3 Protected le 4 File no 5 Meta value of taken picture 6 Shutter speed info 7 Apertur...

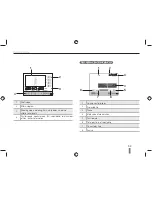
Page 59: ...number of les battery information Descriptions about movie playback 1 Volume control display 2 Protected le 3 File no 4 Meta value of movie taken 5 Fast forward 6 Total play time of selected le 7 Cur...

Page 60: ...Press to return to the previous Converting into the thumbnail view Since several les can be shown on one display les can be searched quickly To have a thumbnail view of 9 images press two times or pr...

Page 61: ...red le 1 After selecting the le to be deleted in the play mode press 2 From the popup window select Yes Deleting selected le 1 After selecting the le to be deleted in the play mode press 2 From the po...

Page 62: ...press MENU 2 Select a desired option U i i iV i i step 4 Images Select the pictures to be shown in the slide show U All View all the saved pictures in the slide show U Date See the pictures taken on a...

Page 63: ...press Pause Play Press the button View a movie While a movie is being played back you are able to select and cut a desired part of the scene 1 After selecting a desired movie in the play mode press 2...

Page 64: ...e playing a movie 3 Press in the pause state Cutting part of a movie 1 Press in the play mode 2 Select the start point to cut by pressing while playing a movie 3 Select the end point of cutting by pre...

Page 65: ...Microsoft Direct X 9 0C or later U Programs contained on the CD Program Purpose Samsung Master Edit photos and videos QuickTime Player 7 6 View videos H 264 MPEG 4 AVC les on a PC Samsung RAW Convert...

Page 66: ...omplete the installation and restart your computer Transferring les to your PC Once you connect the camera to your PC the camera will be recognised as a removable drive 1 Connect your camera to your P...

Page 67: ...XP The way to disconnect the USB cable for Windows 2000 Vista is similar 1 It the status lamp on your camera is blinking it means the data transfer is in progress Please wait until the status lamp sto...

Page 68: ...downloaded les Click to download the selected les Thumbnails of les click an image to download Using the Samsung Master Interface No Description Toolbar Menus Click for more information about the pro...

Page 69: ...dit functions are listed below U Menu bar Image editing tools Exposure bias Compensates the exposure value White balance Adjusts the white balance value Color Adjusts the color of the image Tone Chang...

Page 70: ...Con guring print settings MENU Exit Print 2 1 Images Size Layout Type Quality Date One Photo Auto Auto Auto Auto Auto Images Select whether to print the current photo or all photos Size Specify the si...

Page 71: ...of a picture taken in the backlight mode 86 Picture style You can express various moods of emotional picture by selecting the picture style 86 Face retouching You can retouch the face of portrait sho...

Page 72: ...he previous mode Camera settings menu The camera use environment can be set to a desired state by using the setup menu MENU OK 2 1 2 1 1 3 Quickview Display Adjust Display Save Power Save Date Time So...

Page 73: ...ess setting and color Display Brightness Depending on whether the user uses the screen or the view nder the display brightness can be adjusted by using the Auto Brightness Adjust the brightness of scr...

Page 74: ...ng lename Standard SAM_XXXX JPG sRGB _SAMXXXX JPG Adobe RGB Date 8888 8888 Li H i _ADDXXXX JPG Adobe RGB indicating A for Oct B for Nov C for Dec For example the image taken by setting Jan 01 sRGB is...

Page 75: ...3min 5min 10min 30min U i i vv i Li i i i i v i i V i L i U v V iV V i 6 i i i Date Time This sets to indicate the date and time that has taken a picture Type Date Time Zone Time Imprint U i i i i i...

Page 76: ...cted to HDTV that supports Anynet HDMI CEC the play function of camera can be controlled with the TV remote controller CD ROM User manual page 90 On The play function of camera can be controlled with...

Page 77: ...charge the battery Memory Full Delete unnecessary les or insert a new memory card No Image File Take photos or insert a memory card that has some photos Check the lens Check whether dust or foreign su...

Page 78: ...et Using the ash or recording videos depletes the battery quickly Recharge if needed U Batteries are consumable parts that must be replaced over time Get a new battery if the battery life is diminishi...

Page 79: ...ooting the photo may be blurry Use the tripod to avoid possible camera shake U Make sure that the lens is clean If not clean the lens CD ROM User manual page 108 U The colors in the photo do not match...

Page 80: ...ission may be interrupted by static electricity Disconnect the USB cable and connect it again Your computer cannot play videos The codec installed in your computer may not be compatible with the video...

Page 81: ...0 921k dots Field of View Approx 100 Magni cation Approx 0 86x APS C 50mm 1m 1 Eyepoint About 20 2mm Diopter Adjustment H 1 Speci cation Focusing Type Contrast AF Focusing point Selection 1point Free...

Page 82: ...ill in Red eye reduction 1st Curtain 2nd Curtain OFF Guide Number 11 at ISO 100 Angle of View Coverage 28mm wide angle Equivalent to 35mm Sync Speed Less than 1 180sec Flash Compensation 2 2EV 0 5EV s...

Page 83: ...80 RAW 14M 4592x3056 Quality Super ne Fine Normal RAW Format SRW Color Space sRGB Adobe RGB Speci cation Movie Format MP4 H 264 Compression Movie H 264 Sound AAC Movie Clip With Audio or without Audio...

Page 84: ...ty 44min Normal 66min 320x240 High Quality 145min Normal 210min These gures are measured under the Samsung standard Speci cation Direct Printing PictBridge Interface Digital Output Connector USB 2 0 H...

Page 85: ...es 7 Circular Aperture Diaphragm F3 5 5 6 Min F22 Number of Blades 7 Circular Aperture Diaphragm F4 5 6 Min F22 Number of Blades 7 Circular Aperture Diaphragm Mount Type Samsung NX Mount Samsung NX Mo...

Page 86: ...ent dial 12 Display type 24 Depth Preview 30 Depth of eld 30 Deleting a le 61 Display 73 Date Time 75 E Eye sensor 11 Eye cup 12 EV button 35 External ash 56 Error message 77 F Fn 23 Flash popup butto...

Page 87: ...o mode 31 Shutter Priority mode 34 Shutter speed 34 Scene mode 37 Self portrait face Setting the ash option 45 Single AF 48 Selection AF 48 detection 51 Shooting method 54 Spot metering 57 Smart range...

Page 88: ...Please refer to the warranty that came with your product or visit our website http www samsung com for after sales service or inquiries AD68 04529A 1 0...

Reviews: