background image

7

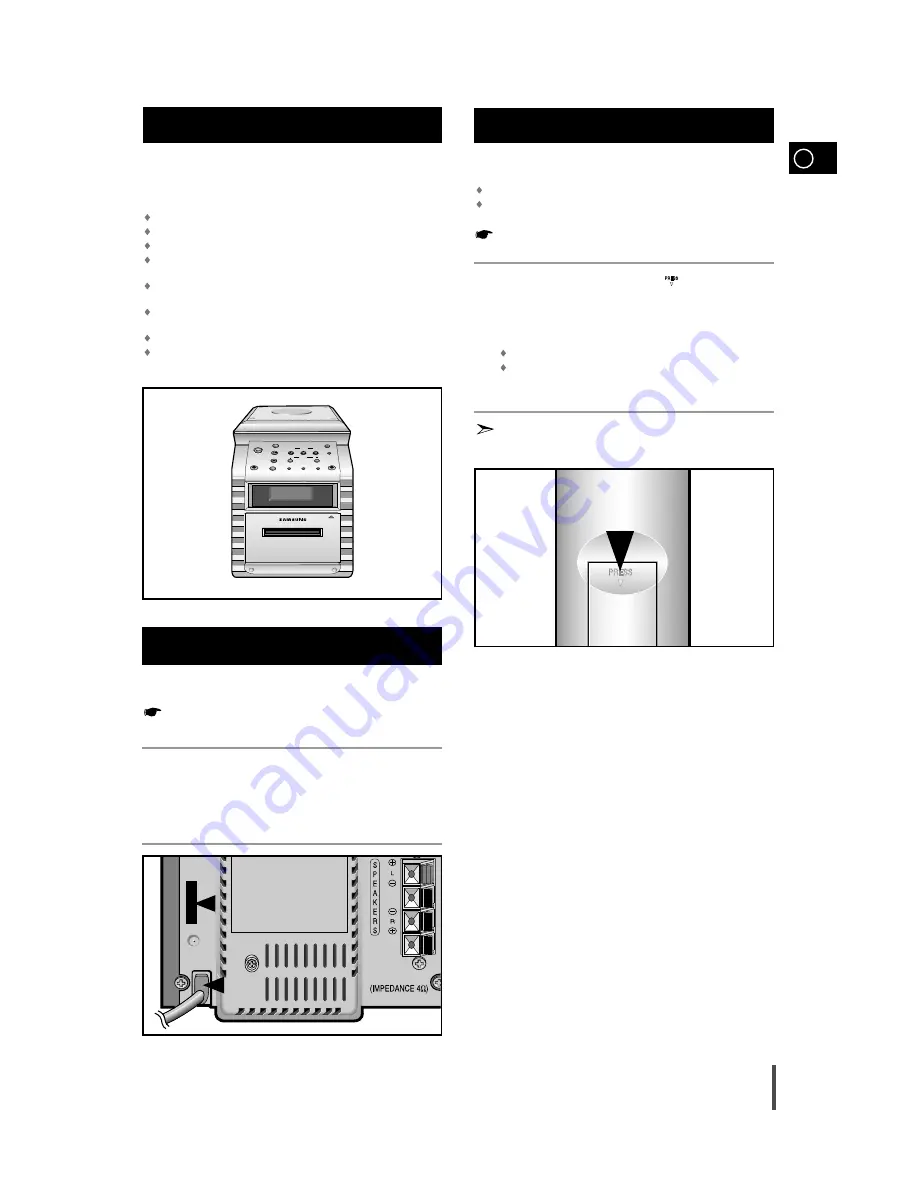
The main lead must be plugged into an appropriate socket.

Before plugging your system into a main socket, you must check
the voltage.

Check the position of the voltage selector on the rear panel

(OPTIONAL).

Plug the main lead (marked AC Cord on the rear of the system) into

an appropriate socket.

Press the Standby/On button to switch your mini-compact system on.

To take full advantage of your new micro component system,
follow these installation instructions before connecting the unit.

Install the system on a flat, stable surface.

Never place this unit on carpeting.

Never place this unit in an outdoor area.

Maintain an open space of approximately 6 inches (15 cm) on the
sides and rear of the system, for ventilation purposes.

Make sure that you have enough room to open the compact disc
compartment easily.

Place the loudspeakers at a reasonable distance on either side of
the system to ensure good stereo sound.

Direct the loudspeakers towards the listening area.

For optimum performance, make sure that both speakers are placed
at an equal distance above the floor.

Where to Install Your 
Micro Component System

Connecting your System to the
Power Supply

2

Insert or replace remote control batteries when you:

Purchase the micro component system

Find that the remote control is no longer operating correctly

When replacing the batteries, use a new set of batteries and
never mix alkaline and manganese batteries.

Place your thumb on the position marked       on the battery 
compartment cover (rear of the remote control) and push the cover in
the direction of the arrow.

Insert two AA, R6 or equivalent batteries, taking care to respect the
polarities:

+ on the battery a in the battery compartment

– 

on the battery against – in the battery compartment

Replace the cover by sliding it back until it clicks into position.

If you will not be using the remote control for a long time,
remove the batteries to prevent corrosion.

Inserting Remote Control Batteries

1

2

3

Standby/On

Phones

Mic

Open/Close

Band

VCD/CD

TAPE

AUX

TUNER

Volume

Tuning

Mode

Previous

Down

Next

Up

Demo

REC/Pause

REV.Mode

Sound

Mode

Full Auto Remote Control Operation

Push Eject

Push Eject

1

GB

3

Summary of Contents for MM-VB7

Page 1: ...Instruction Manual VIDEO CD MICRO COMPONENT AUDIO SYSTEM VCD MP3 CD CD R RW PLAYBACK MM VB7 ...

Page 2: ...IDE REFER SER VICING TO QUALIFIED SERVICE PERSONNEL RISK OF ELECTRIC SHOCK DO NOT OPEN CAUTION CLASS 1 LASER PRODUCT KLASSE 1 LASER PRODUKT LUOKAN 1 LASER LAITE KLASS 1 LASER APPARAT PRODUCTO LASER CLASE 1 This symbol indicates that dangerous voltage constituting of a risk of electric shock is present within this unit This symbol indicates that there are important operating and maintenance instruc...

Page 3: ...ayer Playback 15 Search Functions 15 Time Search Function 15 When adjusting play speed 16 NTSC PAL Selection Method 16 Sound Select Function 16 Key Control Function 16 VCD View function 17 ZOOM Function 17 Last Memory Function 17 TUNER Searching for and Storing the Radio Stations 18 Selecting a Stored Station 18 Improving Radio Reception 18 Tape Deck Listening to a Cassette 19 Selecting the Casset...

Page 4: ...use REV Mode Sound Mode Push Eject Push Eject 1 2 3 4 5 6 7 8 9 10 11 12 13 4 Front Panel View 1 Skip or Search 2 Function TUNER VCD CD TAPE AUX 3 Standby On 4 Headphone Jack Connector 5 REC Pause 6 Stop 7 CD Door open close 8 Demo 9 Mic jack 10 Sound Mode 11 Volume 12 REV Mode 13 Push Eject Cassette Door Open Close ...

Page 5: ... Sleep 14 CD Synchro 15 VCD Sound 16 VCD Slow Play 17 Key Control 18 Key Control 19 Return 20 Time Search Last Memory 21 TAPE Stop 22 TAPE Play 23 Tuner Band 24 Volume Up Down 25 Program Set 26 Disc Play Pause 27 Track Next 28 View 29 VCD CD MP3 CD Shuffle Play 30 Timer Clock 31 Timer On Off 32 Mute GB 5 Remote Control 1 17 18 19 20 21 22 23 24 25 26 27 28 29 30 31 32 2 3 4 5 6 7 8 9 10 11 12 13 1...

Page 6: ...B 6 Rear Panel View 1 SW Aerial option 2 AM Aerial Connector Terminal 3 FM Aerial Connector Terminal 4 Video Output 5 Audio Output 6 AUX Input 7 Loudspeakers Connector Terminals 8 Voltage Selector option ...

Page 7: ...rformance make sure that both speakers are placed at an equal distance above the floor Where to Install Your Micro Component System Connecting your System to the Power Supply 2 Insert or replace remote control batteries when you Purchase the micro component system Find that the remote control is no longer operating correctly When replacing the batteries use a new set of batteries and never mix alk...

Page 8: ...source on Adjust the volume and balance as required Volume Sound Mode Example You can watch a film and take advantage of stereo sound provided that the original sound track is in stereo as if you were in a cinema Connecting to an External Source 1 2 3 4 5 6 Speaker Connection Directions in Installing Speaker Installation in a place near heating apparatus under direct lay of light or with high humi...

Page 9: ... you may need to install an outdoor aerial To do so connect an outdoor FM aerial to the FM socket on the rear of the system using a 75Ω coaxial cable not supplied Connecting the FM Aerial Using the Audio Cord Connect the Audio Output Terminals Left Right of the rear panel with the Audio Input Terminals Left Right of TV Using the Video Cord Connect the Video Output Terminal of the rear panel with t...

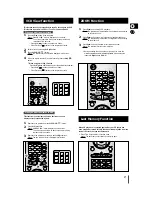
Page 10: ...lock starts and is displayed even when the system is in standby mode You can display the time even when you are using another function by pressing Timer Clock once You can use the button on the main unit to instead button on the remote control in step 4 6 Setting the Clock 1 2 3 4 5 6 7 You can view the various functions available on your system Press the Demo button in standby mode Result The var...

Page 11: ... Disc on the TV Press the Previous Next buttons to move on to the next or previous track 2 How to play back MP3 CD on menu mode After inserting MP3 CD in the Set Press the View button at the stop mode 1 Select the Number of Directory You can see the following Display Select the number of song on the remote control Digit buttons and you can enjoy the music You can see the following information of D...

Page 12: ...r doc only are not audio files and therefore will be skipped MP3 means MPEG1 Layer 3 the global standard for audio signal compression technology It uses digital compression technology to compress original sound data by up to 12 times without sound quality degradation File Compatibility The unit will playback files created in MP3 format Mpeg1 Layer3 with mp3 as their extension Files created in MP2 ...

Page 13: ...When you wish to stop the Repeat function press Stop button Repeating One or All Tracks on the Compact Discs 1 2 2 In selecting a track on MP3 CD digit 0 will be entered if the button of 10 0 is pressed Example If you want to select a track 40 during the playback of a certain track press both buttons of 4 and 10 0 You can listen to the tracks on a compact disc in a different order each time as the...

Page 14: ...multaneously with the CD Repeat function If the CD function is selected stop the player by pressing Stop button Load the selected CDs Press Program Set Result The following indications are displayed 01 Program no Track no on the disc Select the required track by pressing to move back through the tracks to move forward through the tracks Press Program Set to confirm your selection Result The select...

Page 15: ...l picture Result Pause is displayed a still picture appears and the sound is muted To return to normal playback press VCD CD button Press the Stop button to stop playback Please make sure that the Video CD to be played is not flawed optically as this may cause a distorted sound or the unit to malfunction GB 15 Video CD Player Playback 1 2 3 4 5 6 7 8 You can find a certain passage faster during pl...

Page 16: ...t speakers Rch MONO Only the right channel vocal parts is played back through both the right and left speakers STEREO Cancels the Multiplex Sound normal stereo playback resumes You can select between listening to the tone from the left channel the right channel or both channels Sound Select Function L CH R CH STEREO Lch MONO Rch MONO This function can work only at VCD mode Press the Key Control bu...

Page 17: ...e being reproduced is enlarged four times as large as the initial one Press Zoom button in the state of four times sized zoom Result The picture will return to the initial size During operating the zoom function if you want to move the picture upward downward leftward rightward please press the respective Digit buttons 2 4 6 8 ZOOM Function When you want to select a track 1 1 2 3 2 3 4 This functi...

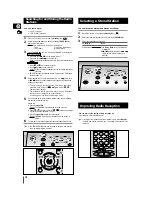
Page 18: ... happens use the manual search mode If you do not want to store the radio station found revert to Step 4 and search for another station Otherwise a Press Program Set Result The PROGRAM is displayed for a few seconds b Press remote control or main unit to assign a program number between 1 and 15 c Press Program Set to store the radio station Result PROGRAM is no longer displayed and the station is ...

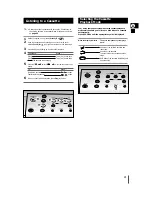
Page 19: ...he cassette button Fast forward the cassette button When you have finished playback press Stop button 5 6 1 5 4 Your micro component system has three cassette playback modes which enable you to listen to both sides of a cassette automatically Press REV Mode until the appropriate symbol is displayed When the display indicates The micro component system plays back One side of the selected cassette a...

Page 20: ... will begin To stop recording press Stop button Standby On Phones Op VCD CD TAPE AUX TUNER Volume Tuning Mode D REC Pause REV Mode Sound Mode Band Previous Down Next Up Recording a Radio Program 4 1 4 5 6 3 You can record a compact disc on a cassette in two different ways Synchronised recording Direct recording This feature enables you to synchronize the start of the recording with the start of th...

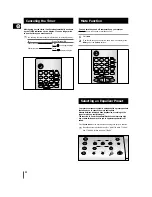
Page 21: ...ady set you can now set the timer switch off time Set the timer switch off time a Set the hour by pressing or button b Press Program Set Result The minutes flash c Set the minutes by pressing or button d Press Program Set Result VOL 10 is displayed where 10 corresponds to the volume already set Press or button to adjust the volume level and press Program Set Result The source to be selected is dis...

Page 22: ...off temporarily on your system Example You wish to answer a telephone call Press Mute To switch the sound back on at the same volume as before press Mute again or the Volume buttons Mute Function Selecting an Equalizer Preset 2 1 Mic Open Close VCD CD TAPE AUX TUNER Volume Tuning Mode Demo REC Pause REV Mode Sound Mode Band Pervious Down Next Up After having set the timer it will start automatical...

Page 23: ...d Press Sleep one or more times to indicate how long the system should continue playing before it switches off At any time you can Check the remaining time by pressing Sleep Change the remaining time by repeating Steps 1 and 2 To cancel SLEEP function press Sleep one or more times until OFF is display Setting the System to Switch off Automatically Connecting Headphones 1 2 3 90 MIN Standby On Phon...

Page 24: ... could lead to overheating and malfunction of the unit Do not place potted plants or vases on top of the unit Moisture entering the unit could lead to dangerous electric shock and can cause equipment damage In such events immediately disconnect the main plug from the socket VOLUME UP DOWN Remove the batteries from the remote control if not used for any extended period Leaking batteries can cause s...

Page 25: ...em does not work There is no sound The Timer does not work In case it does not work even the action is taken as above The compact disc player does not start playing The tape does not start playing The volume falls off The cassette is not erased correctly There is excessive wow and flutter Reception is poor or no radio stations are received at all G E N E R A L C D R A D I O C A S S E T T E S Check...

Page 26: ...nal noise ratio 62 dB Usable sensitivity 3 dB Total harmonic distortion 0 5 COMPACT DISC PLAYER Frequency range 20 Hz 20 KHz 1 dB Signal noise ratio 90 dB at 1 KHz with filter Distortion 0 05 at 1 KHz Channel separation 75 dB Disc sizes Diameter 120 or 80 mm Thickness 1 2 mm TAPE DECK Frequency range 125 Hz 10 KHz Signal noise ratio 40 dB Channel separation 35 dB Erasing effect 60 dB AMPLIFIER Out...

Page 27: ...ELECTRONICS THIS APPLIANCE IS MANUFACTURED BY AH68 01157B ...

Reviews: