background image

Your New Microwave oven

ME1480STC

Table of Contents

Safety ...................................................................................................2
Your New Microwave oven ................................................................5

Checking Parts .................................................................................5
Warranty and Service Information ....................................................5
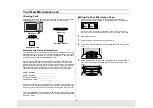
Setting Up Your Microwave Oven.....................................................5
Control Panel Buttons .................................................................. 6~8
Table of Contents .............................................................................8

Operation.............................................................................................9

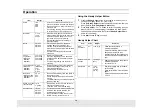
Turning on the Power and Selecting a Weight .................................9
Setting the Clock...............................................................................9
Using the Pause/Cancel Button ........................................................9
Using the One  Button.........................................................9
Using the Instant Cook Buttons ........................................................9
Using the Handy Helper Button ......................................................10
Using the Kids Meals Button...........................................................11
Using the Snack Bar Button............................................................11
Reheating Automatically
(MW1240/1440, ME1240/1440/1280/1480)....................................12
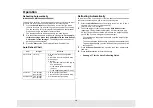
Defrosting Automatically .................................................................12
Setting Cooking Times & Power Levels..........................................13
One-stage Cooking  ........................................................................13
Multi-stage Cooking  .......................................................................13
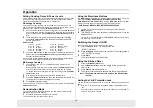
Demonstration Mode ......................................................................13
Using the More/Less Buttons..........................................................13
Switching the Beeper On/Off ..........................................................13
Using the Kitchen Timer .................................................................13
Setting the Child Protection Lock....................................................13

Cooking Instructions........................................................................14

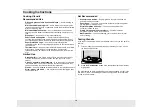
Cooking Utensils .............................................................................14
Testing Utensils ..............................................................................14
Cooking Techniques .......................................................................15
General Tips ...................................................................................15
Cooking Guide ......................................................................... 16~17
Auto Defrosting Guide ....................................................................17
Recipes...........................................................................................18

Appendix ...........................................................................................19

Troubleshooting Guide ...................................................................19
Care and Cleaning ..........................................................................19
Specifications........................................................................... 20~21

Warranty ............................................................................................21

Warranty Information ............................................................... 21~22

Guíd de Consulta Rápida en Español(Spanish) ............................23
Quick Reference(English) ................................................Back Cover

1

2

3

4

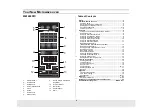
7

9

11

13

12

10

8

6

5

1.

One

2.

Auto Reheat

3.

Auto Defrost

4.

Instant Cook Buttons

5.

Clock

6.

Sound

7.

Power Level

8.

Kitchen Timer 

9.

Handy Helper, Kids Meals, 
Snack Bar

10.

Number Buttons

11.

More/Less

12.

Pause/Cancel

13.

Start

Summary of Contents for ME1240SC

Page 1: ...Code No DE68 02612A Microwave Oven Owner s Manual MW1040WC BC MW1240WC BC MW1440WC BC ME1240SC ME1440SC ME1280STC ME1480STC ME1480STC ME1280STC MW1040WC BC MW1240WC BC MW1440WC BC ME1240SC ME1440SC ...

Page 2: ...ons should be followed including the following WARNING To reduce risk of burns electric shock fire personal injury or exposure to excessive microwave energy Read all safety instructions before using the appliance Read and follow the specific PRECAUTIONS TO AVOID POSSIBLE EXPOSURE TO EXCESSIVE MICROWAVE ENERGY on this page This appliance must be grounded Connect only to properly grounded outlets Se...

Page 3: ...er panel If the door is opened the fire may spread d Do not use the oven compartment for storage purposes Do not leave paper products cooking utensils or food in the oven when not in use Do not try to preheat oven or operate while empty Do not cook without the glass tray in place on the oven floor Food will not cook properly without the tray Do not defrost frozen beverages in narrow necked bottles...

Page 4: ...ords A short power supply cord is provided to reduce the risk of becoming entangled in or tripping over a longer cord Longer cord sets or extension cords are available and may be used if care is exercised in their use If a long cord or extension cord is used 1 The marked electrical rating of the cord set or extension cord should be at least as great as the electrical rating of the appliance 2 The ...

Page 5: ...________ DATE PURCHASED ____________________ PURCHASED FROM ____________________ Warranty service can only be performed by a Samsung Authorized Service Center If you should require warranty service provide the above information with a copy of your sales receipt to the Samsung Authorized Service Center For service assistance and the location of the nearest service center please call 1 800 SAMSUNG 1...

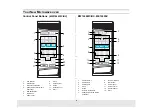
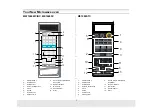
Page 6: ... Bar 5 Number Buttons 6 More Less 7 Power Level 8 Clock 9 Kitchen Timer 10 Sound 11 Pause Cancel 12 Start 1 2 3 4 5 8 12 11 10 9 6 7 1 One Minute 2 Auto Defrost 3 Auto Reheat 4 Clock 5 Sound 6 Instant Cook Buttons 7 Handy Helper Kids Meals Snack Bar 8 Number Buttons 9 More Less 10 Power Level 11 Kitchen Timer 12 Pause Cancel 13 Start 1 2 4 7 8 10 12 3 5 6 9 11 13 ...

Page 7: ...6 Sound 7 Power Level 8 Kitchen Timer 9 Handy Helper Kids Meals Snack Bar 10 Number Buttons 11 More Less 12 Pause Cancel 13 Start 1 2 3 4 6 7 9 11 13 12 10 5 8 1 One Minute 2 Auto Reheat 3 Auto Defrost 4 Instant Cook Buttons 5 Clock 6 Sound 7 Power Level 8 Kitchen Timer 9 Handy Helper Kids Meals Snack Bar 10 Number Buttons 11 More Less 12 Pause Cancel 13 Start ...

Page 8: ... Power Levels 13 One stage Cooking 13 Multi stage Cooking 13 Demonstration Mode 13 Using the More Less Buttons 13 Switching the Beeper On Off 13 Using the Kitchen Timer 13 Setting the Child Protection Lock 13 Cooking Instructions 14 Cooking Utensils 14 Testing Utensils 14 Cooking Techniques 15 General Tips 15 Cooking Guide 16 17 Auto Defrosting Guide 17 Recipes 18 Appendix 19 Troubleshooting Guide...

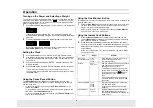
Page 9: ...istake you have just entered press Pause Cancel once then re enter the instructions Using the One Minute Button This button offers a convenient way to heat food in one minute increments at the High power level 1 Press the One Minute button once for each minute you wish to cook the food For example press it twice for two minutes The time will display and the oven starts automatically Add minutes to...

Page 10: ...vings 3 servings 4 servings Remove from package Place the vegetables into a casserole bowl and add a small amount of water 2 4Tbsp Cover during cooking and stir before standing Frozen Breakfast MW1440 ME1440 ME1480 2 4 oz MW1440 only 4 6 oz 6 8 oz Remove package from outer wrapping and follow package instructions for covering and standing After cooking let stand 1 3 min Baby food MW1240 1440 ME124...

Page 11: ...paper towel on top of plate and arrange nuggets in spoke fashion on paper towel Do not cover Let stand 1 min Hot Dogs A 2 2 EA 4 EA Prick hot dogs place on plate When the oven beeps add buns and re start the oven French Fries A 3 4 5 oz 6 7 oz Place 2 paper towels on plate and arrange french fries on towels do not overlap Blot with additional paper towel after removal from oven Frozen Sandwich A 4...

Page 12: ...ess the Auto Defrost button The display shows 0 5 lbs 0 2Kg if you have set your oven for metric measure ENTER and Lbs will flash 2 To set the weight of your food press the Auto Defrost button repeatedly This increases the weight by 0 5 lb increments up to 6 0 lbs The Auto Defrost button will increase the weight by 0 2Kg up to 2 6kg if you are using metric measurement You can also use the number b...

Page 13: ...el button then use the number buttons to set the power level of the second stage of cooking 4 Press Start to begin cooking You can check the Power Level while cooking is in progress by pressing the Power Level button Demonstration Mode You can use the Demonstration Mode to see how your microwave oven operates without the oven heating 1 Hold the 0 button and then press the 1 button To turn demo mod...

Page 14: ...g too much foil can damage your oven so be careful Ceramic porcelain and stoneware Use these if they are labeled Microwave Safe If they are not labeled test them to make sure they can be used safely Never use dishes with metallic trim Plastic Use only if labeled Microwave Safe Other plastics can melt Straw wicker and wood Use only for short term heating as they can be flammable Not Recommended Gla...

Page 15: ...en or stirred when cooking is complete Let liquids stand a moment before serving When heat ing baby food stir well and test the temperature before serving Adding Moisture Microwave energy is attracted to water molecules Food that is uneven in moisture content should be covered or allowed to stand so that the heat dis perses evenly Add a small amount of water to dry food to help it cook General Tip...

Page 16: ...min lb for 160 F Well Done Power Level High 0 for first 5 min then Medium 5 Place roast fat side down on roasting rack Cover with vented plastic wrap Turn over when cooking time is half up Let stand 10 min Food Cook Time Power Level Directions Whole Chicken Up to 4 lbs Cooking Time 6 9 min lb 180 F Power Level Medium High 7 Place chicken breast side down on roasting rack Cover with wax paper Turn ...

Page 17: ... for five minutes before cooking is completed while a dish of peas can be served immediately Auto Defrosting Guide Follow the instructions below when defrosting different types of food Notes Check foods when the oven signals After the final stage small sections may still be icy let them stand to continue thawing Do not defrost until all ice crystals have thawed Shielding roasts and steaks with sma...

Page 18: ...ccoli and pasta mix well Cover with lid Cook at High 0 for 4 to 6 minutes until heated through stirring once Stir before serving Makes 6 servings Warm Potato Salad 2 lbs small red potatoes cut into inch pieces 4 slices bacon uncooked cut into inch pieces cup chopped onion 2 tsp sugar 1 tsp salt 1 tsp flour tsp celery seed 1 8 tsp pepper 2 Tbs apple cider vinegar 1 In a 2 quart casserole combine po...

Page 19: ...ble and roller ring are positioned correctly Using your microwave causes TV or radio interference This is similar to the interference caused by other small appliances such as hair dryers Move your microwave further away from other appliances like your TV or radio Care and Cleaning Follow these instructions to clean and care for your oven Keep the inside of the oven clean Food particles and spilled...

Page 20: ...ons 217 8 W X 125 16 H X 1713 16 D Oven Cavity Dimensions 143 4 W X 913 16 H X 161 16 D Net Gross Weight 39 6 42 9 lbs Model Number ME1240SC Oven Cavity 1 2cuft Controls 10 power levels including defrost Timer 99 minutes 99 seconds Power Source 120 VAC 60 Hz Power Output Consumption 1100 1650 Watts Outside Dimensions 2019 32 W X 1125 32 H X 1613 32 D Oven Cavity Dimensions 1431 64 W X 91 64 H X 15...

Page 21: ...rty of SAMSUNG and must be returned to SAMSUNG Replacement parts and products assume the remaining original warranty or ninety 90 days whichever is longer This limited warranty covers manufacturing defects in materials and workmanship encountered in normal non commercial use of this product and shall not apply to the following including but not limited to damage which occurs in shipment delivery a...

Page 22: ...he exclusion or limitation of incidental or consequential damages so the above limitations or exclusions may not apply to you This warranty gives you specific legal rights and you may also have other rights which vary from state to state To obtain warranty service please contact SAMSUNG ELECTRONICS AMERICA INC WWW SAMSUNGUSA COM SAMSUNG CUSTOMER SERVICE 400 VALLEY ROAD SUITE 201 MT ARLINGTON NJ 07...

Page 23: ... Utilice los botones numéricos 0 9 para ajustar el segundo tiempo de cocinar Oprima el botón POWER LEVEL y los botones numéricos 0 9 para seleccionar la potencia de cocinar si es diferente a 0 Utilice los botones numéricos 0 9 para ajustar el tercer tiempo de cocinar Oprima el botón POWER LEVEL y los botones numéricos 0 9 para seleccionar la potencia de cocinar si es diferente a 0 Oprima el botón ...

Page 24: ... CANCEL button and turn food over Press START to resume defrosting cycle Set Cooking Time and Power Levels 1 Use number buttons to set cooking time 2 To set power level at other than HIGH press POWER LEVEL and use the number buttons to enter the power level 3 Press START to begin cooking Handy Helper Kids Meals Snack Bar 1 Press HANDY HELPER KIDS MEALS SNACK BAR repeatedly to select type of dish t...

Reviews: