background image

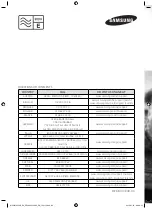
QUESTIONS OR COMMENTS

COUNTRY

CALL

OR VISIT US ONLINE AT

AUSTRIA

0800 - SAMSUNG (0800 - 7267864)

www.samsung.com/at/support

BELGIUM

02-201-24-18

www.samsung.com/be/support (Dutch)

www.samsung.com/be_fr/support (French)

DENMARK

70 70 19 70

www.samsung.com/dk/support

FINLAND

030-6227 515

www.samsung.com/fi/support

FRANCE

01 48 63 00 00

www.samsung.com/fr/support

GERMANY

0180 6 SAMSUNG bzw.

0180 6 7267864*

(*0,20 €/Anruf aus dem dt. Festnetz,  

aus dem Mobilfunk max. 0,60 €/Anruf)

www.samsung.com/de/support

ITALIA

800-SAMSUNG (800.7267864)

www.samsung.com/it/support

CYPRUS

8009 4000 only from landline, toll free

www.samsung.com/gr/support

GREECE

80111-SAMSUNG (80111 726 7864) only from 

land line 

(+30) 210 6897691 from mobile and land line

LUXEMBURG

261 03 710

www.samsung.com/support

NETHERLANDS

0900-SAMSUNG (0900-7267864) (€ 0,10/Min)

www.samsung.com/nl/support

NORWAY

815 56480

www.samsung.com/no/support

PORTUGAL

808 20 7267

www.samsung.com/pt/support

SPAIN

0034902172678

www.samsung.com/es/support

SWEDEN

0771 726 7864 (SAMSUNG)

www.samsung.com/se/support

SWITZERLAND

0800 726 78 64 (0800-SAMSUNG)

www.samsung.com/ch/support (German)

www.samsung.com/ch_fr/support (French)

UK

0330 SAMSUNG (7267864)

www.samsung.com/uk/support

EIRE

0818 717100

www.samsung.com/ie/support

DE68-04334D-00

Microwave Oven

User manual

MC32J7035**

Please be advised that the Samsung warranty does NOT cover 
service calls to explain product operation, correct improper 
installation, or perform normal cleaning or maintenance.

MC32J7035AK_EU_DE68-04334D-00_EN_150113.indd   80

2015-01-13   �� 8:09:51

Summary of Contents for MC32J7035 series

Page 1: ...000 only from landline toll free www samsung com gr support GREECE 80111 SAMSUNG 80111 726 7864 only from land line 30 210 6897691 from mobile and land line LUXEMBURG 261 03 710 www samsung com support NETHERLANDS 0900 SAMSUNG 0900 7267864 0 10 Min www samsung com nl support NORWAY 815 56480 www samsung com no support PORTUGAL 808 20 7267 www samsung com pt support SPAIN 0034902172678 www samsung ...

Page 2: ...Please be advised that the Samsung warranty does NOT cover service calls to explain product operation correct improper installation or perform normal cleaning or maintenance MC32J7035AK_EU_DE68 04334D 00_EN_150113 indd 1 2015 01 13 8 09 51 ...

Page 3: ...ok up guide 23 Oven features 24 Oven 24 Control panel 25 Oven use 26 How a microwave oven works 26 Checking that your oven is operating correctly 27 Setting the time 27 Cooking Reheating 28 Power levels and time variations 29 Adjusting the cooking time 30 Stopping the cooking 30 Setting the energy save mode 31 Using the healthy cooking features 32 Using the dough proof yogurt features 35 Using the...

Page 4: ... 47 Using the deodorisation feature 50 Switching the beeper off 51 Using the child lock features 51 Using the turntable on off features 52 Cookware guide 53 Cooking guide 55 Troubleshooting 72 Troubleshooting 72 Information codes 77 Technical specifications 78 MC32J7035AK_EU_DE68 04334D 00_EN_150113 indd 3 2015 01 13 8 09 51 ...

Page 5: ...cooking tips Cooking tips The following symbols are used in this User Manual WARNING Hazards or unsafe practices that may result in severe personal injury or death CAUTION Hazards or unsafe practices that may result in minor personal injury or property damage NOTE Useful tips recommendations or information that helps users manipulate the product Using this user manual MC32J7035AK_EU_DE68 04334D 00...

Page 6: ...ver which gives protection against exposure to microwave energy WARNING Liquids and other foods must not be heated in sealed containers since they are liable to explode This appliance is intended to be used in household only and it is not intended to be used such as staff kitchen areas in shops offices and other working environments farm houses by clients in hotels motels and other residential env...

Page 7: ...The microwave oven is intended for heating food and beverages Drying of food or clothing and heating of warming pads slippers sponges damp cloth and similar may lead to risk of injury ignition or fire If smoke is emitted observed switch off or unplug the appliance and keep the door closed in order to stifle any flames WARNING Microwave heating of beverages can result in delayed eruptive boiling th...

Page 8: ...not play with the appliance If the supply cord is damaged it must be replaced by the manufacturer its service agent or similarly qualified persons in order to avoid a hazard The appliance should not be cleaned with a water jet This oven should be positioned proper direction and height permitting easy access to cavity and control area Before using the your oven first time oven should be operated wi...

Page 9: ...rp metal scrapers to clean the oven door glass since they can scratch the surface which may result in shattering of the glass WARNING The appliance and its accessible parts become hot during use Care should be taken to avoid touching heating elements Children less than 8 years of age shall be kept away unless continuously supervised This appliance can be used by children aged from 8 years and abov...

Page 10: ... location exposed to direct sunlight and water or where gas may leak on un level ground This appliance must be properly grounded in accordance with local and national codes Remove all foreign substances such as dust or water from the power plug terminals and contact points using a dry cloth on a regular basis Do not pull or excessively bend or place heavy objecton the power cord In the event of a ...

Page 11: ...ven Take special care when heating dishes or drinks that contain alcohol as alcohol vapours may contact a hot part of the oven Keep children away from the door when opening or closing it as they may bump themselves on the door or catch their fingers in the door WARNING Microwave heating of beverages can result in delayed eruptive boiling therefore care must be taken when handling the container To ...

Page 12: ...paper They may catch fire as hot air escapes from the oven The oven may also overheat and switch itself off automatically and will remain off until it cools sufficiently Always use oven mitts when removing a dish from the oven to avoid unintentional burns Stir liquids halfway during heating or after heating ends and allow the liquid stand at least 20 seconds after heating to prevent eruptive boili...

Page 13: ...ng will charge a repair fee for replacing an accessory or repairing a cosmetic defect if the damage to the unit and or damage to or loss of the accessory was caused by the customer Items this stipulation covers include A A dented scratched or broken door handle out panel or control panel B A broken or missing tray guide roller coupler or wire rack Use this appliance only for its intended purpose a...

Page 14: ...ipment Applicable in countries with separate collection systems This marking on the product accessories or literature indicates that the product and its electronic accessories e g charger headset USB cable should not be disposed of with other household waste at the end of their working life To prevent possible harm to the environment or human health from uncontrolled waste disposal please separate...

Page 15: ...from the bared flexible cord Wiring instructions WARNING THIS APPLIANCE MUST BE EARTHED This appliance must be earthed In the event of an electrical short circuit earthing reduces the risk of electric shock providing an escape wire for the electric current The appliance is equipped with a mains lead which includes an earth wire for connecting to the earth terminal of your mains plug The plug must ...

Page 16: ...easingly using a microwave symbol similar to the one below When you see this Symbol on food packaging cooking instructions are based on either the IEC Power Output Rating or the Reheating Categories A B C D or E WARNING Ensure that the plug and power cord are not damaged before use If you have any reason to remove the moulded plug from this appliance immediately remove the fuse and dispose of the ...

Page 17: ...ed by the food manufacturer and then frozen chilled or vacuum sealed for long life Increasingly heating times for such ready meals are being based on the Heating Categories A B C D and E On this instance simply match the heating category of your oven to the instructions on the food package and set your timer accordingly For example If the heating instructions are 3 minutes on HIGH for a D category...

Page 18: ...roller ring with the centre fitting on to the coupler Purpose The turntable serves as the main cooking surface it can be easily removed for cleaning 03High rack Low rack to be placed on the turntable Purpose The metal racks can be used to cook two dishes at the same time A small dish may be placed on the turntable and a second dish on the rack The metal racks can be used in grill convection and co...

Page 19: ...e Important DO NOT operate the microwave oven without the roller ring and turntable Important DO NOT operate the MW Grill Convection Combi mode with plate warm only use for Plate warming function in Warming mode Operation Mode Warming Mode MW Grill Convection Combi Plate warming bowl O X MC32J7035AK_EU_DE68 04334D 00_EN_150113 indd 18 2015 01 13 8 09 52 ...

Page 20: ... Do not install the oven in hot or damp surroundings such as next to other microwave ovens or radiators Conform to the power supply specifications of this oven Use only approved extension cables if you need to use Wipe the interior and the door seal with a damp cloth before using your oven for the first time Remove all packing materials inside the oven Install the roller ring and turntable Check t...

Page 21: ...oor seals have built up impurities Use a soft cloth in soapy water to clean both the inner and outer sides of the oven Rinse and dry well To remove stubborn impurities with bad smells from inside the oven 1 With an empty oven put a cup of diluted lemon juice on the centre of the turntable 2 Heat the oven for 10 minutes at max power 3 When the cycle is complete wait until the oven cools down Then o...

Page 22: ...CAUTION Keep the door and door sealing clean and ensure the door opens and closes smoothly Otherwise the oven s lifecycle may be shortened Take caution not to spill water into the oven vents Do not use any abrasive or chemical substances for cleaning After each use of the oven use a mild detergent to clean the cooking chamber after waiting for the oven to cool down MC32J7035AK_EU_DE68 04334D 00_EN...

Page 23: ... contact a local Samsung service centre Do not replace it yourself If you encounter a problem with the outer housing of the oven first unplug the power cord from the power source and then contact a local Samsung service centre Care against an extended period of disuse If you don t use the oven for an extended period of time unplug the power cord and move the oven to a dry dust free location Dust a...

Page 24: ...end reminder signal will beep 3 times once every minute 3 The current time is displayed again If you want to add an extra 30 seconds 1 Press START 30s button one or more times for each extra 30 seconds that you wish to add 2 By turning the Multi Function Selector Dial You can set the time as you want 1 2 quick look up guide MC32J7035AK_EU_DE68 04334D 00_EN_150113 indd 23 2015 01 13 8 09 53 ...

Page 25: ...9 05 06 01 02 03 01 Safety interlock holes 04 Door latches 07 Door handle 02 Heating element 05 Turntable 08 Roller ring 03 Ventilation holes 06 Coupler 09 Door 10 Control panel Oven features MC32J7035AK_EU_DE68 04334D 00_EN_150113 indd 24 2015 01 13 8 09 53 ...

Page 26: ...5 Convection Button 06 Grill Button 07 Microwave Button 08 Combi Button 09 Warming Mode Button 10 Deodorisation Button 11 Turntable On Off Button 12 Multi Function Selector Dial 13 Child Lock Button 14 Stop Eco Button 15 Start 30s Button 05 10 11 12 13 14 15 06 01 02 03 04 07 08 09 MC32J7035AK_EU_DE68 04334D 00_EN_150113 indd 25 2015 01 13 8 09 53 ...

Page 27: ...are absorbed by the food up to a depth of about 1 inch 2 5 cm Cooking then continues as the heat is dissipated within the food 3 Cooking times vary according to the container used and the properties of the food Quantity and density Water content Initial temperature refrigerated or not Important As the centre of the food is cooked by heat dissipation cooking continues even when you have taken the f...

Page 28: ...r should then be boiling Setting the time When power is supplied 88 88 and then 12 00 is automatically displayed on the display Please set the current time The time can be displayed in either the 24 hour or 12 hour notation You must set the clock When you first install your microwave oven After a power failure note Do not forget to reset the clock when you switch to and from summer and winter time...

Page 29: ...ti Function Selector Dial until the appropriate power level is displayed At that time press the Multi Function Selector Dial to set the power level If don t set the power level within 5 seconds Automatically changes to the cooking time setting stage Cooking Reheating The following procedure explains how to cook or reheat food Important ALWAYS check your cooking settings before leaving the oven una...

Page 30: ...me by turning the Multi Function Selector Dial Result The cooking time is displayed 4 Press the START 30s button Result The oven light comes on and the turntable starts rotating Cooking starts When it has finished 1 The oven beeps 4 times 2 The end reminder signal will beep 3 times once every minute 3 The current time is displayed again 4 3 The cooking times given in recipes and in this booklet co...

Page 31: ... 2 Just turning Multi Function Selector Dial to adjust cooking time To increase cooking time turn to right and to decrease cooking time turn to left Stopping the cooking You can stop cooking at any time so that you can Check the food Turn the food over or stir it Leave it to stand To stop the cooking Then Temporarily Temporarily Open the door or press the STOP ECO button once Result Cooking stops ...

Page 32: ...display shows current time The oven is ready for use note Auto energy saving function If you do not select any function when appliance is in the middle of setting or operating with temporary stop condition function is canceled and clock will be displayed after 25 minutes Oven Lamp will be turned off after 5 minutes with door open condition MC32J7035AK_EU_DE68 04334D 00_EN_150113 indd 31 2015 01 13...

Page 33: ...les 3 Poultry Fish 3 Select the type of food that you are cooking by turning the Multi Function Selector Dial Refer to the table on the following page for a description of the various pre programmed settings At that time press the Multi Function Selector Dial to select the type of food 4 Select the size of the serving by turning the Multi Function Selector Dial 5 Press the START 30s button Result ...

Page 34: ...ore standing time and drain thoroughly afterwards Stand for 1 3 minutes 2 Vegetables Code Food Serving Size Instructions 2 1 Green Beans 200 250 g 300 350 g Rinse and clean green beans Put them evenly into a glass bowl with lid Add 30 ml 2 tbsp water when cooking for 200 250 g and add 45 ml 3 tbsp for 300 350 g Put bowl in the centre of turntable Cook covered Stir after cooking Stand for 1 2 minut...

Page 35: ... 2 minutes 3 2 Turkey Breasts 300 350 g 400 450 g Rinse turkey breast and put on deep glass ovenware dish Cover with microwave cling film and pierce film Put dish on the turntable Stand for 2 minutes 3 3 Grilled Chicken Breasts 300 350 g 400 450 g Rinse chicken breast marinate and put them on the high rack Turnover as soon as the beep sounds Stand for 2 minutes 3 4 Grilled Fish Fillets 200 300 g 4...

Page 36: ...tton 2 Select the Dough Proof or Yogurt and press the Multi Function Selector Dial 1 Dough proof 2 Yogurt 3 Select the type of food that you are cooking by turning the Multi Function Selector Dial You have to choose the number that you want to use for cooking by turning the Multi Function Selector Dial Refer to the table on the following page for a description of the various pre programmed setting...

Page 37: ...gurt Code Food Serving Size Instructions 2 1 Small Cups 500 g Distribute 150 g natural yogurt into 5 ceramic cups or small glass jars evenly 30 g each Add 100 ml milk into each cup Use long life milk room temperature 3 5 fat Cover each with cling film and set in a circle on turntable After finish keep 6 hours in a refrigerator For the first time we recommend to use dried yoghurt bacteria ferment 2...

Page 38: ...g the Multi Function Selector Dial Refer to the table on the following page for a description of the various pre programmed settings At that time press the Multi Function Selector Dial to select the type of food 3 Select the size of the serving by turning the Multi Function Selector Dial 4 Press the START 30s button Result Defrosting begins The oven beeps through defrosting to remind you to turn t...

Page 39: ... the tail of a whole fish with aluminium foil Turn the fish over when the oven beeps This programme is suitable for whole fishes as well as for fish fillets Stand for 20 80 minutes 4 Bread Cake 125 1000 g Put bread horizontally on a piece of kitchen paper and turn over as soon as the oven beeps Place cake on a ceramic plate and if possible turn over as soon as the oven beeps Oven keeps operating a...

Page 40: ...Auto Cook 3 Select the Auto Reheat by pressing the Multi Function Selector Dial 4 Select the type of food that you are cooking by turning the Multi Function Selector Dial Refer to the table on the following page for a description of the various pre programmed settings At that time press the Multi Function Selector Dial to select the type of food 5 Select the size of the serving by turning the Mult...

Page 41: ...600 650 g Put frozen lasagne into a suitable sized ovenproof dish Put dish on low rack Stand for 3 4 minutes 1 4 Quiche Chilled 600 650 g This program is suitable for refrigerated quiche Remove a package and put on the dish Place on turntable in oven After cooking stand for 1 2 minutes 2 Auto Cook Code Food Serving Size Instructions 2 1 Roast Chicken 1100 1150 g 1200 1250 g Brush chilled chicken w...

Page 42: ...s finished 1 The oven beeps 4 times 2 The end reminder signal will beep 3 times once every minute 3 The current time is displayed again Convection The convection mode enables you to cook food in the same way as in a traditional oven The microwave mode is not used You can set the temperature as required in a range varying from 40 C to 200 C The maximum cooking time is 60 minutes Always use oven glo...

Page 43: ...od on the rack 4 3 2 2 Press the Grill button Result The following indications are displayed grill mode You cannot set the temperature of the grill 3 Set the grilling time by turning the Multi Function Selector Dial The maximum grilling time is 60 minutes 4 Press the START 30s button Result Grilling starts When it has finished 1 The oven beeps 4 times 2 The end reminder signal will beep 3 times on...

Page 44: ...d use in your normal oven Microwave safe containers are not usually suitable for convection cooking don t use plastic containers dishes paper cups towels etc If you wish to select a combined cooking mode microwave and grill or convection use only recipients that are microwave safe and oven proof Important For further details on suitable cookware and utensils refer to the Cookware Guide on page 53 ...

Page 45: ...Function Selector Dial until the corresponding output power is displayed 600 450 300 W At that time press the Multi Function Selector Dial to set the power level You cannot set the temperature of the grill If don t set the temperature within 5 seconds Automatically changes to the cooking time setting stage 4 Set the cooking time by turning the Multi Function Selector Dial The maximum cooking time ...

Page 46: ...r Dial until the corresponding output power is displayed 600 450 300 180 100 W At that time press the Multi Function Selector Dial to set the power level If don t set the power level within 5 seconds Automatically changes to the cooking time setting stage Default 180 C 2 3 1 Important ALWAYS use microwave safe and oven proof cookware Glass or ceramic dishes are ideal as they allow the microwaves t...

Page 47: ...rowave convection combi mode 600 W output power 180 C temperature 5 Set the cooking time by turning the Multi Function Selector Dial The maximum cooking time is 60 minutes 6 Press the START 30s button Result Combination cooking starts The oven is heated to the required temperature and then microwave cooking continues until the cooking time is over When it has finished 1 The oven beeps 4 times 2 Th...

Page 48: ...al 4 Select the Hot Mild Mode by turning the Multi Function Selector Dial 5 Press the START 30s button Result The food is cooked according to the preprogrammed setting selected When it has finished 1 The oven beeps 4 times 2 The end reminder signal will beep 3 times once every minute 3 The current time is displayed again Recommend warming mode menu Hot 1 1 2 1 Lasagne Soup Gratin Casserole Pizza S...

Page 49: ... cold foods This programmes are for keeping food warm that has just been cooked Important Do not recommend food being kept warm for too long more than 1 hour as it will continue to cook Warm food spoils more quickly Important Do not cover with lids or plastic wrap Important Use oven gloves when taking out food 2 Plate Warming You can serve perfectly warmed dishes with the plate warming feature Use...

Page 50: ... guide line water level inside the plate warming bowl The line is about 200 ml 3 Cover the plate warming bowl with lid And then screw it toward Lock 4 Put the plate warming bowl on the plates 5 Close the Door And then operate the plate warming function 5 MC32J7035AK_EU_DE68 04334D 00_EN_150113 indd 49 2015 01 13 8 09 55 ...

Page 51: ...th plate warm only use for Plate warming function in Warming mode Operation Mode Warming mode MW Grill Convection Combi Plate warming bowl O X Using the deodorisation feature Use the feature after cooking odorous food or when there is a lot of smoke in the oven interior First clean the oven interior 1 Press the Deodorisation button than it will start automatically 1 Important The deodorisation tim...

Page 52: ...oven operates normally Using the child lock features Your microwave oven is fitted with a special child lock programme which enables the oven to be locked so that children or anyone unfamiliar with it cannot operate it accidentally 1 Press the Child Lock button for 3 second Result The oven is locked no functions can be selected The display shows L 2 To unlock the oven press the Child Lock button f...

Page 53: ...at and Combi function It is not available with pre programmed function or before press the Microwave Grill Convection Preheat and Combi button Result Turntable on off symbol appears on the display the turntable will not rotate during the cooking Turntable off mode 2 To switch the turntable rotating back on press the Turntable On Off button again Result Turntable on off symbol disappears on the dis...

Page 54: ...st plate Do not preheat for more than 8 minutes China and earthenware Porcelain pottery glazed earthenware and bone china are usually suitable unless decorated with a metal trim Disposable polyester cardboard dishes Some frozen foods are packaged in these dishes Fast food packaging Polystyrene cups containers Can be used to warm food Overheating may cause the polystyrene to melt Paper bags or news...

Page 55: ...other plastics may warp or discolour at high temperatures Do not use Melamine plastic Cling film Can be used to retain moisture Should not touch the food Take care when removing the film as hot steam will escape Freezer bags Only if boilable or oven proof Should not be airtight Prick with a fork if necessary Wax or grease proof paper Can be used to retain moisture and prevent spattering Recommende...

Page 56: ...s of food are suitable for microwave cooking including fresh or frozen vegetables fruit pasta rice grains beans fish and meat Sauces custard soups steamed puddings preserves and chutneys can also be cooked in a microwave oven Generally speaking microwave cooking is ideal for any food that would normally be prepared on a hob Melting butter or chocolate for example see the chapter with tips techniqu...

Page 57: ...tructions Add 30 ml 2 tbsp cold water Serve after 2 3 minutes standing Mixed Vegetables Carrots Peas Corn 300 g 600 W 7 8 Instructions Add 15 ml 1 tbsp cold water Serve after 2 3 minutes standing Mixed Vegetables Chinese style 300 g 600 W 7 8 Instructions Add 15 ml 1 tbsp cold water Serve after 2 3 minutes standing Cooking guide for fresh vegetables Use a suitable glass pyrex bowl with lid Add 30 ...

Page 58: ...00 W 4 4 Instructions Cut courgettes into slices Add 30 ml 2 tbsp water or a knob of butter Cook until just tender Serve after 3 minutes standing Egg plants 250 g 900 W 3 4 Instructions Cut egg plants into small slices and sprinkle with 1 tbsp lemon juice Serve after 3 minutes standing Leeks 250 g 900 W 4 4 Instructions Cut leeks into thick slices Serve after 3 minutes standing Mushrooms 125 g 250...

Page 59: ...emark the rice may not have absorbed all water after the cooking time is finished Pasta Use a large glass pyrex bowl Add boiling water a pinch of salt and stir well Cook uncovered Stir occasionally during and after cooking Cover during standing time and drain thoroughly afterwards Food Serving Size Power Time min White Rice Parboiled 250 g 375 g 900 W 15 16 17 18 Instructions Add cold water of dou...

Page 60: ...nd to overcook and dry out before the centre is piping hot Reheating small pieces will be more successful Power levels and stirring Some foods can be reheated using 900 W power while others should be reheated using 600 W 450 W or even 300 W Check the tables for guidance In general it is better to reheat food using a lower power level if the food is delicate in large quantities or if it is likely t...

Page 61: ...vent eruptive boiling and possible scalding you should put a spoon or glass stick into the beverages and stir before during and after heating Reheating baby food Baby food Empty into a deep ceramic plate Cover with plastic lid Stir well after reheating Let stand for 2 3 minutes before serving Stir again and check the temperature Recommended serving temperature between 30 40 C Baby milk Pour milk i...

Page 62: ...led 350 g 600 W 4 5 Instructions Put stew in a deep ceramic plate Cover with plastic lid Stir occasionally during reheating and again before standing and serving Serve after 2 3 minutes standing Pasta with Sauce Chilled 350 g 600 W 3 4 Instructions Put pasta e g spaghetti or egg noodles on a flat ceramic plate Cover with microwave cling film Stir before serving Serve after 3 minutes standing Fille...

Page 63: ...Food Serving Size Power Time Baby Food Vegetables Meat 190 g 600 W 30 sec Instructions Empty into ceramic deep plate Cook covered Stir after cooking time Before serving stir well and check the temperature carefully Serve after 2 3 minutes standing Baby Porridge Grain Milk Fruit 190 g 600 W 20 sec Instructions Empty into ceramic deep plate Cook covered Stir after cooking time Before serving stir we...

Page 64: ...during defrosting Should poultry start to warm up on the outer surface stop thawing and allow it to stand for 20 minutes before continuing Leave the fish meat and poultry to stand in order to complete defrosting The standing time for complete defrosting will vary depending on the quantity defrosted Please refer to the table below Hint Flat food defrosts better than thick and smaller quantities nee...

Page 65: ...ceramic plate Arrange the thinner parts under the thicker parts Shield narrow ends of fillets and tail of whole fish with aluminium foil Turn over after half of defrosting time Serve after 10 25 minutes standing Fruits Berries 300 g 180 W 6 7 Instructions Spread fruit on a flat round glass dish with a large diameter Serve after 5 10 minutes standing Bread Bread Rolls each ca 50 g 2 pcs 4 pcs 180 W...

Page 66: ... turntable the food browns evenly Three combination modes are available with this model 600 W Grill 450 W Grill and 300 W Grill Cookware for cooking with microwave grill Please use cookware that microwaves can pass through Cookware should be flameproof Do not use metal cookware with combination mode Do not use any type of plastic cookware as it can melt Food suitable for microwave grill cooking Fo...

Page 67: ...am Pineapple Cheese slices 4 pcs 500 g 300 W Grill 6 8 Instructions Toast the bread slices first Put the toast with topping on the high rack Stand for 2 3 minutes Baked Potatoes 500 g 600 W Grill 12 14 Instructions Cut potatoes into halves Put them in a circle on the high rack with the cut side to the grill Gratin Potatoes Vegetables Chilled 450 g 450 W Grill 11 13 Instructions Put the fresh grati...

Page 68: ...t two fishes side by side head to tail on the high rack After grilling stand for 2 3 minutes Plantain 1 ea 200 g 1 step 450 W Grill 2 step Grill 7 7 4 5 Instructions Peel and slice plantain 1 cm thick and put on the grill rack Brush all sides with oil If plantain becomes soft reduce time 1 2 minute soft type Stand for 1 2 minutes Yam 200 g 450 W Grill 11 11 Instructions Peel and slice yam 1 5 cm t...

Page 69: ... pastry and soufflés Microwave Convection This mode combines the microwave energy with the hot air and is therefore reducing the cooking time while giving the food a brown and crispy surface Cooking with convection is the traditional and well known method of cooking food in an oven with hot air circulated by a fan on the back wall Cookware for cooking with microwaves convection Should be able to l...

Page 70: ...ozen pasta gratin on the low rack After cooking stand for 2 3 minutes Meat Roast Beef Roast Lamb Medium 1200 1300 g 600 W 180 C 20 23 10 13 Instructions Brush beef lamb with oil and spice it with pepper salt and paprika Put it on the low rack first with the fat side down After cooking wrap in aluminium foil and stand for 10 15 minutes Roast Chicken 1000 1100 g 1 step 450 W 200 C 2 step 450 W Grill...

Page 71: ...ll Cakes Fresh Dough 10 x 28 g Only 160 C 31 34 Instructions Fill the fresh dough evenly in paper cups and set on baking tray on the low rack After baking stand for 5 minutes Cookies Fresh Dough 200 250 g Only 200 C 15 20 Instructions Put the chilled croissants on baking paper on the low rack Frozen Cake 1000 g 180 W 180 C 18 20 Instructions Put the frozen cake directly on the low rack After defro...

Page 72: ...50 ml cold water Cook uncovered in a glass pyrex bowl for 3 to 4 minutes using 900 W until glaze icing is transparent Stir twice during cooking Cooking jam Put 600 g fruits for example mixed berries in a suitable sized glass pyrex bowl with lid Add 300 g preserving sugar and stir well Cook covered for 10 12 minutes using 900 W Stir several times during cooking Empty directly into small jam glasses...

Page 73: ...er Remove the foreign matter and try again The oven stops while in operation The user has opened the door to turn food over After turning over the food press the START 30s button again to start operation The power turns off during operation The oven has been cooking for an extended period of time After cooking for an extended period of time let the oven cool The cooling fan is not working Listen f...

Page 74: ...ked or improper cookware is being used Put one cup of water in a microwave safe container and run the microwave for 1 2 minutes to check whether the water is heated Reduce the amount of food and start the function again Use a cooking container with a flat bottom Heating is weak or slow The oven may not work too much food is being cooked or improper cookware is being used Put one cup of water in a ...

Page 75: ...t operation The oven is not level The oven is installed on an uneven surface Make sure the oven is installed on flat stable surface There are sparks during cooking Metal containers are used during the oven thawing functions Do not use metal containers When power is connected the oven immediately starts to work The door is not properly closed Close the door and check again There is electricity comi...

Page 76: ...The turn table drags while turning The roller ring is not properly in place there is too much food or the container is too large and touches the inside of the microwave Adjust the amount of food and do not use containers that are too large The turn table rattles while turning and is noisy Food residue is stuck to the bottom of the oven Remove any food residue stuck to the bottom of the oven Grill ...

Page 77: ...es not cook properly The oven door is frequently opened during cooking Do not frequently open the door unless you are cooking things that need to be turned If you open the door often the interior temperature will be lowered and this may affect the results of your cooking The oven controls are not correctly set Correctly set the oven controls and try again The grill or other accessories are not cor...

Page 78: ...l SAMSUNG Customer Care Centre C 21 Temperature sensor detect higher temperature than setting temperature Turn off the microwave oven for cooling the product and then try setting again If it appears again call your local SAMSUNG Customer Care Centre C d0 Control buttons are pressed over 10 seconds Clean the keys and check if there is water on the surface around key If it occurs again turn off the ...

Page 79: ...230 V 50 Hz AC Power consumption Maximum power Microwave Grill heating element Convection heating element 2900 W 1400 W 1500 W Max 2100 W Output power 100 W 900 W 6 levels IEC 705 240 V 900 W 230 V 850 W Operating frequency 2450 MHz Dimensions W x H x D Outside Oven cavity 523 x 309 x 506 mm 373 x 233 x 370 mm Volume 32 liter Weight Net 20 0 kg approx Technical specifications MC32J7035AK_EU_DE68 0...

Page 80: ...Memo MC32J7035AK_EU_DE68 04334D 00_EN_150113 indd 79 2015 01 13 8 09 56 ...

Reviews: