background image

Video files (DivX,  WMV, MPEG, etc.) are  supported.

To prevent the loss of data saved in the USB device, please turn the unit off or
switch it to another mode before disconnecting the USB cable.

Music File Icon

Image File Icon

All File Icon

Movie File Icon

Note

2

Press the AUX/USB
button on the main
unit or the 

USB

/

AUX

button on the remote
control to select the
USB mode.

USB

” appears on the display screen and

then disappear.

USB SORTING screen appears on the
TV screen and the saved file is played.

1

connect the USB

cable.

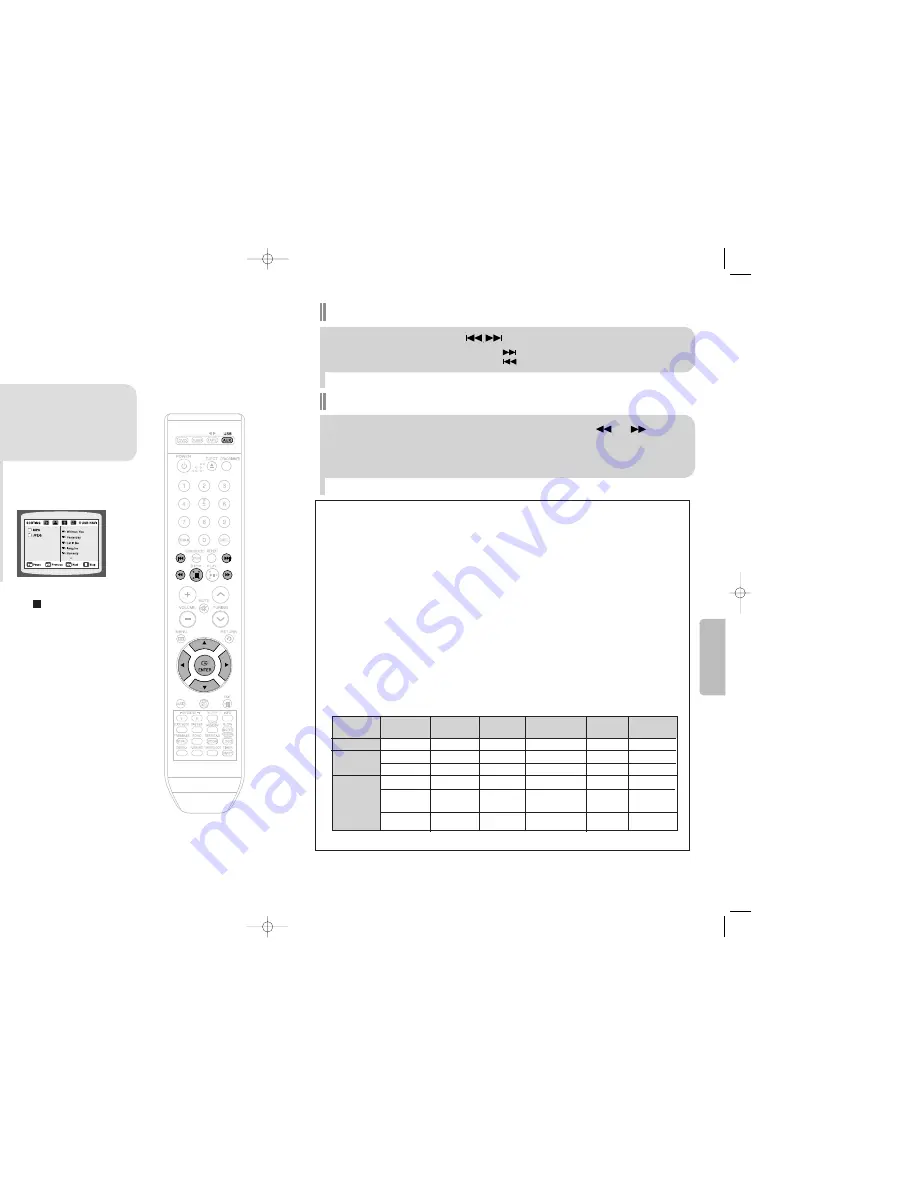
Press the                 button when it is in stop status and
select a desired icon from the top part of the menu.

To play music files only, select the          Icon.

To view image files only, select the          Icon.

To select all files select the          Icon.

To view movie files only, select the          Icon.

You can connect and play files from external USB storage devices such as  MP3 players, USB flash memory,
etc. using the player's USB  function.

To stop playback, press the 

STOP

(    ) button. 

To play a file in the USB menu screen,

24

23

Fast playback

Skip Forward/Back

During playback, press the              button.

When there is more than a file, when you press the           button, the next file is selected.

When there is more than a file, when you press the           button, the previous file is selected.

To playback the disc at a faster speed, press and hold        or
during playback.

Each time you press and hold either button, the playback speed will change as follows: 
2x 

4x 

8x 

32x 

Normal.

Compatible Devices

1. USB devices that support USB Mass Storage v1.0.

(USB devices that operate as a removable disk in Windows 
(2000 or later) without additional driver installation.)

2. MP3 Player: HDD and flash type MP3 player.

3. Digital camera: PTP protocol is not supported.

Devices which require additional program installation when you have connected it to a computer, are not
supported.

4. USB HDD and USB Flash Drive: Devices that support USB2.0 or USB1.1.

You may experience a difference in playback quality when you connect a USB1.1 device.

For a USB HDD, make sure to connect an auxiliary power cord to the USB HDD for proper operation.

5. USB card Reader: One slot USB card reader and Multi slot USB card reader

Depending on the manufacturer. the USB card reader may not be supported.

If you install multiple memory devices into a multi card reader, you may experience problems.

File name

File 

Bit rate

Version

Pixel

Sampling

extension

Frequency

Still Picture

JPG

.JPG  .JPEG

640*480

Music

MP3

.MP3

80~384kbps

44.1kHz

WMA

.WMA

56~128kbps

V8

44.1kHz

Movie 

VCD         

MPG.MPEG .DAT

1.5Mbps        

VCD1.1,VCD2.0

320*480             44.1KHz

WMV      .WMV                     4Mbps           V1,V2,V3,V7         720*480         

44.1KHz~48KHz

(V9 is not supported)

DivX             .AVI,.ASF     4Mbps        

DivX3.11~DivX5.1,Xvid     

720*480         

44.1KHz~48KHz

Supported Formats

OPERA

TION

A device using NTFS file system is not supported.(Only FAT file system is supported.)

Playing Media Files using the USB  feature

The USB host function of this product does not support all USB devices.
For the information on the supported devices,pls see the P68.

  1p~28p(Dx75)-NO GB-3-29  2007.4.23  10:35 AM  Page 26

Summary of Contents for MAX-DX75

Page 1: ...DVD MINI COMPONENT SYSTEM WITH USB HOST DVD VCD CD MP3 CD CD R RW PLAYBACK MAX DX75 MAX DX76 MAX DX79 COMPACT DIGITAL VIDEO Instruction Manual AH68 01940B UFACTURED BY V I D E O AM Page 2 ...

Page 2: ...if your player or disc have been stored in cold temperatures If transporting the player during the winter wait approximately 2 hours until the unit has reached room temperature before using During thunderstorms disconnect AC main plug from the wall outlet Voltage peaks due to lightning could damage the unit Do not expose the unit to direct sunlight or other heat sources This could lead to overheat...

Page 3: ... to Radio 49 Presetting Stations 50 TAPE DECK Listening to a Cassette 51 MISCELLANEOUS Recording a Compact Disc 54 Recording a Radio Program 56 Timer Function 57 Canceling the Timer 58 POWER SOUND and Sound Field DSP EQ Function 59 Sleep Timer Function Mute Function 60 DEMO Function DIMMER Function ECO Function 61 Bass Treble Level Function 62 Connecting Headphones Microphone option 63 Key Control...

Page 4: ... or Joliet format can be played JPEG file names should be 8 characters or less in length and contain no blank spaces or special characters Only a consecutively written multisession disc can be played If there is a blank segment in the multisession disc the disc can be played only up to the blank segment A maximum of 9 999 images can be stored on a single CD When playing a Kodak Fuji Picture CD onl...

Page 5: ...nel Speaker Output Terminals for MAX DX75 2 1 Channel Speaker Output Terminals for MAX DX76 4 1 Channel Speaker Output Terminals for MAX DX79 7 Voltage Selector Option 15 KEY CONTROL 16 DEMO DIMMER 17 ECHO 18 TREBLE 19 MULTI JOG 20 ENTER 21 AUX USB 22 TAPE BUTTON 23 VOLUME 24 EJECT BUTTON 25 CASSETTE DECK 13 14 16 15 17 18 19 20 22 21 24 25 23 7 The picture of Rear panel is based on MODEL MAX DX79...

Page 6: ...straight line It can also be operated at a horizontal angle of up to 30 from the remote control sensor Range of Operation of the Remote Control Caution Remove the battery cover in the direction of the arrow 1 Insert two 1 5V AAA batteries paying attention to the correct polarities and 2 Replace the battery cover 3 Follow these precautions to avoid leaking or cracking cells Place batteries in the r...

Page 7: ...wards about 45 toward you Place the speakers so that their tweeters will be at the same height as your ear Position of the DVD Player Place it on a stand or cabinet shelf or under the TV stand Selecting the Listening Position The listening position should be located about 2 5 to 3 times the distance of the TV s screen size away from the TV Example For 32 TVs 2 2 4m 6 8feet For 55 TVs 3 5 4m 11 13f...

Page 8: ... the Cursor button to move to Audio and then press the ENTER button 3 Press the Cursor button to move to HDMI AUDIO and then press the ENTER button 4 Press the Cursor button to select ON or OFF and then press the ENTER button ON Both video and audio signals are transmitted over the HDMI connection cable and audio is output through your TV speakers only OFF Video is transmitted over the HDMI connec...

Page 9: ...holes are covered with a newspaper or cloth heat may build up inside the unit and fire may result Cooling Fan FM antenna connection 1 Connect the FM antenna supplied to the FM 75Ω COAXIAL terminal as a temporary measure 2 Slowly move the antenna wire around until you find a location where reception is good then fasten it to a wall or other rigid surface If reception is poor connect an outdoor ante...

Page 10: ... When the correct hour is displayed press ENTER The minutes flash Note button on the panel front p 3 4 CONNECTIONS Checking the Remaining Time CHAPTER REMAIN TITLE REMAIN CHAPTER ELAPSED TITLE ELAPSED TRACK REMAIN TOTAL ELAPSED TOTAL REMAIN TRACK ELAPSED TRACK REMAIN TRACK ELAPSED Each time the REMAIN button is pressed Press the REMAIN button For checking the total and remaining time of a title or...

Page 11: ...ayback Depending on the recording mode some MP3 WMA CDs may not play Table of contents of a MP3 CD varies depending on the MP3 WMA track format recorded on the disc Note 2 In Stop mode use to select the album and then press the ENTER button The MP3 WMA menu screen will appear and playback will start The appearance of the menu depends on the MP3 WMA disc WMA DRM files cannot be played Use to select...

Page 12: ...whenever you press button Note OPERATION Subtitle Display Press the SUBTITLE button DivX Feature Table DivX Supported Avi files are used to contain the audio and video data these must be stored on CD in the ISO 9660 format MPEGs containing DivX can be divided into Video and Audio Video compatibility All versions of DivX later than 3 11 including the latest 5 1 are supported In addition XviD is sup...

Page 13: ...er installation 2 MP3 Player HDD and flash type MP3 player 3 Digital camera PTP protocol is not supported Devices which require additional program installation when you have connected it to a computer are not supported 4 USB HDD and USB Flash Drive Devices that support USB2 0 or USB1 1 You may experience a difference in playback quality when you connect a USB1 1 device For a USB HDD make sure to c...

Page 14: ...s a Chapter ach title on a DVD disc is divided into several smaller sections called chapters appears on the TV screen his symbol appears on the TV screen while buttons are being operated that eration is not possible with the disc currently being played hat is a Track File section of video or a music file recorded on a VCD CD or MP3 CD TRACK FILE display AUDIO LANGUAGE display SUBTITLE display STER...

Page 15: ...ollows 3 Press Cursor buttons or numeric buttons to select the desired angle The Angle function works only with discs on which multiple angles have been recorded Note g Scenes Songs VCD MP3 ng playback the previous or next chapter y en watching a VCD with a track ger than 15 minutes each time is pressed playback skip back or forward 5 minutes 28 OPERATION ion DVD VCD h time the button is pressed A...

Page 16: ...a VCD or CD Press INFO button once Playback repeatedly play a chapter title track song or directory MP3 file k the repeat playback mode changes as follows MP3 JPEG discs if PBC is turned on e PBC to OFF in the disc menu See page 35 CHAPTER Repeatedly plays the selected chapter TITLE Repeatedly plays the selected title RANDOM Plays tracks in random order A track that has already been played may be ...

Page 17: ...separately If a DVD R RW disc has not been recorded properly in DVD Video format it will not be playable DVD Icon Term Definition DVD CD MP3 JPEG DivX CAUTION NOTE DVD CD CD MP3 JPEG DivX This involves a function available with DVD or DVD R DVD RW discs that have been recorded and finalized in Video Mode This involves a function available with a data CD CD R or CD RW This involves a function avail...

Page 18: ...ress ENTER button 01 05 028 040 1 30 00 1 1 Moving to a Specific Time 3 Press Cursor buttons to move to Chapter display Moving to a Chapter 01 05 025 040 1 17 30 1 1 5 Press Cursor buttons to move to time display Moving to a Specific Time Press the numeric buttons You can press on the remote control to move directly to the desired title chapter or track Depending on the disc you may not be able to...

Page 19: ...or buttons during playback Original Image e Playback camera or camcorder or JPEG files on a PC can be back with this DVD player JPEG s backward or forward ext slide n yed for 5 seconds and then the next 36 OPERATION ransition as follows DE RANDOM k select the desired image and then re moving to the next image ress the button once AM Page 38 ...

Page 20: ...o exit the setup screen isc Menu audio language subtitle language profile etc disc to disc n you select the disc menu that is not ported by the disc the This menu is not ported message appears on the screen Press Cursor buttons to move to DISC MENU and then press ENTER button Press ENTER button t and view various scenes according to the menu screen s played back according to the menu screen Some f...

Page 21: ...Aymara 1209 Hausa 1353 Moldavian 1513 Siswati 1052 Azerbaijani 1217 Hindi 1356 Marathi 1514 Sesotho 1053 Bashkir 1226 Croatian 1357 Malay 1515 Sundanese 1057 Byelorussian 1229 Hungarian 1358 Maltese 1516 Swedish 1059 Bulgarian 1233 Armenian 1363 Burmese 1517 Swahili 1060 Bihari 1235 Interlingua 1365 Nauru 1521 Tamil 1069 Bislama 1239 Interlingue 1369 Nepali 1525 Tegulu 1066 Bengali Bangla 1245 Inu...

Page 22: ...d TV select either 4 3PS or 4 3LB option according to personal preference Select WIDE HDTV if you have a widescreen TV Adjusting the TV Aspect Ratio Screen Size 4 3PS 4 3 Pan Scan Select this to play a 16 9 picture in the pan scan mode on a conventional TV You can see the central portion of the screen only with the sides of the 16 9 picture cut off 4 3LB 4 3 Letterbox Select this to play a 16 9 pi...

Page 23: ...ill be aken to the previous screen 3 5 Press Cursor button to move to PARENTAL and then press ENTER button Enter the password and then press ENTER button Note 2 1 Press MENU button Press Cursor button to move to Setup and then press ENTER button 4 Enter the old password a new password and confirm new password The setting is complete 3 5 Press Cursor button to move to PASSWORD and then press ENTER ...

Page 24: ...n to move to LOGO and then press ENTER button To Change the Wallpaper 5 4 Press EXIT button to exit the setup screen Press to select the desired USER and then press ENTER e ge as Select this to set the desired image as your wallpaper Press RETURN button to return to the previous level Press EXIT button to exit the setup screen 46 COPY LOGO DATA will be displayed on the TV screen e displayed to set...

Page 25: ...onnected with digital TV In this case adjust the delay time of audio to optimal status to fit the video Press Cursor buttons to move to AV SYNC and then press ENTER button Press the MENU button DRC Dynamic Range Compression to enjoy Dolby Digital sound when watching movies at 2 ess MENU button Press Cursor button to move to Audio and then press ENTER button 4 If DRC is selected press ENTER Press C...

Page 26: ...t Example Presetting FM 89 10 in the memory This unit does not receive AM broadcasts 1 Press the TUNER button to select the FM band 2 Press the button to select 89 10 3 Press the TUNER MEMORY button PROGRAM flashes in the display 4 Press the button to select preset number You can select between 1 and 15 presets 5 Press the TUNER MEMORY button again Press the TUNER MEMORY button before PROGRAM disa...

Page 27: ...cassette playback modes which enable you to listen to both sides of a cassette automatically Selecting the Cassette Playback Mode g to a Cassette with care refer if necessary to the section entitled dio Cassettes on page 64 Insert a cassette with the recording playback side facing the cassette holder and then push the cassette door shut 2 3 Press TAPE on the player to select the Tape function Rewi...

Page 28: ...Tape Switch the system on by pressing STANDBY ON When stopped press and hold the button to start the recording from the first piece of music Press and hold CD SYNCHRO button during the playback of CD to start the recording from the first part of the music being played 5 4 Use the CD selection buttons to select the desired song Load a disc Press CD SYNCHRO button 6 To stop recording press button Pr...

Page 29: ... is not available when recording Note ables you to start recording with any track on the compact disc Recording a Radio Program You can record a radio program of your choice You do not need to adjust the volume as it has no effect on the recording 2 1 3 Insert a blank cassette in Deck Switch the system on by pressing STANDBY ON REC is displayed in red and recording starts 5 4 Select the TUNER func...

Page 30: ...ss POWER to set the system to standby mode et the hour by pressing or utton ress ENTER The minutes flash et the minutes by pressing or utton ress ENTER VOL 10 is displayed where 10 corresponds to the volume already set Set the timer switch off time 6 Press or button to adjust the volume level and press ENTER MISCELLANEOUS h on and off times are identical the word ERROR is displayed e Multi Jog or ...

Page 31: ...seful when answering a doorbell or telephone call Press MUTE button kHz MHz kHz MHz nd sound field DSP EQ Function To obtain a Select Normal balance linear PASS Balance suitable for pop music POPS Balance suitable for jazz music JAZZ Balance suitable for rock music ROCK Balance suitable for studio STUDIO Balance suitable for club CLUB Balance suitable for hall HALL Balance suitable for movie MOVIE...

Page 32: ... panel to select from TRE 08 to TRE 08 total 9 steps 1 You can select the level of high tones you desire 2 in turn on the in this booklet to the n ailable on To cancel this function press DEMO DIMMER again utton nction DIMMER Function ction Each time the button is press the brightness changes as follows DIMMER ON Dim DIMMER OFF Bright DIMMER Function You can adjust the brightness of the display on...

Page 33: ... exposed to high temperatures Avoid using 120 minute cassettes as they place unnecessary strain on the tape mechanism Precautions When Using Audio Cassettes ed to Connect the Microphone Turn the MIC LEVEL knob to adjust the MIC level Press the ECHO button to select ECHO1 ECHO2 and ECHO OFF During using the microphone you can press the REC PAUSE button to record your favorite When connected a MIC H...

Page 34: ...rnal FM antenna in an area with good reception Can t receive radio broadcast Symptom Check Remedy You can play 16 9 DVDs in 16 9 WIDE mode 4 3 LETTER BOX mode or 4 3 PAN SCAN mode but 4 3 DVDs can be seen in 4 3 ratio only Refer to the DVD disc jacket and then select the appropriate function Aspect ratio cannot be changed alling for Service is unit does not function properly If the problem you are...

Page 35: ...Panasonic Digital Camera Lumix LC33 Panasonic Digital Camera LUMIX DMC F1 Panasonic Digital Camera Optio S40 Pentax Digital Camera Optio S50 Pentax Digital Camera Optio 33LF Pentax Digital Camera Optio MX Pentax Digital Camera Digimax 420 Samsung Digital Camera Digimax 400 Samsung Digital Camera Sora PDR T30 Toshiba Digital Camera Coolpix 5900 Nikon Digital Camera Coolpix S1 Nikon Digital Camera C...

Page 36: ...sity recording technology a DVD disc wo 0 6 mm thick discs bonded together for Pulse Code Modulation another name for digital audio rded on a video CD version 2 0 Selected scenes or information can rom the menu displayed on the TV monitor D player and DVD discs are encoded with a region number number on the DVD disc does not correspond to the region number player the player cannot play the disc ap...

Reviews: