background image

GB

3

2

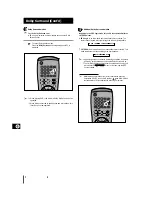
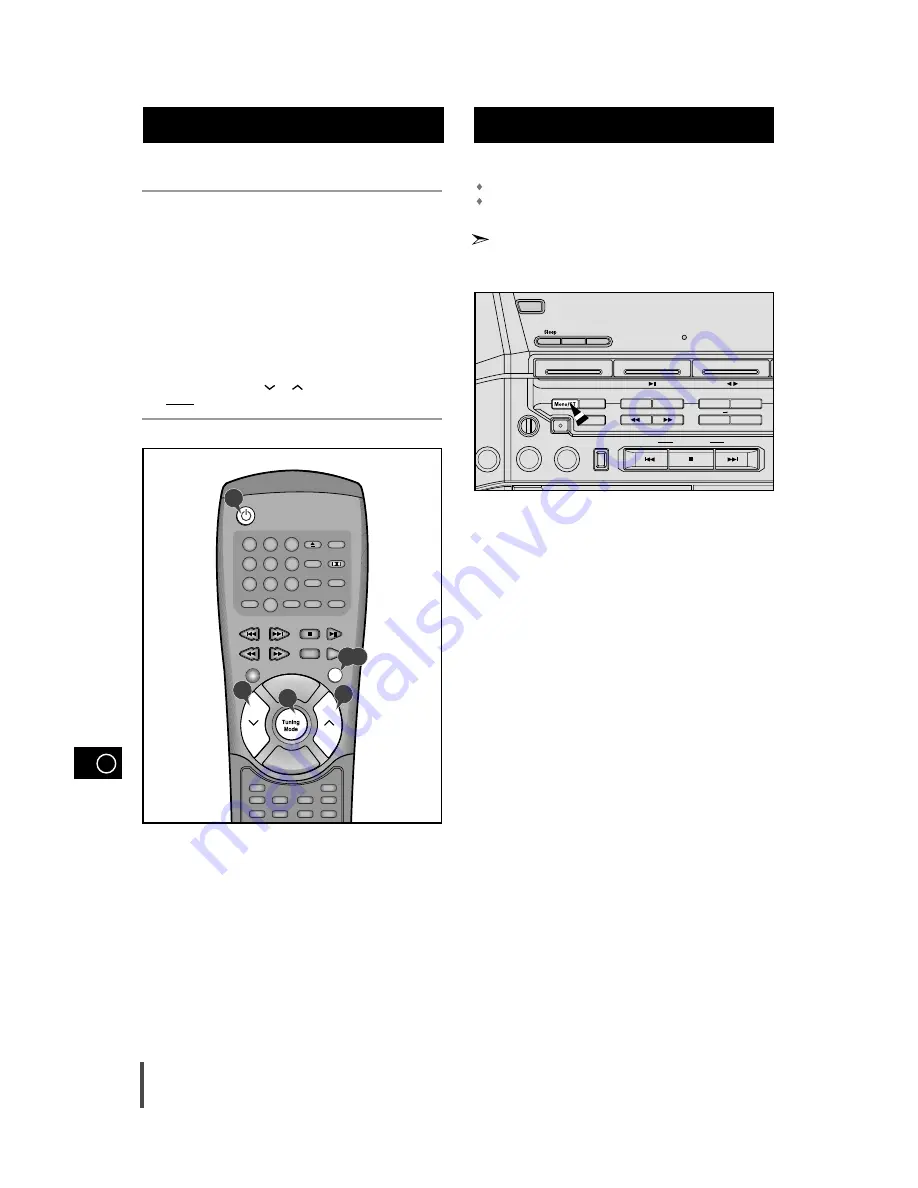
You can improve the quality of radio reception by:

Rotating the FM or AM(MW) aerial

Testing the positions of the FM and AM(MW) aerials before fixing them
permanently

If reception from a specific FM radio station is poor, press Mono/ST.
to switch from stereo mode to mono. The quality of the sound will be
improved.

Improving Radio Reception

Sleep

Speaker Mode

Angle

Sound Edit

Audio

Test Tone

Display

Book Mark

Zoom

Step

 Timer On/Off

DVD/CD

On/Standby

+

Volume

Tuning

Mode

Volume

DECK

Open/Close

Dolby Surround

Power Sound

S.Bass

Disc Skip

Deck 1/2

Band

Clear

Repeat

Program

DSP/EQ

Mute

10/0

1

2

3

4

5

6

7

8

9

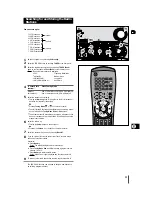
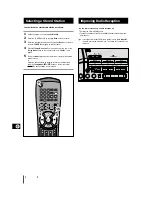
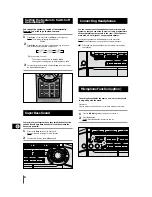
You can listen to a stored radio station as follows:

Switch the system on by pressing On/Standby.

Select the TUNER function by pressing Band on remote control.

Select the required frequency band by pressing Band on the remote
control or TUNER (Band) again on the front panel.

Press the Tuning Mode button on the front panel of the unit, or the
Tuning Mode button on the remote control until “

PRESET

” is dis-

played.

Tuning the Multi-Jog on the front panel left or right until the desired
station is found.
or
Select the desired station by pressing the station number stored,

using the Tuning Mode

or 

button on the remote control.

Result: The desired station is now received. 

Selecting a Stored Station

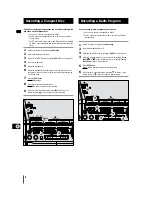
1
2

3

4

5

1

2,3

5

4

5

Demo

TUNER

DVD/CD

TAPE

Band

Mono/ST

Memory

CD Synchro

Display

Deck 1/2

REV. Mode

Normal

TAPE

TAPE  REC

HI-Speed

REC/Pause

Phones

REC Lock

Tuning Mode

Down

Up

DOLBY DIGITAL

Timer

On/Off

Timer

/Clock

MIC Mixing

MIC1

MIC2

Echo

Summary of Contents for MAX-DN54

Page 1: ...GB Instruction Manual THREE CD CHANGER MINI COMPACT SYSTEM MAX DN54 ...

Page 2: ...lerts you to important operating and maintenance instructions accompanying the unit WARNING To reduce the risk of fire or electric shock do not expose this appliance to rain or moisture CAUTION TO PREVENT ELECTRIC SHOCK MATCH WIDE BLADE OF PLUG TO WIDE SLOT FULLY INSERT CLASS 1 LASER PRODUCT KLASSE 1 LASER PRODUKT LUOKAN 1 LASER LAITE KLASS 1 LASER APPARAT PRODUCTO LASER CLASE 1 RISK OF ELECTRIC S...

Page 3: ... the setup Menu 22 Setting up the language features 23 Setting up the parental level 25 Setting up audio options 26 Setting up display options 28 Dolby Surround 29 TUNER Searching for and Storing the Radio Stations 31 Selecting a Stored Station 32 Improving Radio Reception 32 TAPE DECK Listening to a Cassette 33 CD Synchro Record Feature 33 Recording a Compact Disc 34 Recording a Radio Program 34 ...

Page 4: ...y 18 CD Synchro 19 Fast Forward Rewind 20 Tuning Mode or Stop button 21 CD Track or radio station search Down Up 22 TAPE Normal Recording 23 TAPE Hi Speed Recording 24 Rev mode 25 Deck 1 2 26 Cassette Deck 2 27 EQ 28 S Bass 29 Power Sound Surround 30 Multi Jog 31 Return 32 Menu On Off 33 Volume 34 Function Selection buttons 35 Open Close 36 Disc Change Front Panel View 1 35 36 2 3 4 5 6 7 8 9 11 1...

Page 5: ... Radio selection 29 Cassette Function Selection buttons 30 Clear 31 Program 32 Repeat 33 S Bass 34 Power Sound 35 DSP EQ 36 Dolby Surround 37 Sound Cut Off Selection 38 Compact Disc Compartment Open Close Timer On Off Sleep Speaker Mode Title Angle Sound Edit Audio Test Tone Display Set up Return AUX Book Mark Menu Sub Title Zoom Step Enter On Standby Volume Tuning Mode Volume DECK Open Close Dolb...

Page 6: ... 3 AM AERIAL CONNECTOR TERMINAL 4 SW AERIAL CONNECTOR TERMINAL OPTION 5 DVD CD DIGITAL OUT JACK 6 LINE OUT 7 AUX INPUT 8 LOUDSPEAKER CONNECTOR TERMINALS 9 CENTER SPEAKER 10 SURROUND SPEAKERS 11 VOLTAGE SELECTOR OPTION 12 VIDEO OUT 13 S VIDEO OUT 1 2 3 5 6 7 8 9 10 12 13 4 11 ...

Page 7: ...s towards the listening area For optimum performance make sure that both speakers are placed at an equal distance above the floor Where to Install Your Mini Compact System Connecting your System to the Power Supply On Standby Demo TUNER DVD CD TAPE AUX Volume Disc Change Disc 3 Disc 2 Disc 1 Disc Selection Direct Play Band Mono ST Memory CD Synchro Display Deck 1 2 REV Mode Normal TAPE TAPE REC HI...

Page 8: ... to a terminal push the tab as far as it will go To the right on the system Insert the wire up to the plastic sheathing in the hole Push the tab back To the left on the system until it clicks into place To the top on the loudspeaker Result The wire is pinched and held firmly in place Repeat the operation for each wire 1 2 3 4 Connect the CENTER SPEAKER Connect the center speaker cord to the CENTER...

Page 9: ...tional Refer to page 41 to give a full detail of the peripheral connection methods This unit can output DVD CD digital sound signals through this jack Use an optical cable to connect digital audio equipment DAT deck MD recorder etc Remove the dust cap 1 from the DVD CD DIGITAL OUT jack Then connect an optical cable plug to the DVD CD DIGITAL OUT jack When the DVD CD DIGITAL OUT jack is not being u...

Page 10: ... Repeat Program Deck 1 2 REV mode Normal TAPE TAPE REC HI Speed REC Pause Mic Mixing Phones Mic 1 Mic 2 REC Lock Echo Shuffle Tuning Mode Down PREVIOUS NEXT Up Timer On Off Timer Clock R Surround P ower S B a s s E Q M u t e On Off R E T U R N CD SYNC How to connect a COAXIAL TYPE aerial Connect a 75Ω antenna to the FM antenna terminal Plug the connector on the FM aerial supplied into the coaxial ...

Page 11: ...ress Timer Clock twice Result CLOCK is displayed Press Enter Result The hour flashes To Turn the Multi Jog knob to the Increase the hours Right Decrease the hours Left When the correct hour is displayed press Enter Result The minutes flash To Turn the Multi Jog knob to the Increase the minutes Right Decrease the minutes Left When the correct time is displayed press Enter Result The clock starts an...

Page 12: ...in If you wish to start playing a disc directly you can also proceed as follows To play Press Disc 1 DVD CD or DISC 1 Disc 2 DISC 2 Disc 3 DISC 3 Result The compartment closes automatically and the disc selected starts playing To change or unload the compact disc changer repeat Steps 2 to 5 Keep the compartment closed whenever you are not using it to prevent dust from entering You can load or unlo...

Page 13: ...red disc indicator flashes If you use the Disc 1 2 3 function when listening to the radio or to a tape the system switches automatically to the DVD CD mode If the disc selected is not loaded the next disc is played auto matically Making a sound with only Dolby Digital the DOLBY DIGITAL LED at the bottom of the display panel turns on red light DOLBY SURROUND DSP EQ POWER SOUND and S BASS functions ...

Page 14: ... search 8X 16X 32X on DVD or high speed playback on VCD no sound will be heard Though 2X SCAN AUDIO in ON in SETUP MENU no sound will be heard on discs which are recorded with LPCM or DTS Depending on the disc audio may or may not be heard when a disc is in 2X playback mode S e a r c h i n g If you want to display the title chapter time audio and subti tle information on a DVD press the DISPLAY bu...

Page 15: ...VD Press the Repeat button once to display the current status Press the Repeat button twice to repeat the chapter currently playing Press the Repeat button a third time to repeat the title currently playing Press the Repeat button again to turn off the repeat feature DVD repeats playback by chapter or title CD and VCD repeat play back by disc or track Depending on the disc the Repeat function may ...

Page 16: ... select CLEAR LAST TRACK or CHAPTER or TITLE Press the Enter button to delete the last track or chapter or title in the program order Program Playback in a specific Order REPEAT TRACK REPEAT ALL REPEAT OFF 1 2 3 4 DVD CD DECK Open Close Dolby Surround Power Sound S Bass Disc Skip Deck 1 2 Band Clear Repeat Program DSP EQ Mute 10 0 1 2 3 4 5 6 7 8 9 1 2 3 4 1 2 3 4 Sleep Speaker Mode Title Angle So...

Page 17: ...e menu function Track View VCD Displays the beginning view of each track and the track number Press the Title button in playback Press the UP DOWN button to select TRACK VIEW Press the Enter button Select the desired view by pressing the UP DOWN or LEFT RIGHT buttons An example of a Track View Press the Enter button Using the Disc View Function 1 2 4 1 2 3 TRACK PROGRAM ORDER 01 02 03 04 05 06 07 ...

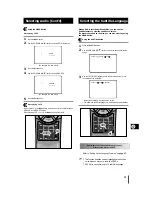
Page 18: ...on Use the UP DOWN button to select the desired language on a DVD The audio and subtitle languages are represented by abbreviations Use the UP DOWN button to select STEREO R CHANNEL or L CHANNEL on a VCD CD Even when the microphone has been connected press the audio button and the UP DOWN button to select a wanted action Selecting Audio INDEX VIEW 01 02 03 04 05 06 07 08 09 1 2 3 4 Sleep Speaker M...

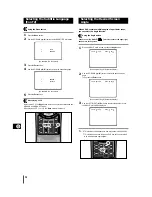
Page 19: ... desired subtitle lan guage Use the LEFT RIGHT button to determine whether or not the subtitle will be displayed Initially the subtitling will not appear on screen The audio and subtitle languages are represented by abbreviations Selecting the Subtitle Language 3 AUDIO 4 SUBTITLE 1 ENGLISH 2 FRANCAIS 1 2 3 4 5 Sleep Speaker Mode Title Angle Sound Edit Audio Test Tone Display Set up Return AUX Book...

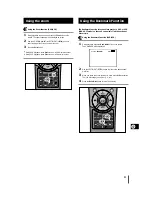
Page 20: ...ark is shown press the Angle button An example of Angle information display Use the UP DOWN button to select the desired screen angle Then press the Enter button An example of Angle information display Use the LEFT RIGHT button to determine whether or not the ANGLE mark will be displayed This function is disc dependent and may not work with all DVDs This function does not work when a DVD has not b...

Page 21: ...ng the Bookmark Function DVD VCD During playback press the Book Mark button on the remote Then MARKER will be displayed Use the LEFT RIGHT button to move to the desired book mark icon When you reach the scene you want to mark press the Enter button The icon will change to a number 1 2 or 3 Press the Book Mark button to turn off the display Using the Bookmark Function 1 2 3 Sleep Speaker Mode Title...

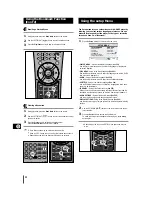
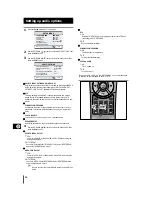
Page 22: ...reference menu to select the language the disc s subti tles are to be displayed in PARENTAL Setup of the Parental Level See P25 Allows users to set the level necessary to prevent children from viewing unsuitable movies such as those with violence adult subject matter etc AUDIO OPTIONS Setup of the Audio Options See P26 Use to set up the audio options such as digital out setup DISPLAY OPTIONS Setup...

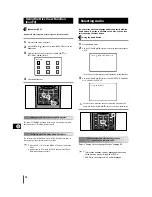
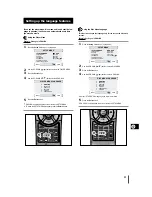
Page 23: ...RS if the language you want is not listed Press the Enter button ENGLISH is selected and the screen returns to SETUP MENU Setting up the language features SETUP MENU 1 PLAYER MENU ENGLISH 2 DISC MENU ENGLISH 3 AUDIO ENGLISH 4 SUBTITLE ENGLISH 5 PARENTAL UNLOCKED 6 AUDIO OPTIONS 7 DISPLAY OPTIONS RETURN ENTER PLAYER MENU LANGUAGE 1 ENGLISH 2 FRANCAIS 3 DEUTSCH 4 ESPAÑOL 5 ITALIANO 6 NEDERLANDS RETU...

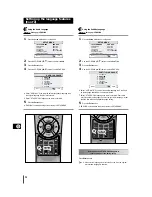
Page 24: ...s the Enter button ENGLISH is selected and the screen returns to SETUP MENU Setting up the language features Cont d AUDIO LANGUAGE 1 ENGLISH 2 FRANCAIS 3 DEUTSCH 4 ESPAÑOL 5 ITALIANO 6 NEDERLANDS 7 ORIGINAL 8 OTHERS RETURN ENTER SUBTITLE LANGUAGE 1 AUTOMATIC 2 ENGLISH 3 FRANCAIS 4 DEUTSCH 5 ESPAÑOL 6 ITALIANO 7 NEDERLANDS 8 OTHERS RETURN ENTER 1 3 4 5 Sleep Speaker Mode Title Angle Sound Edit Audi...

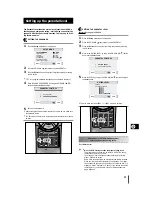
Page 25: ...button What if a DVD s rating exceeds the player s rating level The player alerts you when you try to play a DVD with a rating that exceeds the level you ve set The message Your selection exceeds the rating level for this player appears on screen Some discs are authorized with a rating override feature included When you play a disc with this feature the message Your selec tion exceeds the rating l...

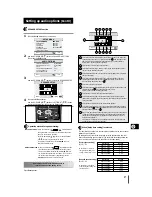
Page 26: ...sing the Analog Audio Outputs BITSTREAM Convert to Dolby Digital BITSTREAM 5 1CH Select BITSTEREAM when using the Digital Audio Output MPEG 2 DIGITAL OUT PCM Converts to PCM 2CH of 48KHz 16Bit Select PCM when using the Analog Audio Outputs BITSTREAM Convert to MPEG 2 Audio BITSTREAM Select BITSTEREAM when using the Digital Audio Output Be sure to select the correct Digital Output or no audio will ...

Page 27: ...er Operation is not required when selection has been made for This selects super woofer status This selects the size large small none of the right surround speaker The right left surround also changes at the same time Select small for the accessory speakers This sets the volume for the right surround speaker This adjusts the delay time for the left and the right surround speaker delay time in rega...

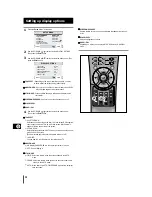
Page 28: ...f movie picture will be cut off 16 9 WIDE You can view the full 16 9 picture in your widescreen TV ANGLE MARK ON Displays ANGLE MARK in the upper right corner of screen OFF Doesn t display it STILL MODE FIELD Select this feature when the screen shakes in the AUTO mode FRAME Select this feature when you want to see small letters more clearly in the AUTO mode AUTO When selecting AUTO FIELD FRAME mod...

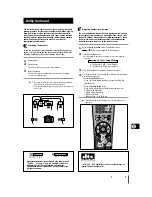
Page 29: ...apparent loudness from each channel Use the remote control Press the Dolby Surround button to select PRO LOGIC Result PRO LOGIC appears on the displayed Press the Test Tone button A noise signal is sent to each channel in turn in the following sequence L Left Speaker CNTR Center Speaker R Right Speaker REAR Rear Speaker Press the Test Tone button again to stop the noise signal To change the sound ...

Page 30: ...re connected This mode reproduces rear sounds through the front speakers Depending on the sound source or listening conditions a surround effect may not be obtained even when the Dolby Surround is on The full Dolby Surround effect cannot be obtained when using soft ware without mark In this case use the DSP system instead DOLBY SURROUND P R O L O G I C Dolby Surround Cont d DVD CD On Standby Volum...

Page 31: ...Turning the Volume knob on the front panel or Pressing the Volume or buttons on the remote control Select the stereo or mono mode by pressing Mono ST If you do not want to store the radio station found revert to Step 4 and search for another station Otherwise a Press Memory Result The PRGM is displayed for a few seconds b Press Tuning Mode Down and Up to assign a program number between 1 and 15 c ...

Page 32: ...the system on by pressing On Standby Select the TUNER function by pressing Band on remote control Select the required frequency band by pressing Band on the remote control or TUNER Band again on the front panel Press the Tuning Mode button on the front panel of the unit or the Tuning Mode button on the remote control until PRESET is dis played Tuning the Multi Jog on the front panel left or right ...

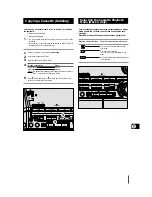
Page 33: ...e the deck by pushing on it until it clicks into place Result Depending on the deck selected the 1 or 2 indication is displayed in front of the counter number If you insert a cassette in both decks the system selects the deck in which you inserted the second cassette If you have inserted two cassettes press Deck 1 2 on the front panel or directly the Deck 1 2 button on the remote control to select...

Page 34: ...io program of your choice You can only record on cassettes in Deck 2 You do not need to adjust the volume as it has no effect on the recording Switch the system on by pressing On Standby Insert a blank cassette in Deck 2 Select the TUNER function by pressing TUNER on the front panel Select the radio station that you wish to record by pressing Tuning Mode or on the remote control or by press the Tu...

Page 35: ...ayback modes which enable you to listen to both sides of a cassette auto matically Press REV Mode until the appropriate symbol is displayed When the display indicates The mini compact system plays back One side of the selected cassette and then stops One side of the cassette The other side of the cassette and then stops Both sides of the cassette indefinitely until you press stop Copying a Cassett...

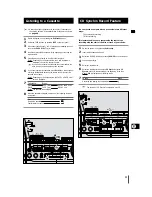
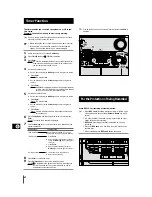
Page 36: ...e system switches on If you select You must also TAPE cassette Insert a recorded cassette in one of the decks before setting the system to standby TUNER radio a Press Enter b Select the FM or AM frequency band by tuning the Multi Jog knob to the right or to the left c Press Enter d Select a preset station by tuning the Multi Jog knob to the right or to the left CD compact disc a Load one or more c...

Page 37: ...ch makes the sound more powerful and full bodied Press P Sound button on the front panel Result The P Sound button on the front panel lights up red P SOUND is displayed for a few seconds A more powerful resonant sound is diffused To cancel this function press P Sound again After having set the timer it will start automatically as shown by the TIMER indication on the display If you no longer wish t...

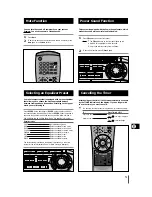
Page 38: ...onnect the headphones to the Phones jack on the front panel Result The loudspeakers are no longer used to output the sound Prolonged use of headphones at a high volume may damage your hearing 1 2 Setting the System to Switch off Automatically Super Bass Sound Connecting Headphones DVD CD TAPE AUX ynchro Display Deck 1 2 REV Mode Normal TAPE TAPE REC HI Speed Tuning Mode Down Up Surround Dolby S B ...

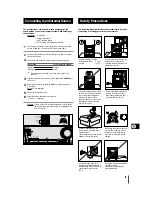
Page 39: ...y Deck 1 2 REV Mode Normal TAPE TAPE REC HI Speed REC Pause Phones REC Lock Tuning Mode Down Up Display Timer Clock DOLBY DIGITAL R Surround Dolby S B a s s D S P E Q P S o u n d E n t e r Do not place potted plants or vases on top of the unit Moisture entering the unit could lead to dangerous electric shock and can cause equipment damage In such events immediately disconnect the main plug from th...

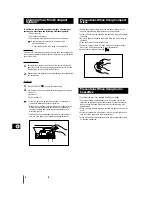
Page 40: ...ronment or subjected to shocks or extreme heat close to heating appliances or in direct sunlight etc If the unit emits an unpleasant odor when in use unplug it from the main supply and contact the after sales service Handle your compact discs with care Always hold them by the edges to avoid leaving fingerprints on the shiny surface When you have finished playing a compact disc always put it back i...

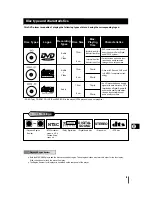
Page 41: ...logy DO NOT play CD ROM CD I CD R and DVD ROM in this player CDGs play audio only not graphics Playback Region Number An LP is recorded as an analog signal with more distortion CD is recorded as a Digital Signal with better audio quality less distor tion and less deterioration of audio quality over time 20 min 74 min 20 min 8 cm 12 cm 8 cm Audio Video Audio Disc Markings 1 6 NTSC broadcast system ...

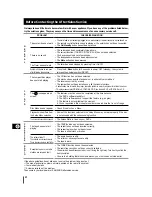
Page 42: ...ted a set of earphones The loudspeaker wires have been disconnected The Mute button has been pressed The timer has been stopped by pressing Timer On Off Press the S Bass button for 5 seconds in power OFF standby the system is returned the original position RESET The CD function has not been selected The disc has been inserted face down or is either dirty or scratched The laser sensor is dirty or d...

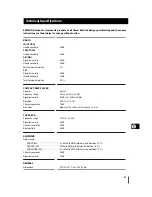
Page 43: ...rtion 0 3 COMPACT DISC PLAYER Capacity 3 discs Frequency range 20 Hz 20 KHz 1 dB Signal noise ratio 90 dB at 1 KHz with filter Distortion 0 05 at 1 KHz Channel separation 74 dB Disc sizes Diameter 120 or 80 mm Thickness 1 2 mm TAPE DECK Frequency range 125 Hz 12 KHz Signal noise ratio 40 dB Channel separation 35 dB Erasing effect 60 dB AMPLIFIER Output power FRONT 6Ω 2 x 60 Watts RMS total harmoni...

Page 44: ...ELECTRONICS THIS APPLIANCE IS MANUFACTURED BY AH68 00527B ...

Reviews: