background image

GB

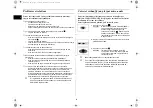
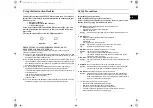
Using the Instant Reheat Feature

With the Instant Reheat  feature, the cooking time is set automatically 
and you do not have to press the


button. You can adjust the number 

of servings by pressing the appropriate Instant Reheat button the 
required number of times.
First, place the food in the centre of the turntable and close the door.

Example:  Press the 

 button once times to reheat one cups of coffee.  

Refer to the table on the side page.

Use only recipients that are microwave-safe.

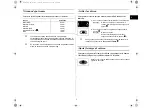
Instant Reheat Settings

The following table presents the various Instant Reheat Programmes, 
quantities, standing times and appropriate recommendations.

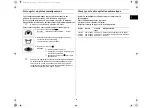
Press the Instant Reheat button which you want the 
required number of times.

Result : 

Cooking starts after about two seconds. 
When it has finished:

1) The oven beeps four times.
2) The end reminder signal will beep 3 times 

(once every minute).

3) The current time is displayed again.

Button Food

Serving Size

Standing 
Time

Recommendations

Ready Meal
(chilled)

300-350 g
400-450 g

3 min.

Put on a ceramic plate and 
cover it with microwave cling 
film. This programme is suitable 
for meals consisting of 3 
components (e.g. meat with 
sauce, vegetables and side 
dish like potatoes, rice or 
pasta).

Drinks
(coffee,  milk, 
tea,  water 
with room 
temperature)

150 ml
(1 cup)
250 ml
(1 mug)

1- 2 min.

Pour into a ceramic cup and  
reheat uncovered. 
Place cup(150 ml) or mug(250 
ml) in the centre of turntable. 
Stir carefully before and after 
standing time.

Ready Meal
(frozen)

300 - 350 g
400 - 450 g

4 min.

Take frozen ready meal and 
check if dish is suitable for 
microwave. Pierce film of ready 
meal. Put the frozen ready meal 
in the centre. This programme 
is suitable for frozen ready 
meals consisting of 3 
components (e.g. meat with 
sauce, vegetables and a side 
dish like potatoes, rice or 
pasta).

tX^Z]u†niU”GGwˆŽŒG_GG{œŒš‹ˆ SGkŒŠŒ”‰Œ™GZSGYWWYGG^aWXGwt

Summary of Contents for M1736N

Page 1: ...z et réchauffez un plat par micro ondes 6 Niveaux de puissance 7 Arrêtez la cuisson 7 Ajustez le temps de cuisson 7 Réchauffez un plat en mode instantané 8 Temps pour le réchauffage en mode instantané 8 Décongelez un plat automatiquement 9 Temps pour la décongélation automatique 9 Cuisez en plusieurs étapes 10 Guide des récipients 11 Nettoyez votre four à micro ondes 12 Spécifications techniques 1...

Page 2: ...n adaptant le centre sur le coupleur Objet ce plateau constitue la principale surface de cuisson il est facile de le retirer pour le nettoyer ORIFICES DE VENTILATION CROCHETS DE VERROUILLAGE DE LA PORTE PORTE PLATEAU COUPLEUR ANNEAU DE GUIDAGE ORIFICES DE VERROUILLAGE ÉCLAIRAGE AFFICHEUR PANNEAU DE COMMANDE BOUTON D OUVERTURE DE LA PORTE 1 2 3 6 4 5 7 8 9 1 AFFICHEUR 2 SÉLECTION DU MODE DE RÉCHAUF...

Page 3: ...précieusement pour vous y reporter ultérieurement Avant de cuire des aliments ou des liquides dans votre four à micro ondes vous devez prendre les précautions suivantes 1 N utilisez aucun récipient ou ustensile métallique dans le four à micro ondes plats métalliques assiettes avec décorations dorées ou argentées brochettes fourchettes etc Raison ils provoquent des arcs électriques ou étincelles qu...

Page 4: ...MAIS complètement le récipient Choisissez un récipient évasé pour prévenir tout débordement de liquide Des bouteilles à goulot étroit peuvent exploser en cas de surchauffe Vérifiez TOUJOURS la température du lait ou des aliments pour bébé avant de les servir NE chauffez JAMAIS un biberon avec la tétine car il pourrait exploser en cas de surchauffe 10 Veillez à ne pas endommager le cordon d aliment...

Page 5: ... par exemple à côté d un radiateur ou d un four traditionnel Avant d utiliser votre four pour la première fois nettoyez les surfaces intérieures et les joints d étanchéité à l aide d un chiffon humide Réglez l horloge Votre four à micro ondes est équipé d une horloge grâce à laquelle vous pouvez afficher l heure sur 24 heures ou sur 12 heures Vous devez régler l horloge à l installation initiale a...

Page 6: ...al Pour remédier à ce problème installez le four loin des téléviseurs radios ou antennes Si le microprocesseur du four détecte une interférence l afficheur peut être réinitialisé Pour remédier à ce problème déconnectez le cordon d alimentation puis rebranchez le Réglez de nouveau l horloge Si le problème ne peut être résolu à l aide des instructions ci dessus contactez votre revendeur ou le servic...

Page 7: ...r la cuisson en appuyant sur le bouton d annulation Ajustez le temps de cuisson Vous pouvez augmenter le temps de cuisson en appuyant sur le bouton 30s chaque fois que vous souhaitez ajouter 30 secondes Niveau Puissance MAXIMUM MOYEN ÉLEVÉ MOYEN MOYEN BAS DÉCONGÉLATION BAS 800 W 600 W 450 W 300 W 180 W 100 W 1 Pour arrêter la cuisson temporairement ouvrez la porte Résultat la cuisson s arrête Pour...

Page 8: ...le est terminée 1 un signal sonore retentit quatre fois 2 un signal de rappel de fin de cuisson est émis toutes les minutes 3 l heure s affiche de nouveau Bouton Aliment Quantité Temps de repos Recommandations Assiette garnie Réfrigérée 300 350 g 400 450 g 3 min Mettez les aliments dans une assiette en céramique et recouvrez cette dernière d un film plastique garanti micro ondes Ce programme conce...

Page 9: ...6 Temps pour la décongélation automatique Retirez les emballages des aliments avant de commencer la décongélation Placez l aliment congelé sur le plateau Au signal sonore retournez l aliment Respectez le temps de repos en fin de décongélation 1 Appuyez sur le bouton Auto Résultat l indication suivante s affiche poids 2 Sélectionnez le poids en appuyant autant de fois que nécessaire sur le bouton 1...

Page 10: ...r le bouton le mode micro ondes I est sélectionné Si nécessaire sélectionnez le niveau de puissance en appuyant de nouveau sur le bouton 600 W dans l exemple 4 Réglez le temps de cuisson en appuyant autant de fois que nécessaire sur les boutons 10min 1min et 10s quatre minutes dans l exemple 5 Appuyez sur le bouton le mode micro ondes II est sélectionné Si nécessaire sélectionnez le niveau de puis...

Page 11: ...is risquent de se déformer en cas de surchauffe Risquent de brûler Risquent de provoquer des arcs électriques étincelles Verre Résistant à la chaleur Verres de table Bocaux Utilisable à condition de ne pas présenter de décorations métalliques Utilisables pour réchauffer des aliments ou des liquides Du verre fin peut cependant être fêlé ou brisé par un changement soudain de température Retirez le c...

Page 12: ... le plateau si nécessaire ce dernier pouvant aller au lave vaisselle Ne laissez JAMAIS couler d eau dans les orifices de ventilation N utilisez JAMAIS de produits abrasifs ou de solvants chimiques Nettoyez avec un soin tout particulier les joints de la porte afin qu aucune particule ne s accumule ne nuise à l étanchéité de la porte Spécifications techniques Les descriptions et caractéristiques fig...

Page 13: ...to Do if You are in Doubt or Have a Problem 6 Cooking Reheating 6 Power Levels 7 Stopping the Cooking 7 Adjusting the Cooking Time 7 Using the Instant Reheat Feature 8 Instant Reheat Settings 8 Using the Auto Defrost Feature 9 Auto Defrost Settings 9 Multistage Cooking 10 Cookware Guide 11 Cleaning Your Microwave Oven 12 Technical Specifications 12 tX Z u niU GGw GXGG SGk GZSGYWWYGG aWXGwt ...

Page 14: ...n Purpose The roller ring supports the turntable 3 Turntable to be placed on the roller ring with the centre fitting to the coupler Purpose The turntable serves as the main cooking surface it can be easily removed for cleaning VENTILATION HOLES DOOR LATCHES DOOR TURNTABLE COUPLER ROLLER RING SAFETY INTERLOCK HOLES LIGHT DISPLAY CONTROL PANEL OPEN DOOR PUSH BUTTON 1 DISPLAY 2 INSTANT REHEAT SELECTI...

Page 15: ...tions Read Carefully and keep for future reference Before cooking food or liquids in your microwave oven please check that the following safety precautions are taken 1 DO NOT use any metallic cookware in the microwave oven Metallic containers Dinnerware with gold or silver trimmings Skewers forks etc Reason Electric arcing or sparking may occur and may damage the oven 2 DO NOT heat Airtight or vac...

Page 16: ... to the baby NEVER heat a baby s bottle with the teat on as the bottle may explode if overheated 9 Be careful not to damage the power cable Do not immerse the power cable or plug in water and keep the power cable away from heated surfaces Do not operate this appliance if it has a damaged power cable or plug 10 Stand at arm s length from the oven when opening the door Reason The hot air or steam re...

Page 17: ...the interior and the door seal with a damp cloth before using your microwave oven for the first time Setting the Time Your microwave oven has an inbuilt clock The time can be displayed in either the 24 hour or 12 hour notation You must set the clock When you first install your microwave oven After a power failure Do not forget to reset the clock when you switch to and from summer and winter time 1...

Page 18: ...lve this problem install the oven away from televisions radios and aerials If interference is detected by the oven s microprocessor the display may be reset To solve this problem disconnect the power plug and reconnect it Reset the time If the above guidelines do not enable you to solve the problem contact your local dealer or SAMSUNG after sales service Cooking Reheating The following procedure e...

Page 19: ...sting the Cooking Time You can increase the cooking time by pressing the 30s button once for each 30 seconds to be added Power Level Output HIGH MEDIUM HIGH MEDIUM MEDIUM LOW DEFROST LOW 800 W 600 W 450 W 300 W 180 W 100 W 1 To stop temporarily Open the door Result Cooking stops To resume cooking close the door and press again 2 To stop Completely Press the button Result The cooking stops If you w...

Page 20: ...2 The end reminder signal will beep 3 times once every minute 3 The current time is displayed again Button Food Serving Size Standing Time Recommendations Ready Meal chilled 300 350 g 400 450 g 3 min Put on a ceramic plate and cover it with microwave cling film This programme is suitable for meals consisting of 3 components e g meat with sauce vegetables and side dish like potatoes rice or pasta D...

Page 21: ...l kinds of packaging material before defrosting Place the frozen foods on a turntable Turn the food over when the oven beeps Keep the corresponding standing time after Auto Defrosting has finished 1 Press the Auto button Result The following indication is displayed 2 Select the food weight by pressing the 100g button It is possible to set up to a maximum of 1500g 3 Press button Result Defrosting b...

Page 22: ...de I if necessary set the power level by pressing the button again one or more times 600W in the example 4 Set the cooking time by pressing the 10min 1min and 10s buttons the appropriate number of times 4 minutes in the example 5 Press the button The microwave mode II if necessary set the power level by pressing the button again one or more times 450W in the example 6 Set the cooking time by press...

Page 23: ...ystyrene cups containers Paper bags or newspaper Recycled paper or metal trims Glassware Can be used to warm food Overheating may cause the polystyrene to melt May catch fire May cause arcing Glassware Oven to table ware Fine glassware Glass jars Can be used unless decorated with a metal trim Can be used to warm foods or liquids Delicate glass may break or crack if heated suddenly Must remove the ...

Page 24: ...en minutes at maximum power 4 Wash the dishwasher safe plate whenever necessary DO NOT spill water in the vents NEVER use any abrasive products or chemical solvents Take particular care when cleaning the door seals to ensure that no particles Accumulate Prevent the door from closing correctly Technical Specifications SAMSUNG strives to improve its products at all times Both the design specificatio...

Reviews: