29
Preparations
1
1 Preparations
1.4
"MagicRotation Auto"
The "MagicRotation Auto" function detects the rotation of monitors that are fitted with a rotation sensor
and rotates the Windows screen accordingly.
[Software Installation]
1
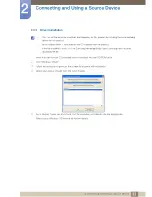
Insert the user manual CD provided with the product into the CD-ROM drive.
2
Follow the instructions given on the screen to proceed with installation.
After installation, the on-screen display (OSD) menu will be displayed in the language of the operating
system.
(This complies with the basic policies of Windows.)
[Caution]
1
Compatible only with Windows 7 (32 bits or 64 bits)
2
Compatible with a graphics card that complies with the DDC/CI and MS API standards
With a graphics card that does not comply with the aforementioned standards, the "MagicRotation
Auto" function may not be available.
3
To maximize the performance of the function, update the graphics card driver to the latest version.
4
Fourteen languages are available as installation languages.
5
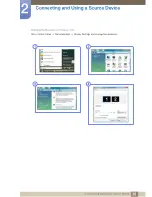
If the orientation is set to a mode other than "Landscape" in the screen resolution menu on Windows
7, the "MagicRotation Auto" function may not work properly.
6
The OSD menu will be displayed if the monitor is rotated. When the monitor is rotated, the screen
reconfiguration process may be displayed or screen burn-in may appear, depending on the graphics
card. This is performed by the Windows operating system and has nothing to do with the product.
7
If you do not want the screen to rotate automatically when the monitor is rotated, press the Windows
and L keys at the same time to lock the Windows operating system. If the operating system cannot
be locked, it is due to the constraints of Windows API and has nothing to do with the product.
(QJOLVK)UDQoDLV'HXWVFK0DJ\DU,WDOLDQR3ROVNL3RUWXJXrV
ƧNJLjLjǁƿǀ(VSDxRO6YHQVND7UNoH
ᣣᧄ⺆
㩷
∝䇁
ଞ˲߭


