10 Operating Instructions and Installation
10-4
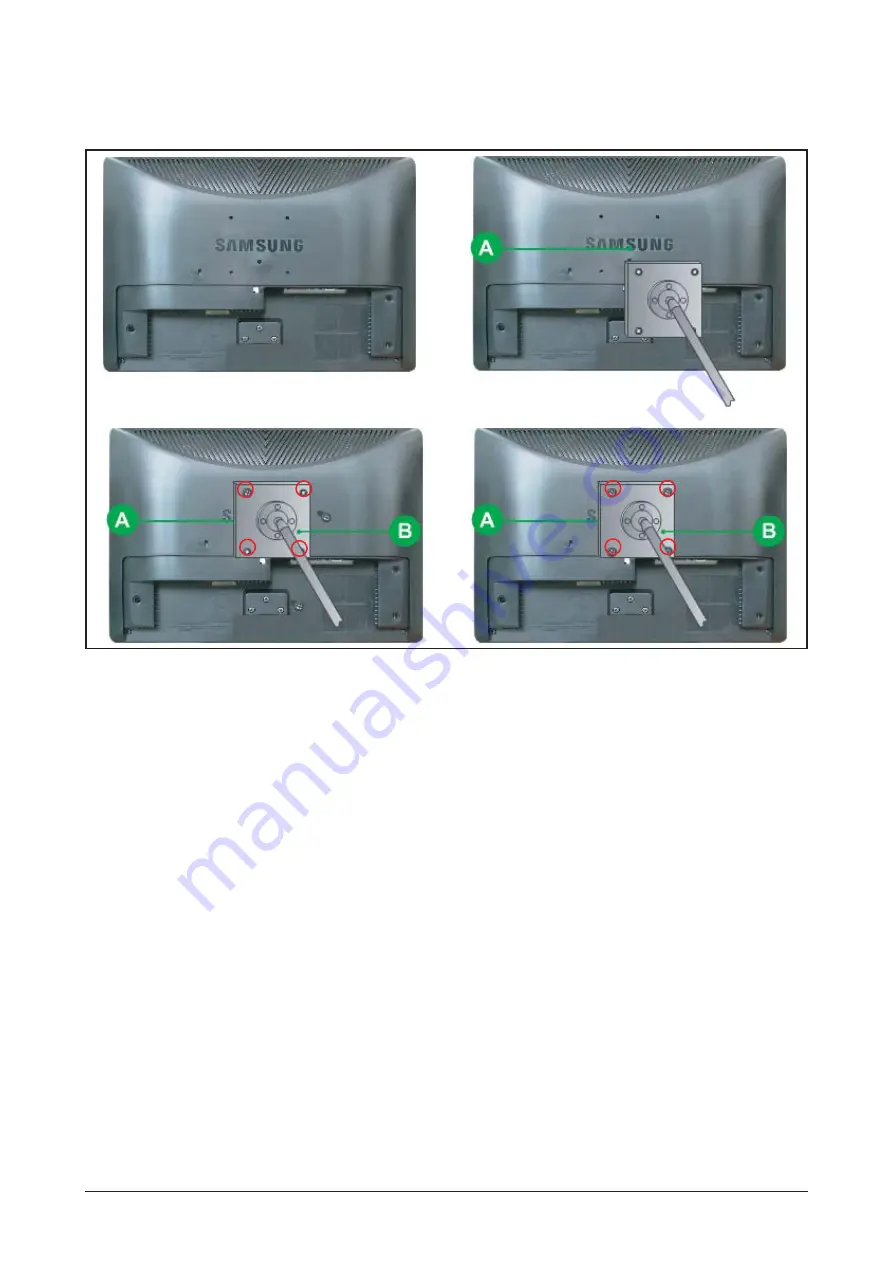
A. Monitor
B. Mounting interface pad
1. Turn off your monitor and unplug its power cord.
2. Lay the LCD monitor face-down on a flat surface with a cushion beneath it to protect the screen.
3. Remove four screws and then remove the stand from the LCD monitor.
4. Align the mounting interface Pad with the holes in the rear cover mounting pad and secure it with four
screws that came with the arm-type base, wall mount hanger or other base.
10-3-2 Attaching a Base
- This monitor accepts a 100mm x 100mm VESA-compliant mounting interface pad.
1.
2.
4.
3.
Summary of Contents for LME20AS
Page 12: ...11 Disassembly and Reassembly 11 3 10 Main PCB and IB Board Description Picture Description ...
Page 15: ...13 Circuit Descriptions 13 2 Memo ...
Page 25: ...Memo 14 Reference Infomation 14 10 ...
Page 31: ...Memo 3 Alignments and Adjustments 3 6 ...
Page 33: ...4 Troubleshooting 4 2 WAVEFORMS 2 1 3 4 ...
Page 35: ...4 Troubleshooting 4 4 WAVEFORMS 6 5 7 ...
Page 37: ...4 Troubleshooting 4 6 WAVEFORMS 9 5 ...
Page 38: ...4 Troubleshooting 4 7 ...
Page 39: ...4 Troubleshooting 4 8 ...
Page 40: ...4 Troubleshooting 4 9 ...
Page 41: ...Memo 4 Troubleshooting 4 10 ...
Page 43: ...6 Electrical Parts List 6 2 Memo ...
Page 44: ...7 Block Diagrams 7 1 7 Block Diagram 7 1 Block Diagram ...
Page 45: ...7 Block Diagrams 7 2 Memo ...
Page 47: ...9 Schematic Diagrams 9 2 This Document can not be used without Samsung s authorization ...
Page 48: ...9 Schematic Diagrams 9 3 This Document can not be used without Samsung s authorization ...
Page 49: ...9 Schematic Diagrams 9 4 Memo ...
Page 53: ...9 Schematic Diagrams 9 2 This Document can not be used without Samsung s authorization ...
Page 54: ...9 Schematic Diagrams 9 3 This Document can not be used without Samsung s authorization ...
Page 55: ...9 Schematic Diagrams 9 4 Memo ...


