background image

English-15

You can select the type of the special sound effect to be used when watching a given 
broadcast.

1. 

Press the 

MENU 

button to display the menu. Press the 

 or 

 button to    


select “Sound”, then press the 

ENTER

 button.

2. 

Press the 

ENTER

 button again, to select “Mode”.

3. 

Select the required sound effect by pressing the 

 or 

 button repeatedly and then    

 press 

the 

ENTER

 button.

4. 

Press the 

EXIT 

button to exit.

Œ


Standard: 

Selects the normal sound mode.

Œ


Music: 

Emphasizes music over voices.

Œ


Movie: 

Provides live and full sound for movies.

Œ


Speech: 

Emphasizes voices over other sounds.

Œ


Custom: 

Selects your custom sound settings. 

(Refer to “Adjusting the Sound Settings”)


You can also select these options by 


simply pressing the 

S.MODE

 button on  

 the 

remote 

control.

 PIP 

Settings 

(

O

: PIP operates, 

X

: PIP doesn’t operate)

TV

AV1

AV2

S-Video

Component1

Component2

PC

HDMI

DTV

TV

X

X

X

X

X

X

X

O

X

AV1

X

X

X

X

X

X

X

O

X

AV2

X

X

X

X

X

X

X

O

X

S-Video

X

X

X

X

X

X

X

O

X

Component1

X

X

X

X

X

X

X

O

X

Component2

X

X

X

X

X

X

X

O

X

PC

O

O

O

X

X

X

X

X

X

HDMI

O

O

O

O

O

O

X

X

X

DTV

X

X

X

X

X

X

X

X

X

Sub

Main

Changing the Sound Standard

Œ


Source:

 Used to select a source of the sub picture.

Œ


Swap:

 Used to interchange the main picture and the sub picture.

Œ


Size:

 Used to select a size of the sub picture. 

Œ


Position:

 Used to move the sub picture.

Œ


Programme:

 Used to Change the sub picture.

8. 

Press the 

 or 

 button to select “Programme” and then press the 

ENTER

 button. 


You can select the channel that you want to view through sub picture by pressing the 


 or 

 button. 

 Press 

the 

ENTER

 button.


The “Programme” can be active when the sub picture is set to TV.

9. 

Press the 

EXIT 

button to exit.


You may notice that the picture in the PIP window becomes slightly unnatural when you use the main  


screen to view a game or karaoke.

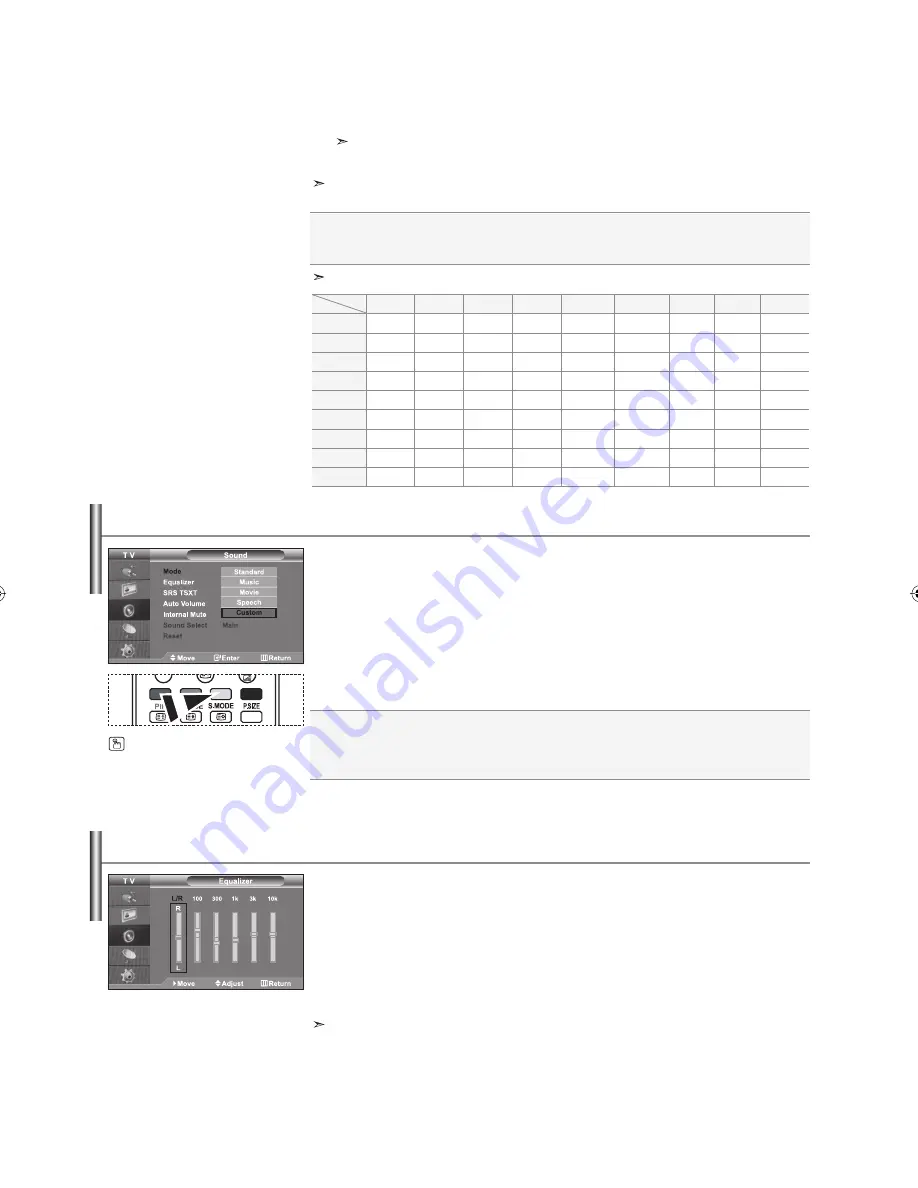
The sound settings can be adjusted to suit your personal preferences.

1. 

Press the 

MENU 

button to display the menu. Press the 

 or 

 button to    


select “Sound”, then press the 

ENTER

 button.

2. 

Press the 

 or 

 button to select “Equalizer”, then press the 

ENTER

 button.

3. 

Press the 

 or 

 button to select a particular item. Press the 

ENTER

 button.

4. 

Press the 

 or 


button to reach the required setting. Press the 

ENTER

 button.

5. 

Press the 

EXIT 

button to exit.

  If you make any changes to these settings, the Sound Mode is automatically switched to “Custom”.

Adjusting the Sound Settings

BN68-01096A-00Eng.indd   15

BN68-01096A-00Eng.indd   15

2006-08-08   

 9:59:06

2006-08-08   

 9:59:06

Summary of Contents for LA26R7

Page 1: ...TURE PIP TELETEXT Register your product at www samsung com global register Contact SAMSUNGWORLD WIDE If you have any questions or comments relating to Samsung products please contact the SAMSUNG customer care centre Samsung Electronics Australia 7 Parkview Drive Homebush Bay NSW 2127 1300 362 603 www samsung com au BN68 01096A 00Cover indd 1 BN68 01096A 00Cover indd 1 2006 08 08 9 57 38 2006 08 08...

Page 2: ...may leave traces of borders displayed on the left right and center of the screen caused by the difference of light emission on the screen Playing a DVD or a game console may cause a similar effect to the screen Damages caused by the above effect are not covered by the Warranty Displaying still images from Video games and PC for longer than a certain period of time may produce partial after images ...

Page 3: ...TTING THE TIME Setting and Displaying the Current Time 17 Setting the Sleep Timer 18 Switching the Television On and Off Automatically 18 SETTING THE OTHERS Using Game Mode 19 Setting the Blue Screen Mode Selecting the Melody 19 Using the Energy Saving Feature 20 Selecting the Source 20 Editing the Input Source Names 20 USING THE DTV FEATURE Previewing the DTV Menu System 21 Updating the Channel L...

Page 4: ...le 2 Put the stand into the hole at the bottom of the TV 3 Insert screw into the hole indicated and tighten The stand is installed for models with the screen size of 40 inch and above Installing the Stand Wall mount items sold separately allow you to mount the TV on the wall For detailed information on installing the wall mount see the instructions provided with the Wall Mount items Contact a tech...

Page 5: ...and buttons on the remote control Press to change channels In the on screen menu use the buttons as you use the and buttons on the remote control Without the Remote Control You can turn on the TV by using the Channel buttons Speakers Power Press to turn the TV on and off Power Indicator Blinks and turns off when the power is on and lights up in stand by mode Remote Control Sensor Aim the remote co...

Page 6: ...evice to your TV make sure that power on the unit is turned off When connecting an external device match the colour of the connection terminal to the cable Side Panel Jacks 26 inch model does not have the side panel jacks Rear Panel Jacks 32 inch 37 inch 40 inch Rear Panel Jacks 26 inch ...

Page 7: ... PB Y on your set The PR PB and Y connectors on your component devices DTV or DVD are sometimes labeled Y B Y and R Y or Y Cb and Cr Connect RCA audio cables optional to R AUDIO L on the rear of your set and the other ends to corresponding audio out connectors on the DTV or DVD This LCD TV displays its optimum picture resolution in 720p mode This LCD TV displays its maximum picture resolution in 1...

Page 8: ...ects the TV and DTV mode directly VCR DVD Functions Rewind Stop Play Pause Fast Forward Volume increase Volume decrease Temporary sound switch off Menu display and change confirmation Electronic Program Guide EPG display Picture In Picture On Off Picture freeze Picture effect selection Sound effect selection SET Adjusts 5 separate devices TV DVD STB CABLE or VCR RESET When your remote does not wor...

Page 9: ...nitially powered on several basic settings proceed automatically and subsequently The following settings are available 1 Press the POWER button on the remote control The message Start Plug Play is displayed with OK selected 2 The message Check antenna input is displayed with OK selected Press the ENTER button Please check that the antenna cable is connected correctly 3 The Auto Store menu is displ...

Page 10: ...ing Channels Manually If you want to reset this feature 1 Press the MENU button to display the menu Press the or button to select Setup then press the ENTER button 2 Press the ENTER button again to select Plug Play 3 The message to Start Plug Play is displayed You can scan for the frequency ranges available to you Automatically allocated programme numbers may not correspond to actual or desired pr...

Page 11: ...emote control 5 Press the or button to select Colour System then press the ENTER button 6 Select the colour standard required by pressing the or button then press the ENTER button 7 Press the or button to select Sound System then press the ENTER button 8 Select the sound standard required by pressing the or button then press the ENTER button If there is an abnormal sound or no sound re select the ...

Page 12: ...e Stored Channels This feature allows you to prevent unauthorized users such as children from watching unsuitable programmes by muting out video and audio Child Lock cannot be released using the buttons on the side Only the remote control can release the Child Lock setting so keep the remote control away from children 1 Press the MENU button to display the menu Press the or button to select Channe...

Page 13: ... Fine Tuning Channel Reception Channel names will be assigned automatically when channel information is broadcast These names can be changed allowing you to assign new names 1 Press the MENU button to display the menu Press the or button to select Channel then press the ENTER button 2 Press the or button to select Name then press the ENTER button 3 If necessary select the channel to be assigned to...

Page 14: ...r of objects making them more red or green for a more natural look The Picture mode must be adjusted separately for each input source You can return to the factory defaults picture settings by selecting the Reset Refer to Resetting the Picture Settings to the Factory Defaults on page 13 Changing the Picture Standard Your set has several settings which allow you to control picture quality 1 To sele...

Page 15: ...responds to your viewing requirements 1 Press the MENU button to display the menu Press the or button to select Picture then press the ENTER button 2 Press the or button to select Size then press the ENTER button 3 Select the required option by pressing the or button Press the ENTER button 4 Press the EXIT button to exit You can select these options by simply pressing the P SIZE button on the remo...

Page 16: ...en press the ENTERbutton Select the position of the sub picture by pressing the or button and then press the ENTER button Viewing the Picture In Picture PIP Press the PIP button on the remote control repeatedly to activate or deactivate the PIP Samsung s new technology brings you more detailed images with contrast and white enhancement A new image compensation algorithm gives viewers brighter and ...

Page 17: ...X X X Sub Main Changing the Sound Standard Source Used to select a source of the sub picture Swap Used to interchange the main picture and the sub picture Size Used to select a size of the sub picture Position Used to move the sub picture Programme Used to Change the sub picture 8 Press the or button to select Programme and then press the ENTER button You can select the channel that you want to vi...

Page 18: ...SXT Each broadcasting station has its own signal conditions and so it is not easy for you to adjust the volume every time the channel is changed This feature allows you to automatically adjust the volume of the desired channel by lowering the sound output when the modulation signal is high or by raising the sound output when the modulation signal is low 1 Press the MENU button to display the menu ...

Page 19: ...ess the ENTER button 3 Press the EXIT button to exit You can select this option when the Game Mode is set to On Listening to the Sound of the Sub Picture During the PIP features activation you can listen to the sound of the sub picture 1 Press the MENU button to display the menu Press the or button to select Sound then press the ENTER button 2 Press the or button to select Sound Select then press ...

Page 20: ...ice at the time you select Switch off automatically at the time you select The first step is to set the television s clock 1 Press the MENU button to display the menu Press the or button to select Setup then press the ENTER button 2 Press the or button to select Time then press the ENTER button 3 Press the or button to select On Timer then press the ENTER button 4 Press the or button to adjust Hou...

Page 21: ... can enjoy a more realistic gaming experience by selecting game menu 1 Press the MENU button to display the menu Press the or button to select Setup then press the ENTER button 2 Press the or button to select Game Mode then press the ENTER button 3 Press the or button to select On or Off Press the ENTER button 4 Press the EXIT button to exit To disconnect the game console and connect another exter...

Page 22: ...rce List AV1 AV2 S Video Component1 Component2 PC HDMI DTV are activated only when they are connected to your set 26 inch model supports TV AV1 S Video Component1 Component2 PC HDMI and DTV only 3 Select the required device by pressing the or button Press the ENTER button Selecting the Source Press the SOURCE button on the remote control to toggel between all the available source TV mode can be se...

Page 23: ...ignal Information Time Zone Software Upgrade Reset Updating the Channel List Automatically You can update the channel list when the broadcaster adds new Services or if you move the TV to a new location 1 Press the D MENU button to display the DTV menu 2 Press the or button to select Channel then press the ENTER button 3 Press the ENTER button again to select Auto Store 4 When it has finished the n...

Page 24: ...all currently stored channels 5 Press the or button to select a channel you want Press the ENTER button A icon is shown next to the selected channel and the channel will be added to the favourite channel list To undo press the ENTER button again Select All Select all channels currently displayed Select None Deselect all selected channels Preview Displays a currently selected channel s The Favorite...

Page 25: ...om the channels you have scanned When you scan through the stored channels those you have chosen to skip are not displayed All channels that you do not specifically choose to skip are displayed during scanning 1 Press the D MENU button to display the DTV menu 2 Press the or button to select Channel then press the ENTER button 3 Press the or button to select Channel Manager Press the ENTER button 4...

Page 26: ...ded on the detailed information will be appeared if the summary is long Six channels are displayed To scroll between channels move to a channel using the or button To display page by page use the P or button Viewing the EPG Electronic Programme Guide Information The EPG Electronic Programme Guide information is provided by the broadcasters Programme entries may appear blank or out of date as a res...

Page 27: ... the time Date SetYear Month and Day Frequency Set the frequency Once Daily or Weekly 6 After setting the schedule Press the red button 7 Press the EXIT button to exit The Scheduled list may be displayed in the EPG menu Save Save the adjusted schedule Cancle Cancel the adjusted schedule Add Programme Add a new schedule Edit Re adjust the selected schedule Delete Delete the selected schedule Using ...

Page 28: ...nels menu is displayed If you select No all channels will remain unchanged To edit the favourite channels refer to page 22 for more details 9 Press the EXIT button to exit All Channels is the list of channels that have been scanned by the channel list update All channels are displayed in the all channel mode Favourites favourite channels is the list of channels that has been set in the Edit Favour...

Page 29: ...Press the or button to select the age rating you want to lock out Press the ENTER button 8 If you want to change the PIN code select Change PIN by pressing the or button Press the ENTER button The Enter New PIN is displayed 9 Enter your new PIN code by using the numeric buttons 0 9 The Confirm New PIN is displayed 10 Re enter your new PIN code to confirm by using the numeric buttons 0 9 The Your P...

Page 30: ...o exit While viewing a programme the subtitle can be selected While viewing a programme audio languages can be selected You can preset the default guide style 1 Press the D MENU button to display the DTV menu 2 Press the or button to select Feature then press the ENTER button 3 Press the or button to select Audio Format then press the ENTER button 4 Select the required option by pressing the or bu...

Page 31: ... upgrade Upgrade Now If you select Upgrade Now the iDTV immediately installs the new upgrade and then restarts Upgrade Later If you select Upgrade Later the upgrade is postponed until the next restart or channel change some 90 minutes later when the upgrade dialog appears again Don t Upgrade If you select Don t Upgrade the iDTV does not perform the upgrade and the software upgrade banner is not di...

Page 32: ... digit PIN code by using the numeric buttons 0 9 The warning message is displayed All values will be reset by pressing the coloured buttons red green yellow and blue in turn 6 Press the EXIT button to exit Resetting Select the time zone where locate 1 Press the D MENU button 2 Press the or button to select System 3 Press the or button to select Time Zone 4 Select the time zone where you locate by ...

Page 33: ...e pages may not be displayed To activate the teletext mode and display the contents page 1 Using the P or P button select the channel providing the teletext service 2 Press the TTX MIX button to activate the teletext mode The contents page is displayed It can be redisplayed at any time by pressing the MENU button 3 Press the TTX MIX button again The actual broadcast will be displayed with Teletext...

Page 34: ... secondary page by entering its 4 digit number PRE CH The next page The previous page P P Double size letters in the Upper half of the screen Lower half of the screen Normal screen P MODE Once Twice Three times Selecting a Specific Teletext Page The various topics included in the teletext pages are colour coded and can be selected by pressing the col oured buttons on the remote control 1 Display t...

Page 35: ...try one of the other codes listed for your brand of VCR If no other codes are listed try each VCR code 000 through 080 Note on Using Remote Control Modes VCR When your remote control is in VCR mode the volume buttons still control your TV s volume Setting Up the Remote to Operate Your Cable Box 1 Turn off your cable box 2 Press the CABLE button on your TV s remote control 3 Press the SET button on...

Page 36: ... Control Modes DVD When your remote control is in DVD mode the volume buttons still control your TV s volume Setting Up the Remote to Operate Your STB 1 Turn off your STB 2 Press the STB button on your TV s remote control 3 Press the SET button on your TV s remote control 4 Using the number buttons on your remote control enter three digits of the STB code listed on page 37 of this manual for your ...

Page 37: ... 021 026 037 062 MARTA 006 MEI 021 MEMOREX 006 021 024 025 MGA 034 MIDLAND 005 MINOLTA 019 041 075 MITSUBISHI 019 034 041 046 Brand Code MONTGOMERYWARD 020 MTC 002 025 MULTITECH 002 005 025 038 NEC 007 008 018 026 037 062 064 OPTIMUS 020 ORION 073 074 075 076 PANASONIC 021 056 071 072 PENTAX 019 041 075 PENTEX RESEARCH 008 PHILCO 021 056 059 PHILIPS 021 080 PIONEER 019 026 039 053 PORTLAND 015 049...

Page 38: ... 018 STB DVD COMBO 019 DVD Receiver 020 AV Receiver 021 DVD Brand Code ANAM 030 AUDIOVOX 075 AUDIOLOGIC 085 ANABA 072 APEX DIGITAL 070 071 074 086 083 084 088 111 112 AIWA 114 BROKSONIC 062 BLAUPUNKT 074 B K 122 123 CURTIS MATHES 027 CYBER HOME 077 078 079 082 CLARION 080 125 CIRRUS 081 CYBER HOME 065 CINEVISION 095 DAEWOO 066 DENON 146 FARENHEIT 067 068 FISHER 090 GPX 060 GO VIDEO 061 089 133 135...

Page 39: ...lite STB HDD COMBO Standard 009 SET TOP BOX Brand Code ALPHASTAR 023 ANAM 043 CHANNEL MASTER 018 034 CROSSDIGITAL 019 CHAPARRAL 035 DIRECT TV 015 016 017 019 022 045 060 061 062 065 066 067 068 DAEWOO 074 DISHNETWORKSYSTEM 069 070 DISHPRO 069 DRAKE 018 024 032 DX ANTENNA 027 ECHOSTAR 025 069 070 071 EXPRESSVU 069 GOI 069 GE 065 GENERALINSTRUMENT 046 047 048 063 064 HTS 069 HOME CABLE 056 HITACHI 0...

Page 40: ... box the correct value is 60 or 60 Hz Otherwise just click OK and exit the dialog box Setting up Your PC Software Based on Windows XP Display Modes Both screen position and size will vary depending on the type of PC monitor and its resolution The resolutions in the table are recommended All resolutions between the supported limits are supported Mode Resolution Horizontal Frequency kHz Vertical Fre...

Page 41: ...creen positioning if it does not fit the TV screen 1 Follow the Coarse and Fine Tuning of the Image Image Lock instructions number 1 to 3 2 Press the or button to select Position then press the ENTER button 3 Press the or button to adjusting the Vertical Position Press the or button to adjust the Horizontal Position Press the ENTER button 4 Press the EXIT button to exit Adjusting the PC Screen Aut...

Page 42: ...te control Check if Internal Mute is off No picture or black and white picture Adjust the colour settings Check that the broadcast system selected is correct Sound and picture interference Try to identify the electrical appliance that is affecting the set and move it further away Plug your set into a different mains socket Blurred or snowy picture distorted sound Check the direction location and c...

Page 43: ... 4 F to 113 F 5 to 95 non condensing Model Name LA37R7 LA40R7 Screen Size Diagonal 37 inch 40 inch Power Supply AC 220 240 V 50 Hz AC 220 240 V 50 Hz Power Consumption 170 W 190 W PC Resolution 1360 x 768 60 Hz 1360 x 768 60 Hz Sound Output 10 W X 2 10 W X 2 Dimension WxDxH Body With stand 923 x 87 x 619 mm 923 x 326 x 676 mm 992 X 87 X 659 mm 992 X 326 X 713 mm Weight With stand 22 8 kg 24 0 kg E...

Page 44: ...This page is intentionally left blank ...

Reviews: