Port Configuration
3-135
3
Statically Configuring a Trunk
Command Usage
• When configuring static trunks, you may not be
able to link switches of different types,
depending on the manufacturer’s
implementation. However, note that the static
trunks on this switch are Cisco EtherChannel
compatible.
• To avoid creating a loop in the network, be sure
you add a static trunk via the configuration
interface before connecting the ports, and also
disconnect the ports before removing a static
trunk via the configuration interface.
Command Attributes
•
Member List
(Current)
– Shows configured trunks (Trunk ID, Unit, Port).
•
New
– Includes entry fields for creating new trunks.
- Trunk
– Trunk identifier. (Range: 1-8)
-
Port
– Port identifier.
(Range: 1-28 on iES4028F/iES4028FP, 1-24 on iES4024GP)
Web
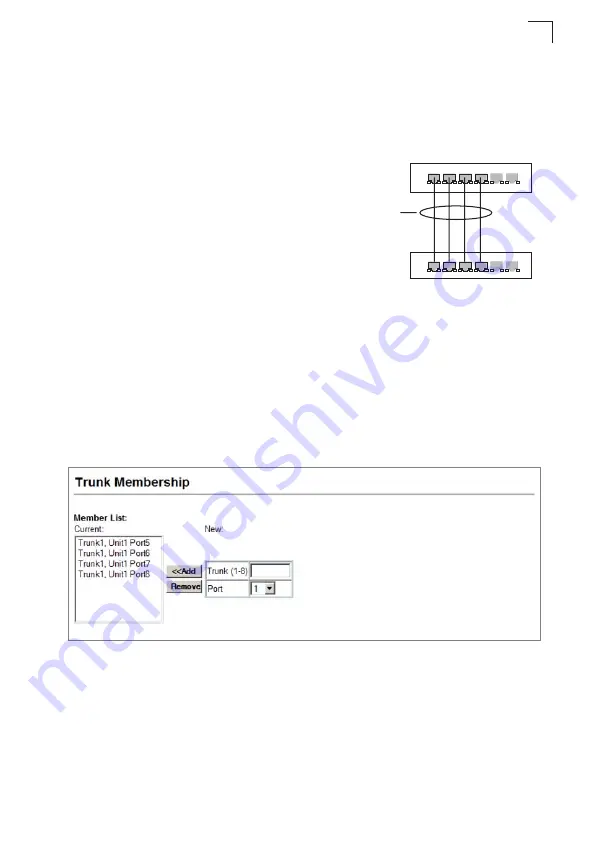
– Click Port, Trunk Membership. Enter a trunk ID of 1-8 in the Trunk field,
select any of the switch ports from the scroll-down port list, and click Add. After you
have completed adding ports to the member list, click Apply.
Figure 3-80 Configuring Static Trunks
active
links
}
statically
configured
Summary of Contents for iES4024GP
Page 1: ...iES4028F 4028FP 4024GP ...
Page 4: ...iv This page is intentionally left blank ...
Page 10: ...x This page is intentionally left blank ...
Page 28: ...Contents xxviii This page is intentionally left blank ...
Page 32: ...Tables xxxii This page is intentionally left blank ...
Page 46: ...Introduction 1 10 1 This page is intentionally left blank ...
Page 336: ...Configuring the Switch 3 280 3 This page is intentionally left blank ...
Page 688: ...Command Line Interface 4 352 4 This page is intentionally left blank ...
Page 702: ...Glossary Glossary 8 This page is intentionally left blank ...
Page 710: ...Index 8 Index This page is intentionally left blank ...
Page 711: ...This page is intentionally left blank ...
Page 712: ...iES4028F 4028FP 4024GP ...


