©
2005 Verizon Wireless
8
ActiveSync icon in the task tray is green.
NOTE
: Either a Standard or a Guest partnership is OK for installing the software.
16.
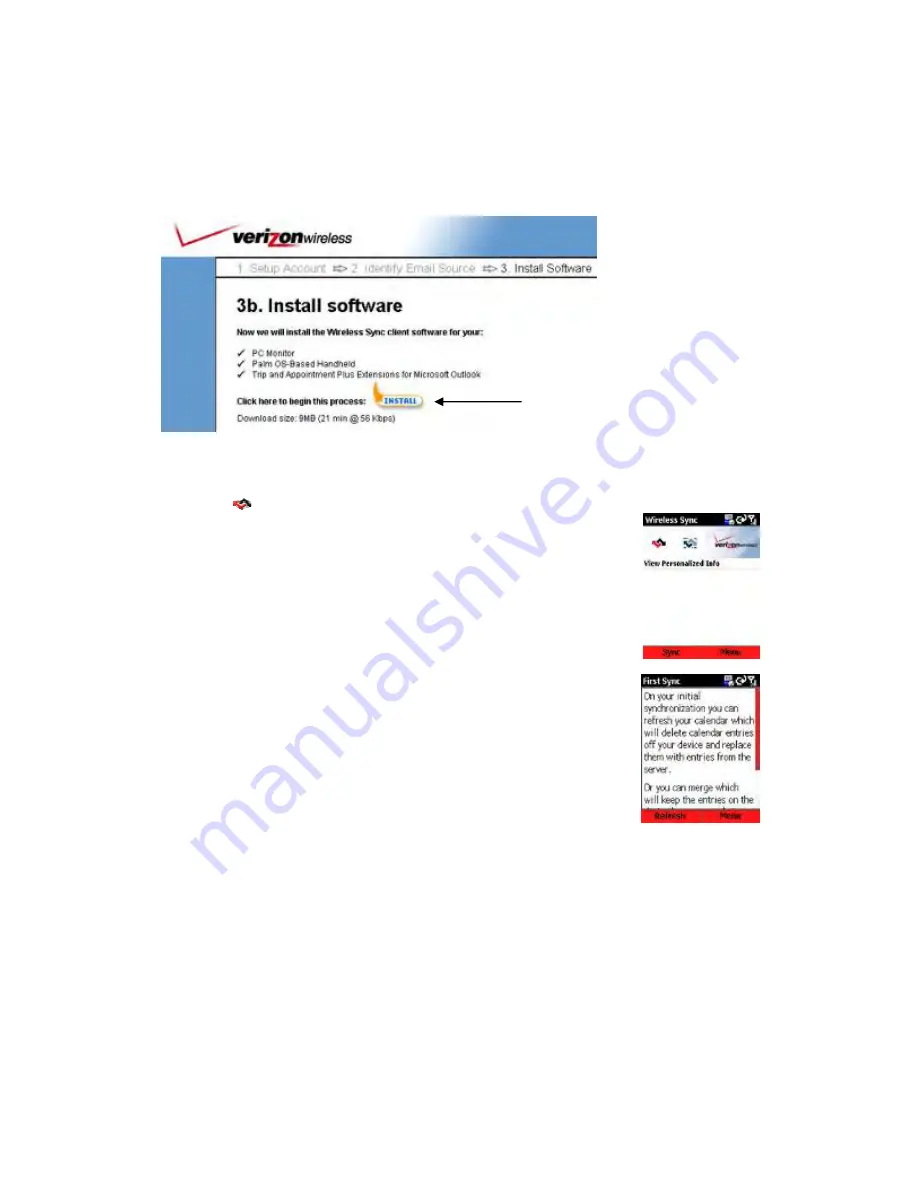
Click
Install
then carefully read and follow the prompts provided from the installer to install
the software on your PC.
17. After the software install is complete, remove the device from the cradle or cable.
18. If not already open, launch the Wireless Sync Client on the Samsung i600.
19.
Select the
button to initiate a Wireless Sync.
20. Enter your Wireless Sync password when prompted.
21. On the first sync event you will be prompted to
Refresh
or
Merge
the
data in Wireless Sync with the data on the device.
If you selected
Corporate email
or
Both
when configuring your email
source, it is recommended to select the
Refresh
option.
If you selected
Internet email
as your email source, it is
recommended to select the
Merge
option.
22. Your device is configured and synchronized with Wireless Sync.
Keep the device radio powered on and you will continue to get your
information pushed to you!
NEXT STEPS:
-
If you selected the
Corporate email
option for your email source, please continue with
the configuration of your PC Monitor. Refer to the
Quick Start Guide for Microsoft
Exchange
or
Quick Start Guide for Lotus Domino
for more information. Once the PC
Monitor is configured, you will begin to receive your email and PIM (calendar, contacts,
tasks and notes) data wirelessly.
-
If you selected the
Internet email
option you will begin to receive your email after the
Wireless Sync server has successfully loaded your messages from the email source.
This may take several minutes depending on the amount of mail on your server.
Click here!
NOTE:
Your install
checklist may differ
from what is shown
here, depending on
the email source
you selected during
the setup process


