background image

ENG

3

PREP

ARA

TION

Precautions

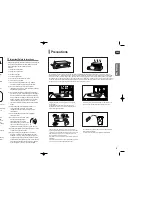
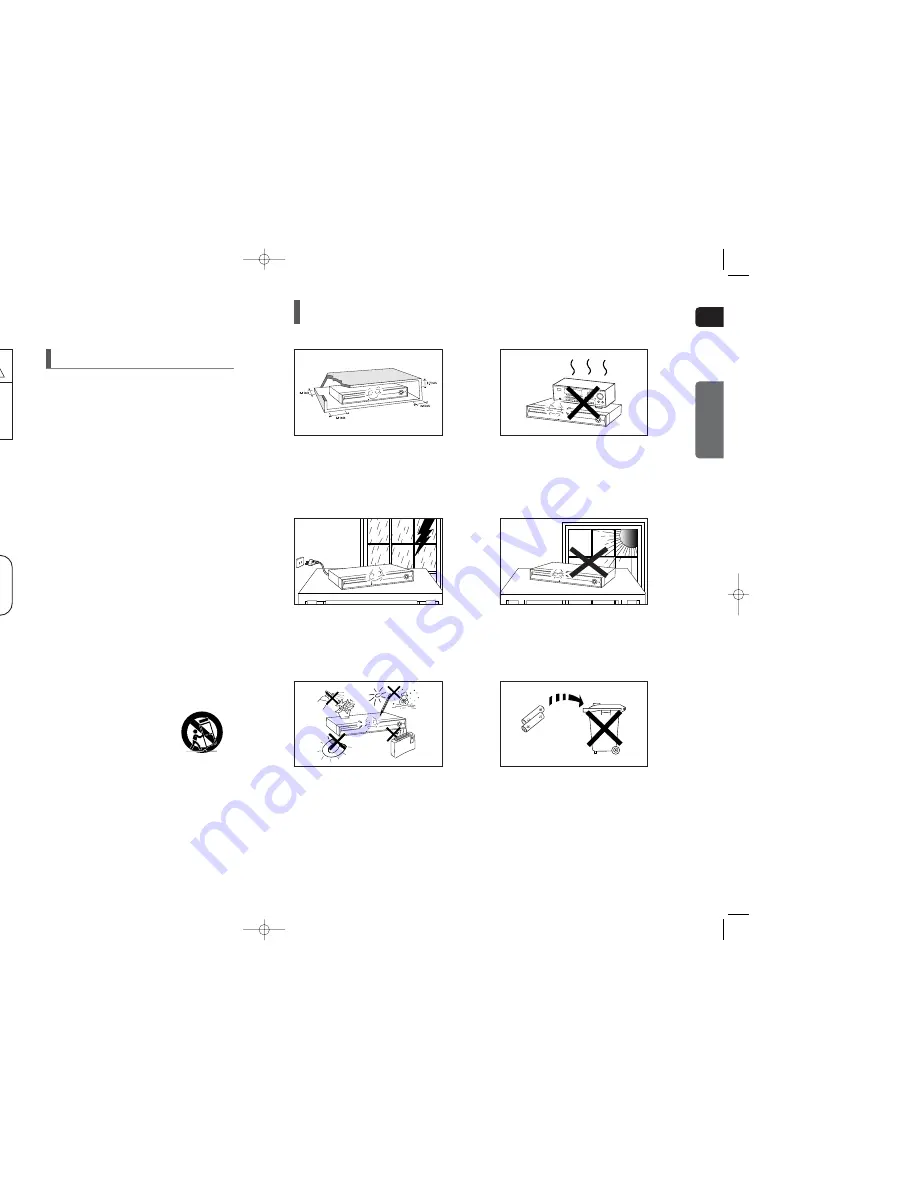
Ensure that the AC power supply in your house complies with the identification sticker located on the back of your player. Install your 
player horizontally, on a suitable base (furniture), with enough space around it for ventilation (3~4inches). Make sure the ventilation slots
are not covered. Do not stack anything on top of the player. Do not place the player on modules or other equipment which may become
hot. Before moving the player, ensure the disc tray is empty. This player is designed for continuous use. Switching off the Home Theater to
the stand-by mode does not disconnect the electrical supply. In order to disconnect the player completely from the power supply, remove
the main plug from the wall outlet, especially when left unused for a long period of time.

Protect the player from moisture (i.e. vases) , and excess heat
(e.g.fireplace) or equipment creating strong magnetic or electric fields
(i.e.speakers...). Disconnect the power cable from the AC supply if the
player malfunctions. Your player is not intended for industrial use.
Use of this product is for personal use only.
Condensation may occur if your player or disc has been stored in cold
temperatures.
If transporting the player during the winter, wait approximately 2 hours
until the unit has reached room temperature before using.

Phones

During thunderstorms, disconnect the AC main plug from
the wall outlet.
Voltage peaks due to lightning could damage the unit.
The Mains plug is used as a disconnect device and shall
stay readily operable at any time.

Do not expose the unit to direct sunlight or other heat sources.
This could lead to overheating and malfunction of the unit.

The batteries used with this product contain chemicals that are

harmful to the environment. 

Do not dispose of batteries in the general household trash.

2

Safety Warnings

RISK OF ELECTRIC SHOCK. 

DO NOT OPEN

TO REDUCE THE RISK OF ELECTRIC SHOCK,
DO NOT REMOVE REAR COVER (or BACK).
NO USER SERVICEABLE PARTS INSIDE. 
REFER SERVICING TO QUALIFIED SERVICE
PERSONNEL.

CAUTION

Use of controls, adjustments or performance of 
procedures other than those specified herein may result
in hazardous radiation exposure.

CAUTION : INVISIBLE LASER RADIATION WHEN OPEN

AND INTERLOCKS DEFEATED, AVOID
EXPOSURE TO BEAM.

This Compact Disc player is classified as a CLASS 1
LASER product.

WARNING

To reduce the risk of fire or electric shock, do not expose
this appliance to rain or moisture.

CAUTION

Apparatus shall not be exposed to dripping or splashing
and no objects filled with liquids, such as vases, shall 
be placed on the apparatus.

This reminder is provided to call the CATV system
installer’s attention to Section 820~40 of the NEC 
which provides guidelines for proper grounding and, 
in particular, specifies that the cable ground shall 
be connected to the grounding system of the building,
as close to the point of cable entry as practical.

CLASS 1 LASER PRODUCT
KLASSE 1 LASER PRODUKT
LUOKAN 1 LASER LAITE
KLASS 1 LASER APPARAT
PRODUCTO LASER CLASE 1

This symbol indicates “dangerous voltage”
inside the product that presents a risk of 
electric shock or personal injury.

This symbol indicates important instructions
accompanying the product.

Read these operating instructions carefully before using the
unit. Follow all the safety instructions listed below. Keep
these operating instructions handy for future 
reference.

1)   Read these instructions.

2)   Keep these instructions.

3)   Heed all warnings.

4)   Follow all instructions.

5)   Do not use this apparatus near water.

6)   Clean only with dry cloth.

7)   Do not block any ventilation openings, Install in

accordance with the manufacturer's instructions.

8)   Do not install near any heat sources such as 

radiators, heat registers, or other apparatus (including
amplifiers) that produce heat.

9)   Do not defeat the safety purpose of the polarized or

grounding- type plug. A polarized plug has two blades
with one wider than the other. A grounding type plug
has two blades and a third grounding prong. The wide
blade or the third prong are provided for your safety. 
If the provided plug does not fit into your outlet, 
consult an electrician for replacement of the obsolete
outlet.

10) Protect the power cord from being walked on or

pinched particularly at plugs, convenience 
receptacles, and the point where they exit from
the apparatus.

11) Only use attachments/accessories specified by 

the manufacturer.

12) Use only with the cart, stand, tripod,

bracket, or table specifi ed by 
the manufacturer, or sold with 
the apparatus. When a cart is used, 
use caution when moving the cart/
apparatus combination to avoid injury from tip-over.

13) Unplug this apparatus during lightning storms or when

unused for long periods of time.

14) Refer all servicing to qualified service personnel.

Servicing is required when the apparatus has been
damaged in any way, such as the power-supply cord
or plug is damaged, liquid has been spilled or objects
have fallen into the apparatus. Service is also required
if the apparatus has been exposed to rain or moisture,
does not operate normally, or has been dropped.

CLASS 1 LASER PRODUCT

Note to CATV system installer

Important Safety Instructions

X40(1~39P) SEA  2007.2.8  2:31 PM  Page 2

Summary of Contents for HT-X40

Page 1: ...EM HT X40 COMPACT DIGITAL AUDIO ENG Instruction Manual AH68 01660E REV 01 AH68 01937R REV 00 or comments relating to Samsung products e SAMSUNG customer care center g Electronics America Inc SAMSUNG 7267864 www samsung com ...

Page 2: ...n the general household trash ay result N OPEN OID S 1 expose ashing shall tem EC and all uilding ge f ions Read these operating instructions carefully before using the unit Follow all the safety instructions listed below Keep these operating instructions handy for future reference 1 Read these instructions 2 Keep these instructions 3 Heed all warnings 4 Follow all instructions 5 Do not use this a...

Page 3: ...o Select One of the 3 Wallpaper Settings you ve made 43 DVD Playback Mode 44 DivX R registration 44 Setting the Speaker Mode 44 Setting the Delay Time 45 Setting the Test Tone 46 Setting the Audio 47 Setting the DRC Dynamic Range Compression 48 Setting the AV SYNC 48 Setting the HDMI Audio 49 Sound Field DSP EQ Function 50 Dolby Pro Logic II Mode 51 Dolby Pro Logic II Effect 52 MISCELLANEOUS Liste...

Page 4: ...les may be played For files encoded in Variable Bit Rate VBR format i e files encoded in both low bit rate and high bit rate e g 32Kbps 320Kbps the sound may skip during playback A maximum of 500 tracks can be played per CD A maximum of 300 folders can be played per CD DVD R RW CD R RW DivX Discs Since this product only provides encoding formats authorized by DivX Networks Inc a DivX file created ...

Page 5: ...these jacks 4 FM 75Ω COAXIAL Jack 5 5 1 Channel Speaker Output Connector 6 Cooling Fan 7 TX Card Connection WIRELESS 8 AUX IN 2 Connectors 9 HDMI Output Jack 8 9 5 1 6 7 3 4 2 PREPARATION ay Pause button olume Control ower button andby indicator 9 AUX IN 1 Connector 10 USB Connector 11 Tuning Up Skip button Tuning Down Skip button 6 3 4 11 2 5 RACK indicator ROGRAM indicator EPEAT indicator UNER i...

Page 6: ...ntal angle of up to 30 from the remote control sensor 1 DVD RECEIVER button 2 TV button 3 TV VIDEO button 4 POWER button 5 Number 0 9 buttons 6 REMAIN button 7 STEP button 8 Tuning Preset CD Skip buttons 9 VOLUME button 10 MENU button 11 AUDIO button 12 PL II EFFECT button 13 PL II MODE button 14 TUNER MEMORY SD Standard Definition HD High Definition button 15 ZOOM button 16 SLEEP button 17 SLOW M...

Page 7: ...en substances into the duct hole of the subwoofer speaker Do not hang the subwoofer on the wall through the duct hole 1 2 Connecting the Speakers Black Red HT X40 Front Speaker R Rear Speaker R Subwoofer Center Speaker Front Speaker L Rear Speaker L Speakers Rear Speakers Place these speakers behind your listening position If there isn t enough room place these speakers so they face each other Pla...

Page 8: ...AIN button for 5 seconds The STANDBY LED on the front panel of the wireless receiver module blinks 2 With the wireless receiver module turned on use a ball point pen or a toothpick to press the RESET button on the back of the unit The STANDBY LED on the front panel of the wireless receiver module blinks 2 Times 3 Turn on the main unit The LINK LED of the wireless receiver module is lit and the Res...

Page 9: ...ce This function allows the user to select the screen resolution for HDMI output What is HDMI High Definition Multimedia Interface This device transmits a DVD video signal digitally without the process of converting to analog You will get sharper digital pictures when using an HDMI connection 1 Connect the main unit of the Home Theater to a Samsung TV with an HDMI cable See page 16 2 Set the Anyne...

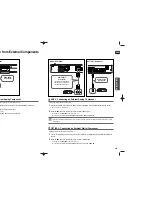
Page 10: ...PTICAL Rear Panel Optical Cable not supplied nel Audio Cable not supplied rnal Analog Component og Component through the main unit Theater to the Audio Out of the external analog component rol to select AUX1 input ain unit TAL IN AUX 1 AUX 2 USB FM AUX2 Connecting an External Analog Component Analog signal components such as a VCR 1 Connect the AUX IN 2 Audio on the Home Theater to the Audio Out o...

Page 11: ...ction available with DVD or DVD R DVD RW discs that have been recorded and finalized in Video Mode This involves a function available with a data CD CD R or CD RW This involves a function available with CD R RW discs This involves a function available with CD R RW discs This involves a function available with MPEG4 discs DVD R RW CD R or CD RW This involves a case where a function does not operate...

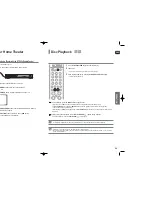
Page 12: ...ding on the content of the disc the initial screen may appear different Any piracy could not be runnable in the player Otherwise it violates the CSS Content Scrambling System a copy protection system recommendations To stop playback press the STOP button during playback If pressed once PRESS PLAY is displayed and the stop position will be stored in memory If the PLAY PAUSE button or ENTER button i...

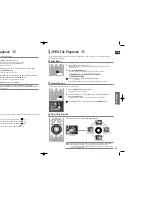
Page 13: ...orted by this product are 5120 x 3480 or 19 0 MPixel for standard JPEG files and 2048 x 1536 or 3 0 MPixel for progressive image files If a JPEG file is played when the HDMI output resolution is 720p 1080i the mode is automat ically converted to 480p mode Slide Mode 1 Press the DIGEST button during playback JPEG files will be shown in 9 windows 2 Press the Cursor button to select the desired image...

Page 14: ...to provide audio and video data over the Internet in real time MPEG4 is used for video encoding and MP3 for audio encoding so that the users can watch a movie at near DVD quality video and audio DivX Digital internet video eXpress 1 Supported Formats This product only supports the following media formats If both video and audio formats are not supported the user may experience problems such as bro...

Page 15: ...al and remaining time of a title or chapter being played Each time the Remain button is pressed Checking the Remaining Time Press the button Each time the button is pressed during playback the playback speed changes as follows Fast Playback 2X 4X 8X 32X PLAY 2X 4X 8X 32X PLAY Press the SLOW button Each time the button is pressed during playback the playback speed changes as follows Slow Playback N...

Page 16: ...essed during playback the repeat playback mode changes as follows 1 Press the INFO button twice 2 Press the Cursor button to move to REPEAT PLAYBACK display 3 Press the Cursor button to select the desired Repeat Playback mode To select another album and track repeat Steps 2 and 3 above 4 Press the ENTER button For DivX MP3 and JPEG discs you cannot select Repeat Play from the information dis play ...

Page 17: ... Cursor button to move to ANGLE display 3 Press the Cursor button or numeric buttons to select the desired angle Each time the button is pressed the angle changes as follows This function allows you to view the same scene in different angles Angle Function 2 3 3 3 1 3 The Angle function works only with discs on which multiple angles have been recorded 1 Press the ZOOM button 2 Press the Cursor but...

Page 18: ...le 1 Press the INFO button twice 2 Press the Cursor button or numeric buttons to select the desired audio language Depending on the number of languages on a DVD disc a different audio language ENGLISH SPANISH FRENCH etc is selected each time the button is pressed Audio Language Selection Function SP 2 3 FR 3 3 1 Press the INFO button twice 2 Press the Cursor button to move to SUBTITLE display 3 Pr...

Page 19: ...be different depending on the disc 1 In Stop mode press the MENU button 2 Press the Cursor button to move to the DISC MENU and then press the ENTER button When you select Disc Menu and it is not supported by the disc the This menu is not supported message appears on the screen 3 Press the Cursor button to select the desired item 4 Press the ENTER button You can use the menus for the audio language...

Page 20: ...REMOVE USB e the USB cable ck press the button more than one file and you press the button the next file is selected more than one file and you press the button the previous file is selected he disc at a faster speed press the button during playback press either button the playback speed will change as follows 32x Normal Compatible Devices 1 USB devices that support USB Mass Storage v1 0 USB devic...

Page 21: ...itor For a standard TV select either 4 3LB or 4 3PS option according to personal preference Select 16 9 if you have a widescreen TV 1 In Stop mode press the MENU button 2 Press the Cursor button to move to Setup and then press the ENTER button 3 Press the Cursor button to move to TV DISPLAY and then press the ENTER button 4 Press the Cursor button to select the desired item and then press the ENTE...

Page 22: ... image you like as background wallpaper 1 During playback press the PLAY PAUSE button when an image you like appears 2 Press the LOGO button COPY LOGO DATA will be displayed on the TV screen 3 The power will turn off and then back on The selected wallpaper will be displayed You can select up to 3 wallpaper settings Setting the Wallpaper To Select One of the 3 Wallpaper Settings you ve made ion wor...

Page 23: ...ace all speakers within this circle Ideal SURROUND SPEAKER placement Distance between Df and Dc Delay Time 0 inch 13 6 inches 27 2 inches 40 8 inches 4 5 feet 5 6 feet 0 ms 1 ms 2 ms 3 ms 4 ms 5 ms Distance between Df and Dc Delay Time 0 inch 40 8 inches 6 7 feet 10 0 feet 13 4 feet 16 7 feet 0 ms 3 ms 6 ms 9 ms 12 ms 15 ms With Dolby Pro Logic II the delay time may be different for each mode With...

Page 24: ...dB to 6dB The sound gets louder as you move closer to 6dB and quieter as you get closer to 6dB Manually Adjusting the Speaker Volume and Balance with the SOUND EDIT Button onnections de press the MENU button ursor button to move to Audio and then press the ENTER button Cursor button to move to TEST TONE and then press button ne will be sent to L C R SR SL SW in order ER button is pressed again at ...

Page 25: ...ffect is smaller RETURN button to return to the previous level EXIT button to exit the setup screen Range Compression The audio signals transmitted over the HDMI Cable can be toggled ON OFF 1 In Stop mode press the MENU button 2 Press the Cursor button to move to Audio and then press the ENTER button 3 Press the Cursor button to move to HDMI AUDIO and then press the ENTER button 4 Press the Cursor...

Page 26: ... hall s the feeling of a movie theater s the feel of being in a grand church is for normal listening You can select the desired Dolby Pro Logic II audio mode Press the PL II MODE button Each time the button is pressed the mode changes as follows Dolby Pro Logic II Mode PRO LOGIC II MUSIC When listening to music you can experience sound effects as if you are listening to the actual performance CINE...

Page 27: ...NER button to select the FM band 2 Tune in to the desired station Automatic Tuning 1 When the button is pressed a preset broadcast station is selected Automatic Tuning 2 Press and hold the button to automatically search for active broadcasting stations Manual Tuning Briefly press the button to increase or decrease the frequency incrementally 1 Press the FUNCTION button to select the FM band 2 Sele...

Page 28: ...your movie viewing Press the DIMMER button Each time the button is pressed the brightness of front display will be adjusted Adjusting Display Brightness This is useful when answering a doorbell or telephone call Press the MUTE button MUTE appears in the display To restore the sound press the button again Mute Function MISCELLANEOUS io esetting FM 89 10 in the memory nit does not receive AM broadca...

Page 29: ...ears Magnavox Marantz Matsui MGA Mitsubishi MGA No Brand Code 56 57 58 01 15 01 02 03 04 05 06 07 08 09 10 11 12 13 14 01 18 40 48 57 58 81 59 60 18 03 03 18 25 97 03 18 46 15 03 05 61 82 83 84 62 03 59 61 63 03 02 03 04 15 16 17 18 19 20 21 22 23 24 25 26 27 28 29 30 32 34 35 36 48 59 90 40 03 03 15 40 46 59 61 64 82 83 84 85 19 65 03 03 06 40 56 59 66 67 68 40 15 18 50 59 69 45 56 59 67 86 70 59...

Page 30: ...in 4 3 ratio only Refer to the DVD disc jacket and then select the appro priate function Aspect ratio cannot be changed MISCELLANEOUS nction properly If the problem you are experiencing is not listed below e unit disconnect the power cord and contact the nearest authorized the power cord plugged securely into the outlet urn off the power and then turn it back on heck the region number of the DVD V...

Page 31: ... 1353 Moldavian 1513 Siswati 1052 Azerbaijani 1217 Hindi 1356 Marathi 1514 Sesotho 1053 Bashkir 1226 Croatian 1357 Malay 1515 Sundanese 1057 Byelorussian 1229 Hungarian 1358 Maltese 1516 Swedish 1059 Bulgarian 1233 Armenian 1363 Burmese 1517 Swahili 1060 Bihari 1235 Interlingua 1365 Nauru 1521 Tamil 1069 Bislama 1239 Interlingue 1369 Nepali 1525 Tegulu 1066 Bengali Bangla 1245 Inupiak 1376 Dutch 1...

Page 32: ...ayer Product Company Type MP3 Player MOMOBAY UX 2 Dvico USB 2 0 Product Company Type USB External HDD Specifications MISCELLANEOUS Speaker system Impedance Frequency range Output sound pressure level Rated input Maximum input Dimensions W x H x D Weights S P E A K E R Subwoofer speaker 3Ω 35Hz 155KHz 86dB W M 135W 270W 7 1 in x 12 6 in x 15 4 in 12 1 Ibs Front Rear Center 3 5 in x 6 6 in x 3 7 in ...

Page 33: ...Contact SAMSUNG WORLD WIDE If you have any questions or comments relating to Samsung products please contact the SAMSUNG customer care centre Region Country Customer Care Center Web Site ...

Reviews: