35
Basic Operation
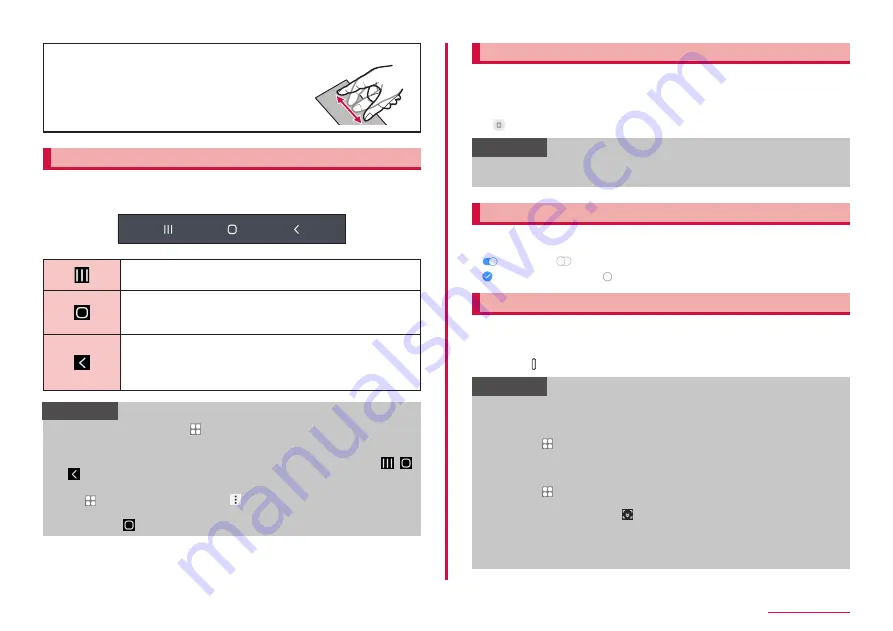
■ Pinch out/Pinch in
With touching a displayed image or web page
with your two fingers, widen (pinch out) or
narrow (pinch in) the distance to zoom in/out
the content.
Using navigation bar
Icons for operating the screen are displayed at the bottom of the screen
on the navigation bar. The names and functions of the icons are described
below.
History button
Tap to display the most recently used apps.
Home button
The Home screen appears. Touch and hold to launch the
Google assistant.
Back button
The screen returns to the previous screen. It also closes
pop-up screen, option menus and the notification panel. It
can also quit some apps.
Information
• From the Home screen, → "Settings" → "Display" → "Navigation
bar" to set of navigation bar, the order of the button, etc. Set type
of navigation bar to "Full screen gestures", hide navigation bar and
be able to use screen space widely. If you use function of
/
/
when navigation bar is not displayed, drag up the bar under the
screen.
• Tap → "Settings" → "Apps" →
→
"Default apps" → "Assist app"
→ "Device assistance app", select the app booting when touching
and holding [Home button].
Switching the orientation of the display automatically
Motion sensor which detects the terminal orientation (vertical/horizontal)
and tilt can switch the screen view automatically.
1
Open the Notification panel (P.42)
2
Information
• Home screen or some functions may not automatically switch the
view orientation.
Switching settings
Tap the toggle switches or drag them and tap checkboxes, to toggle the
ON/OFF and enable/disable settings.
•
is ON, and
is OFF.
•
shows available, and
shows unavailable.
Saving display content as image
Save screen content as image (screen capture).
1
Display a screen you want to save as an image
2
Press [Side key] and Volume DOWN key at the same time
Information
• Screen capture may not be available for some apps.
• Captured images are saved in the jpg format, and you can check
them in "Gallery"/"Photos" app.
• When set → "Settings" → "Advanced features" → "Motions and
gestures" → "Palm swipe to capture" to ON on the Home screen,
screen capture is available by swiping the screen of the terminal
from right to left or vice versa with the side of your hand.
• When set → "Settings" → "Advanced features" → "Screenshots" →
"Screenshot toolbar" to ON on the Home screen, menu is displayed
after screen capture. Tap (Scroll capture) from displayed menu to
capture the area that is able to display by scrolling as one image.
Captured images are saved in the jpg format. Turning on "Delete
shared screenshots" automatically deletes the screen capture after
you share it.
Summary of Contents for Galaxy A41
Page 1: ...INSTRUCTION MANUAL SC 41A...


