


English - 71
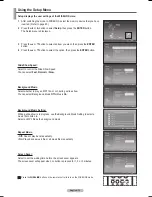
Zooming-In
1
After switching the mode to WISELINK, select the memory device that you have
inserted. (Refer to page 65)
2
Press the ◄ or ► button to select
Photo
, then press the
ENTER
button.
JPEG files and existing folders are displayed.
3
Press the ▲/▼/◄/► buttons to select a file, then press the
ENTER
button.
Pressing the button over a photo icon shows the currently selected photo in full
screen.
4
Press the
INFO
button to display the option (
Start Slide Show
,
Rotate
,
Zoom
,
List
).
Press the ▲ or ▼ button to select
Zoom
, then press the
ENTER
button.
Press the ▲ or ▼ button to select desired item, then press the
ENTER
button.
(
X1
→
X2
→
X4
)
• X1:
Restore the photo to its original size.
• X2:
Zoom-in to the photo X2.
• X4:
Zoom-in to the photo X4.
To move the enlarged photo image up/down/left/right, press the ▲/▼/◄/►
buttons.
To exit WISELINK mode, press the
WISELINK
button on the remote control.
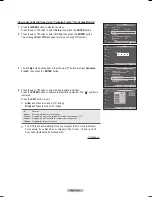
Zoom function information icon
(Displayed at the top left of the screen)
.
Icon
Current OSD
Function
Zoom (x1)
Restore a photo to its original size.
Zoom (x2)
Zoom-in to a photo x2.
Zoom (x4)
Zoom-in to a photo x4.
/ / /
Move the zoomed-in photo up/down/right/left.
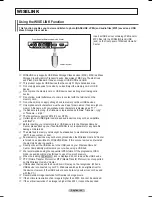
Press the
WISELINK
button on the remote control to turn on the WISELINK mode.
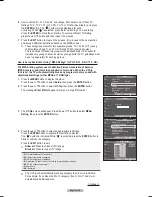
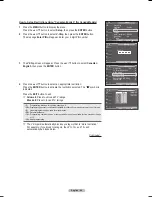
RETURN
FAV.CH AUTO PROG. ADD/DEL
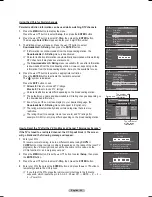
Start Slide Show
Rotate : 0˚
Zoom : X1
List
Exit
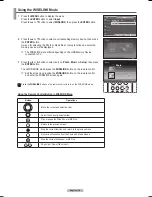
Photo 0001
File 2
File 4
File 9
File 10
File 11
File 12
File 13
File 5
File 6
File 7
File 8
None
1/10 Page
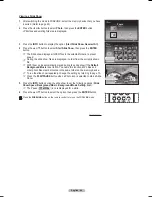
Photo
400x340
53 KB
May 1, 2007
1 / 14
CELLDISK2.0
315MB/495MB Free
Photo 0001
Select
Option Move
View Return
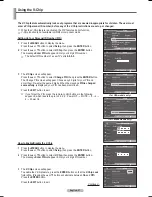
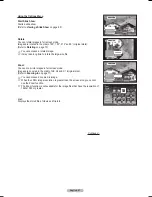
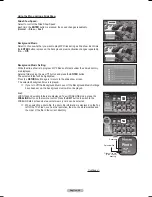
Photo
Music
Setup
CELLDISK2.0
315MB/495MB Free
Move
Enter
Return
Photo
Exit
Start Slide Show
Rotate : 0˚
Zoom : X1
List
X1
X2
X4
BN68-01094W-01Eng.indb 71
2007-10-08 ¿ÀÈÄ 6:07:04