background image

English - 39

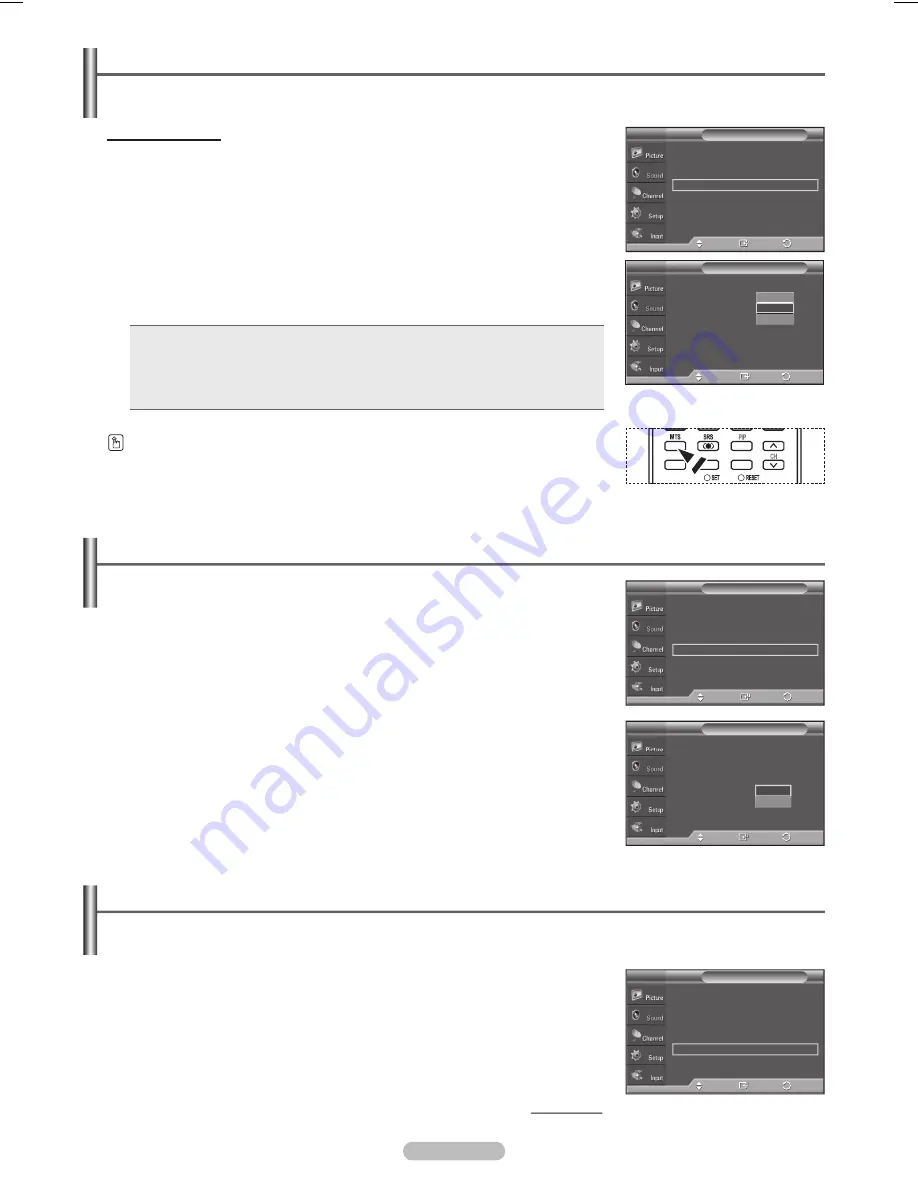
Multi-Track Sound

Press the 

MENU

 button to display the menu. 

Press the ▲ or ▼ button to select 

Sound

, then press the 

ENTER

 button.

Press the ▲ or ▼ button to select 

Multi-Track Options

, then press the 

ENTER


button.

Press the 

ENTER

 button to select 

Multi-Track Sound

Press the ▲ or ▼ button to select a setting you want, then press the 

ENTER


button.

  Press the 

EXIT

 button to exit.

•  Choose 

Mono

 for channels that are broadcasting in mono, or if you are having a 

difficulty receiving a stereo signal.

• Choose 

Stereo

 for channels that are broadcasting in stereo.

•  Choose 

SAP

 to listen to the Separate Audio Program, which is usually a foreign-

language translation.

Press the 

MTS

 buttons on the remote control to select 

Mono

Stereo

, or 

SAP

.

Choosing a Multi-Channel Sound (MTS) Track - Analog

Depending on the particular program being broadcast, you can listen to Mono, Stereo or SAP.

Preferred Language : English 

Multi-Track Sound  : Stereo 

Multi-Track Options

T  V

Mono

Stereo

SAP

Enter

Move

RETURN

FAV.CH AUTO PROG. ADD/DEL

Mode 

: Custom 

Equalizer 


SRS TruSurround XT : Off 

Multi-Track Options        

Auto Volume 

: Off 

Internal Mute 

: Off 

Sound Select 

: Main 

Digital Output 

: Dolby Digital  ►

Sound

T  V

Enter

Move

Return

Return

Press the 

MENU

 button to display the menu. 

Press the ▲ or ▼ button to select 

Sound

, then press the 

ENTER

 button.

Press the ▲ or ▼ button to select 

Auto Volume

, then press the 

ENTER

 button.

Press the ▲ or ▼ button to select 

Off

 or 

On

, then press the 

ENTER

 button.

  Press the 

EXIT

 button to exit.

Automatic Volume Control

Reduces the difference in volume level among broadcasters.

Mode 

: Custom 

Equalizer 


SRS TruSurround XT : Off 

Multi-Track Options        

Auto Volume 

: Off 

Internal Mute 

: Off 

Sound Select 

: Main 

Digital Output 

: Dolby Digital  ►

Sound

T  V

Enter

Move

Mode 

: Custom 

Equalizer 


SRS TruSurround XT : Off 

Multi-Track Options      

Auto Volume 

: Off 

Internal Mute 

: Off 

Sound Select 

: Main 

Digital Output 

: Dolby Digital Mode 

Sound

T  V

Off

On

Enter

Move

Return

Return

Press the 

MENU

 button to display the menu. 

Press the ▲ or ▼ button to select 

Sound

, then press the 

ENTER

 button.

Press the ▲ or ▼ button to select 

Internal Mute

, then press the 

ENTER

 button.


Continued...

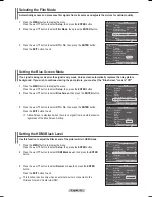
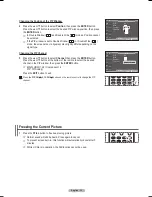
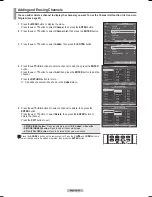
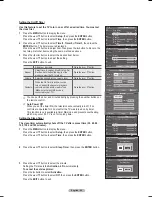
Selecting the Internal Mute

Sound output from the TV speakers is muted. This is useful when you want to listen to audio through your sound 

system instead of the TV. 

Mode 

: Custom 

Equalizer 


SRS TruSurround XT : Off 

Multi-Track Options        

Auto Volume 

: Off 

Internal Mute 

: Off 

Sound Select 

: Main 

Digital Output 

: Dolby Digital  ►

Sound

T  V

Enter

Move

Return

BN68-01094W-01Eng.indb   39

2007-10-08   ¿ÀÈÄ 6:05:29

Summary of Contents for FP-T5094

Page 1: ...FP T5894W Owner s Instructions Register your product at www samsung com global register Record your Model and Serial number here for future reference Model _______________ Serial No _______________ with Wireless Home AV Center ...

Page 2: ...t permanent burned in ghost images in the Plasma TV picture To avoid this vary the programming and images and primarily display full screen moving images not stationary patterns or dark bars On Plasma TV models that offer picture sizing features use these controls to view different formats as a full screen picture Be careful in the selection and duration of television formats used for viewing Unev...

Page 3: ...picture on the screen may be distorted by interference from wireless communications Avoid installation near metal framework furniture or any other metal objects Do not use other wireless devices near the Wireless AV Center and the TV Wireless communication Frequency Range 5 15 5 825GHz Do not place any object on or insert anything into the holes of the top of Wireless Home AV Center Make sure to t...

Page 4: ...nstalling the Wireless Home AV Center on a table underneath the PDP TV Example of installing at 26 feet 8m distance 2 Installing the Wireless Home AV Center on a table next to you Avoid installing in these locations 1 There are people or other obstacles between the Wireless Home AV Center and the TV 2 There is metal casing around the Wireless Home AV Center 3 There is a cover over the Wireless Hom...

Page 5: ...a TV uses a panel consisting of 1 230 000 SD level to 3 150 000 HD level pixels which require sophisticated technology to produce However there may be a few bright or dark pixels on the screen These pixels will have no impact on the performance of the product Avoid operating the TV at temperatures below 5 C 41 F A still image displayed too long may cause permanent damage to the Plasma TV Panel Wat...

Page 6: ...ezing the Current Picture 36 Sound Control Using Automatic Sound Settings 37 Customizing the Sound 37 Setting the TruSurround XT 38 Choosing a Multi Channel Sound MTS Track Digital 38 Choosing a Multi Channel Sound MTS Track Analog 39 Automatic Volume Control 39 Selecting the Internal Mute 39 Listening to the Sound of the Sub PIP Picture 40 Choosing a Digital Sound Format Dolby Digital or PCM 41 C...

Page 7: ...Accessories Please make sure the following items are included with your TV and Wireless Home AV Center If any items are missing contact your dealer RET URN FAV CH Remote Control BN59 00655A AAA Batteries 4301 000103 Power Cord 3903 000144 Owner s Instructions Quick Setup Guide Warranty Card Registration Card Safety Guide Manual Cleaning Cloth Cover Bottom Screws 2ea Refer to page 77 Ferrite Core f...

Page 8: ...the remote control 2 MENU Press to see an on screen menu of your TV s features 3 VOL Press to increase or decrease the volume In the on screen menu use the VOL buttons as you would use the and buttons on the remote control 4 CH Press to change channels In the on screen menu use the CH buttons as you would use the and buttons on the remote control 5 POWER Press to turn the TV on and off Power Indic...

Page 9: ...rd for serial data signals connected between a DTE ie TV and a DCE ie Wall Mount Viewing the Connection Panel WIRELESS HOME AV CENTER Front Panel Jacks Use the front panel jacks to connect a component that is used only occasionally such as a camcorder or video game 1 HEADPHONE You can connect a set of headphones if you wish to watch a television program without disturbing other people in the room ...

Page 10: ...og audio inputs An optional HDMI DVI cable will be necessary to make this connection When using an optional HDMI DVI adapter the DVI analog audio inputs on your TV allow you to receive left and right audio from your DVI device 3 DVI IN HDMI 1 AUDIO R L Connect to the DVI audio output jack of an external device 4 AUDIO OUT R L Audio outputs to external devices 5 AV IN 1 Video and audio inputs for e...

Page 11: ... DVD player or Set Top Box TV DVD STB CABLE VCR Press to operate your TV DVD player STB CABLE box or VCR Press to backlight the VOL CH and active source button TV DVD CABLE STB VCR on the remote SOURCE Press to display all of the available video sources a PRE CH Tunes to the previous channel b WISELINK This function enables you to view and play photo JPEG and audio files MP3 from an external devic...

Page 12: ...g the antennas to the Wireless Home AV Center This procedure requires an optional combiner adaptor available at most electronics shops 1 Connect both antenna leads to the combiner 2 Plug the combiner into the ANT 1 IN AIR or ANT 2 IN CABLE terminal on the back of the Wireless Home AV Center ANT 1 IN AIR ANT 1 IN AIR UHF VHF ANT 1 IN AIR UHF VHF Installing Batteries in the Remote Control 1 Lift the...

Page 13: ...isconnect the cable that is connected to the ANT IN terminal on your cable box This terminal might be labeled ANT IN VHF IN or simply IN 2 Connect this cable to a two way splitter 3 Connect an Antenna cable between an OUTPUT terminal on the splitter and the IN terminal on the cable box 4 Connect an Antenna cable between the ANT OUT terminal on the cable box and the B IN terminal on the RF A B swit...

Page 14: ...ess Home AV Center and the HDMI OUT on the DVD Player Cable Box Satellite receiver Set Top Box What is HDMI HDMI or high definition multimedia interface is an interface that enables the transmission of digital audio and video signals using a single cable The difference between HDMI and DVI is that the HDMI device is smaller in size and has the HDCP High Bandwidth Digital Copy Protection coding fea...

Page 15: ...s Home AV Center Component Cable Not supplied 1 Audio Cable Not supplied 2 Connecting a VCR Video Connection These instructions assume that you have already connected your Wireless Home AV Center to an antenna or a cable system according to the instructions on pages 12 13 Skip step 1 if you have not yet connected to an antenna or a cable system 1 Unplug the cable or antenna from the back of the Wi...

Page 16: ...2 or S Video Connection Your Samsung Wireless Home AV Center can be connected to the S Video jack of a VCR This connection delivers a better picture when compared to the regular Video connection above 1 To begin follow steps 1 3 in the previous section to connect the antenna or cable to your VCR and your Wireless Home AV Center 2 Connect an S Video Cable between the S VIDEO OUT jack on the VCR and...

Page 17: ... Optical Cable between the DIGITAL AUDIO OUT OPTICAL jacks on the Wireless Home AV Center and the Digital Audio Input OPTICAL jacks on the Digital Audio System When a Digital Audio System is connected to the DIGITAL AUDIO OUT OPTICAL jack Decrease the gain volume of the Wireless Home AV Center and adjust the volume level with the system s volume control What is OPTICAL An optical cable converts an...

Page 18: ...onments If the unit is accidentally set to Shop mode and you want to return to Dynamic Home mode press any Volume button and then hold down the MENU button for five seconds on the TV panel 4 Press the or button to memorize the channels of the selected connection Press the ENTER button to select Start If the antenna is connected to ANT1 IN AIR select Air and if it is connected to ANT 2 IN CABLE sel...

Page 19: ...matically disappear after several seconds Setting the Clock Automatically 9 Press the or button to select On or Off then press the ENTER button Select the time zone in which you live menu is automatically displayed 10 Press the or button to highlight the time zone for your local area Press the ENTER button If clock is not automatically set see page 48 to set the clock 11 The message Enjoy your wat...

Page 20: ...ge channels when you press the second number Using the Button The button is used to select stations that broadcast a digital signal 1 For example for Channel 7 1 press 7 then then 1 HD indicates the TV is receiving a Digital High Definition signal SD indicates the TV is receiving a Standard Definition signal For quick channel change press the number buttons then press the ENTER button Using the PR...

Page 21: ... and the status of certain picture and sound settings Press the INFO button once more or wait approximately 10 seconds and it disappears automatically Viewing the Menus 1 With the power on press the MENU button The main menu appears on the screen Its left side has five icons Picture Sound Channel Setup Input 2 Use the or button to select one of the five icons Then press the ENTER button to access ...

Page 22: ... among STD HRC and IRC then press the ENTER button If you have Digital cable TV select the cable system signal source for both Analog and Digital STD HRC and IRC identify various types of cable TV systems Contact your local cable company to identify the type of cable system that exists in your particular area At this point the signal source has been selected 5 The TV begins memorizing all availabl...

Page 23: ...umber buttons on your remote control enter three digits of the cable box code listed on page 26 of this manual for your brand of cable box Make sure you enter three digits of the code even if the first digit is a 0 If more than one code is listed try the first one 5 Press the POWER button on the remote control Your cable box should turn on if your remote is set up correctly If your cable box does ...

Page 24: ...ns still control your TV s volume Setting Up the Remote to Operate Your Set Top Box 1 Turn off your STB 2 Press the STB button on your TV s remote control 3 Press the SET button on your TV s remote control 4 Using the number buttons on your remote control enter three digits of the STB code listed on page 26 of this manual for your brand of STB Make sure you enter three digits of the code even if t...

Page 25: ... 018 026 037 070 025 038 025 081 082 083 021 056 059 007 008 018 021 026 037 062 006 036 073 074 075 076 021 006 021 024 025 034 005 019 041 075 Brand MITSUBISHI MONTGOMERY WARD MTC MULTITECH NEC OPTIMUS PANASONIC PENTAX PENTEX RESEARCH PHILCO PHILIPS PIONEER PORTLAND PROSCAN QUARTZ QUASAR RADIO SHACK REALISTIC RCA SANSUI SANYO SCOTT SEARS SHARP SHIMTOM SIGNATURE SONY SYLVANIA SYMPHONIC TANDY TASH...

Page 26: ...RISM JANEIL JERROID JVC Code 023 043 018 034 019 035 015 016 017 019 022 045 060 061 062 065 066 067 068 074 069 070 069 018 024 032 027 025 069 070 071 069 069 065 046 047 048 063 064 069 056 022 015 017 020 020 059 063 069 070 Brand LG Goldstar MAGNAVOX MEMOREX MOTOROLA MACOM MITSUBISHI NEXT LEVEL PHILIPS PRIMESTAR PANASONIC PAYSAT PROSCAN RCA RADIOSHACK REALISTIC STS STAR TRAK SKY SKY LIFE SHAC...

Page 27: ...74 122 123 027 065 077 078 079 082 080 125 081 095 066 146 067 068 090 060 061 089 133 135 069 074 074 064 113 071 073 091 110 089 092 091 022 033 115 116 073 051 108 109 073 059 100 106 107 074 075 025 031 057 058 054 055 056 076 093 074 094 073 Brand NORCENT NEXT BASE NEC NANTAUS NESA OPTOMEDIA ELECTRONICS OPTIVIEW ONKYO PHILCO PRINCETON PROSCAN PANASONIC PHILIPS ROTEL RIO RCA RAITE ROWA SAMPO S...

Page 28: ... name the device connected to the input jacks to make your input source selection easier 1 Press the MENU button to display the menu Press the or button to select Input then press the ENTER button Press the or button to select Edit Name then press the ENTER button 2 Press the or button to select AV1 AV2 S Video Component1 Component2 HDMI1 HDMI2 or HDMI3 input jack then press the ENTER button 3 Pre...

Page 29: ...crease the clarity and sharpness of the picture Choose Standard for general TV watching mode Choose Movie when watching movies Press the P MODE button on the remote control to select one of the standard picture settings 3 Press the or button to select Contrast Brightness Sharpness Color or Tint then press the ENTER button 4 Press the or button to decrease or increase the value of a particular item...

Page 30: ... menu Press the ENTER button to select Picture 2 Press the or button to select Digital NR then press the ENTER button 3 Press the or button to select Off Low Medium High or Auto then press the ENTER button Press the EXIT button to exit More Color Tone Cool1 Detailed Settings Size 16 9 Digital NR Auto Active Color On DNIe On Reset OK Picture T V Enter Move Return More Color Tone Cool1 Detailed Sett...

Page 31: ...m the ones above In TV VIDEO S VIDEO and COMPONENT 480i 480p modes all screen modes can be selected 16 9 Zoom1 Zoom2 4 3 In COMPONENT 720p 1080i or HDMI 720p 1080i mode 16 9 4 3 and Wide Fit can be selected In Zoom1 Zoom2 and Wide Fit modes you can move the picture on the screen by pressing the or button You can not change the picture size when PIP is set to Double When Double mode has been set in...

Page 32: ... pressing the or button then press the ENTER button Press the or button until you reach the optimal setting R offset Adjusts the red color darkness G offset Adjusts the green color darkness B offset Adjusts the blue color darkness R gain Adjusts the red color brightness G gain Adjusts the green color brightness B gain Adjusts the blue color brightness Reset The previously adjusted white balance wi...

Page 33: ...e Demo The screen before applying DNIe appears on the right and the screen after applying DNIe appears on the left On Switches on the DNIe mode The DNle function is not supported in the Movie mode More Color Tone Cool1 Detailed Settings Size 16 9 Digital NR Auto Active Color On DNIe On Reset OK Picture T V Enter Move Return More Color Tone Cool1 Detailed Settings Size 16 9 Digital NR Auto Active C...

Page 34: ...ice regardless of the Blue Screen Setting Setting the HDMI Black Level Use this function to adjust the Black Level of the picture while in HDMI mode 1 Press the MENU button to display the menu Press the or button to select Setup then press the ENTER button 2 Press the or button to select HDMI Black Level then press the ENTER button 3 Press the or button to select Normal or Low then press the ENTER...

Page 35: ...urn it on again the PIP window will disappear Press the PIP button on the remote control to activate or deactivate the PIP Analog TV signals can be viewed on the PIP screen while viewing the picture from an external source DVD Set top box etc connected to the Component 1 2 and HDMI 1 2 3 jacks on the main screen Main picture Sub picture Component 1 2 HDMI 1 2 3 Analog TV broadcasts only Changing t...

Page 36: ...t the bottom of the remote to select the desired channel in the PIP window then press the ENTER button MAIN HDMI 1 2 3 Component 1 2 PIP TV Analog Press the EXIT button to exit Press the PIP CH and CH buttons on the remote control to change the PIP channel Freezing the Current Picture 1 Press the STILL button to freeze a moving picture Normal sound will still be heard Press again to cancel To prev...

Page 37: ...atively you can use one of the automatic settings 1 Press the MENU button to display the menu Press the or button to select Sound then press the ENTER button 2 Press the or button to select Equalizer then press the ENTER button 3 Press the or button to select a particular frequency to adjust Press the or button to increase or decrease the level of the particular frequency then press the ENTER butt...

Page 38: ...Track Options then press the ENTER button 3 Press the ENTER button to select Preferred Language Press the or button to choose the language English Spanish or French you want then press the ENTER button Press the EXIT button to exit You can only select the language from among the actual languages being broadcast Press the MTS button on the remote control to listen to the language other than the pre...

Page 39: ...Digital Output Dolby Digital Sound T V Enter Move Return Return 1 Press the MENU button to display the menu Press the or button to select Sound then press the ENTER button 2 Press the or button to select Auto Volume then press the ENTER button 3 Press the or button to select Off or On then press the ENTER button Press the EXIT button to exit Automatic Volume Control Reduces the difference in volum...

Page 40: ...ti Track Options Auto Volume Off Internal Mute Off Sound Select Main Digital Output Dolby Digital Sound T V Enter Move Return Mode Custom Equalizer SRS TruSurround XT Off Multi Track Options Auto Volume Off Internal Mute Off Sound Select Main Digital Output Dolby Digital Sound T V Main Sub Enter Move Return Internal Mute Off Internal Mute On Video No Signal TV Speaker Output Mute Mute AV S Video S...

Page 41: ...marks of Dolby Laboratories 3 Press the or button to select the appropriate format then press the ENTER button 4 Press the EXIT button to exit This function is supported only with HD Digital channels received via an antenna connected to the Wireless Home AV Center Select PCM when lip sync problems occur witth the Wireless Center set to Dolby Digital When an external device is connected to the COMP...

Page 42: ...Channels Digital The Clear Scrambled Channel function is used to filter out scrambled channels after Auto Program is completed It removes the scrambled channels from the list by tuning the digital cable channels This process may take up to 20 30 minutes 1 Press the MENU button to display the menu Press the or button to select Channel then press the ENTER button 2 Press the ENTER button to select A...

Page 43: ... 12 Air 13 Air 14 Air 15 Air 16 Air 17 Air 18 Air 19 Air 20 Air 21 Air 22 Air 23 Delete All Return Channel List Added List Mode Add All Move Enter DTV Air 2 DTV Air 2 Air 3 Air 4 Air 5 Air 6 Air 7 DTV Air 7 1 Air 9 DTV Air 9 1 Air 10 Air 11 DTV Air 11 1 Air 12 Air 13 Air 14 Air 15 Air 16 Air 17 Air 18 Air 19 Air 20 Air 21 Air 22 Air 23 Delete All Watch Add Delete Favorite Return Page 1 2 1 2 5 Pre...

Page 44: ...emorized channels can be set as favorite channels All favorite channels will be shown on the Favorite menu To select the favorite channels you have set up press the FAV CH button on the remote control Antenna Air Auto Program Clear Scrambled Channel Channel List Name Fine Tune Signal Strength LNA On Channel T V Enter Move All Added Favorite Default List Mode All Channel List T V Enter Move RETURN ...

Page 45: ...Press the or button to select All Added or Favorite then press the ENTER button Select the Channel list you want to appear when you press the CH LIST button All Shows All the channels when you press the CH LIST button on the remote control Added Shows Added channels when you press CH LIST button on the remote control Favorite Shows Favorite channels when you press CH LIST button on the remote cont...

Page 46: ...log Channels Use fine tuning to manually adjust a particular channel for optimal reception 1 Press the MENU button to display the menu Press the or button to select Channel then press the ENTER button 2 Press the or button to select Fine Tune then press the ENTER button 3 Press the or button to adjust the fine tuning 4 To store the fine tuning setting in the TV s memory press the ENTER button To r...

Page 47: ...select OK then press the EXIT button to exit the menu LNA Low Noise Amplifier If the TV is operating in a weak signal area sometimes the LNA function can improve the reception a low noise preamplifier boosts the incoming signal 1 Press the MENU button to display the menu Press the or button to select Channel then press the ENTER button 2 Press the or button to select LNA then press the ENTER butto...

Page 48: ... move to Month Day Year Hour Minute or am pm Set the date and time you want by pressing the or button then press the ENTER button Press the EXIT button to exit The current time will appear every time you press the INFO button You can set the Month Day Year Hour and Minute directly by pressing the number buttons on the remote control Continued 7 26 2007 9 10 am Clock Sleep Timer Off Timer1 Inactiva...

Page 49: ... press the ENTER button Press the or button to select On or Off then press the ENTER button Press the EXIT button to exit Depending on the broadcast station and signal the auto time may not be set correctly If this occurs set the time manually Antenna or Cable must be connected in order to set the time automatically Continued 7 26 2007 9 10 am Clock Sleep Timer Off Timer1 Inactivated Timer2 Inacti...

Page 50: ... 3 hours after the TV was turned on by timer This function is only available in timer On mode and prevents overheating which may occur if a TV is on for too long time Setting the Sleep Timer The sleep timer automatically shuts off the TV after a preset time 30 60 90 120 150 and 180 minutes 1 Press the MENU button to display the menu Press the or button to select Setup then press the ENTER button P...

Page 51: ...ENTER button 2 Press the or button to select the appropriate language English Español or Français then press the ENTER button Press the EXIT button to exit Plug Play Language English Time V Chip Caption Menu Transparency Medium Blue Screen Off More Setup T V Enter Move English Español Français Plug Play Language English Time V Chip Caption Menu Transparency Medium Blue Screen Off More Setup T V En...

Page 52: ...you want The default is Default Foreground Color This option consists of Default White Black Red Green Blue Yellow Magenta and Cyan You can change the color of the letter The default is Default Background Color This option consists of Default White Black Red Green Blue Yellow Magenta and Cyan You can change the background color of the caption The default is Default Foreground Opacity This option c...

Page 53: ...nel carries data that is intended to augment information carried in the program CC3 Secondary Synchronous Caption Service Alternate program related caption data typically second language captions CC4 Special Non Synchronous Use Captions Similar to CC2 Text1 First Text Service This may be various non program related data Text2 Second Text Service Additional data usually not program related Text3 Te...

Page 54: ...play the menu Press the or button to select Setup then press the ENTER button 2 Press the or button to select Light Effect then press the ENTER button Press the or button to select Off In Standby In Watching TV or Always then press the ENTER button Press the EXIT button to exit Off The LED is always off In Standby The LED lights while in Standby mode and it turns off when your TV is turned on In W...

Page 55: ...ws you to program the time between movement of the picture in minutes 1 Press the MENU button to display the menu Press the or button to select Setup then press the ENTER button 2 Press the or button to select Screen Burn Protection then press the ENTER button 3 Press the ENTER button to select Pixel Shift then press the ENTER button Pressing the or button will alternate between On and Off You wil...

Page 56: ... screen If the after image is not removed after performing the function repeat the function again Press any key on the remote control to cancel this feature Pixel Shift White Scrolling Side Gray Dark Screen Burn Protection T V Enter Move Dark Light Return Reducing the Effects of Screen Burn If screen burn has occurred you can select a white screen or scrolling to help remove screen burn artifacts ...

Page 57: ...resets the pin to 0 0 0 0 Power Off MUTE 8 2 4 Power On Change PIN T V 0 9 Enter PIN Enter new PIN Confirm new PIN Return V Chip Lock Off TV Parental Guidelines MPAA Rating Downloadable U S Rating Change PIN V Chip T V Enter Move Return V Chip Lock Off TV Parental Guidelines MPAA Rating Canadian English Canadian French Downloadable U S Rating Change PIN V Chip T V Enter Move Return for USA models ...

Page 58: ...ain sophisticated themes sexual content strong language and more intense violence TV MA Mature audiences only This program may contain mature themes profane language graphic violence and explicit sexual content 5 At this point one of the TV Ratings is selected Press the ENTER button Depending on your existing setup the symbol will be selected Blank Unblocked Blocked While is selected press the ENT...

Page 59: ... display the menu Press the or button to select Setup then press the ENTER button 2 Press the or button to select V Chip then press the ENTER button The message Enter PIN will appear Enter your 4 digit PIN number 3 The V Chip screen will appear Press the or button to select MPAA Rating then press the ENTER button 4 Press the or button to select an appropriate restriction Press the ENTER button to ...

Page 60: ...C Programming intended for children under age 8 C8 Programming generally considered acceptable for children 8 years and over to watch on their own G General programming suitable for all audiences PG Parental guidance 14 Programming contains themes or content which may not be suitable for viewers under the age of 14 18 Adult programming The V Chip will automatically block any category that is more ...

Page 61: ...tings Block all Press to lock all TV ratings G General 8 ans Not recommended for young children 13 ans Programming may not be suitable for children under the age of 13 16 ans Programming is not suitable for children under the age of 16 18 ans Programming restricted to adults The V Chip will automatically block any category that is more restrictive For example if you block 8 ans category then 13 an...

Page 62: ...e or button to select Downloadable U S Rating then press the ENTER button If information is not downloaded from the broadcasting station the Downloadable U S Rating menu is deactivated Parental restriction information is automatically downloaded while watching DTV channels It may take several seconds The Downloadable U S Rating menu is available for use after information is downloaded from the bro...

Page 63: ...1 Insert a USB drive containing the firmware upgrade into the SERVICE port on the rear panel of the TV 2 Press the MENU button to display the menu Press the or button to select Setup then press the ENTER button 3 Press the or button to select SW Upgrade then press the ENTER button 4 Press the or button to select TV USB then press the ENTER button The message Scanning for USB It may take up to 30 s...

Page 64: ...es SAMSUNG is not responsible for any data file damage or data loss The data files in memory cards might be erased due to electrostatic discharge EST loose contact or dust Some memory devices may not be recognized when the Wireless Home AV Center is turned on and switched to WISELINK Mode If this occurs remove and reinstall the memory device in question Directly connect the USB device to the USB j...

Page 65: ...SELINK button on the remote control Exit the screen by pressing the WISELINK button on the remote control and enter the WISELINK screen again Press the WISELINK button on the remote control to turn on the WISELINK mode Using the Remote Control Button in WISELINK Menu Button Operations Move the cursor and select an item Select the currently selected item Play or pause the Slide Show or MP3 file Ret...

Page 66: ...uch as gif or tiff will not be displayed Fifteen thumbnail photos are displayed per page The thumbnails are numbered from left to right and from top to bottom from 1 to 15 Folders are displayed first and they are followed by all JPEG files in the current folder The folders and JPEG files are sorted in alphabetical order If the photo is displayed in full screen you can zoom in and out or rotate the...

Page 67: ...You cannot save a zoomed in image When the JPEG image resolution is greater than the screen size you cannot use the Zoom function The Zoom function is not available for the image files that have the resolution of 1920x1080 or greater List Displays the stored files folders and file info Continued Photo 0001 File 2 File 4 File 9 File 10 File 11 File 12 File 13 File 5 File 6 File 7 File 8 None 1 10 P...

Page 68: ...iles must be located in the same folder on the memory device To run the slide show repeatedly change the setting by referring to page 73 Press the PLAY PAUSE button when a Photo icon is selected to start a Slide Show 5 Press the INFO button during the slide show to set the following options Slide Show Speed Background Music Background Music Setting List The Pause Pause icon is displayed for a whil...

Page 69: ... To exit WISELINK mode press the WISELINK button on the remote control Press the EXIT button to switch to the WISELINK start screen where another memory card can be selected When selecting a photo file the photo file information is displayed on the Top left of the TV screen such as the resolution the size the date modified and the order of the file in the current directory Continued Photo 0001 Fil...

Page 70: ... the photo may not be displayed on the screen To exit WISELINK mode press the WISELINK button on the remote control The rotated file is not saved The Rotating function information icon Displayed at the top left of the screen Icon Current OSD Function Rotating 90 To rotate a photo by 90 degrees Rotating 180 To rotate a photo by 180 degrees Rotating 270 To rotate a photo by 270 degrees Rotating 0 To...

Page 71: ...n to the photo X4 To move the enlarged photo image up down left right press the buttons To exit WISELINK mode press the WISELINK button on the remote control Zoom function information icon Displayed at the top left of the screen Icon Current OSD Function Zoom x1 Restore a photo to its original size Zoom x2 Zoom in to a photo x2 Zoom x4 Zoom in to a photo x4 Move the zoomed in photo up down right l...

Page 72: ... playing time of each MP3 file can be found in the file information When not found it may be displayed as 00 00 00 Music function information icon Displayed at the top left of the screen Icon Current OSD Function Music All Repeat When all music files in the folder are repeated Music All When all music files in the folder are played once Music Play Pause Pressing PLAY PAUSE button on the remote con...

Page 73: ...ic Off Doesn t play back repeatedly On Plays back a music file or all music files repeatedly Screen Saver Select to set the waiting time before the screen saver appears The screensaver will appear when no button is pressed for 1 3 or 5 minutes Press the WISELINK button on the remote control to turn on the WISELINK mode Slide Show Speed Fast Background Music On Background Music Setting Repeat Music...

Page 74: ...ut antenna The image is too light or too dark Adjust the Brightness and Contrast Adjust the Fine tuning The image is too large or too small Adjust the Size settings The visual qualities of digital channels vary The visual qualities of digital channels may vary depending on the original production method analog or digital If the original production method is digital High visual quality If the origi...

Page 75: ...ected the message Current position saved as Position1 is displayed 5 Press the ENTER button The saved Position appears on the left side of the OSD Moving to the remembered position 1 Complete Step 1 of Entering the menu 2 Pressing a Color Red Green Yellow button moves the auto wall mount to the saved position You can move the wall mount to one of the 3 pre set positions by pressing the Red Positio...

Page 76: ...dard dimension as they may cause damage to the inside of the TV set For wall mounts that do not comply with the VESA standard screw specifications the length of the screws may differ depending on their specifications Do not use screws that do not comply with the VESA standard screw specifications Do not use fasten the screws too strongly this may damage the product or cause the product to fall lea...

Page 77: ...2 inches 430 0 X 268 5 X 640 1 mm Weight Body With stand 98 8 lbs 44 8 kg 106 9 lbs 48 5 kg 130 1 lbs 59 0 kg 141 1 lbs 64 0 kg 6 8 lbs 3 1 kg Environmental Considerations Operating Temperature Operating Humidity Storage Temperature Storage Humidity 50 F to 104 F 10 C to 40 C 10 to 80 non condensing 4 F to 113 F 20 C to 45 C 5 to 95 non condensing This device is a Class B digital apparatus Design ...

Page 78: ...English 78 Dimensions FP T5094W SIDE VIEW REAR VIEW TOP VIEW FRONT VIEW JACK PANEL DETAIL 2 3 H x 18 8 W 5 8 UP FROM BOTTOM 44 4 50 8 43 6 24 5 29 1 31 7 24 4 3 7 2 0 12 6 4 6 23 6 15 8 ...

Page 79: ...English 79 Dimensions FP T5894W SIDE VIEW REAR VIEW TOP VIEW FRONT VIEW JACK PANEL DETAIL 2 3 H x 18 8 W 5 8 UP FROM BOTTOM 57 7 33 35 6 29 1 3 9 2 0 13 6 5 3 23 6 15 8 ...

Page 80: ...E Si tiene alguna pregunta o comentario referente a nuestros productos por favor contacte con nuestro Servicio de Atención al Cliente Country Customer Care Center Web Site Address CANADA 1 800 SAMSUNG 7267864 www samsung com ca Samsung Electronics Canada Inc Customer Service 55 Standish Court Mississauga Ontario L5R 4B2 Canada Samsung Electronique Canada Inc Service à la Clientèle 55 Standish Cour...

Reviews: