background image

20 _ Disassembly and Reassembly

Part

Figure

Description

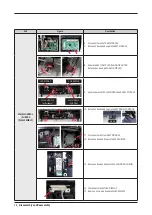
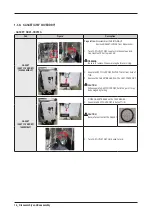
ASSY BASKET LOWER 

[ASSEMBLY]

1.  Assemble HANDLE BASKET at BASKET

Front side

Back side

2.   Assemble ASSY ROLLER at BASKET  

Secure hook to lock it.

* Match wire and center of ASSY ROLLER

Summary of Contents for DW60BG8 Series

Page 1: ...FSL DW60BG850B00 DW60BG830I00 DW60BG830I00 DW60BG830FSL DW60BG830FSL DW60BB890UAP DW60BB890UAP DW60BB890FAP DW60BB890FAP DW60BB890FAP DW60BG770FSL DW60BG770FGL DW60BG750USL DW60BG750SSL DW60BG750FSL DW60BG750FSL DW60BG750FSL DW60BG750FSL DW60BG750FSL DW60BG750B00 DW60BG750B00 DW60BG750B00 DW60BG730FSL DW60BG730FSL DW60BG730FSL DW60BG730B00 DW60BB770APT DW60BG7 Series DW60BB7 Series For End User ...

Page 2: ...G Note 1 You can check where to buy replacement parts at http www samsung com support 2 Visit the part purchase site and enter the model code of your product to check the parts available for purchase The model code is labelled on the edge of the tub When you open the dishwasher s door you can check the model code and version on the barcode label at the left side of the tub 3 For replacement parts ...

Page 3: ...ve 2 screws at back ofASSY COVER TOP 2 1 2 Pull the COVER TOPbackward first and take it off upward ASSYCOVERTOP ASSEMBLY Reassemblyis the reverse orderof disassembly 1 1 1 ASSYCOVERTOP ASSY COVER TOP DD97 00313E DW60B F MODELONLY 1 1 DISASSEMBLYANDREASSEMBLY 1 DISASSEMBLYANDREASSEMBLY ...

Page 4: ...ACKING to assemble it easily Fold the SEALTUB PACKING in halfwith the tip of the seal facing inward CAUTION Payattention to the direction of seal If it is assembled in reverse it maycause leakage of steam orwater SEALTIP Insert to Bracket seal tub Seal tip faces to inside Center About 20cm 2 Assemble the SEALTUB PACKING to centerof the BRACKETSEALTUB Press seal about 20 cm red dotted line on both ...

Page 5: ...5 Part Figure Description SEALTUBPACKING ASSEMBLY 4 Press the seal from the top cornertoward remaining side CAUTION Payattention to assemble not to deform the seal tip at the corner If the gap is opened it maycause steam leakage ...

Page 6: ...t of HOUSING 2 Release 6 hooks at back of Dishwasherto remove HOUSING 3 Remove HOUSING from Dishwasher CAUTION Do not do thisworkwithout safetygloves It maycause injuryfrom sharp edges 1 1 3 HOUSING ASSY HOUSING LEFT DD97 00555C DD97 00712A DW60BG F ASSY HOUSING RIGHT DD97 00556C DD97 00713A DW60BG F ...

Page 7: ...Figure Description HOUSING ASSEMBLY 1 Assemble Housing to side of Dishwasher CAUTION Do not do thisworkwithout safetygloves It maycause injuryfrom sharp edges 2 Secure 6 hooks at back of Dishwasher 3 Fasten 4 screws at front of HOUISNG ...

Page 8: ...o loosen the force on the hinge pull the rope down and hold 3 separate HOLDER ROPE from hinge DOORSPRING ASSEMBLY 1 Assemble rope at BRACKETWIRE 2 Assemble ropewith 2 rollers 3 To loosen the force on the hinge pull the rope down and hold 4 Assemble HOLDER ROPE to HINGE 1 1 4 DOORSPRING SPRING ETC DOOR DD61 00763A DD61 00761A DW60BG F HOLDER ROPE DOOR DD61 00742B DD61 00742A DW60BG F ...

Page 9: ...p edges 4 Pull outwires from dishwasher Preparation Disassemble HOUSING from Dishwasher 5 ClampGUIDEHINGEwithPlierandpulloutto disassemble Dothesamedisassemblyontheotherside 6 Pullropedown andtakeoffHOLDERROPEDOORfrom DOORHINGE Dothesamedisassemblyontheotherside WARNING Do not do thisworkwithout safetygloves It maycause injuryfrom sharp edges 7 Open theASSY DOOR 30 45 degree 8 Pull outASSY DOOR to...

Page 10: ... GUIDE HINGE to lock door Do the same assemblyon the otherside 3 Pulltheropedown andassemble HOLDERROPEDOORathinge Dothesameassemblyonthe otherside check rope and spring are assembled as picture 4 Insertwires and COVERWIRE to inside of dishwasher 5 AssembleCOVERWIREtoFRAMEFRONTSecure2hooks 6 Assemble3connectors 7 Fasten GROUNDWIREwith1 screw ...

Page 11: ...urniture cabinet 2 Remove the14 screwswhich holding the doorouterand control panel in place Use Torx T20 driverto remove it 3 Separate PANELCONTROLand DOOR OUTER from DOOR INNER CAUTION Be careful not to dent the DOOR during disassembly 4 SeparateASSY LAMPLED from DOOR OUTER Release hook and pullASSY LAMPLED LED DISPLAY W LAN MODULE wifi module ASSY MODULE SUB PBA ASSY BUZZER 5 Separatewires of pa...

Page 12: ...Release hook and pullASSY LAMPLED LED DISPLAY W LAN MODULE wifi module ASSY MODULE SUB PBA ASSY BUZZER 9 Separatewires ofW LAN MODULE andASSY MODULE 10 Release 2 hooks and separateASSY PANELCONTROL Hook 11 Disconnectwire fromASSY MODULE 12 Release a hook and separateASSY BUZZER 13 Release a hook and separateW LAN MODULE Wifi 14 Disconnectwires of LED DISPLAY 15 Remove a screwand separate LED DISPL...

Page 13: ...PLAY 3 Lock hook ofW LAN MODULE 4 Connectwire ofW LAN MODULE 5 Lock hook ofASSY BUZZER 6 Connectwire ofASSY BUZZER 7 InsertASSY PANELCONTROLto DOOR OUTER Lock 2 hooks W LAN MODULE wifi module ASSY MODULE SUB PBA 8 Connectwires ofW LAN MODULE ASSY MODULE 9 InsertASSY LAMPLED to DOOR OUTER Lock a hook 10 Assemble DOOR OUTERwith DOOR INNER ...

Page 14: ...14 _ Disassemblyand Reassembly Part Figure Description PANELCONTROL SUBPBA ASSEMBLY 11 Fasten14 screws to DOOR OUTER and DOOR INNER Use Torx T20 driverto fasten it ...

Page 15: ...clockwise to unlock Use Handle of Plierto grab CAP 2 MakeASY CASE BRAKE come out from hole of TUB 3 Remove the GASKETBRAKE from the CASE BRAKE assembly GASKET ASSYCASEBRAKE ASSEMBLY GASKET 1 Fit the GASKETBRAKE on the CASE BRAKE 2 InsertASSY CASE BRAKE to hole of TUB CAUTION Becarefulnottomissthe GASKET 3 Turn CAPOUTLETDRY clockwise to lock 1 1 7 GASKET ASSYCASEBRAKE GASKET DD63 00072A ...

Page 16: ... remove the powerplug before servicing GASKET 2 SeparateASSY COVER DRY WATER TANK from hole of TUB 3 Remove the GASKETBRAKE from theASSY COVER DRY CAUTION When separateASSY COVER DRY hold the part It may be damaged byfalling GASKET ASSYCOVERDRY ASSEMBLY GASKET 1 Fit the GASKETBRAKE on the CASE BRAKE 2 AseembleASSY COVER DRY to hole of TUB CAUTION BecarefulnottomisstheGASKET 3 Turn CAPOUTLETDRY clo...

Page 17: ...ve a screwwith Torx T20 driver 2 ReleasehooksholdingASSYDUCTMAINatthetopofTUB 3 Release hooks holdingASSY DUCTMAIN at 4 Pull Out DUCTMAIN from TUB ASSYDUCTMAIN ASSEMBLY 1 AssembleASSY DUCTMAIN with hole of HOUSING 2 Lock hooks of TUBwithASSY DUCTMAIN 3 Assemble a screwwith Torx T20 driver 1 1 9 ASSYDUCTMAIN ASSY DUCT DD93 01019C ...

Page 18: ...ll out FILTERS Fine filter Micro filter Coarse filter ASSYROTOR FILTER ASSEMBLY 1 Insert Micro filterin the SUMP Fine filter Micro filter Coarse filter 2 Insert Coarse filterand Fine filterinto SUMP 3 Turn Coarse filterclockwise to lock it 4 AssembleASSY ROTOR to HOUSING 1 1 10 ASSYROTOR FILTER ASSY ROTOR DD97 00646B DW60B 8 DD97 00646C DW60B 7 FILTER MICRO DD63 00383A FILTER COARSE DD63 00384A CO...

Page 19: ...SKETLOWER DISASSEMBLY 1 Pull outASSY BASKETLOWER from Dishwasher 2 Push 2 hooks atASSY ROLLER 3 TakeoffASSYROLLERfromBASKET 4 Push hookwith flat head driverto take off HANDLE BASKET 1 1 11 ASSYBASKETLOWER ASSY BASKETLOWER DD97 00697A DW60B 8 DD97 00697B DW60B 7 ...

Page 20: ...emblyand Reassembly Part Figure Description ASSYBASKETLOWER ASSEMBLY 1 Assemble HANDLE BASKETat BASKET Front side Back side 2 AssembleASSY ROLLER at BASKET Secure hook to lock it Matchwire and centerofASSY ROLLER ...

Page 21: ... from Dishwasher 2 Release hook and pushASSY DUCTMIDDLE 3 MoveASSYDUCTMIDDLEtodirectionofarrow 4 PulloutASSYDUCTMIDDLE 5 Clamp SUPPORTCUP HOLDER using plier And Pull out SUPPORTCUPfrom HOLDER 6 Remove SUPPORTCUP HOLDER from BASKET 1 1 12 ASSYBASKETMIDDLE ASSY BASKETMIDDLE DD97 00698A DW60B 8 DD97 00698B DW60B 7 ...

Page 22: ...gure Description ASSYBASKETMIDDLE DISASSEMBLY 7 Push hookwith flat head driverto take off HANDLE BASKET 8 Pull handle and adjust BRACKETRAILto lowerposition 9 Push out lowerpart ofASSY BASKETADJUSTER 10 RemoveASSY BASKETADJUSTER from BASKET ...

Page 23: ...DDLE ASSEMBLY 1 Assemble BRACKETRAILandASSY BASKETADJUSTER at BASKET 2 AssembleASSY BASKETADJUSTER at BASKET 3 Assemble HANDLER BASKETat BASKET Front side Back side 4 Assemble 2 HOLDER SUPPORTCUPat BASKET 5 Clamp HOLDER SUPPORTCUPwith plierand and assemble SUPPORTCUP ...

Page 24: ...Figure Description ASSYBASKETMIDDLE ASSEMBLY 5 4 3 2 1 6 Assemble arm ofASSY DUCTMIDDLE at BASKETArm is assembled between 4 and 5 row 7 SlideASSY DUCTMIDDLE to direction of arrow SUPPORTCUPat BASKET 8 PushASSY DUCTMIDDLE and secure hooks ...

Page 25: ...edwith the specified torque 5 Removeforeignmaterial Checkwhetheranyforeign material such as soil wire scraps and screws are in the dishwasher Checkwhetheranyforeign material is entering through the sump into the disposer 6 Checkforwaterleakage Checkwhetherthere iswaterleakage from the hose connector door case sump drain motor circulation motor heater thermistor turbiditysensor distributormotor and...

Page 26: ... Eurpoe CIS Mideast africa gspn1 samsungcsportal com Asia gspn2 samsungcsportal com North Latin America gspn3 samsungcsportal com China china samsungportal com This Service Manual is a property of Samsung Electronics Co Ltd Any unauthorized use of Manual can be punished underapplicable International and ordomestic law ...

Reviews: