12
ENG
Plug & Play Feature
(depending on the model)
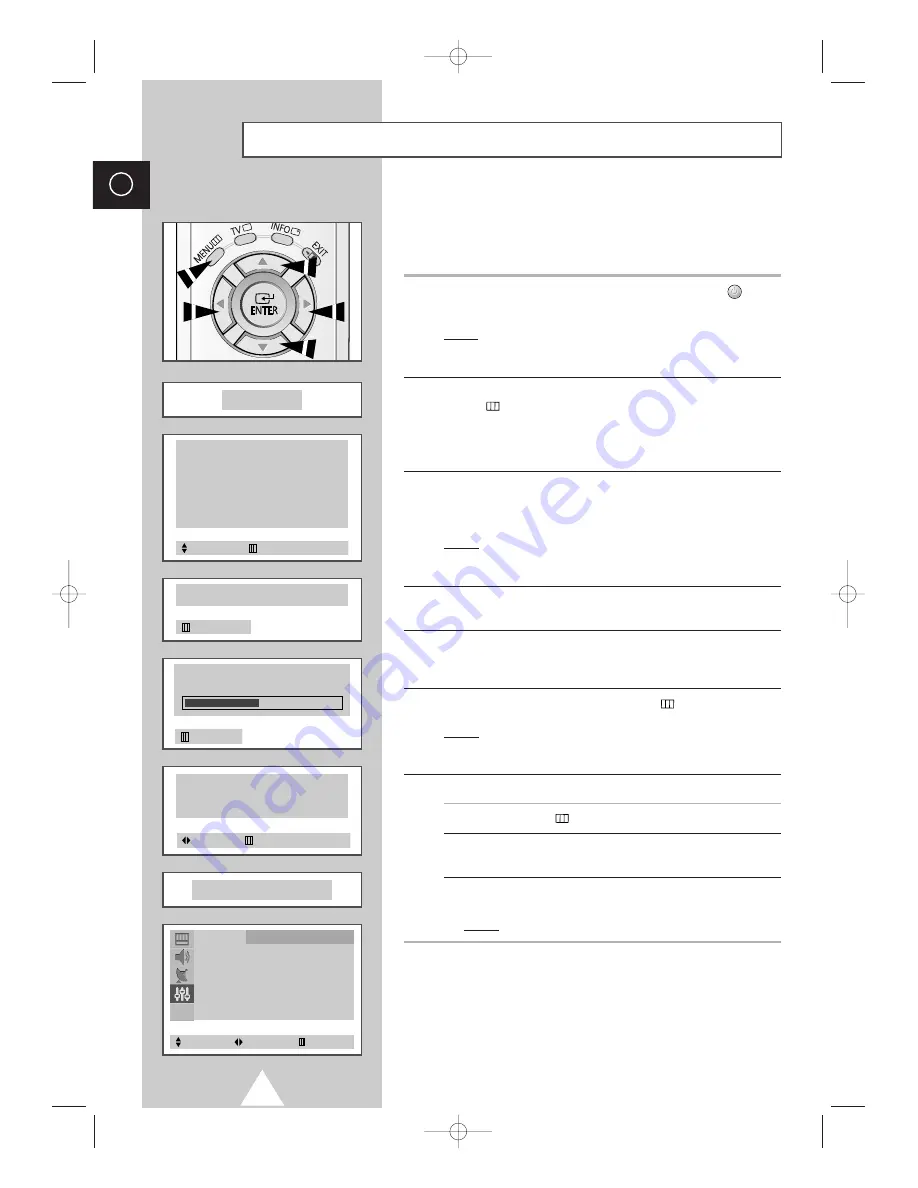
When the television is initially powered ON, three basic customer
settings proceed automatically and subsequently: setting the
language, channel and clock.
1
If the television is in Standby mode, press the
POWER
(
) button
on the remote control.
Result:
The message
Plug & Play
is displayed. It flickers for a
little while and then the “Language” menu is automatically
displayed.
2
Press the
▲
or
▼
button to select required language. Press the
MENU
(
) button to enter the language, and then the message
Ant. Input : Check
is displayed.
➣
If any language is not selected on the
Language
menu, the
“Language” menu will be displayed about 30 seconds later.
3
Make sure that the antenna is connected to the TV. And then press
the
œ
or
√
button to store the channels (refer to “Storing the
Channels Automatically” on page 14).
Result:
The horizontal bar is displayed, and then channels are
stored in an order which reflects their positions in the
frequency range.
4
When searching and storing is complete, the
Time
menu is
displayed.
5
Press the
œ
or
√
button to move to the hour or minute. Set the
hour or minute by pressing the
▲
or
▼
button (refer to “Setting and
Displaying the Current Time” on page 31).
6
When you have finished, press the
MENU
(
) button.
Result:
The message
ENJOY YOUR WATCHING
is displayed, and
then the channel which has been stored will be
activated.
7
If you want to reset this feature...
1
Press the
MENU
(
) button.
2
Press the
▲
or
▼
button to select the
Function
, and then
press the
œ
or
√
button.
3
Select the
Plug & Play
by pressing the
▲
or
▼
button, and
then press the
œ
or
√
button.
Result:
The message
Plug & Play
is displayed.
Function
Language : English
Time
√
Plug & Play
√
Blue Screen
: Off
Child Lock
√
Demonstration
√
Plug & Play
ENJOY YOUR WATCHING
Select
Enter
Exit
P 1 - - - - -
471 MHz 48 %
Exit
Ant. Input : Check
Exit
Time
Clock
11 : 35
Move
Exit
Language
English
Português
Deusch
Italiano
Français
Sverige
Nederland
Türkçe
Español
EÏÏËÓÈο
Adjust
Select
S56A_UI_ENG_EU 8/30/03 10:47 AM Page 12


