5
7. Charging Indication LED
– Indicates the camera is in charge when the LED is red on
8. DC 5V Power
– Connect the DC 5V power adaptor to the camera
NOTE: The camera can also be powered using 3 AA batteries (not included) installed in the base. If the
camera is plugged in with the AC adaptor, the batteries will not be used. The batteries are intended for
short term, portable camera use.
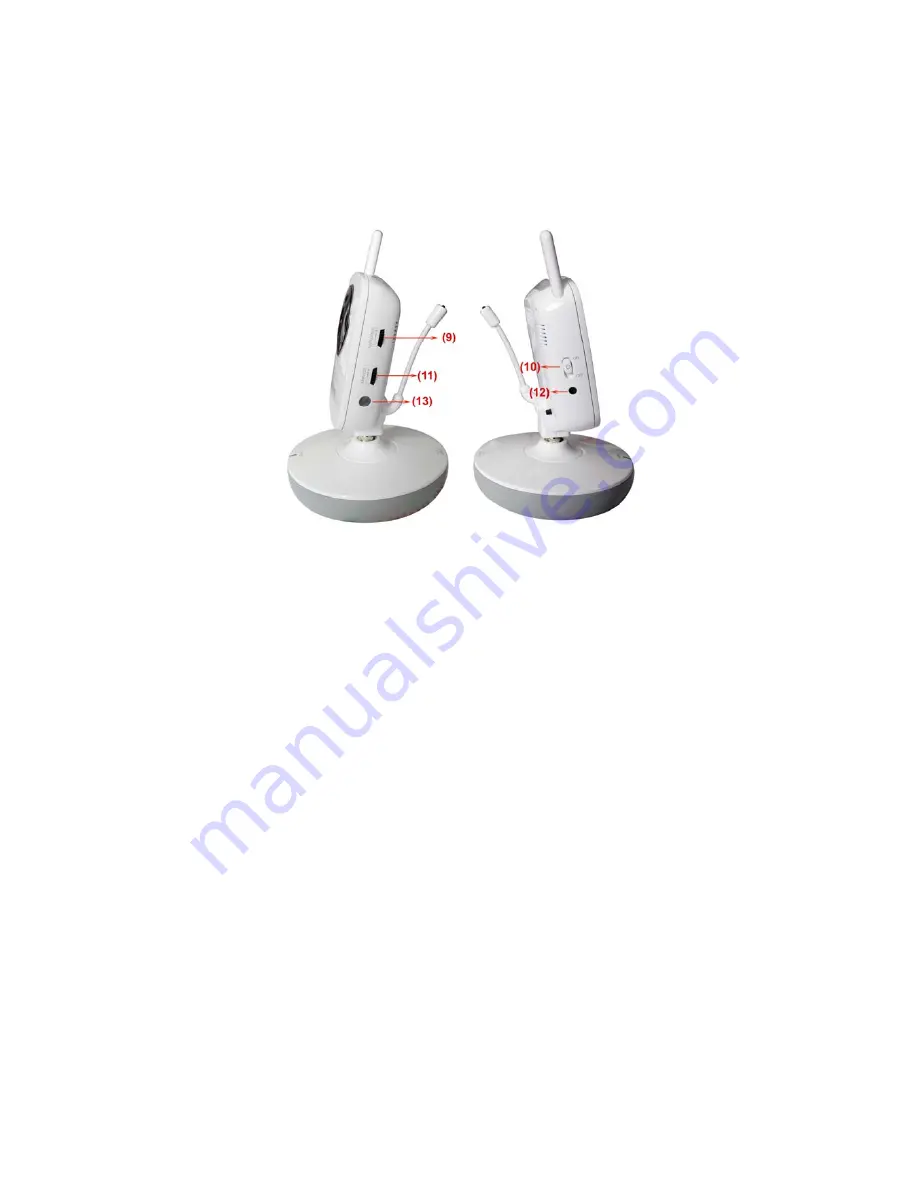
Side Controls
9. Sound Alarm Trigger
– Adjust the sensitivity knob to set the sound alarm sensitivity. The receiver will
beep to alert you when the sound is above a preset sound level. Adjust the sensitivity knob to increase or
decrease the level.
10. Camera ON/OFF Switch
– Turns the camera ON or OFF.
11. Volume
—
Press to increase or decrease the volume of the audio alarm.
12.Camera ON and low battery indication
—
Turn on the camera, the LED light show green ; Low
battery,the LED light is blinking.
13.Night vision sensor
—
Use to detect the illumination in the camera side.
Camera Installation
Before you install the camera, carefully plan where and how it will be positioned, and where you will
route the cable that connects the camera to the power adaptor.
Before starting permanent installation, verify its performance by observing the image on the receiver
when camera is positioned in the same location/position where it will be permanently installed and the
receiver is placed in the location where it will be used most of the time.
Installation Warnings
Aim the camera(s) to best optimize the viewing area: Select a location for the camera that provides a
clear view of the area you want to monitor, which is free from dust, and is not in line-of-sight to a strong
light source or direct sunlight.


