background image

9

ENGLISH

INSTALLING YOUR MICROWAVE OVEN

Place the oven on a flat level surface 85 cm above the floor. The surface 
should be strong enough to safely bear the weight of the oven.

1. 

When you install your oven, make sure there is 
adequate ventilation for your oven by leaving at least 
10 cm (4 inches) of space behind and, on the sides 
of the oven and 20 cm (8 inches) of space above.

2. 

Remove all packing materials inside the oven.
Install the roller ring and turntable. 
Check that the turntable rotates freely.

3. 

This microwave oven has to be positioned so that plug is accessible.

If the supply cord is damaged, it must be replaced by a special cord or 
assembly available from the manufacturer or its service agent. 
For your personal safety, plug the cable into a 3-pin, 230 Volt, 50 Hz, 
AC earthed socket. If the power cable of this appliance is damaged, it 
must be replaced by a special cable. 

Do not install the microwave oven in hot or damp surroundings like 
next to a traditional oven or radiator. The power supply specifications 
of the oven must be respected and any extension cable used must 
be of the same standard as the power cable supplied with the oven. 
Wipe the interior and the door seal with a damp cloth before using your 
microwave oven for the first time.

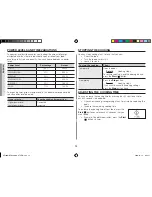
SETTING THE TIME

Your microwave oven has an inbuilt clock. When power is supplied, “:0”, 
“88:88” or “12:00” is automatically displayed on the display.  
Please set the current time. The time can be displayed in either the 24- hour 
or 12-hour notation. You must set the clock:

•  When you first install your microwave oven
•  After a power failure

Do not forget to reset the clock when you switch to and from summer 
and winter time.

1.  To display the time 

in the...

Then press the 

Clock button...

24-hour notation
12-hour notation

Once
Twice

2. 

Turn the 

dial knob

 to set the hour.

3. 

Press the 

Clock

 button.

4. 

Turn the 

dial knob

 to set the minute.

5. 

When the right time is displayed, press the 

Clock


button to start the clock.

Result:


The time is displayed whenever you are 
not using the microwave oven.

10 cm 

behind

20 cm 

above

10 cm on 

the side

85 cm of 

the floor

CE108MDF_03900A_XTL-EN.indd   9

2010-12-14     8:53:10

Summary of Contents for CE108MDF

Page 1: ...purchasing this Samsung product Please register your product at www samsung com register Microwave Oven Owner s Instructions Cooking Guide CE108MDF This manual is made with 100 recycled paper CE108MDF...

Page 2: ...oven 34 Switching the beeper off 34 Cookware guide 35 Cooking guide 36 Cleaning your microwave oven 45 Storing and Repairing Your Microwave Oven 45 Technical specifications 46 QUICK LOOK UP GUIDE I wa...

Page 3: ...EATURE BUTTON 3 AUTO REHEAT FEATURE BUTTON 4 MICROWAVE BUTTON 5 CONVECTION BUTTON 6 GRILL BUTTON 7 DIAL KNOB Cook time Weight and serving size 8 STOP CANCEL BUTTON 9 CLOCK SETTING BUTTON 10 INDIAN REC...

Page 4: ...two dishes at the same time A small dish may be placed on the turntable and a second dish on the rack The metal racks can be used in grill convection and combination cooking 5 Roasting spit Coupler Ba...

Page 5: ...The manufacturer cannot be held liable for damage caused by improper or incorrect use of the appliance Failure to maintain the oven in a clean condition could lead to deterioration of the surface tha...

Page 6: ...grounded in accordance with local and national codes Remove all foreign substances such as dust or water from the power plug terminals and contact points using a dry cloth on a regular basis Do not p...

Page 7: ...exposure to microwave energy WARNING Ensure that the appliance is switched off before replacing the lamp to avoid the possibility of electric shock WARNING Liquids and other foods must not be heated...

Page 8: ...s in their shell and whole hard boiled eggs should not be heated in microwave ovens since they may explode even after microwave heating has ended Also do not heat airtight or vacuum sealed bottles jar...

Page 9: ...l oven or radiator The power supply specifications of the oven must be respected and any extension cable used must be of the same standard as the power cable supplied with the oven Wipe the interior a...

Page 10: ...high frequency electromagnetic waves the energy released enables food to be cooked or reheated without changing either the form or the colour You can use your microwave oven to Defrost Reheat Cook Coo...

Page 11: ...depress the Stop Cancel key to utilize the initialization mode If the above guidelines do not enable you to solve the problem then contact your local SAMSUNG customer serivice centre Please have the...

Page 12: ...op cooking at any time so that you can Check the food Turn the food over or stir it Leave it to stand To stop the cooking Then Temporarily Open the door Result Cooking stops To resume cooking close th...

Page 13: ...combination of microwaves and convection Code Food Serving Size Standing Time Recommendations 1 Drinks Coffee milk tea water room temperature 150 ml 1 cup 300 ml 2 cups 450 ml 3 cups 600 ml 4 cups 1 2...

Page 14: ...ue to the steam cleaning function 1 Open the Door 2 Fill with water following guide line inside the water bowl The line is about 30 ml 3 Please attach the water bowl in right side of the oven 4 Close...

Page 15: ...ry and fish on a flat glass plate or on a ceramic plate arrange bread and cake on kitchen paper Code Food Serving Size Standing Time Recommendations 1 Meat 200 2000 g 20 90 min Shield the edges with a...

Page 16: ...eria CA Tikka Series tS Healthy Cook HC Indian s Best Ib Nutrition for kids nu CA 1 Peppy Pizza tS 1 Chicken Malai Tikka HC 1 Vegetable Hariyali Ib 1 Chicken 65 nu 1 Vegetable Pasta CA 2 Baked Veg Bol...

Page 17: ...icum tbsp Chopped Mushroom tbsp Grated Cream Cheese tbsp Salt to taste Black Pepper powder tsp Oil 2 tsp Whisk egg till it becomes fluffy and all the ingredients mix well Grease the glass dish evenly...

Page 18: ...cook dip the almond in melted chocolate and put them on a greased tray and freeze for 8 minutes And serve Code Food Serving Size Ingredients Recommendations CA 9 Oat Fudge Fingers 200 g Oats cup Sesam...

Page 19: ...ikka Arrange the tikkas on a plate sprinkle the remaining chaat masala and lemon juice and serve hot Code Food Serving Size Ingredients Recommendations tS 3 Fish Tikka 550 600 g Fish pieces of any typ...

Page 20: ...on greased crusty plate and pour few drops of oil over the kebabs and cook Serve hot with sauce or chutney Code Food Serving Size Ingredients Recommendations tS 7 Tangri Kebab 350 400 g Chicken 2 larg...

Page 21: ...In a bowl add boiled fettuccine and pumpkin puree with all the ingredients and cook and sprinkle grated nutmeg Code Food Serving Size Ingredients Recommendations HC 3 Lemon Chicken 210 g Boneless chic...

Page 22: ...he ingredients in a dish and cook and serve hot Code Food Serving Size Ingredients Recommendations HC 0 Exotic Tomatoes 400 g Tomatoes 4 big Cottage Cheese 1 cup grated Boiled Peas cup Golden corns cu...

Page 23: ...ritsari Fish 600 650 g Fish 500 g Curd 2 tbsp Coriander Powder 2 tsp Ginger Garlic Paste 2 tsp Dried Mango Powder 2 tsp Cumin Powder 2 tsp Red Chilli Powder 2 tsp Chicken Colour 1 pinch Onion cup chop...

Page 24: ...and add salt after removing from the microwave oven Code Food Serving Size Ingredients Recommendations nu 2 Chocolate Rocks 200 250 g Roasted Oats cup Cornflakes 1 4 cup Mixed Nuts 2 tbsp Wheat bran...

Page 25: ...rve hot nu 8 Veggie Mayo Rolls 4 pieces Hot Dog rolls 4 Boiled Mix Veg cup beans carrots peas potatoes cauliflower Sweet Corns Celery 2 tbsp Walnuts 1 tbsp Mayonnaise cup Salt Pepper to taste In a bow...

Page 26: ...on the crust plate that are not heat resistant plastic bowls for example 4 Place the crust plate on the turntable or on the low rack in the microwave oven Never place the crust plate in the oven with...

Page 27: ...plate on high rack Grilled Vegetables 250 g 3 4 450W Grill 7 8 Preheat crusty plate and brush with 1 tbsp oil Put fresh sliced vegetables on plate e g pieces of pepper onions courgette slices and mus...

Page 28: ...at two different power levels 1 Press the Power Defrost button 2 Select the type of food that you are cooking by pressing the Power Defrost button 3 Set the weight by turning the dial knob the approp...

Page 29: ...reheat the oven to the appropriate temperature before placing the food in the oven When the oven reaches the requested temperature it is maintained for approximately 10 minutes it is then switched off...

Page 30: ...to heat and brown food quickly without using microwaves Always use oven gloves when touching the recipients in the oven as they will be very hot You can get better cooking and grilling results if you...

Page 31: ...the meat over It can be used for combined microwave and Convection cooking Make sure that the weight of the meat is evenly distributed on the spit and that the spit rotates freely Always use oven glov...

Page 32: ...he multi spit use the 6 skewers 2 Put the same amount of food on each skewer 3 Place the roasting spit into the glass bowl and insert the multi spit into it 4 Put the glass bowl with the multi spit in...

Page 33: ...knob The maximum cooking time is 60 minutes 4 Set the appropriate power level by pressing the Microwave Convection button until the corresponding output power is displayed 600 450 300 180 100 W COMBI...

Page 34: ...hild Safety programme which enables the oven to be locked so that children or anyone unfamiliar with it cannot operate it accidentally The oven can be locked at any time 1 Press the Grill and Combi bu...

Page 35: ...d Overheating may cause the polystyrene to melt Paper bags or newspaper May catch fire Recycled paper or metal trims May cause arcing Glassware Oven to tableware Can be used unless decorated with a me...

Page 36: ...for example see the chapter with tips techniques and hints Covering during cooking To cover the food during cooking is very important as the evaporated water rises as steam and contributes to cooking...

Page 37: ...and once after cooking Add salt herbs or butter after cooking Cover during a standing time of 3 minutes Hint Cut the fresh vegetables into even sized pieces The smaller they are cut the quicker they...

Page 38: ...reheating food for the first time it is helpful to make a note of the time taken for future reference Always make sure that the reheated food is piping hot throughout Allow food to stand for a short...

Page 39: ...2 2 3 3 3 4 1 2 Pour into cups and reheat uncovered 1 cup in the centre 2 cups opposite of each other 3 cups in a circle Keep in microwave oven during standing time and stir well Soup chilled 250 g 3...

Page 40: ...ing food For defrosting of frozen food with a temperature of about 18 to 20 C use the following table as a guide All frozen food should be defrosted using defrosting power level 180 W Food Portion Tim...

Page 41: ...d browns evenly Three combination modes are available with this model 600 W Grill 450 W Grill and 300 W Grill Cookware for cooking with Combi Please use cookware that microwaves can pass through Cookw...

Page 42: ...alves Put them in a circle on the high rack with the cut side to the grill Gratin Potatoes vegetables chilled 450 g 450 W Grill 9 11 Put the fresh gratin into a small glass pyrex dish Put the dish on...

Page 43: ...s well as casseroles and gratin dishes sponge cakes and light fruit cakes pies and crumbles roast vegetables scones and breads Convection Guide for fresh and frozen food Preheat the convection with th...

Page 44: ...ELTING CRYSTALLIZED HONEY Put 20 g crystallized honey into a small deep glass dish Heat for 20 30 seconds using 300 W until honey is melted MELTING GELATINE Lay dry gelatine sheets 10 g for 5 minutes...

Page 45: ...ucts or chemical solvents Take particular care when cleaning the door seals to ensure that no particles Accumulate Prevent the door from closing correctly Clean the microwave oven cavity right after e...

Page 46: ...urce 230 V 50 Hz AC Power consumption Maximum power Microwave Grill heating element Convection heating element 2700 W 1400 W 1250 W Max 1850 W Output power 100 W 900 W 6 levels IEC 705 Operating frequ...

Page 47: ...47 ENGLISH NOTE NOTE CE108MDF_03900A_XTL EN indd 47 2010 12 14 8 53 18...

Page 48: ...Code No DE68 03900A 3030 8282 1800 110011 1800 3000 8282 1800 266 8282 INDIA www samsung com CE108MDF_03900A_XTL EN indd 48 2010 12 14 8 53 18...

Reviews: