


17
2-5. You want to check a software program.
•
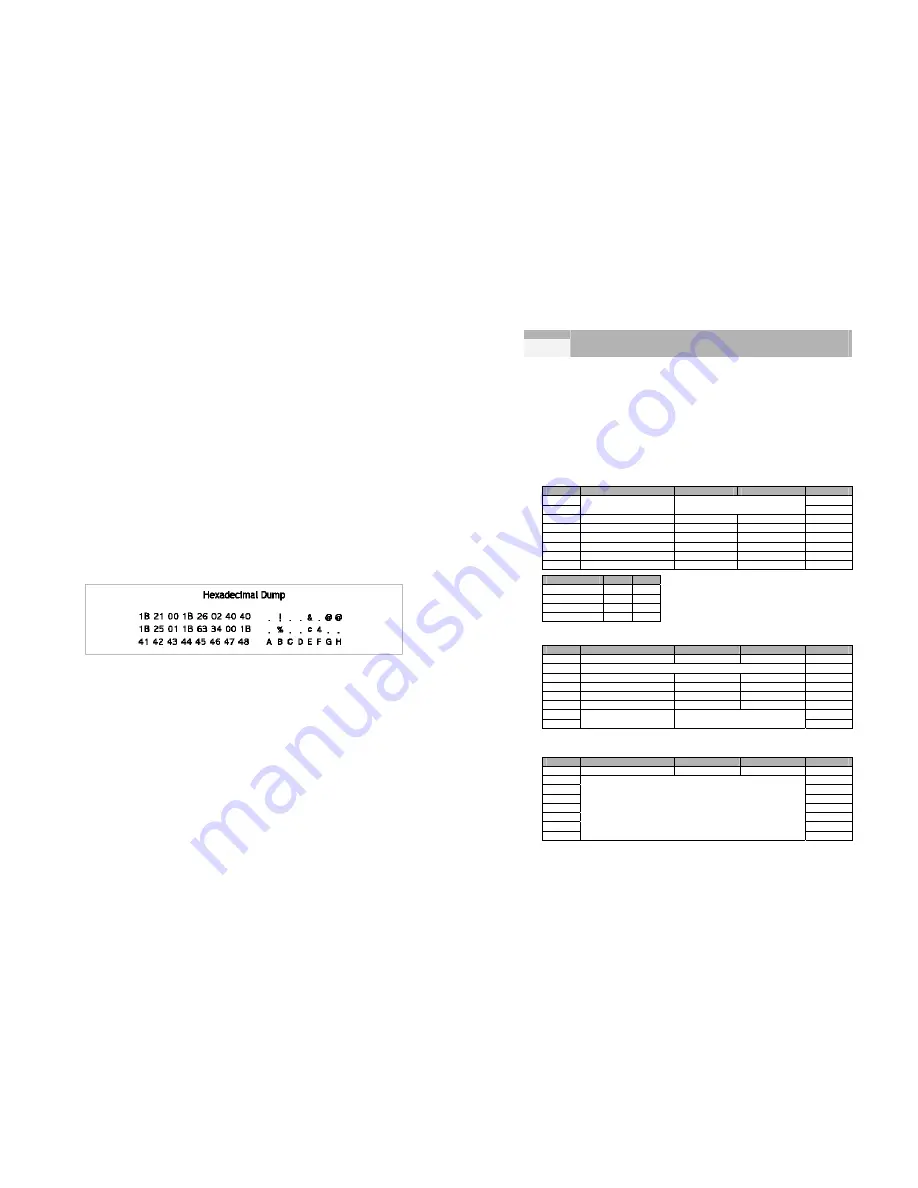
Hexadecimal Dump
This feature allows experienced users to see exactly what data is coming
to the printer. This can be useful in finding software problems. When you
turn on the hexadecimal dump function, the printer prints all commands
and other data in hexadecimal format along with a guide section to help
you find specific commands.
To use the hexadecimal dump feature, follow these steps:
1) After you make sure that the printer is off, open the front cover of the
printer.
2) Hold down the Feed button while you turn on the printer.
3) Close the front cover.
4) Run any software program that sends data to the printer. The printer
prints “Hexadecimal Dump” and then all the codes it receives in a two –
column format. The first column contains the hexadecimal codes and
the second column gives the ASCII characters that correspond to the
codes.
•
A period(.) is printed for each code that has no ASCII equivalent.
5) When the printing finishes, turn off the printer.
18
Chapter 3
DIP switch settings
Although the factory settings are best for almost all users, if you have special
requirements, you can change the DIP switch.
3-1. Setting the DIP switches
•
DIP switch functions
Your printer has two sets of DIP switches.
The functions of the switches are shown in the following table.
DIP - SW1
Switch
Function
ON
OFF
Default
1-1
OFF
1-2
Emulation Selection
Refer to the following table
OFF
1-3 Auto
cutter Enable Disable
OFF
1-4
Cartridge
one cartridge
two cartridges
OFF
1-5 Density
*1)
Bold
Normal
OFF
1-6 Special
Function
*2)
Enable Disable OFF
1-7
Near end sensor
Enable
Disable
OFF
1-8 Low
ink
check Disable Enable OFF
1-1
1-2
EPSON OFF
OFF
STAR OFF
ON
CITIZEN ON
OFF
EPSON-KP
*3)
ON ON
DIP - SW2 (RS232C Serial interface model)
Switch
Function
ON
OFF
Default
2-1
Data receive error
Print “?”
Ignore
OFF
2-2 Reserved OFF
2-3 Hand
Shaking
DTR/DSR XON/XOFF OFF
2-4 Word
length
7bit
8bit OFF
2-5 Parity
check Enable Disable OFF
2-6 Parity
selection
EVEN
ODD OFF
2-7
OFF
2-8
Baud rate selection
Refer to the following table
OFF
DIP - SW2 (Parallel interface model)
Switch
Function
ON
OFF
Default
2-1
Auto Line Feed
Enable
Disable
OFF
2-2
OFF
2-3
OFF
2-4
OFF
2-5
OFF
2-6
OFF
2-7
OFF
2-8
Undefined
OFF
Summary of Contents for Bixolon SRP-500
Page 1: ...Samsung Elector Mechanics Printed In Korea 2003 2 Operator s Manual SRP 500...
Page 16: ...23 Page 3 PC860 Portuguese 24 Page 4 PC 863 Canadian French...
Page 17: ...25 Page 5 PC 865 Nordic 26 page 16 CP1252 WinLatin1...
Page 18: ...27 page 17 PC 866 Russian 28 page 18 CP 852 DosLatin2...
Page 19: ...29 Page 19 PC 858 Euro 30 Page 21 MS DOS 862 Israel...
Page 20: ...31 Page 22 MS DOS 864 Arabic 32 Page 23 MS DOS 874 Thai...
Page 41: ...73 Memo...


