background image


Self-Test Feature Check


Check the following items yourself before calling for service. Contact the 

service center

 for problems 

that you cannot solve by yourself.  
 

Self-Test Feature Check

 | 

Not Optimum Mode

 | 

Display Adapter Driver


Maintenance and Cleaning

 | 

Symptoms & Recommended Actions


1. Self-Test Feature Check

Your monitor provides a self test feature that allows you to check whether your monitor is functioning 
properly. 

1. Turn off both your computer and the monitor.  
2. Unplug the video cable from the back of the computer.  
3. Turn on the monitor.  

 
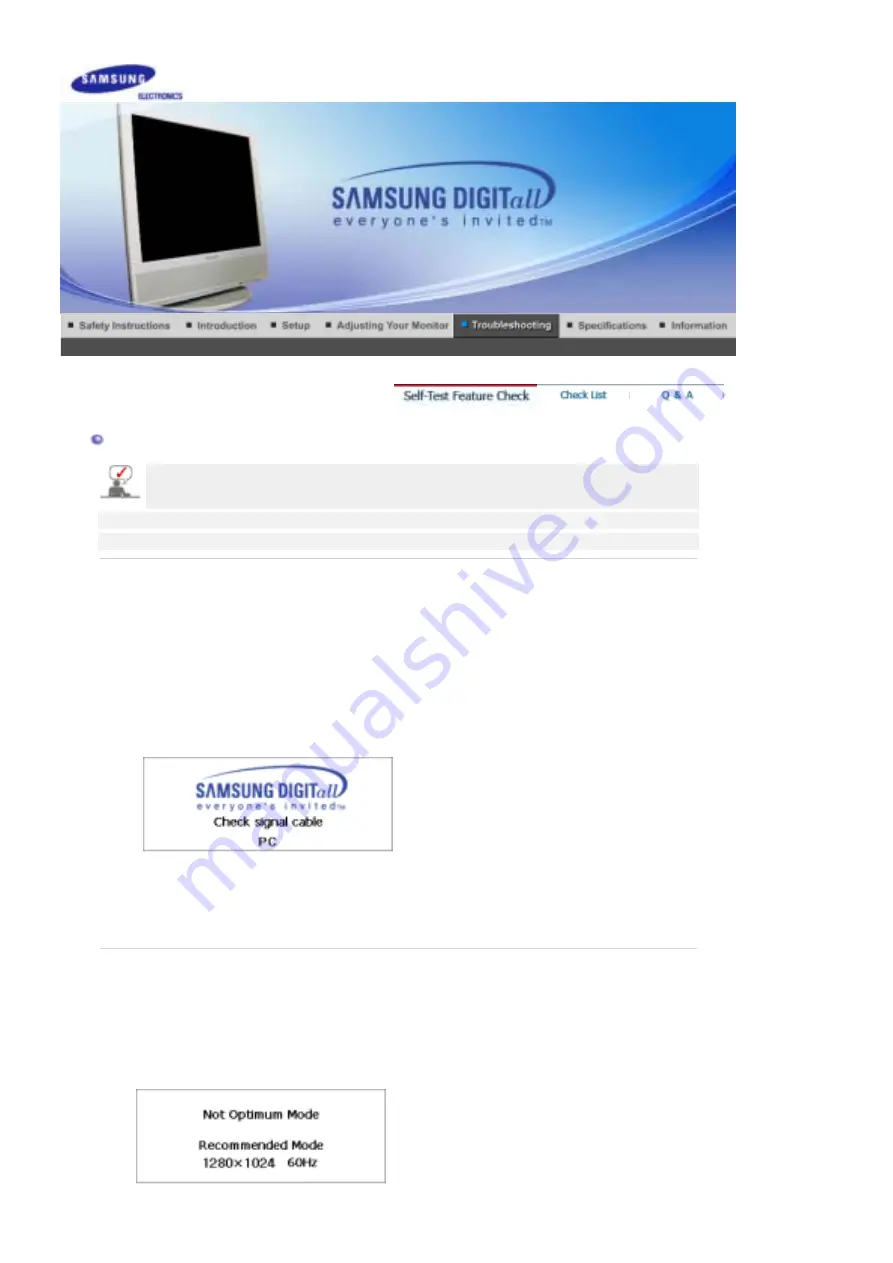
The figure shown below ("Check Signal Cable") appears on a black background when the monitor is 
in its normal working condition though it does not sense any video signal: While in the Self-Test 
mode, the LED power indicator remains green and the figure moves around on the screen. 


4. Turn off your monitor and reconnect the video cable; then turn on both your computer and the 

monitor.  

If your monitor screen remains blank after using the previous procedure, check your video controller and 
computer system; 

your monitor is functioning properly


2. Not Optimum Mode 

1. When the vertical frequency is between 76 and 85hz or the resolution is UXGA (1600x1200), the 

following message is displayed.  
This notifies you that the screen can be viewed for a minute. Thereafter, you cannot view the screen 
any longer and are required to switch to optimal mode. 
 

2. When the vertical frequency is more than 86hz, nothing appears on the screen but the following 

message. In this case, reboot the system in safe mode and change the display settings.  


Summary of Contents for 910MP - SyncMaster 19" LCD Monitor

Page 1: ...Install Drivers Install Programs SyncMaster 910MP...

Page 2: ...erstand at all times Do not disassemble Disconnect the plug from the outlet Do not touch Grounding to prevent an electric shock Power When not used for extended period of time set your computer to DPM...

Page 3: ...use fire Installation Be sure to contact an authorized service center when installing your monitor in a location with the heavy dust high or low temperatures high humidity chemical substance and where...

Page 4: ...for ventilation purposes z An overheated product may catch fire To prevent rainwater from running along the outdoor antenna cable and entering the house be sure the outdoor portion of the cable hangs...

Page 5: ...z This may cause an electric shock or fire z Refer servicing to qualified service personnel If your monitor does not operate normally in particular if there are any unusual sounds or smells coming fro...

Page 6: ...shock or fire z If a foreign substance enters the monitor unplug the power cord and contact the Service Center Do not use or store inflammable substances near the monitor z This may cause an explosion...

Page 7: ...the power switch off and unplug the power cord Make sure that all cables including the antenna cable and cables connected to other devices are disconnected before moving the monitor z Failure to disc...

Page 8: ...d or rechargeable battery for recycling purposes as the consumer of the battery z The customer can return the used or rechargeable battery to a nearby public recycling center or to a store selling the...

Page 9: ...d with your monitor If any items are missing contact your dealer Contact a local dealer to buy optional items Unpacking Monitor Manual Quick Setup Guide Warranty Card Not available in all locations Us...

Page 10: ...ble D Sub Cable Power Cord Audio Cable Others Remote Control Batteries AAA X 2 Connector Front 1 SOURCE 2 PIP 3 MENU 4 CH 5 VOL 6 ENTER 7 Power button 8 Power indicator 9 Remote Control Sensor 1 SOURC...

Page 11: ...her vertically or adjusts selected menu values In TV mode selects TV channels Click here to see an animation clip 5 VOL Moves from one menu item to another horizontally or adjusts selected menu values...

Page 12: ...inal 3 EXT RGB connection Terminal EXT RGB connection Terminal EXT RGB is mainly used in Europe 4 AV connection Terminal 1 Left L Right R audio connection Terminal Input 2 Video connection Terminal In...

Page 13: ...d near the monitor causing malfuction due to interference with frequency 1 POWER 2 number 3 100 4 5 MUTE 6 TTX MIX 7 MENU 8 ENTER 9 CH P 10 SOURCE 11 INFO 12 EXIT 13 Up Down Left Right Buttons 14 AUTO...

Page 14: ...ideo 11 INFO Current picture information is displayed on the upper left corner of the screen 12 EXIT Exits from the menu screen 13 Up Down Left Right Buttons Moves from one menu item to another horizo...

Page 15: ...ated depending on broadcasting type by using DUAL button on the remote control while watching TV MTS You can select the MTS MultiCHANNEL Television Stereo mode Mono Stereo SAP Separate Audio Program S...

Page 16: ...power cord for the monitor into a nearby outlet 2 Using the D sub Analog connector on the video card Connect the signal cable to the 15 pin D sub connector on the back of Your Monitor 3 Connect the au...

Page 17: ...ut devices as a DVD player a VCR a camcorder a DTV or a TV without disconnecting the PC For detailed information on connecting AV input devices refer to User Controls under Adjusting Your Monitor The...

Page 18: ...enna or a CATV cable without installing any separate TV reception hardware or software on your computer 1 Connect the CATV or antenna coaxial cable to the Antenna terminal on the rear of the monitor Y...

Page 19: ...ect your headphones to the Headphone connection terminal Using the Stand This monitor supports various types of VESA standard bases You need to either fold or remove the base in use in order to instal...

Page 20: ...away from the wall surface Contact the nearest Samsung Service Center for more information Samsung Electronics will not be responsible for damages caused by using a base other than those specified Whe...

Page 21: ...ws XP 2000 1 Insert CD into the CD ROM drive 2 Click Windows XP 2000 Driver 3 Choose Your Monitor model in the model list then click the OK button 4 Click the Install button in the Warning window 5 If...

Page 22: ...e operating system to another Follow the directions appropriate for the operating system you have Prepare a blank disk and download the driver program file at the Internet web site shown here z Intern...

Page 23: ...t Don t search I will then click Next and then click Have disk 7 Click the Browse button then choose A D Driver and choose Your Monitor model in the model list and click the Next button 8 If you can s...

Page 24: ...n 3 Choose the Settings tab and then click Advanced 4 Choose Monitor 5 Click Driver and then click on Update Driver then click on the Next button 6 Choose Display a list of the known drivers for this...

Page 25: ...click OK 4 Click Apply button if you see the screen working normally after clicking Test If the screen is not normal change to a different mode lower mode of resolution colors or frequency If there i...

Page 26: ...p F1 in the software program How to install the Natural Color software Insert the CD included with the Samsung monitor into the CD ROM Drive Then the initial screen of the program Natural Color will b...

Page 27: ...the remote control is SOURCE button 1 PC 2 TV 3 Ext As for EXT RGB port of the Monitor it makes TV or VIDEO signal input and output 4 AV 5 S Video PIP When external A V devices such as VCRs or DVDs a...

Page 28: ...irect button on the remote control is SIZE button 4 Position Change the Position of the PIP window The direct button on the remote control is POSITION button 1 PIP 2 Source 3 Size 4 Position Edit Name...

Page 29: ...n be changed The individual color DTVs are also user customizable 1 Cool 2 Normal 3 Warm 4 Custom Colour Control Adjust the individual R G B Colour Controls 1 Red 2 Green 3 Blue If you adjust picture...

Page 30: ...tom which automatically recalls your personalized picture settings The direct button on the remote control is P MODE button 1 Dynamic 2 Standard 3 Movie 4 Custom Custom You can use the on screen menus...

Page 31: ...videos or concerts 3 Movie Choose Movie when viewing movies 4 Speech Choose Speech when watching a show that is mostly dialogue i e news 5 Custom Choose Custom if you want to adjust the settings accor...

Page 32: ...s a result high sounds are clearer brilliant and finely detailed while low sounds are tight well defined and harmonically rich Off On BBE and Dolby Virtual cannot be functioned at the same time Sound...

Page 33: ...ing the air channel through the adjustment of up down under the current frequency 5 Search The tuner scans the frequency range until the first channel or the channel that you selected is received on y...

Page 34: ...On Language You can choose one of 8 languages Note The language chosen affects only the language of the OSD It has no effect on any software running on the computer You can choose other languages if a...

Page 35: ...oes not sense any video signal While in the Self Test mode the LED power indicator remains green and the figure moves around on the screen 4 Turn off your monitor and reconnect the video cable then tu...

Page 36: ...ter disconnecting the power cord 2 Maintaining the Flat Panel Display Screen Clean with a soft cloth cotton flannel smoothly z Do not use benzene thinner or other flammable substances or a wet cloth z...

Page 37: ...to Screen Problems related to the monitor screen and their solutions are listed Problems Solutions Screen is blank and power indicator is off z Ensure that the power cord is firmly connected and the...

Page 38: ...the Volume z If the volume is still too low after turning the control to its maximum check the volume control on the computer sound card or software program Sound is too high pitched or too low pitch...

Page 39: ...s Computer Manual z Windows ME 2000 Set the resolution at the Control Panel Display Screen Saver Set the function at BIOS SETUP of the computer Refer to Windows Computer Manual How can I clean the out...

Page 40: ...resolution SXGA 1280 x 1024 60Hz Maximum resolution SXGA 1280 x 1024 75Hz Input Signal Terminated RGB Analog 0 7Vp p 5 Positive bright 75 ohms 10 terminated Separate H V sync Composite TTL level posit...

Page 41: ...siness z For example the number of TFT LCD sub pixels that is contained in this product are 3 932 160 Note Design and specifications are subject to change without prior notice PowerSaver This monitor...

Page 42: ...37 500 75 000 31 500 VESA 640 x 480 37 861 72 809 31 500 VESA 800 x 600 35 156 56 250 36 000 VESA 800 x 600 37 879 60 317 40 000 VESA 800 x 600 48 077 72 188 50 000 VESA 800 x 600 46 875 75 000 49 500...

Page 43: ...l Frequency The time to scan one line connecting the right edge to the left edge of the screen horizontally is called Horizontal Cycle and the inverse number of the Horizontal Cycle is called Horizont...

Page 44: ...SP SAC 0800 124 421 http www samsung com br CANADA Samsung Electronics Canada Inc Samsung Customer Care 7037 Financial Drive Mississauga Ontario L5N 6R3 1 800 SAMSUNG 1 800 726 7864 http www samsung c...

Page 45: ...om M XICO SAMSUNG ELECTRONICS M XICO S A de C V V a Lopez Portillo No 6 Col San Fco Chilpan Tultitl n Estado de M xico C P 54940 Tel 01 55 5747 5100 01 800 726 7864 Fax 01 55 5747 5202 01 800 849 1743...

Page 46: ...ge 8001 1800 Samsung support Finland 0800 118001 Tel 46 8 590 966 00 Fax 46 8 590 966 50 http www samsung se THAILAND HAI SAMSUNG Service Center MPA COMPLEX BUILDING 1st 2nd Floor 175 SOI SUEKSA VIDHA...

Page 47: ...n Interlace Methods Showing the horizontal lines of the screen from the top to the bottom in order is called the Non Interlace method while showing odd lines and then even lines in turn is called the...

Page 48: ...nal video devices as VCRs camcorders and DVD players separate from a TV broadcast For Better Display 1 Adjust computer resolution and screen injection rate refresh rate on computer as described below...

Page 49: ...use of this material Samsung is the registered trademark of Samsung Electronics Co Ltd Microsoft Windows and Windows NT are registered trademarks of Microsoft Corporation VESA DPMS and DDC are registe...

Page 50: ...dealer or an experienced radio TV technician for help User Information Changes or modifications not expressly approved by the party responsible for compliance could void the user s authority to opera...

Page 51: ...ion receiver in a domestic environment it may cause radio interference Install and use the equipment according to the instruction manual TCO 95 Ecological requirements for personal computers TCO 95 ap...

Page 52: ...On the page this folder you will find a brief summary of the environmental requirements met by this product The complere environmental criteria document may be ordered from TCO Development Unit S 114...

Page 53: ...as computers and other electronics equipment are concerned is that environmentally harmful substances are used both in the products and during their manufacture Since it is not so far possible to sat...

Page 54: ...ntain any mercury It also demands that mercury is not present in any of the electrical or electronics components associated with the labelled unit There is however one exception Mercury is for the tim...

Page 55: ...s for the residents in the following countries please contact the company corresponding to your region of residence For those who reside in other countries please contact a nearest local Samsung deale...

Page 56: ...er or field service technician for help Video In RS 232 Video Out Accessories equipment connected to the analog and digital interfaces must be certified to the respective IEC standards i e IEC 950 for...

Page 57: ...ttern z Use a Screen saver if possible z Set the Monitor to power off with the PC Display Properties Power Scheme Turn the power off for 4 hours after 24 hours in use Turn the power off for 2 hours af...

Page 58: ...tterns When the LCD panel is operated for a long time with a fixed pattern over 12 hours there may be slight difference in voltage between electrodes that work the liquid crystal LC in a pixel The vol...

Reviews: