Samsung 2493HM - SyncMaster - 24

 Monitor

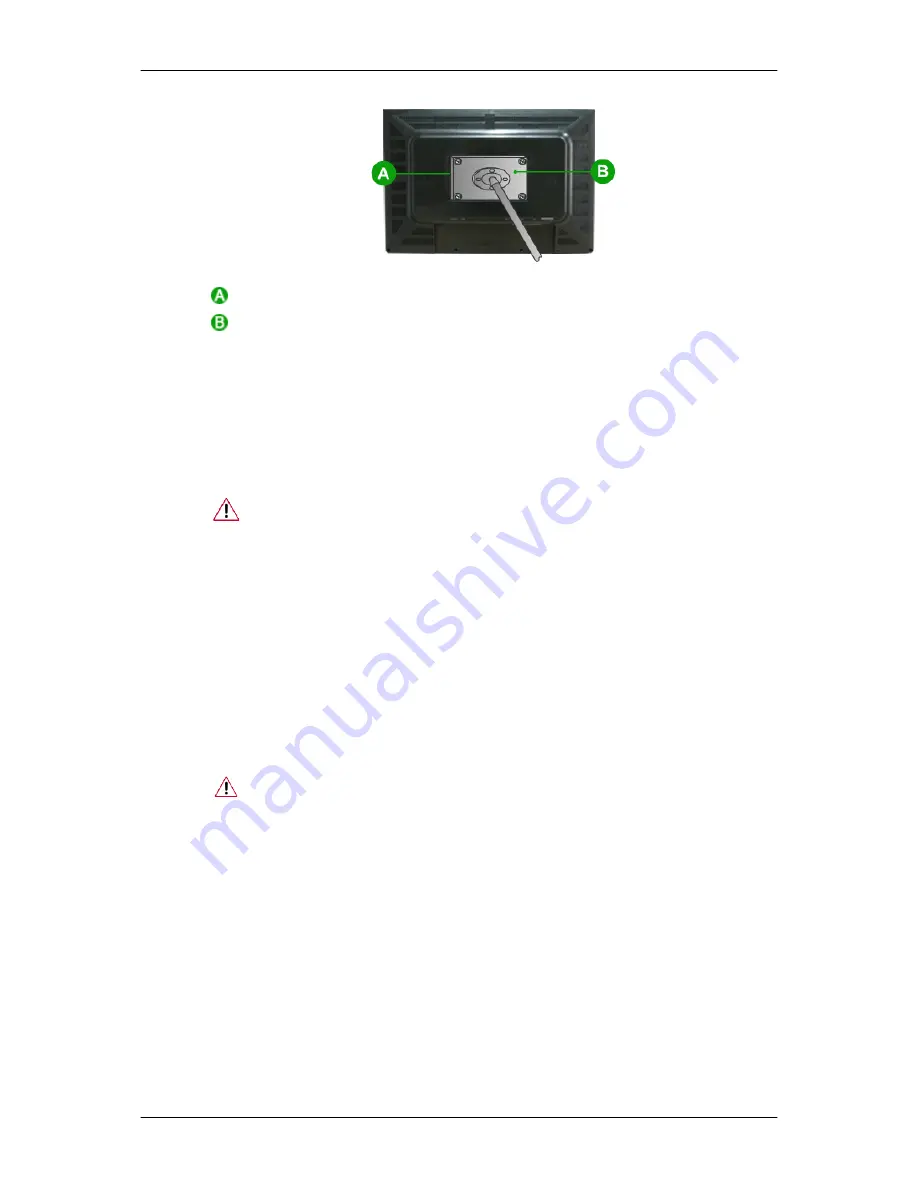
 Mounting interface pad (Sold separately)

1.

Turn off your monitor and unplug its power cord.

2.

Lay the LCD monitor face-down on a flat surface with a cushion beneath it to protect the screen.

3.

Remove four screws and then remove the stand from the LCD monitor.

4.

Align the mounting interface pad with the holes in the rear cover mounting pad and secure it with
four screws that came with the arm-type base, wall mount hanger or other base.

Do not use screws longer than the standard dimension, as they may damage the
inside of the Monitor.

For wall mounts that do not comply with VESA standard screw specifications,
the length of the screws may differ depending on their specifications.

Do not use screws that do not comply with the VESA standard screw specifica-
tions.

Do not fasten the screws too tightly, as this may damage the product or cause the
product to fall, leading to personal injury.

Samsung is not liable for these kinds of accidents.

Samsung is not liable for product damage or personal injury when a non-VESA
or non-specified wall mount is used or the consumer fails to follow the product
installation instructions.

To mount the monitor on a wall, you should purchase the wall mounting kit that
allows you to mount the monitor at least 10 cm away from the wall surface.

Contact  the  nearest  Samsung Service  Center  for  more  information.  Samsung
Electronics will not be responsible for damages caused by using a base other than
those specified.

Please use Wall Mount according to the International standards.

Connections

19

Summary of Contents for 2493HM - SyncMaster - 24" LCD Monitor

Page 1: ...ii LCD MONITOR quick start guide 2493HM 2693HM...

Page 2: ...tems are missing contact your dealer Contact a local dealer to buy optional items Unpacking Without stand With stand Monitor Monitor Sliding stand Manuals Quick Setup Guide Warranty Card Not available...

Page 3: ...displayed content will disappear after 40 seconds Turn the power button off and on It will be displayed again It can be displayed up to three 3 times Make sure to adjust the resolution of your PC befo...

Page 4: ...zed key for a required function via Setup Cus tomized Key Volume button When OSD is not on the screen push the button to adjust volume Click here to see an animation clip Adjust buttons Adjust items i...

Page 5: ...light glows blue during normal operation and blinking blue once as the mon itor saves your adjustments Note See PowerSaver described in the manual for further information regarding power saving functi...

Page 6: ...he DVI IN HDCP port on the back of your monitor RGB IN Connect the RGB IN terminal at the back of your monitor to your computer AUDIO IN AUDIO OUT AUDIO IN Connect the audio cable for your monitor to...

Page 7: ...Kensington Lock The Kensington lock is a device used to physi cally fix the system when using it in a public place The locking device has to be purchased sepa rately Note For using a locking device c...

Page 8: ...tal connector on the video card Connect the DVI Cable to the DVI IN HDCP Port on the back of your Mon itor DVI IN HDCP Connected to a Macintosh Connect the monitor to the Macintosh computer using the...

Page 9: ...red and white jacks of an stereo cable to the same colored audio output terminals of the digital output device and connect the opposite jack to the AUDIO IN terminal of the monitor 3 When all the con...

Page 10: ...his monitor to connect the monitor s UP port and your computer s USB port 2 Connect the DOWN port of the USB monitor and a USB device with the USB cable 3 The use procedures are as the same as those f...

Page 11: ...alfunction of the device If the device malfunctions even if it is connected to the computer contact the service center of the device computer Connecting Headphone Note You may connect your headphones...

Page 12: ...and Stand Stopper Note When rotating the monitor screen you should lift it to the maximum height of the stand and then lean the top backwards Otherwise the corners of the monitor screen may come into...

Page 13: ...their specifications Do not use screws that do not comply with the VESA standard screw specifica tions Do not fasten the screws too tightly as this may damage the product or cause the product to fall...

Page 14: ...nd computer system your monitor is functioning properly Warning Messages If there is something wrong with the input signal a message appears on the screen or the screen goes blank although the power i...

Page 15: ...the D sub cable Check the signal cable connection Connected using the DVI cable If you still see an error message on the screen when the monitor is connected properly check to see if the monitor stat...

Page 16: ...d then reconnect the DVI cable while the system is running as certain types of graphic cards do not send out video signals Connect the DVI cable and then reboot the system I cannot see the On Screen D...

Page 17: ...rs been set properly A Windows XP Set the resolution at the Control Panel Appearance and Themes Display Settings A Windows ME 2000 Set the resolution at the Control Panel Display Settings Q Has the vi...

Page 18: ...oot the computer after installing the program for the first time If a copy of the program is already installed remove it reboot the computer and then install the program again You need to reboot the c...

Page 19: ...ance and Themes Display Screen Saver Set the function in the BIOS SETUP of the computer Refer to the Windows Computer Man ual A Windows ME 2000 Set the resolution at the Control Panel Display Screen S...

Reviews: