background image

2

Getting Started

Closed View of Phone

Summary of Contents for 22004

Page 1: ...SCH a600 Series P O R T A B L E T r i M o d e T E L E P H O N E User Guide Please read this manual before operating your phone and keep it for future reference...

Page 2: ...engineer decompile disassemble or otherwise attempt to create source code from the software No title to or ownership in the Intellectual Property is transferred to you All applicable rights of the In...

Page 3: ...PRODUCT THE PERFORMANCE OF THE PRODUCT THE WORKMANSHIP OF THE PRODUCT OR THE COMPONENTS CONTAINED THEREIN OR COMPLIANCE OF THE PRODUCT WITH THE REQUIREMENTS OF ANY LAW RULE SPECIFICATION OR CONTRACT P...

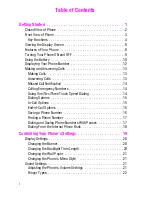
Page 4: ...4 Calling Emergency Numbers 14 Using One Two Three Touch Speed Dialing 14 Dialing Options 15 In Call Options 15 End of Call Options 16 Saving a Phone Number 16 Finding a Phone Number 17 Dialing and Sa...

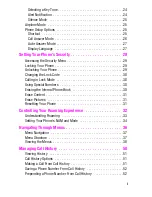
Page 5: ...ng in Lock Mode 30 Using Special Numbers 30 Erasing the Internal Phone Book 30 Erase Content 31 Erase Pictures 31 Resetting Your Phone 31 Controlling Your Roaming Experience 32 Understanding Roaming 3...

Page 6: ...one Book Entry 59 Editing an Internal Phone Book Entry s Phone Number 60 Selecting a Ringer Type for an Entry 60 Secret Internal Phone Book Entries 61 Changing the Group Name 62 Personal Organizer 63...

Page 7: ...92 Setting Up Your Voicemail 92 Voicemail Notification 92 New Voicemail Message Alerts 92 Retrieving Your Voicemail Messages 93 Clearing the Voice Mail Count 93 Using Caller ID 94 Responding to Call...

Page 8: ...110 Downloading Do More Content 112 Sounds 112 Ringtones 112 Sound Clips 113 Images 114 Wallpaper 114 Picture Album 115 Games 117 Tools 119 Applications 119 Memory Management 120 Safety 121 Getting th...

Page 9: ...tting Started Closed View of Phone Front View of Phone Viewing the Display Screen Features of Your Phone Turning Your Phone On and Off Using the Battery and Charger Displaying Your Phone Number Making...

Page 10: ...2 Getting Started Closed View of Phone...

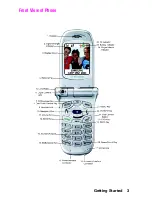
Page 11: ...Getting Started 3 Front View of Phone...

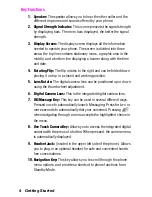
Page 12: ...tion 5 Lens Rotate The digital camera lens can be positioned up or down using the thumb wheel adjustment 6 Digital Camera Lens This is the integrated digital camera lens 7 OK Message Key This key can...

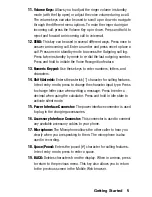
Page 13: ...mbers letters and characters 14 Shift Asterisk Enters the asterisk character for calling features In text entry mode press to change the character input type Press to change letter case when writing a...

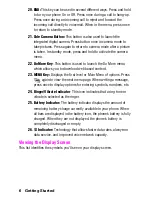
Page 14: ...llows you to download web based content 23 MENU Key Displays the first level or Main Menu of options Press again to view the next menu page When writing a message press once to display options for ent...

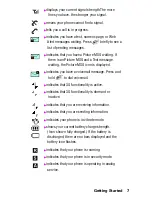
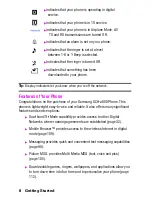
Page 15: ...icon is displayed indicates you have a voicemail message Press and hold to dial voicemail indicates that 3G functionality is active indicates that 3G functionality is dormant or inactive indicates tha...

Page 16: ...etwork Features of Your Phone Congratulations on the purchase of your Samsung SCH a600 Phone This phone is lightweight easy to use and reliable It also offers many significant features and service opt...

Page 17: ...ates that your phone is searching for a signal When your phone finds a signal it automatically enters standby mode the phone s idle state At this point you are ready to begin making and receiving call...

Page 18: ...ours of continuous digital standby time 20 hours in analog When the battery reaches 5 of its capacity the battery icon blinks When there are approximately two minutes of talk time left the phone sound...

Page 19: ...e battery You should charge the battery as soon as possible so you can begin using your phone Keeping track of your battery s charge is important If your battery level becomes too low your phone autom...

Page 20: ...s a problem charging the phone It takes approximately 4 hours to fully recharge a completely rundown standard battery With the Samsung approved LiIon battery you can recharge the battery before it bec...

Page 21: ...ose the flip or press Tip To redial your last outgoing call press twice Answering Calls 1 Make sure your phone is on If your phone is off incoming calls go to voicemail 2 Press to answer an incoming c...

Page 22: ...press even if your phone is locked or your account is restricted Using One Two Three Touch Speed Dialing With this feature you can automatically call Speed Dial entries using one key press for locati...

Page 23: ...al The speed dial function allows you to call the number stored in that memory location by pressing 1 Send is used to dial the phone number If you are roaming and have the Call Guard feature activated...

Page 24: ...ptions For more information see Personal Organizer on page 63 8 Phone Info displays the hardware software version Username and PRL being used For more information see Controlling Your Phone s Settings...

Page 25: ...ind Note If you enter a number larger than 300 press for Find 3 A list of possible matches is displayed Select the desired entry and press 4 To dial the number press Dialing and Saving Phone Numbers W...

Page 26: ...t of numbers Dialing From the Internal Phone Book To dial directly from an Internal Phone Book entry 1 Press the navigation key left to display your Internal Phone Book 2 Scroll left or right to searc...

Page 27: ...Controlling Your Phone s Settings 19 Controlling Your Phone s Settings Display Settings Sound Settings Airplane Mode Phone Setup Options...

Page 28: ...the numeric keypad to enter a new custom banner 7 Press to save and exit Changing the Backlight Time Length The backlight setting lets you select how long the display screen and keypad are illuminate...

Page 29: ...lendar Launch Pad or Digital Clock in local image mode 7 Press to Select Changing the Phone s Menu Style To select the display s menu style 1 Press for Main Menu 2 Press for Setup 3 Press for Display...

Page 30: ...ncludes a variety of standard musical melodies Downloaded are ringers that have been downloaded right to your phone See Downloading Images on page 114 and Ringers on page 112 Vibrate alerts you to cal...

Page 31: ...s for Setup 3 Press for Sounds 4 Press for Ringer Type 5 Press for Messages 6 Press for Voicemail Text or for Web Pic MSG 7 Press the navigation key left or right to select Ring Tones Melodies or Down...

Page 32: ...mail or other automated systems or you may choose from other more entertaining options To select a key tone 1 Press for Main Menu 2 Press for Setup 3 Press for Sounds 4 Press for Tone Length 5 Select...

Page 33: ...e the phone s other features such as Games Notepad Voice Memos etc while you are in Airplane Mode To set your phone to Airplane Mode 1 Press for Main Menu 2 Press for Setup 3 Press for Airplane Mode 4...

Page 34: ...following functions Phone Book Voice Memo Scheduler Messaging Voice Dial Ringer Type Display Alarms Calculator 6 Press to Select Call Answer Mode To set the actions required to answer an incoming call...

Page 35: ...5 Press the navigation key up or down to select Yes or No 6 Press to Select Display Language Your phone is capable of communicating with you in either English or French Selecting a language changes a...

Page 36: ...Setting Your Phone s Security Setting Your Phone s Security Accessing the Security Menu Locking Your Phone Unlocking Your Phone Using Special Numbers 28...

Page 37: ...ur Phone When your phone is locked you can only receive incoming calls or make calls to 911 Customer Service or special numbers To lock your phone 1 From the Security menu press for Lock Phone 2 Using...

Page 38: ...reen Enter your lock code Enter the desired phone number and press Using Special Numbers You can save up to three special numbers in addition to your Internal Phone Book entries the same number may be...

Page 39: ...es 3 Press Erase Pictures Erase Pictures deletes all pictures currently saved in your phone To erase 1 From the Security menu press for Erase Pictures 2 Press the navigation key up and select Yes 3 Pr...

Page 40: ...Controlling Your Roaming Experience Controlling Your Roaming Experience Understanding Roaming Setting Your Phone s System Mode 32...

Page 41: ...and receive calls and access voicemail You will experience a few differences You are more likely to experience static cross talk fade out and dropped calls Some features which are standard on the net...

Page 42: ...u can determine which signals your phone accepts Set NAM This setting allows you to associate your mobile identification number MIN to your phone s electronic serial number ESN 1 Press for Main Menu 2...

Page 43: ...or Roaming 5 Press for Set Mode 6 Press the navigation key up or down to select one of the following Automatic This setting automatically seeks the TELUS service When the service is unavailable it sea...

Page 44: ...Navigating Through Menus Navigating Through Menus Menu Navigation Menu Structure Viewing the Menus 36...

Page 45: ...ou may also navigate to the next menu by pressing the navigation key Menu Structure Selecting Menu Items As you navigate through the menu menu options are highlighted Select any numbered option by sim...

Page 46: ...g Calls 3 Missed Calls 4 Erase History 1 Outgoing 2 Incoming 3 Missed 4 All Calls 5 Air Time 1 Last Call 2 Total Calls 2 Phone Book 1 Find 1 By Name 2 By Entry 3 By Group 2 Add New Entry 3 Group Setti...

Page 47: ...Yes 2 No 2 Outbox 1 Yes 2 No 3 Sent 1 Yes 2 No 4 Drafts 1 Yes 2 No 5 Templates 1 Yes 2 No 6 All messages 1 Yes 2 No 8 MSG Settings 1 Slide Format 1 Image Bottom 2 Image Top 3 Image Left 4 Image Right...

Page 48: ...MSG 5 Saved 6 Erase MSG 7 MSG Settings 1 General 1 Scroll Timer 1 Off 2 1 second 3 2 seconds 4 3 seconds 5 4 seconds 6 5 seconds 2 MSG Reminder 1 Off 2 Once 3 Every 2 min 2 New Message 1 Callback 2 S...

Page 49: ...5 minutes 10 Thank you 4 Do More 1 Wireless Web 2 Sounds 1 Get New 2 Ringtones 3 Sound Clips 3 Images 1 Get New 2 Wallpaper 3 Picture Album 4 Games 1 Get New 5 Tools 1 Get New 6 Applications 1 Get New...

Page 50: ...Normal 4 Help 6 Voice Tools 1 Voice Memo 1 Record 2 Play 3 Erase All 1 Yes 2 No 7 Utilities 1 Schedule 2 Alarm Clock 1 Alarm 1 2 Alarm 2 3 Alarm 3 3 Note Pad 4 Calculator 5 World Clock 6 Countdown 7...

Page 51: ...No Image 2 Downloads 3 Picture Album 2 No Caller ID 1 No Image 2 Downloads 3 Picture Album 4 Banner 5 Backlight 1 LCD 1 Flip Open 2 30 seconds 3 15 seconds 4 8 seconds 2 Keypad 1 Flip Open 2 30 second...

Page 52: ...icemail Text 2 Web Pic MSG 3 Schedule 3 Alerts 1 Minute Beep 1 On 2 Off 2 Service Alert 1 On 2 Off 3 Connect 1 On 2 Off 4 Disconnect Fade 1 On 2 Off 4 Roam Ringer 1 Normal 2 Distinctive 5 Key Beep 6 T...

Page 53: ...No 2 Name Dial 1 Yes 2 No 3 Phonebook 1 Yes 2 No 5 Help 4 Games Tools 1 Backlight 1 10 seconds 2 25 seconds 3 1 minute 4 Permanent 2 Sounds 3 Notification 1 Voicemail 1 On 2 Off 2 Text MSG 1 On 2 Off...

Page 54: ...1 Yes 2 No 7 Reset Phone 1 Yes 2 No 6 Airplane Mode 1 On 2 Off 7 Launch Pad 1 Up Key Note These 9 options are also available for the Left and Right keys 1 Phone Book 2 Voice Memo 3 Scheduler 4 Messag...

Page 55: ...es 2 No 4 Language 1 English 2 French 5 Roaming 1 Set NAM 1 NAM 1 2 NAM 2 2 Set Mode 1 Automatic 2 Home Only 3 Analog 6 Game Pad 1 Get Device 2 Key Remap 1 Cursor Key 1 Up Key Note These 24 options ar...

Page 56: ...Key 19 8 Key 20 9 Key 21 0 Key 22 Star Key 23 Pound Key 24 Launching 2 Down Key 3 Left Key 4 Right Key 2 Fire Key 1 Fire A Key 2 Fire B Key 3 Fire C Key 4 Fire D Key 3 Other Key 1 Start Key 2 Menu Ke...

Page 57: ...Navigating Through Menus InUse Menu 1 Mute Unmute 2 Call History 3 Phone Book 4 3 Way Call 5 Messaging 6 Voice Memo 7 Utilities 8 Phone Info 49...

Page 58: ...Managing Call History Managing Call History Viewing History Call History Options Making a Call From Call History Saving a Phone Number From Call History Erasing Call History 50...

Page 59: ...umber is in your Internal Phone Book Duplicate calls same number and type of call may only appear once on the list To view a Call History entry 1 Press for Main Menu 2 Press for Call History Press for...

Page 60: ...istory 1 Press for Main Menu 2 Press for Call History 3 Highlight the desired entry in the Outgoing Incoming or Missed call history and press 4 Press for Save After you have saved the number the new I...

Page 61: ...in Menu 2 Press for Call History 3 Press for Erase History Press to erase Outgoing Calls Press to erase Incoming Calls Press to erase Missed Calls Press to erase All Calls 4 Using the navigation key h...

Page 62: ...Internal Phone Book Using the Internal Phone Book Internal Phone Book Entry Options Adding a New Internal Phone Book Entry Finding Internal Phone Book Entries Selecting a Ringer Type 54...

Page 63: ...view the previous entry by pressing the navigation key left Entering Text Selecting a Character Input Mode Your phone provides convenient ways to enter words letters punctuation and numbers whenever y...

Page 64: ...e and creates a suitable word The word may change as you type If the word you want does not display after you have entered all the letters press to scroll through additional word selections To accept...

Page 65: ...the Number mode and press the appropri ate key See Selecting a Character Input Mode on page 55 To enter symbols select the Symbols mode See Selecting a Char acter Input Mode on page 55 To enter a sym...

Page 66: ...imple steps 1 Press for Main Menu 2 Press for Phone Book 3 Press for Find 4 Press the navigation key left or right to search by Name Entry or Group 5 Once the desired option is highlighted press the n...

Page 67: ...ups associated with your phone book entries see Changing the Group Name on page 62 to change the group names If no group is selected the entry is automatically set to No Group Adding a Phone Number to...

Page 68: ...number using the keypad and press 9 Press to Save Selecting a Ringer Type for an Entry You can assign a ringer type to an Internal Phone Book entry so you can identify the caller by the ringer type Se...

Page 69: ...ect the desired entry and press 5 Press to edit the entry 6 Press the navigation key down until Secret is selected 7 Press the navigation key left or right until On is displayed in the Secret field an...

Page 70: ...ress for Phone Book 3 Press for Find 4 Select the desired entry and press 5 Press to edit the entry 6 Press the navigation key down until the Group is selected 7 Press the navigation key left or right...

Page 71: ...Personal Organizer 63 Personal Organizer Adding an Event to the Scheduler Event Alerts Viewing Events Using the Calculator Using the Alarm Clock Using the Notepad Using Your Phone s Utilities...

Page 72: ...6 Enter the Start Time and Date using the keypad Press for AM and for PM 7 Enter the End Time and Date using the keypad 8 Press the Navigation key left or right and select one of the following No Alar...

Page 73: ...view your scheduled events 1 Press for Main Menu 2 Press for Utilities 3 Press for Schedule 4 Select desired date and a list of the events scheduled for the day are displayed Erasing a Day s Events T...

Page 74: ...5 Press the navigation key up or down to select the desired event 6 Press to Erase the event 7 Highlight Yes with the navigation key and press to confirm Purging All Events To delete all scheduled ev...

Page 75: ...the navigation key left or right and select one of the following options Daily Once Mon to Fri Sat Sun 9 Press to Save Using the Note Pad Your phone comes with a note pad you can use to compose and st...

Page 76: ...rase 5 Select Yes and press to confirm the deletion Using the Calculator Your phone comes with a built in calculator function To use this feature follow these easy steps 1 Press for Main Menu 2 Press...

Page 77: ...key left right up or down to display the different time zones 5 Press to turn DST Daylight Savings Time On or Off for that time zone Note A sun icon is displayed on screen if DST is selected for a tim...

Page 78: ...wn 1 Press for Main Menu 2 Press for Utilities 3 Press for Countdown 4 Press the navigation key up or down to highlight the desired countdown and press Tip When viewing an existing countdown press the...

Page 79: ...Voice Services 71 Voice Services Using Voice Activated Dialing Voice Memos...

Page 80: ...s one of these commands the phone launches the associated application If the phone does not hear a command within approximately eight seconds it de activates voice recognition without taking any actio...

Page 81: ...say the number 3 Say a valid 7 10 or 11 digit North American phone number naturally and clearly 4 If the phone asks you Did You Say followed by the correct number say Yes You can also select the corr...

Page 82: ...accents or unusual voice characteristics may find difficulty in achieving high accuracy with speaker independent digit dialing so the Adapt Digits feature allows users to dramatically improve the digi...

Page 83: ...e plays back your recording and asks you if the recording sounds OK 6 If the recording sounds ok no mistakes and no background noises say Yes If you need to re record the digits to fix any problems sa...

Page 84: ...ly Name Dial automatically voice activates every contact in your Phone book without the need to record or train names before using them With Name Dial you can dial any person in your Phone book by say...

Page 85: ...he name the phone will display one or more names on the screen and prompt you to confirm the name you spoke If the phone says Did You Say followed by the correct name say Yes If the phone asks you Did...

Page 86: ...ok 5 Press the navigation key up or down to select Yes or No and press When choice lists are enabled for Phone book after you say the name the phone will display one or more names on the screen and pr...

Page 87: ...g 5 To pause the memo press When a memo is paused press again to resume recording 6 To finish recording press When you have finished recording the phone offers you the option of reviewing the memo re...

Page 88: ...a new memo 4 Highlight the desired voice memo and press for Send To 5 Press to enter a caption for the voice memo using the keypad Press again when finished 6 Press for Next 7 Press the navigation ke...

Page 89: ...ant to review The phone replays the memo To pause the memo during replay press Press again to resume replaying the memo To erase an individual memo 1 Follow the steps above to display the list of save...

Page 90: ...Camera Using Your Phone s Camera Take Pictures Storing Pictures Camera Settings 82...

Page 91: ...e thumb wheel to move the lens up or down 5 Hold the camera steady To take the picture press or the Side Camera button until the shutter sounds To Take a Picture With the Phone Closed 1 Rotate the fli...

Page 92: ...d quality images without using too much memory The zoom feature is available using the navigation key Low The low setting allows you to take average quality images You can save the most images in memo...

Page 93: ...ferent options and then press down to select Camera Options Camera options allow you to set up options associated with taking the picture When you are in the camera mode press to display the following...

Page 94: ...for Self timer 3 Using the navigation key highlight the length of delay you want the timer to use 10 seconds or 5 seconds and press An icon is displayed in the top right corner of the screen To deacti...

Page 95: ...re to an online album Erase Removes the image for memory Edit Caption Allows you to edit the caption of the image Up to 32 characters can be entered to identify the image Picture Info This option disp...

Page 96: ...Press the navigation key down to highlight Add sound and press 9 Press for Voice Record 10 Record your message and press when finished 11 If satisfied with the message press for Attach 12 Enter a name...

Page 97: ...t up the slide duration and slide format settings of the image Slide duration is used to change the amount of time a slide is displayed on the screen Slide format is used to change the slide position...

Page 98: ...memory No one can review the images without entering a password Shutter Sound The shutter sound allows you to select between 7 different shutter sounds The shutter sound is heard when you take a pict...

Page 99: ...The Basics 91 The Basics Using Voicemail Using Caller ID Responding to Call Waiting Making a Three Way Call Using Call Forwarding...

Page 100: ...to work correctly Note The voicemail setup process may vary in certain Affiliate areas Voicemail Notification There are several ways your phone alerts you By displaying a message on the screen By soun...

Page 101: ...ress for Voice Mail 4 Press for Inbox 5 Press for Connect Note You are charged for airtime minutes when you are accessing your voicemail from your phone Using a Phone Other Than Your Wireless Phone to...

Page 102: ...lable and you are in digital mode To respond to an incoming call while you re on a call Press This puts the first caller on hold and answers the sec ond call To switch back to the first caller Press a...

Page 103: ...ng and Three Way Calling are not available while roaming Using Call Forwarding Call Forwarding lets you forward all your incoming calls to another phone number even when your phone is turned off You c...

Page 104: ...quired for you to connect and use your phone with your computing device Data Fax setup 1 Press for Main Menu 2 Press for Setup 3 Press for Others 4 Press for Connection 5 Press the navigation key up o...

Page 105: ...nection through the application on your computer which returns your phone to standby mode Disconnecting the data cable or turning off your phone will also end a data or fax call but it may disrupt you...

Page 106: ...Messaging Messaging Message Types Text Messaging Picture Messaging 98...

Page 107: ...w message you ll automatically be notified with a one way text message In addition messaging includes a variety of pre set messages such as I m running late I m on my way that make composing messages...

Page 108: ...not read in the time allotted it is cancelled Send Later allows you to time delay the sending of a message using one of the preset time limits Delivery Ack requests that a delivery acknowledgment is s...

Page 109: ...ll messages 1 Press for Main Menu 2 Press for Messaging 3 Press for Text MSG 4 Press for Erase 5 Press for All Messages 6 Press the navigation key up or down to select one of the following options No...

Page 110: ...ns associated with messaging Scroll Timer The scroll timer allows you to set the duration of the scroll before it closes in the message screen To access the scroll timer 1 Press for Main Menu 2 Press...

Page 111: ...nt with all new text messages To access callback number 1 Press for Main Menu 2 Press for Messaging 3 Press for Text MSG 4 Press for MSG Settings 5 Press for New Message 6 Press for Callback 7 Press a...

Page 112: ...e alphabet setting is the standard keypad entry mode To access Entry Method 1 Press for Main Menu 2 Press for Messaging 3 Press for Text MSG 4 Press for MSG Settings 5 Press for New Message 6 Press fo...

Page 113: ...s for Messaging 3 Press for Text MSG 4 Press for MSG Settings 5 Press for New Message 6 Press for Canned MSG 7 Highlight the desired message and press 8 Press and hold to erase the message Enter your...

Page 114: ...Press for Voice Record 10 Record your message and press when finished 11 If satisfied with the message press for Attach 12 Enter a name for the sound using the keypad and press 13 Press again to atta...

Page 115: ...he message Priority Class This option allows you to set a priority level of low normal or high It also allows you to set a message class to personal advertisement or informational Cc and Bcc Allows yo...

Page 116: ...Web Services Do More Web Services Wireless Web Sounds Images Games Tools Applications 108...

Page 117: ...for Do More 3 Press for Wireless Web 4 Your web connection will launch and the Mobile Web Home page Shortcut You can also press and hold the center of the navigation key down to launch the Web If you...

Page 118: ...b sites during a web session is easy once you ve learned a few basics Here are some tips for getting around Softkeys When browsing the Web the bottom line of your phone s display contains one or more...

Page 119: ...ink and then selecting the appropriate softkey Tip The tenth item in a numbered list may be selected by pressing the key on your phone s keypad even though the number 0 doesn t appear on the screen Go...

Page 120: ...New and press The browser will launch and take you to the Ringtones download menu 4 Use your navigation key to highlight and select a ringer you wish to download For more information on navigating the...

Page 121: ...Do More 2 Press for Sounds 3 Use the navigation key to highlight Ringtones and press 4 Use the navigation key to select the desired ringtone 5 Press for Erase for Erase All Sound Clips Sound Clips is...

Page 122: ...wser will launch and take you to the Wallpapers download menu For more information on navigating the Web see Navigating the Wireless Web on page 110 Note You may store a limited number of downloaded W...

Page 123: ...ey to highlight Wallpaper and press 4 Press the navigation key left or right to select the desired wallpaper and press for Erase for Erase All Picture Album Picture Album allows you to assign a pictur...

Page 124: ...s for Edit and enter the Caption text Note If you have entered text in previous messages they may still be available Press the navigation key down to display a list of previous caption text messages H...

Page 125: ...Images 3 Use the navigation key to highlight Picture Album and press 4 Press the navigation key left or right to select the desired image 5 Press for Upload Erasing an Image 1 Press for Do More 2 Pre...

Page 126: ...to play the game When you are finished select Exit or Quit or press Game Pad The optional Game Pad accessory allows you to insert your phone into a convenient handheld gaming device to control the act...

Page 127: ...10 Using Tools 1 Press for Do More 2 Press for Tools 3 Highlight the tool you wish to launch and press Applications You can download a variety of applications from the web Downloading Applications 1 P...

Page 128: ...s full you may want to erase existing content to free up additional memory To erase downloads go to the Do More menu and select the folder you want to delete from Select the object and then select Era...

Page 129: ...Safety 121 Safety Getting the Most Out of Your Reception Maintaining Safe Use of and Access to Your Phone Caring for the Battery Acknowledging Special Precautions and Industry Canada Notice...

Page 130: ...and transmits radio frequency RF signals When you use your phone the system handling your call controls the power level This power can range from 0 006 watts to 0 2 watts in digital mode Knowing Radi...

Page 131: ...o Your Phone FAILURE TO FOLLOW THE INSTRUCTIONS OUTLINED MAY LEAD TO SERIOUS PERSONAL INJURY AND POSSIBLE PROPERTY DAMAGE Using Your Phone While Driving Talking on your phone while driving or operatin...

Page 132: ...ely shielded electronic operating systems and or entertainment systems in motor vehicles Check with the manufacturer or their representative to determine if these systems are adequately shielded from...

Page 133: ...ransfer or storage facilities Areas where the air contains chemicals or particles such as grain just or metal powders Any other area where you would normally be advised to turn off your vehicle s engi...

Page 134: ...ow these storage rules Less than one month 4 F to 140 F 20 C to 60 C More than one month 4 F to 113 F 20 C to 45 C Disposal of Lithium Ion LiIon Batteries For safe disposal options of your LiIon batte...

Page 135: ...tee that interference will not occur in a particular installation if this equipment does cause harmful interference to radio or television reception which can be determined by turning the equipment of...

Page 136: ...n 1 440 W kg Owner s Record The model number regulatory number and serial number are located on a nameplate inside the battery compartment Record the serial number in the space provided below This wil...

Page 137: ...Warranty 129 Manufacturer s Warranty Manufacturer s Warranty...

Page 138: ...nance installation or adjustment f installation maintenance and service of Product or g Product used or purchased outside the United States or Canada This Limited Warranty covers batteries only if bat...

Page 139: ...LUDING IF APPLICABLE THE IMPLIED WARRANTIES OF MERCHANTABILITY AND FITNESS FOR A PARTICULAR PURPOSE ARE HEREBY LIMITED TO THE SAME DURATION OF TIME AS THE EXPRESS WRITTEN WARRANTY STATED HEREIN SOME S...

Page 140: ...Product failure between Purchaser and SAMSUNG and SAMSUNG s Product pricing reflects this allocation of risk and the limitations of liability contained in this Limited Warranty The agents employees di...

Page 141: ...igit Dial 72 Display Screen Symbols 6 Display Settings 20 Downloading Do More Content 112 E End Fax or Data Call 97 Entering Text Alpha Mode 56 Selecting a Character Input Mode 55 Symbols and Numbers...

Page 142: ...Networks 33 S Scheduler 64 Security Menu 29 Send Fax or Data File 97 set nam 34 Silence Mode 25 Special Numbers 30 T T9 Text Input 56 Text Messaging 99 Three Way Calling 94 Turning Your Phone On and...

Reviews: