background image

 Messaging

Advanced Send Options

There are a number of advanced sending options associated with picture 
messaging. These options are:


Reports

 - This option allows you to attach a Read Receipt to the 

outgoing message. When the message is received by the 
recipient, a message is returned to notify you that the message 
was read.


Message Title

 - This option allows you to attach a message 

title to the message.


Priority & Class

 - This option allows you to set a priority level 

of low, normal, or high. It also allows you to set a message 
class to personal, advertisement, or informational.


Cc and Bcc

 - Allows you to Cc (carbon copy) and Bcc (blind 

carbon copy) the message to another email address or mobile 
number. If the Bcc is used, the other recipients do not see the 
email address or phone number of the Bcc recipient, it is 
hidden.

To access the advanced settings:

1.

Before sending the picture message, press 


 for 

Advanced.

2.

Press  

for 

Reports

,  

for 

Message Title

,  

for 

Priority 

& Class

, or 

 for 

Cc and Bcc

.

107

Summary of Contents for 2.0040223181058e16

Page 1: ...SCH a600 Series P O R T A B L E T r i M o d e T E L E P H O N E User Guide Please read this manual before operating your phone and keep it for future reference ...

Page 2: ...e engineer decompile disassemble or otherwise attempt to create source code from the software No title to or ownership in the Intellectual Property is transferred to you All applicable rights of the Intellectual Property shall remain with SAMSUNG and its suppliers Samsung Telecommunications America STA Inc Headquarters Customer Care Center 1301 E Lookout Drive 1601 E Plano Parkway Suite 150 Richar...

Page 3: ... PRODUCT THE PERFORMANCE OF THE PRODUCT THE WORKMANSHIP OF THE PRODUCT OR THE COMPONENTS CONTAINED THEREIN OR COMPLIANCE OF THE PRODUCT WITH THE REQUIREMENTS OF ANY LAW RULE SPECIFICATION OR CONTRACT PERTAINING THERETO NOTHING CONTAINED IN THE INSTRUCTION MANUAL SHALL BE CONSTRUED TO CREATE AN EXPRESS OR IMPLIED WARRANTY OF ANY KIND WHATSOEVER WITH RESPECT TO THE PRODUCT IN ADDITION SAMSUNG SHALL ...

Page 4: ...14 Calling Emergency Numbers 14 Using One Two Three Touch Speed Dialing 14 Dialing Options 15 In Call Options 15 End of Call Options 16 Saving a Phone Number 16 Finding a Phone Number 17 Dialing and Saving Phone Numbers With Pauses 17 Dialing From the Internal Phone Book 18 Controlling Your Phone s Settings 19 Display Settings 20 Changing the Banner 20 Changing the Backlight Time Length 20 Changin...

Page 5: ...ing in Lock Mode 30 Using Special Numbers 30 Erasing the Internal Phone Book 30 Erase Content 31 Erase Pictures 31 Resetting Your Phone 31 Controlling Your Roaming Experience 32 Understanding Roaming 33 Setting Your Phone s NAM and Mode 34 Navigating Through Menus 36 Menu Navigation 37 Menu Structure 37 Viewing the Menus 38 Managing Call History 50 Viewing History 51 Call History Options 51 Making...

Page 6: ...hone Book Entry 59 Editing an Internal Phone Book Entry s Phone Number 60 Selecting a Ringer Type for an Entry 60 Secret Internal Phone Book Entries 61 Changing the Group Name 62 Personal Organizer 63 Adding an Event to the Scheduler 64 Event Alerts 64 Viewing Events 65 Erasing a Day s Events 65 Going to Today s Scheduler Menu 66 Purging Events 66 Purging All Events 66 Using the Alarm Clock 66 Usi...

Page 7: ...l 92 Setting Up Your Voicemail 92 Voicemail Notification 92 New Voicemail Message Alerts 92 Retrieving Your Voicemail Messages 93 Clearing the Voice Mail Count 93 Using Caller ID 94 Responding to Call Waiting 94 Making a Three Way Call 94 Using Call Forwarding 95 Data Fax 96 Data Fax setup 96 Receiving a fax 96 Ending a Fax or Data Call 97 Sending a Fax or Data File 97 Changing your phone back to ...

Page 8: ... 110 Downloading Do More Content 112 Sounds 112 Ringtones 112 Sound Clips 113 Images 114 Wallpaper 114 Picture Album 115 Games 117 Tools 119 Applications 119 Memory Management 120 Safety 121 Getting the Most Out of Your Reception 122 Maintaining Safe Use of and Access to Your Phone 123 Caring for the Battery 125 Acknowledging Special Precautions and Industry Canada Notice 126 Information to User 1...

Page 9: ...etting Started Closed View of Phone Front View of Phone Viewing the Display Screen Features of Your Phone Turning Your Phone On and Off Using the Battery and Charger Displaying Your Phone Number Making and Answering Calls ...

Page 10: ...2 Getting Started Closed View of Phone ...

Page 11: ...Getting Started 3 Front View of Phone ...

Page 12: ...ition 5 Lens Rotate The digital camera lens can be positioned up or down using the thumb wheel adjustment 6 Digital Camera Lens This is the integrated digital camera lens 7 OK Message Key This key can be used in several different ways Pressed once to automatically launch Messaging Press for two or more seconds to automatically dial your voicemail Pressing when navigating through a menu accepts the...

Page 13: ...umbers letters and characters 14 Shift Asterisk Enters the asterisk character for calling features In text entry mode press to change the character input type Press to change letter case when writing a message Press to enter a decimal when using the calculator Press and hold in idle state to activate silent mode 15 Power Interface Connector The power interface connector is used to plug in the char...

Page 14: ...allows you to download web based content 23 MENU Key Displays the first level or Main Menu of options Press again to view the next menu page When writing a message press once to display options for entering symbols numbers etc 24 Ringer Vibrate Indicator This icon indicates that a ring tone or vibrate is selected as the ringer 25 Battery Indicator The battery indicator displays the amount of remai...

Page 15: ... icon is displayed indicates you have a voicemail message Press and hold to dial voicemail indicates that 3G functionality is active indicates that 3G functionality is dormant or inactive indicates that you are receiving information indicates that you are sending information indicates your phone is in vibrate mode shows your current battery charge strength Icon shown fully charged If the battery i...

Page 16: ...network Features of Your Phone Congratulations on the purchase of your Samsung SCH a600 Phone This phone is lightweight easy to use and reliable It also offers many significant features and service options Dual band Tri Mode capability provides access to other Digital Networks where roaming agreements are established page 32 Mobile BrowserTM provides access to the wireless Internet in digital mode...

Page 17: ...cates that your phone is searching for a signal When your phone finds a signal it automatically enters standby mode the phone s idle state At this point you are ready to begin making and receiving calls If your phone is unable to find a signal after 15 minutes of searching a Power Save feature is automatically activated When a signal is found your phone automatically returns to standby mode In Pow...

Page 18: ...hours of continuous digital standby time 20 hours in analog When the battery reaches 5 of its capacity the battery icon blinks When there are approximately two minutes of talk time left the phone sounds an audible alert and then powers down Note Long backlight settings searching for service vibrate mode camera usage and browser use affect the battery s talk and standby times Tip Be sure to watch y...

Page 19: ...le battery You should charge the battery as soon as possible so you can begin using your phone Keeping track of your battery s charge is important If your battery level becomes too low your phone automatically turns off For a quick check of your phone s battery level glance at the battery charge indicator located in the upper right corner of your phone s display screen If the battery charge is get...

Page 20: ...is a problem charging the phone It takes approximately 4 hours to fully recharge a completely rundown standard battery With the Samsung approved LiIon battery you can recharge the battery before it becomes completely run down If a Travel Charger is used to charge the battery multi colored lights are displayed when the flip is closed Red green and blue lights are cycled during the charging process ...

Page 21: ...lose the flip or press Tip To redial your last outgoing call press twice Answering Calls 1 Make sure your phone is on If your phone is off incoming calls go to voicemail 2 Press to answer an incoming call Depending on your phone s settings you may also answer incoming calls by opening the phone or by pressing any digit Your phone notifies you of incoming calls in the following ways The phone rings...

Page 22: ...d press even if your phone is locked or your account is restricted Using One Two Three Touch Speed Dialing With this feature you can automatically call Speed Dial entries using one key press for locations 1 9 two key presses for locations 10 99 or three key presses for locations 100 300 To use One Touch Dialing for Speed Dial locations 1 9 Press and hold the appropriate key for a few seconds The d...

Page 23: ...ial The speed dial function allows you to call the number stored in that memory location by pressing 1 Send is used to dial the phone number If you are roaming and have the Call Guard feature activated you must then press 2 Save to save the phone number in your Internal Phone Book See Finding Internal Phone Book Entries on page 58 3 Find is used to locate and display Internal Phone Book entries th...

Page 24: ...options For more information see Personal Organizer on page 63 8 Phone Info displays the hardware software version Username and PRL being used For more information see Controlling Your Phone s Settings on page 19 End of Call Options After receiving a call from or making a call to a phone number that is not in your Internal Phone Book the phone number the duration of the call and the following menu...

Page 25: ...Find Note If you enter a number larger than 300 press for Find 3 A list of possible matches is displayed Select the desired entry and press 4 To dial the number press Dialing and Saving Phone Numbers With Pauses You can dial or save phone numbers with pauses for use with automated systems such as voicemail or credit card billing numbers If you select a hard pause the next set of numbers are sent w...

Page 26: ...et of numbers Dialing From the Internal Phone Book To dial directly from an Internal Phone Book entry 1 Press the navigation key left to display your Internal Phone Book 2 Scroll left or right to search by Name Entry or Group 3 Highlight the desired option and press the navigation key down 4 Enter the first few letters or the entry number to locate the desired entry or Enter the entry number using...

Page 27: ...Controlling Your Phone s Settings 19 Controlling Your Phone s Settings Display Settings Sound Settings Airplane Mode Phone Setup Options ...

Page 28: ...e the numeric keypad to enter a new custom banner 7 Press to save and exit Changing the Backlight Time Length The backlight setting lets you select how long the display screen and keypad are illuminated after any key press is made 1 To changePress for Main Menu 2 Press for Setup 3 Press for Display 4 Press for Backlight 5 Press for LCD for Keypad for Pwr Save Mode 6 Use the navigation key to selec...

Page 29: ...alendar Launch Pad or Digital Clock in local image mode 7 Press to Select Changing the Phone s Menu Style To select the display s menu style 1 Press for Main Menu 2 Press for Setup 3 Press for Display 4 Press for Menu Style 5 Press the navigation key up or down to select Camera or Nature 6 Press to Select Reminder To access the phone s main menu press Menu from standby mode Menu items may be selec...

Page 30: ...includes a variety of standard musical melodies Downloaded are ringers that have been downloaded right to your phone See Downloading Images on page 114 and Ringers on page 112 Vibrate alerts you to calls or messages without disturbing others To select vibrate mode press the volume key down while your phone is in idle mode until Vibrate is selected Selecting Ringer Types for Voice Calls Your phone ...

Page 31: ...ss for Setup 3 Press for Sounds 4 Press for Ringer Type 5 Press for Messages 6 Press for Voicemail Text or for Web Pic MSG 7 Press the navigation key left or right to select Ring Tones Melodies or Downloaded ringers 8 Press the navigation key down and then left or right to select the desired Ringer 9 Press to Save Selecting Ringer Types for Schedule To select a ringer type for schedules 1 Press fo...

Page 32: ...email or other automated systems or you may choose from other more entertaining options To select a key tone 1 Press for Main Menu 2 Press for Setup 3 Press for Sounds 4 Press for Tone Length 5 Select Short or Long using the navigation key 6 Press to Select Alert Notification To enable or disable alert sounds 1 Press for Main Menu 2 Press for Setup 3 Press for Sounds 4 Press for Alerts 5 Press for...

Page 33: ...se the phone s other features such as Games Notepad Voice Memos etc while you are in Airplane Mode To set your phone to Airplane Mode 1 Press for Main Menu 2 Press for Setup 3 Press for Airplane Mode 4 Press to continue 5 Press the navigation key up or down to select On or Off and press While in Airplane Mode your phone s standby screen will display Phone off The phone will power cycle when you ch...

Page 34: ... following functions Phone Book Voice Memo Scheduler Messaging Voice Dial Ringer Type Display Alarms Calculator 6 Press to Select Call Answer Mode To set the actions required to answer an incoming call 1 Press for Main Menu 2 Press for Setup 3 Press for Others 4 Press for Call Answer and select one of the following Any Key allows you to press any key on the keypad to answer incoming calls Send Key...

Page 35: ...r 5 Press the navigation key up or down to select Yes or No 6 Press to Select Display Language Your phone is capable of communicating with you in either English or French Selecting a language changes all menus and voice message settings To assign a language for the phone s display 1 Press for Main Menu 2 Press for Setup 3 Press for Others 4 Press for Language 5 Press the navigation key up or down ...

Page 36: ...Setting Your Phone s Security Setting Your Phone s Security Accessing the Security Menu Locking Your Phone Unlocking Your Phone Using Special Numbers 28 ...

Page 37: ...our Phone When your phone is locked you can only receive incoming calls or make calls to 911 Customer Service or special numbers To lock your phone 1 From the Security menu press for Lock Phone 2 Using the navigation key select On Power Up or Lock Now and press Unlocking Your Phone To unlock your phone 1 Press and enter your lock code Note If Lock on Power Up was selected under Locking Your Phone ...

Page 38: ...creen Enter your lock code Enter the desired phone number and press Using Special Numbers You can save up to three special numbers in addition to your Internal Phone Book entries the same number may be in both directories You can make and receive calls from special numbers even when your phone is locked To add or replace a special number 1 From the Security menu press for Special 2 Select entry on...

Page 39: ...Yes 3 Press Erase Pictures Erase Pictures deletes all pictures currently saved in your phone To erase 1 From the Security menu press for Erase Pictures 2 Press the navigation key up and select Yes 3 Press Resetting Your Phone Resetting the phone restores all the factory defaults including the ringer types and display settings The Internal Phone Book Call History Scheduler and Messaging are not aff...

Page 40: ...Controlling Your Roaming Experience Controlling Your Roaming Experience Understanding Roaming Setting Your Phone s System Mode 32 ...

Page 41: ...e and receive calls and access voicemail You will experience a few differences You are more likely to experience static cross talk fade out and dropped calls Some features which are standard on the network such as call waiting web services and direct international dialing are unavailable Though callers can leave voicemail messages while you are roaming you will not receive notification until you r...

Page 42: ...ou can determine which signals your phone accepts Set NAM This setting allows you to associate your mobile identification number MIN to your phone s electronic serial number ESN 1 Press for Main Menu 2 Press for Setup 3 Press for Others 4 Press for Roaming 5 Press for Set NAM 6 Press the navigation key up or down to select NAM 1 or NAM 2 7 Press to Select 34 ...

Page 43: ...for Roaming 5 Press for Set Mode 6 Press the navigation key up or down to select one of the following Automatic This setting automatically seeks the TELUS service When the service is unavailable it searches for an alternative system Home Only This setting allows you to log on the TELUS network both Digital and Analog Analog This setting allows you to access analog service only 7 Press to Select 35...

Page 44: ...Navigating Through Menus Navigating Through Menus Menu Navigation Menu Structure Viewing the Menus 36 ...

Page 45: ...you may also navigate to the next menu by pressing the navigation key Menu Structure Selecting Menu Items As you navigate through the menu menu options are highlighted Select any numbered option by simply pressing the corresponding number on the phone s keypad You may also select any item by highlighting it and pressing For example if you want to view your last incoming call 1 Press for Main Menu ...

Page 46: ...ng Calls 3 Missed Calls 4 Erase History 1 Outgoing 2 Incoming 3 Missed 4 All Calls 5 Air Time 1 Last Call 2 Total Calls 2 Phone Book 1 Find 1 By Name 2 By Entry 3 By Group 2 Add New Entry 3 Group Setting 1 Family 2 Friends 3 Colleague 4 VIPs 4 My Phone 5 Memory 3 Messaging 1 Voice Mail 1 Inbox 2 Clear VM Count 1 Yes 2 No 2 Picture MSG 1 Send Message 38 ...

Page 47: ...1 Yes 2 No 2 Outbox 1 Yes 2 No 3 Sent 1 Yes 2 No 4 Drafts 1 Yes 2 No 5 Templates 1 Yes 2 No 6 All messages 1 Yes 2 No 8 MSG Settings 1 Slide Format 1 Image Bottom 2 Image Top 3 Image Left 4 Image Right 2 Slide Duration 1 Manual 2 1 Second 3 3 Seconds 4 5 Seconds 5 10 Seconds 6 12 Seconds 39 ...

Page 48: ...b MSG 5 Saved 6 Erase MSG 7 MSG Settings 1 General 1 Scroll Timer 1 Off 2 1 second 3 2 seconds 4 3 seconds 5 4 seconds 6 5 seconds 2 MSG Reminder 1 Off 2 Once 3 Every 2 min 2 New Message 1 Callback 2 Save Message 1 Do Not Save 2 Prompt Save 3 Auto Save 3 Entry Method 1 T9 Word 2 Alphabet 4 Delivery Ack 1 On 2 Off 5 Canned MSG 40 ...

Page 49: ...15 minutes 10 Thank you 4 Do More 1 Wireless Web 2 Sounds 1 Get New 2 Ringtones 3 Sound Clips 3 Images 1 Get New 2 Wallpaper 3 Picture Album 4 Games 1 Get New 5 Tools 1 Get New 6 Applications 1 Get New 5 Camera 1 Take Picture 2 Camera Album 3 Picture MSG 4 Online Album 5 Settings 1 Picture Lock 1 On 2 Off 2 Shutter Sound 1 Shutter1 41 ...

Page 50: ...2 Normal 4 Help 6 Voice Tools 1 Voice Memo 1 Record 2 Play 3 Erase All 1 Yes 2 No 7 Utilities 1 Schedule 2 Alarm Clock 1 Alarm 1 2 Alarm 2 3 Alarm 3 3 Note Pad 4 Calculator 5 World Clock 6 Countdown 7 Set Time 8 Setup 1 Display 1 Menu Style 1 Camera 2 Nature 2 Wall Papers 1 Local Image 1 Flowers 2 World Time 42 ...

Page 51: ... No Image 2 Downloads 3 Picture Album 2 No Caller ID 1 No Image 2 Downloads 3 Picture Album 4 Banner 5 Backlight 1 LCD 1 Flip Open 2 30 seconds 3 15 seconds 4 8 seconds 2 Keypad 1 Flip Open 2 30 seconds 3 15 seconds 4 8 seconds 5 Off 3 Pwr Save Mode 1 On 2 Off 6 SVC Lamp 1 On 2 Off 2 Sounds 1 Ringer Volume 1 Calls 2 Messages 43 ...

Page 52: ...oicemail Text 2 Web Pic MSG 3 Schedule 3 Alerts 1 Minute Beep 1 On 2 Off 2 Service Alert 1 On 2 Off 3 Connect 1 On 2 Off 4 Disconnect Fade 1 On 2 Off 4 Roam Ringer 1 Normal 2 Distinctive 5 Key Beep 6 Tone Length 1 Short 2 Long 7 Power On Off 1 On 2 Off 3 Voice Dial 1 Adapt Digits 2 Reset Digits 1 Yes 2 No 44 ...

Page 53: ... No 2 Name Dial 1 Yes 2 No 3 Phonebook 1 Yes 2 No 5 Help 4 Games Tools 1 Backlight 1 10 seconds 2 25 seconds 3 1 minute 4 Permanent 2 Sounds 3 Notification 1 Voicemail 1 On 2 Off 2 Text MSG 1 On 2 Off 3 Picture MSG 1 On 2 Off 5 Security 1 Lock Phone 1 Unlocked 2 On Power Up 3 Lock Now 2 Change Lock 45 ...

Page 54: ...s 1 Yes 2 No 7 Reset Phone 1 Yes 2 No 6 Airplane Mode 1 On 2 Off 7 Launch Pad 1 Up Key Note These 9 options are also available for the Left and Right keys 1 Phone Book 2 Voice Memo 3 Scheduler 4 Messaging 5 Voice Dial 6 Ringer Type 7 Display 8 Alarms 9 Calculator 2 Left Key 3 Right Key 8 Others 1 Restriction 1 Outgoing Call 46 ...

Page 55: ...Yes 2 No 4 Language 1 English 2 French 5 Roaming 1 Set NAM 1 NAM 1 2 NAM 2 2 Set Mode 1 Automatic 2 Home Only 3 Analog 6 Game Pad 1 Get Device 2 Key Remap 1 Cursor Key 1 Up Key Note These 24 options are also available for Down Left Right Fire A Fire B Fire C Fire D and Other keys 1 Up Key 2 Down Key 3 Left Key 4 Right Key 5 Camera Key 6 WEB Key 7 OK Key 8 Send Key 47 ...

Page 56: ...7 Key 19 8 Key 20 9 Key 21 0 Key 22 Star Key 23 Pound Key 24 Launching 2 Down Key 3 Left Key 4 Right Key 2 Fire Key 1 Fire A Key 2 Fire B Key 3 Fire C Key 4 Fire D Key 3 Other Key 1 Start Key 2 Menu Key 7 Connection 1 Voice Only 2 Fax in Only 3 Data in Only 4 Fax in Once 5 Data in Once 8 Memory Usage 9 Phone Info 48 ...

Page 57: ...Navigating Through Menus InUse Menu 1 Mute Unmute 2 Call History 3 Phone Book 4 3 Way Call 5 Messaging 6 Voice Memo 7 Utilities 8 Phone Info 49 ...

Page 58: ...Managing Call History Managing Call History Viewing History Call History Options Making a Call From Call History Saving a Phone Number From Call History Erasing Call History 50 ...

Page 59: ...number is in your Internal Phone Book Duplicate calls same number and type of call may only appear once on the list To view a Call History entry 1 Press for Main Menu 2 Press for Call History Press for Outgoing Calls Press for Incoming Calls Press for Missed Calls Call History Options For additional information and options on a particular call highlight a Call History entry and press This feature ...

Page 60: ...History 1 Press for Main Menu 2 Press for Call History 3 Highlight the desired entry in the Outgoing Incoming or Missed call history and press 4 Press for Save After you have saved the number the new Internal Phone Book entry is displayed See Internal Phone Book Entry Options on page 55 Note You cannot save phone numbers already in your Internal Phone Book or from calls identified as Unknown ID or...

Page 61: ...ain Menu 2 Press for Call History 3 Press for Erase History Press to erase Outgoing Calls Press to erase Incoming Calls Press to erase Missed Calls Press to erase All Calls 4 Using the navigation key highlight Yes and press Air Time Air time allows you to check the time of the last call or the total air time since your phone was activated on the network These times are not meant for billing purpos...

Page 62: ...Internal Phone Book Using the Internal Phone Book Internal Phone Book Entry Options Adding a New Internal Phone Book Entry Finding Internal Phone Book Entries Selecting a Ringer Type 54 ...

Page 63: ... view the previous entry by pressing the navigation key left Entering Text Selecting a Character Input Mode Your phone provides convenient ways to enter words letters punctuation and numbers whenever you are prompted to enter text for example when adding an Internal Phone Book entry To change the character input mode 1 Before you start entering text press 2 To select a character input mode highlig...

Page 64: ...se and creates a suitable word The word may change as you type If the word you want does not display after you have entered all the letters press to scroll through additional word selections To accept a word and insert a space press If you make a mistake press to erase a single character Press and hold to delete an entire entry Entering Characters by Tapping the Keypad To enter characters by tappi...

Page 65: ...t the Number mode and press the appropri ate key See Selecting a Character Input Mode on page 55 To enter symbols select the Symbols mode See Selecting a Char acter Input Mode on page 55 To enter a symbol press the appro priate key indicated on the display Adding a New Internal Phone Book Entry Your phone can store up to 300 Internal Phone Book numbers or email addresses Phone book entries can sto...

Page 66: ...simple steps 1 Press for Main Menu 2 Press for Phone Book 3 Press for Find 4 Press the navigation key left or right to search by Name Entry or Group 5 Once the desired option is highlighted press the navigation key down 6 Enter the first few letters or entry to locate the desired entry 7 Scroll to highlight the name and press to make the call Shortcut From standby mode press the navigation key lef...

Page 67: ...oups associated with your phone book entries see Changing the Group Name on page 62 to change the group names If no group is selected the entry is automatically set to No Group Adding a Phone Number to an Internal Phone Book Entry To add a phone number to an entry 1 Press for Main Menu 2 Press for Phone Book 3 Press for Find 4 Select the desired entry and press 5 Press to Edit the entry 6 Press th...

Page 68: ... number using the keypad and press 9 Press to Save Selecting a Ringer Type for an Entry You can assign a ringer type to an Internal Phone Book entry so you can identify the caller by the ringer type See Ringer Types on page 22 To select a ringer type for an entry 1 Press for Main Menu 2 Press for Phone Book 3 Press for Find 4 Select the desired entry and press 5 Press to edit the entry 6 Press the...

Page 69: ...lect the desired entry and press 5 Press to edit the entry 6 Press the navigation key down until Secret is selected 7 Press the navigation key left or right until On is displayed in the Secret field and press to Save To make an entry public 1 Display an Internal Phone Book entry 2 Press to edit the entry 3 Enter your lock code 4 Press the navigation key down until Secret is selected 5 Press the na...

Page 70: ...Press for Phone Book 3 Press for Find 4 Select the desired entry and press 5 Press to edit the entry 6 Press the navigation key down until the Group is selected 7 Press the navigation key left or right until the desired group name is displayed 8 Press to Save To associate a new number 1 Follow the steps for entering a Adding a New Internal Phone Book Entry 2 Before saving press the navigation key ...

Page 71: ...Personal Organizer 63 Personal Organizer Adding an Event to the Scheduler Event Alerts Viewing Events Using the Calculator Using the Alarm Clock Using the Notepad Using Your Phone s Utilities ...

Page 72: ... 6 Enter the Start Time and Date using the keypad Press for AM and for PM 7 Enter the End Time and Date using the keypad 8 Press the Navigation key left or right and select one of the following No Alarm On Time 10min before 30min before 1Hr before 9 Press to Save Event Alerts There are several ways your phone alerts you of scheduled events By playing the assigned ringer type By illuminating the ba...

Page 73: ...o view your scheduled events 1 Press for Main Menu 2 Press for Utilities 3 Press for Schedule 4 Select desired date and a list of the events scheduled for the day are displayed Erasing a Day s Events To erase a scheduled day s events 1 Press for Main Menu 2 Press for Utilities 3 Press for Schedule 4 Select desired date and a list of the events scheduled for the day are displayed 5 Highlight the de...

Page 74: ...s 5 Press the navigation key up or down to select the desired event 6 Press to Erase the event 7 Highlight Yes with the navigation key and press to confirm Purging All Events To delete all scheduled events 1 Press for Main Menu 2 Press for Utilities 3 Press for Schedule 4 Highlight the desired day of the event being deleted and press 5 Press to Erase All events 6 Highlight Yes with the navigation ...

Page 75: ... the navigation key left or right and select one of the following options Daily Once Mon to Fri Sat Sun 9 Press to Save Using the Note Pad Your phone comes with a note pad you can use to compose and store reminders and notes to help keep you organized To compose a note 1 Press for Main Menu 2 Press for Utilities 3 Press for Note Pad 4 If there are no existing notes the phone displays No Note Enter...

Page 76: ...Erase 5 Select Yes and press to confirm the deletion Using the Calculator Your phone comes with a built in calculator function To use this feature follow these easy steps 1 Press for Main Menu 2 Press for Utilities 3 Press for Calculator 4 Enter a number with the keypad Press to insert a decimal point and or to make the number negative or positive 5 Press the navigation key Left Subtract Right Mul...

Page 77: ... key left right up or down to display the different time zones 5 Press to turn DST Daylight Savings Time On or Off for that time zone Note A sun icon is displayed on screen if DST is selected for a time zone Countdown Countdown allows you to enter a future date and time into the phone and then see the amount of days hours and minutes until that time is reached To setup a new countdown 1 Press for ...

Page 78: ...own 1 Press for Main Menu 2 Press for Utilities 3 Press for Countdown 4 Press the navigation key up or down to highlight the desired countdown and press Tip When viewing an existing countdown press the navigation key left or right to cycle between the other countdown entries Note No audible alert is sounded when the countdown is reached ...

Page 79: ...Voice Services 71 Voice Services Using Voice Activated Dialing Voice Memos ...

Page 80: ...es one of these commands the phone launches the associated application If the phone does not hear a command within approximately eight seconds it de activates voice recognition without taking any action Note If you want to use a different button to activate voice recognition press for Launch Pad On this menu you can change button assignments including the button used to launch Voice Dial which is ...

Page 81: ...o say the number 3 Say a valid 7 10 or 11 digit North American phone number naturally and clearly 4 If the phone asks you Did You Say followed by the correct number say Yes You can also select the correct number from those displayed on the screen by pressing on the correct number The phone will then dial the number 5 If the phone asks you Did You Say followed by an incorrect number say No If there...

Page 82: ... accents or unusual voice characteristics may find difficulty in achieving high accuracy with speaker independent digit dialing so the Adapt Digits feature allows users to dramatically improve the digit accuracy through adaptation Users who get acceptable digit recognition accuracy will find no additional benefit to performing the Adapt Digit adaptation After you adapt Digit Dial your phone will b...

Page 83: ...ne plays back your recording and asks you if the recording sounds OK 6 If the recording sounds ok no mistakes and no background noises say Yes If you need to re record the digits to fix any problems say No The phone then prompts you to say the digits again Wait for the beep and then record the digits again Repeat this step until you are satisfied with the recording 7 After confirming that the reco...

Page 84: ...tly Name Dial automatically voice activates every contact in your Phone book without the need to record or train names before using them With Name Dial you can dial any person in your Phone book by saying that person s name To place a call using Name Dial 1 Activate voice recognition by pressing and holding The phone prompts you for a command 2 Say Name Dial The phone prompts you to say a name 3 S...

Page 85: ...the name the phone will display one or more names on the screen and prompt you to confirm the name you spoke If the phone says Did You Say followed by the correct name say Yes If the phone asks you Did You Say followed by an incorrect name say No The phone then prompts you with the next name if there is one If there are no more names the phone will say Sorry No Match Found and will not place a cal...

Page 86: ...ook 5 Press the navigation key up or down to select Yes or No and press When choice lists are enabled for Phone book after you say the name the phone will display one or more names on the screen and prompt you to confirm the name you spoke If the phone says Did You Say followed by the correct name say Yes If the phone asks you Did You Say followed by an incorrect name say No The phone then prompts...

Page 87: ...ng 5 To pause the memo press When a memo is paused press again to resume recording 6 To finish recording press When you have finished recording the phone offers you the option of reviewing the memo re recording the memo saving it or quitting without saving the memo To listen to the memo again select Review and press To discard the current recording and make a new one select Rerecord and press To s...

Page 88: ...e a new memo 4 Highlight the desired voice memo and press for Send To 5 Press to enter a caption for the voice memo using the keypad Press again when finished 6 Press for Next 7 Press the navigation key down to highlight the address window and press 8 Enter the desired email address or mobile number and press 9 Press to Send Upload 1 Press for Voice Tools 2 Press for Voice Memo 3 Press for Play 4 ...

Page 89: ...want to review The phone replays the memo To pause the memo during replay press Press again to resume replaying the memo To erase an individual memo 1 Follow the steps above to display the list of saved memos 2 Select the memo to erase 3 Press for Erase 4 Press the navigation key up to select Yes and press To erase all existing voice memos in a single step 1 Press for Voice Tools 2 Press for Voice...

Page 90: ...Camera Using Your Phone s Camera Take Pictures Storing Pictures Camera Settings 82 ...

Page 91: ...he thumb wheel to move the lens up or down 5 Hold the camera steady To take the picture press or the Side Camera button until the shutter sounds To Take a Picture With the Phone Closed 1 Rotate the flip to the out position and close Press and hold the Side Camera button to activate Camera mode 2 Point the camera lens at your subject You can check the picture framing through the external display sc...

Page 92: ...od quality images without using too much memory The zoom feature is available using the navigation key Low The low setting allows you to take average quality images You can save the most images in memory using this setting The zoom feature is available using the navigation key To access the picture settings 1 Press for Main Menu 2 Press for Camera 3 Press for Settings 4 Press for Picture Lock for ...

Page 93: ...fferent options and then press down to select Camera Options Camera options allow you to set up options associated with taking the picture When you are in the camera mode press to display the following options Flash Allows you to turn the flash always on or off when taking a picture Also allows you to turn the flash on for just one picture Self Timer Allows you to configure a timer for 5 or 10 sec...

Page 94: ... for Self timer 3 Using the navigation key highlight the length of delay you want the timer to use 10 seconds or 5 seconds and press An icon is displayed in the top right corner of the screen To deactivate the self timer press Cancel The self timer icon in the top right corner of the camera screen disappears and the camera mode is returned to normal shooting mode 4 Press to start the timer A timer...

Page 95: ...ure to an online album Erase Removes the image for memory Edit Caption Allows you to edit the caption of the image Up to 32 characters can be entered to identify the image Picture Info This option displays the caption time and date resolution size and quality of the image Expand Thumbnail Changes the display to thumbnail or expanded view which allows you to see several images at once or the whole ...

Page 96: ... Press the navigation key down to highlight Add sound and press 9 Press for Voice Record 10 Record your message and press when finished 11 If satisfied with the message press for Attach 12 Enter a name for the sound using the keypad and press 13 Press again to attach the memo 14 Press for Next 15 Press to select an email address or phone number from the address book Or Press the Navigation key dow...

Page 97: ...et up the slide duration and slide format settings of the image Slide duration is used to change the amount of time a slide is displayed on the screen Slide format is used to change the slide position in the picture Add Slide Remove Slide Allows you to add or remove a slide Delete Image Sound Allows you to delete an image or sound from the picture message Online Album Online album will open a mobi...

Page 98: ...n memory No one can review the images without entering a password Shutter Sound The shutter sound allows you to select between 7 different shutter sounds The shutter sound is heard when you take a picture Quality The quality allows you to select between Fine and Normal These settings dictate the image quality settings for the pictures Help Allows you to display the photo help file The photo help f...

Page 99: ...The Basics 91 The Basics Using Voicemail Using Caller ID Responding to Call Waiting Making a Three Way Call Using Call Forwarding ...

Page 100: ... to work correctly Note The voicemail setup process may vary in certain Affiliate areas Voicemail Notification There are several ways your phone alerts you By displaying a message on the screen By sounding the assigned ringer type By multi colored LED turning On By displaying at the top of your screen New Voicemail Message Alerts When you receive a new voice message your phone alerts you and promp...

Page 101: ...Press for Voice Mail 4 Press for Inbox 5 Press for Connect Note You are charged for airtime minutes when you are accessing your voicemail from your phone Using a Phone Other Than Your Wireless Phone to Access Messages 1 Dial your wireless phone number 2 When your voicemail answers press 3 Enter your passcode Clearing the Voice Mail Count Your phone may temporarily continue to display the message i...

Page 102: ...ilable and you are in digital mode To respond to an incoming call while you re on a call Press This puts the first caller on hold and answers the sec ond call To switch back to the first caller Press again Tip For those calls where you don t want to be interrupted you can temporarily disable Call Waiting by pressing before placing your call Call Waiting is automatically reactivated once you end th...

Page 103: ...ing and Three Way Calling are not available while roaming Using Call Forwarding Call Forwarding lets you forward all your incoming calls to another phone number even when your phone is turned off You can continue to make calls from your phone when Call Forwarding is activated To Activate Call Forwarding 1 Press 2 Enter the area code and phone number to which your future calls should be forwarded 3...

Page 104: ...equired for you to connect and use your phone with your computing device Data Fax setup 1 Press for Main Menu 2 Press for Setup 3 Press for Others 4 Press for Connection 5 Press the navigation key up or down to select Voice Only Fax in Only Data in Only Fax in Once or Data in Once 6 Press to save Voice Only No incoming Data Fax calls can be received Fax in Only No Voice Calls can be received Only ...

Page 105: ...nnection through the application on your computer which returns your phone to standby mode Disconnecting the data cable or turning off your phone will also end a data or fax call but it may disrupt your computer Sending a Fax or Data File When connected to a computing device your phone allows wireless fax and data transmissions Your computing device software initiates the call to the destination p...

Page 106: ...Messaging Messaging Message Types Text Messaging Picture Messaging 98 ...

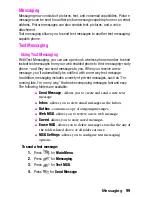
Page 107: ...ew message you ll automatically be notified with a one way text message In addition messaging includes a variety of pre set messages such as I m running late I m on my way that make composing messages fast and easy The following folders are available Send Message Allows you to create and send a new text message Inbox allows you to view email messages in the Inbox Outbox contains a copy of outgoing...

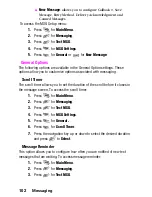
Page 108: ... not read in the time allotted it is cancelled Send Later allows you to time delay the sending of a message using one of the preset time limits Delivery Ack requests that a delivery acknowledgment is sent upon reading the new message Message Save allows you to configure the Auto Save Do Not Save or Prompt Save options for the new message To read a Text Message 1 When you receive a text message you...

Page 109: ...all messages 1 Press for Main Menu 2 Press for Messaging 3 Press for Text MSG 4 Press for Erase 5 Press for All Messages 6 Press the navigation key up or down to select one of the following options No Cancels the deletion Yes Deletes all messages 7 Press Message Setup Options There are several options associated with text messaging The Message Setup menu allows you to customize the options to fit ...

Page 110: ...ons associated with messaging Scroll Timer The scroll timer allows you to set the duration of the scroll before it closes in the message screen To access the scroll timer 1 Press for Main Menu 2 Press for Messaging 3 Press for Text MSG 4 Press for MSG Settings 5 Press for General 6 Press for Scroll Timer 7 Press the navigation key up or down to select the desired duration and press to Select Messa...

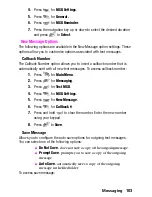
Page 111: ...ent with all new text messages To access callback number 1 Press for Main Menu 2 Press for Messaging 3 Press for Text MSG 4 Press for MSG Settings 5 Press for New Message 6 Press for Callback 7 Press and hold to clear the number Enter the new number using your keypad 8 Press to Save Save Message Allows you to configure the auto save options for outgoing text messages You can select one of the foll...

Page 112: ...he alphabet setting is the standard keypad entry mode To access Entry Method 1 Press for Main Menu 2 Press for Messaging 3 Press for Text MSG 4 Press for MSG Settings 5 Press for New Message 6 Press for Entry Method 7 Press the navigation key up or down to select the desired input method and press to Select Delivery Acknowledgment The Delivery Acknowledgment option allows you to have a return mess...

Page 113: ...ss for Messaging 3 Press for Text MSG 4 Press for MSG Settings 5 Press for New Message 6 Press for Canned MSG 7 Highlight the desired message and press 8 Press and hold to erase the message Enter your new message or changes and press to Save Picture Messaging Your phone gives you the ability to take pictures view them using the phone s display and instantly send them to your friends and family It ...

Page 114: ...9 Press for Voice Record 10 Record your message and press when finished 11 If satisfied with the message press for Attach 12 Enter a name for the sound using the keypad and press 13 Press again to attach the memo 14 Press for Next 15 Press to select an email address or phone number from the address book Or Press the Navigation key down to highlight the address field and press to enter a web enable...

Page 115: ...the message Priority Class This option allows you to set a priority level of low normal or high It also allows you to set a message class to personal advertisement or informational Cc and Bcc Allows you to Cc carbon copy and Bcc blind carbon copy the message to another email address or mobile number If the Bcc is used the other recipients do not see the email address or phone number of the Bcc rec...

Page 116: ...Web Services Do More Web Services Wireless Web Sounds Images Games Tools Applications 108 ...

Page 117: ... for Do More 3 Press for Wireless Web 4 Your web connection will launch and the Mobile Web Home page Shortcut You can also press and hold the center of the navigation key down to launch the Web If you had a previous web connection the last page you visited will display when you launch your browser for example Short Mail or ESPN Top News When this occurs you may not see the Connecting as message wh...

Page 118: ...eb sites during a web session is easy once you ve learned a few basics Here are some tips for getting around Softkeys When browsing the Web the bottom line of your phone s display contains one or more softkeys These keys are shortcut controls for navigating around the Web and they correspond to the softkey buttons directly below the phone s display screen Depending on which Web sites you visit the...

Page 119: ...link and then selecting the appropriate softkey Tip The tenth item in a numbered list may be selected by pressing the key on your phone s keypad even though the number 0 doesn t appear on the screen Going Back To go back one page press on your phone Note that is also used for deleting text like a BACKSPACE key when you are entering text Going Home To return to the Home page from any other Web page...

Page 120: ... New and press The browser will launch and take you to the Ringtones download menu 4 Use your navigation key to highlight and select a ringer you wish to download For more information on navigating the Web see Navigating the Wireless Web on page 110 Assigning Downloaded Ringers Downloaded ringers may be assigned directly from the Downloads menu and are also available through the Setup menu To assi...

Page 121: ... Do More 2 Press for Sounds 3 Use the navigation key to highlight Ringtones and press 4 Use the navigation key to select the desired ringtone 5 Press for Erase for Erase All Sound Clips Sound Clips is a folder where recorded voice memos and voice attachments from Picture MSG are stored Erasing Sound Clips It may become necessary to erase sound clips to free up available memory This will allow you ...

Page 122: ...owser will launch and take you to the Wallpapers download menu For more information on navigating the Web see Navigating the Wireless Web on page 110 Note You may store a limited number of downloaded Wallpapers on your phone depending on the file sizes Assigning Downloaded Wallpapers Downloaded Wallpapers may be assigned directly from the Downloads menu and are also available through the Setup men...

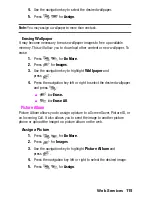
Page 123: ...key to highlight Wallpaper and press 4 Press the navigation key left or right to select the desired wallpaper and press for Erase for Erase All Picture Album Picture Album allows you to assign a picture to a Screen Saver Picture ID or an Incoming Call It also allows you to send the image to another picture phone or upload the image to a picture album on the web Assign a Picture 1 Press for Do More...

Page 124: ...ss for Edit and enter the Caption text Note If you have entered text in previous messages they may still be available Press the navigation key down to display a list of previous caption text messages Highlight the desired text entry and press 7 Press when finished 8 Press the navigation key down until Add sound is highlighted and press to select 9 Press for Voice Record 10 Record your message and ...

Page 125: ...r Images 3 Use the navigation key to highlight Picture Album and press 4 Press the navigation key left or right to select the desired image 5 Press for Upload Erasing an Image 1 Press for Do More 2 Press for Images 3 Use the navigation key to highlight Picture Album and press 4 Press the navigation key left or right to select the desired image 5 Press for Erase Games You can play a variety of ente...

Page 126: ... to play the game When you are finished select Exit or Quit or press Game Pad The optional Game Pad accessory allows you to insert your phone into a convenient handheld gaming device to control the action of downloaded games Large buttons and navigation controls allow you to navigate easily through the phone s menu system When your phone is inserted correctly into the Game Pad a Digital Game Pad i...

Page 127: ...110 Using Tools 1 Press for Do More 2 Press for Tools 3 Highlight the tool you wish to launch and press Applications You can download a variety of applications from the web Downloading Applications 1 Press for Do More 2 Press for Applications 3 Highlight Get New and press The browser will launch and take you to the download menu 4 Use your navigation key to highlight and select a application you w...

Page 128: ...is full you may want to erase existing content to free up additional memory To erase downloads go to the Do More menu and select the folder you want to delete from Select the object and then select Erase from the available menu If the memory is full and you are trying to download content to the phone send receive Picture MSG take picture or create voice memo you will be prompted with a memory full...

Page 129: ...Safety 121 Safety Getting the Most Out of Your Reception Maintaining Safe Use of and Access to Your Phone Caring for the Battery Acknowledging Special Precautions and Industry Canada Notice ...

Page 130: ...s and transmits radio frequency RF signals When you use your phone the system handling your call controls the power level This power can range from 0 006 watts to 0 2 watts in digital mode Knowing Radio Frequency Safety The design of your phone complies with updated NCRP standards described below In 1991 92 the Institute of Electrical and Electronics Engineers IEEE and the American National Standa...

Page 131: ...to Your Phone FAILURE TO FOLLOW THE INSTRUCTIONS OUTLINED MAY LEAD TO SERIOUS PERSONAL INJURY AND POSSIBLE PROPERTY DAMAGE Using Your Phone While Driving Talking on your phone while driving or operating the phone without a hands free device is prohibited in some jurisdictions Laws vary as to specific restrictions Remember that safety always comes first When using your phone in the car Get to know ...

Page 132: ...tely shielded electronic operating systems and or entertainment systems in motor vehicles Check with the manufacturer or their representative to determine if these systems are adequately shielded from external RF signals Also check with the manufacturer regarding any equipment that has been added to your vehicle Consult the manufacturer of any personal medical devices such as pacemakers and hearin...

Page 133: ...transfer or storage facilities Areas where the air contains chemicals or particles such as grain just or metal powders Any other area where you would normally be advised to turn off your vehicle s engine Note Never transport or store flammable gas liquid or explosives in the compartment of your vehicle that contains your phone or accessories Restricting Children s Access to your Phone Your phone i...

Page 134: ...w these storage rules Less than one month 4º F to 140º F 20º C to 60º C More than one month 4º F to 113º F 20º C to 45º C Disposal of Lithium Ion LiIon Batteries For safe disposal options of your LiIon batteries contact your nearest TELUS service center Special Note Be sure to dispose of your battery properly In some areas the disposal of batteries in household or business trash may be prohibited ...

Page 135: ...ntee that interference will not occur in a particular installation if this equipment does cause harmful interference to radio or television reception which can be determined by turning the equipment off and on the user is encouraged to try to correct the interference by one or more of the following measures Reorient relocate the receiving antenna Increase the separation between the equipment and r...

Page 136: ...rn 1 440 W kg Owner s Record The model number regulatory number and serial number are located on a nameplate inside the battery compartment Record the serial number in the space provided below This will be helpful if you need to contact us about your phone in the future Model SCH a600 Serial No User Guide Proprietary Notice CDMA Technology is licensed by QUALCOMM Incorporated under one or more of ...

Page 137: ...Warranty 129 Manufacturer s Warranty Manufacturer s Warranty ...

Page 138: ...enance installation or adjustment f installation maintenance and service of Product or g Product used or purchased outside the United States or Canada This Limited Warranty covers batteries only if battery capacity falls below 80 of rated capacity or the battery leaks and this Limited Warranty does not cover any battery if i the battery has been charged by a battery charger not specified or approv...

Page 139: ...CLUDING IF APPLICABLE THE IMPLIED WARRANTIES OF MERCHANTABILITY AND FITNESS FOR A PARTICULAR PURPOSE ARE HEREBY LIMITED TO THE SAME DURATION OF TIME AS THE EXPRESS WRITTEN WARRANTY STATED HEREIN SOME STATES PROVINCES DO NOT ALLOW LIMITATIONS ON HOW LONG AN IMPLIED WARRANTY LASTS SO THE ABOVE LIMITATION MAY NOT APPLY TO YOU IN ADDITION SAMSUNG SHALL NOT BE LIABLE FOR ANY DAMAGES OF ANY KIND RESULTI...

Page 140: ... Product failure between Purchaser and SAMSUNG and SAMSUNG s Product pricing reflects this allocation of risk and the limitations of liability contained in this Limited Warranty The agents employees distributors and dealers of SAMSUNG are not authorized to make modifications to this Limited Warranty or make additional warranties binding on SAMSUNG Accordingly additional statements such as dealer a...

Page 141: ...Digit Dial 72 Display Screen Symbols 6 Display Settings 20 Downloading Do More Content 112 E End Fax or Data Call 97 Entering Text Alpha Mode 56 Selecting a Character Input Mode 55 Symbols and Numbers 57 T9 Text Input 56 Erase Content 31 Erase Pictures 31 I Images 114 Internal Phone Book Adding an Entry 57 Dialing from 18 Editing Entries 60 Erasing 30 Finding Entries 58 Options 55 Secret Entries 6...

Page 142: ...l Networks 33 S Scheduler 64 Security Menu 29 Send Fax or Data File 97 set nam 34 Silence Mode 25 Special Numbers 30 T T9 Text Input 56 Text Messaging 99 Three Way Calling 94 Turning Your Phone On and Off 9 U Unlocking Your Phone 29 Using One Two Three Touch Speed Dialing 14 V Voice Recognition 72 Voicemail Clearing 93 Notification 92 Retrieving 93 Setting Up 92 W Wall Paper Changing 21 Wireless W...

Reviews: