6
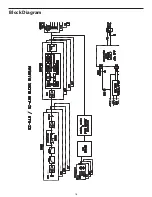
SZ240 Layout - Rear Panel
1: Fan
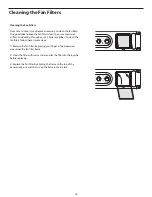
- This internal fan provides vital cooling to your SZ Series. Make sure that both the front and rear panels are kept free of all
obstructions and that cool, fresh air is accessible at all times. Also, try to ensure that the SZ Series is used in a dust-free environ-
ment.
2: Euroblock Input connectors
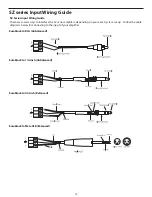
- Connect incoming signals to these electronically balanced connectors. We recommend the
use of balanced three-conductor cabling wherever possible (unbalanced two-conductor signals can also be inserted into these
inputs, but you’ll get better signal quality and less outside noise and hum if you use balanced lines). The SZ Series accepts input
levels of any strength but needs at least +4 dBu to achieve maximum power. See page 14 in this manual for full interconnection
instructions.
3: Limiter
-Each amplifier channel has a quick attack Limiter with peak detection to help ensure a clean signal. The Limiter for each
individual channel can be set to "on or off" using the rear panel dip switches. In order to maximize speaker protection, we recom-
mend that this switch be left in the “on” position during normal operation.
4: AC input
- Connect the supplied heavy-gauge 3-pin “IEC” power cable here.
5: Euroblock Output connectors
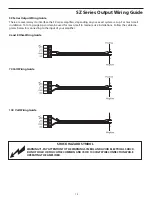
- Use these to connect each channel of the SZ Series to 4-ohm or 8-ohm loudspeakers, or to
one of the 70 and 100 volt outputs if you are using a constant voltage system . See page 15 in this manual for more information
about wiring and interconnection instructio
WARNING!: Each of the SZ series amplifier channels can run only one output configuration at the same time. Operating
SZ amplifiers using 4 ohm and 70 or 100 volt concurrently may cause damage to the amplifier or connected speakers, and
may void your warranty.


