


www.larius.com
22
O
Rif. 20144
REPLACEMENT OF THE
PUMPING GROUP’S GASKETS
O1
O3
O2
O4
O5
O6
O7
Rif. 20213
O8
O8
zEus for sanitation
REV
. 01 - 05/2020 - Cod. 150125
Each time you use the machine, check for material leaking from
the top of the ring nut.
If any material leaks out when the pump is working at the set
pressure, proceed as follows:
• Carry out this operation after cleaning the tooling.
• Remove the pin (
O8
) from its seating.
• Disconnect the product feed hose (
O1
) from the pump unit
by unscrewing the nut (
O2
).
• Unscrew the fixing ring nut (
O3
) using the relevant closing
pin (
Ref. 20144
).
• Release the plastic cover (
O4
).
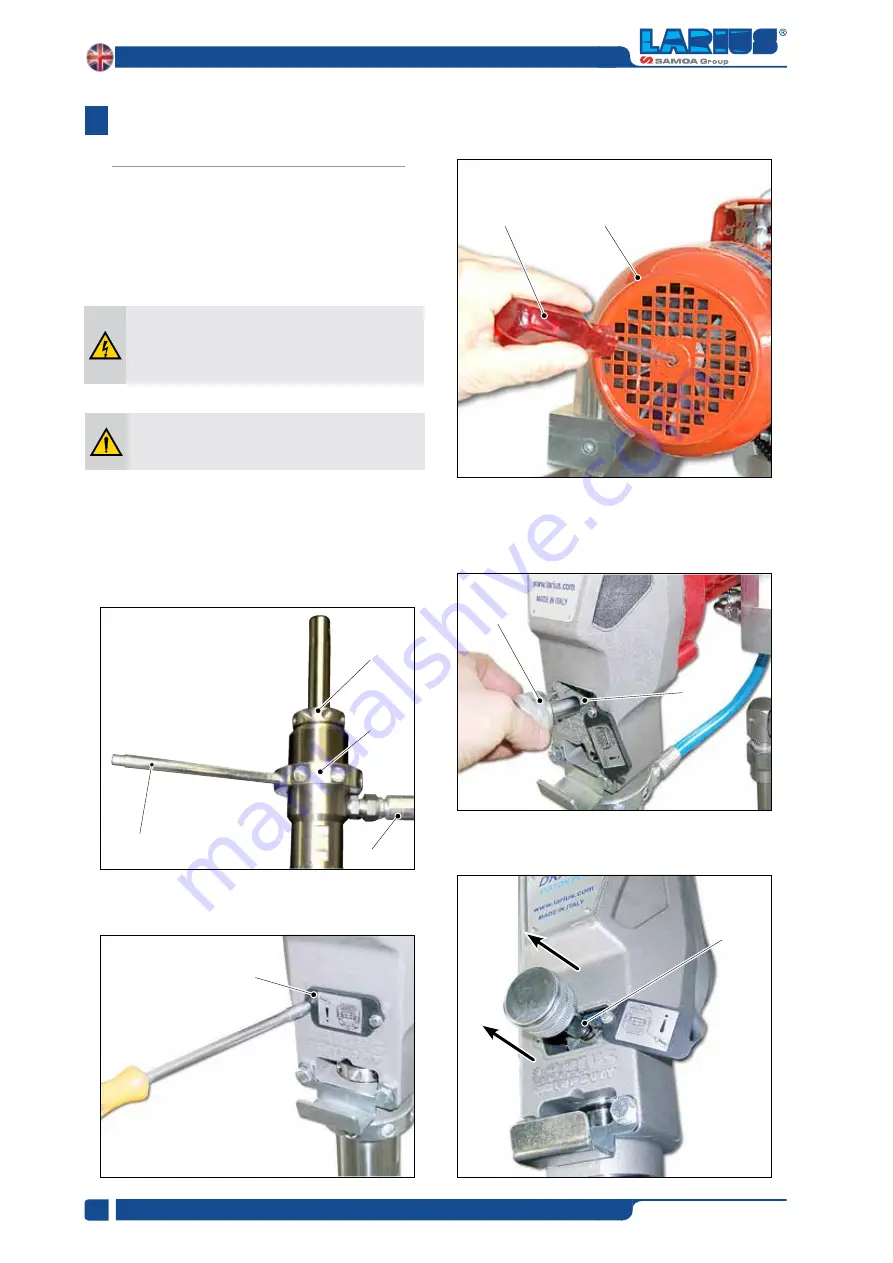
• Turn the motor (
O6
) with a screwdriver (
O5
) until the piston
rod has moved to the lowest point of its stroke.
• Screw the appropriate supplied tool (
O7
– ref- 20213
) into
the threaded hole on the holding pin (
O8
).
The gaskets are self-adjusting. If a leak occurs
they must be replaced.
Always disconnect the power supply and release
pressure before going on with the operations
(
follow the “correct procedure of decompression
).