

Conference System User Manual
SAMCEN
33
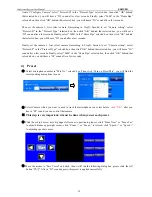
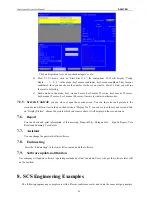
※ Public preset: Screen displaying state when video track start and all microphones
are turn off
⑤
For example, Camera 1 tracks: microphone 1, microphone 3, Pubic
Camera 2 tracks: microphone 2, microphone 4
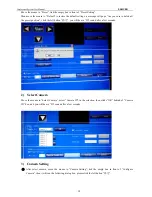
Setting step:
Microphone 1: Click the down arrow in the selected box of “Mic No.” to “1”, click “Turn on Preset Mic”,
you will find the “microphone 1” turn on, “Select Camera” to select “camera 1”, click “OK”, after you hear a
“Di” sound, you can control that camera. Click those big 4 arrow keys big upper-left corner to positioning
lenses; click “Focus Near” or “Focus Far” to adjust distance upper-right corner; click “Zoom +” or “Zoom -”
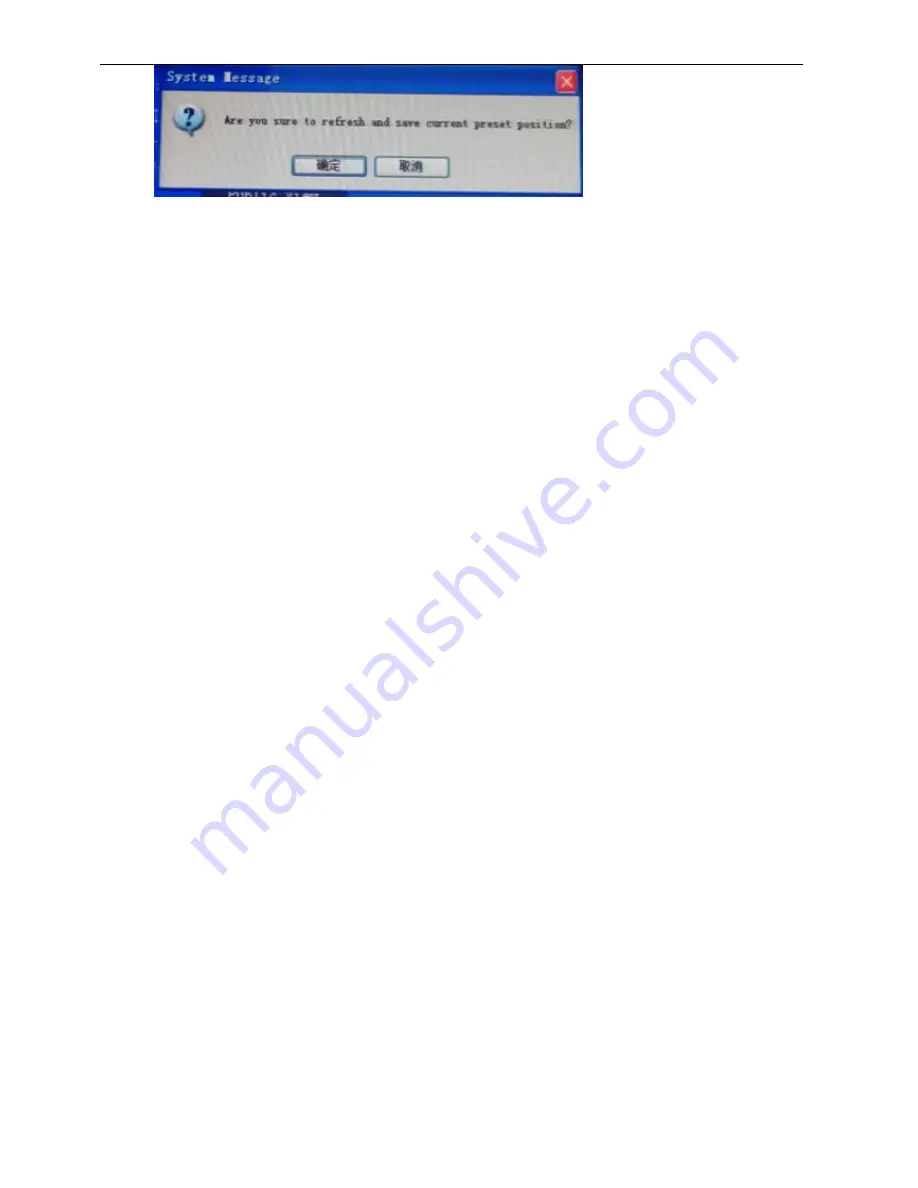
to resized, click “Speed +” or “Speed -” to adjusting speeds to move. Move the mouse to “Save Preset” and
click, after a “Di” sound appears, this preset is applied successfully.
Microphone 2: Click the down arrow in the selected box of “Mic No.” to “2”, click “Turn on Preset Mic”,
you will find the “microphone 2” turn on, “Select Camera” to select “camera 2”, click “OK”, after you hear a
“Di” sound, you can control that camera. Click those big 4 arrow keys big upper-left corner to positioning
lenses; click “Focus Near” or “Focus Far” to adjust distance upper-right corner; click “Zoom +” or “Zoom -”
to resized, click “Speed +” or “Speed -” to adjusting speeds to move. Move the mouse to “Save Preset” and
click, after a “Di” sound appears, this preset is applied successfully.
Microphone 3: Click the down arrow in the selected box of “Mic No.” to “3”, click “Turn on Preset Mic”,
you will find the “microphone 3” turn on, “Select Camera” to select “camera 1”, click “OK”, after you hear a
“Di” sound, you can control that camera. Click those big 4 arrow keys big upper-left corner to positioning
lenses; click “Focus Near” or “Focus Far” to adjust distance upper-right corner; click “Zoom +” or “Zoom -”
to resized, click “Speed +” or “Speed -” to adjusting speeds to move. Move the mouse to “Save Preset” and
click, after a “Di” sound appears, this preset is applied successfully.
Microphone 4: according these steps aboov.
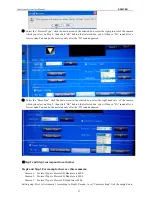
Pubic preset: “Select Camera” to select “camera 1”, click “OK”, after you hear a “Di” sound, you can
control that camera. Click those big 4 arrow keys big upper-left corner to positioning lenses; click “Focus
Near” or “Focus Far” to adjust distance upper-right corner; click “Zoom +” or “Zoom -” to resized, click
“Speed +” or “Speed -” to adjusting speeds to move. Move the mouse to “Pubic Save” and click, after a “Di”
sound appears, this preset is applied successfully. Any Microphone turn on or turn off is never mind.
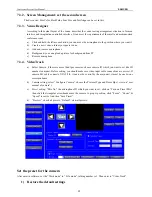
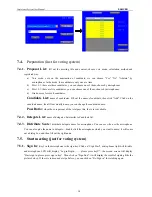
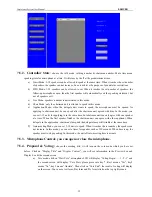
7.3.5.
Unit Management
a)
Unit Setup: “Total Number” in this system, then “Change Mic ID” is for setting microphones’ ID.
Mic Reset" is for clear preset ID.
b)
Line Detect: check microphones’ line. Whether there are all microphones in working condition. For
finding trouble of a circuit.


