background image

5

Induction cooking is very powerful. By far the most common problem 

with new users is that they don’t realize how quickly the pot generates 

heat, causing food to burn or overcook. We recommend that you 

‘practice’ using the induction cooker with a pot/pan of water and bring 

it to a boil several times using different amounts of water and different 

temperature/power settings to familiarize yourself with how quickly 

water can come to a boil.  In a very short time you will become familiar 

with your induction cooker and enjoy its fast, clean, safe and energy 

efficient features.

DESCRIPTION OF PARTS
1.  Induction Cooktop
2. “Set & Lock” Function with  

     Indicator Light
3. Temperature/Power Selector Button  

    with Indicator Light
4. Display Window
5. Time Button with Indicator Light
6. On/Off Button with Indicator Light
7. Adjustment Buttons (+ and -)
8. Touch Slider Bar

HOW TO USE
1.  Place the induction cooker on a dry, level surface.
2.  Add food to the cookware. 
3.  Place the cookware within the circular guide indicated on the 

Induction Cooktop. 

NOTE:

  Ensure that the bottom of the cookware is clean as dirt may 

cause the bottom to stick to the Induction Cooktop.  

IMPORTANT NOTE: 

NEVER heat empty cookware. This will cause the unit to overheat, 

damage the cookware and/or cause the unit to shut off.

4.  Plug into a 120 volt outlet.  The unit will beep and the Indicator Light 

above the On/Off Button will flash.

5.  Press the On/Off Button to turn the unit on. The red Indicator Light 

1

4

7

2 3

6

5

7

8

Summary of Contents for ID1553

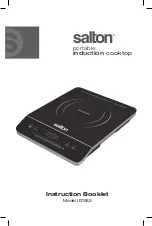
Page 1: ...Instruction Booklet Model ID1553 portable induction cooktop...

Page 2: ...efore cleaning the appliance 7 DO NOT operate any appliance with a damaged cord or plug or after the appliance malfunctions or is dropped or damaged in any manner Return appliance to the manufacturer...

Page 3: ...y the plug in any way ABOUT INDUCTION COOKING Induction cooking has been used for decades in restaurants and commercial kitchens worldwide Only now has the induction revolution been made available at...

Page 4: ...ply wipe with a damp cloth cleanup is a breeze Safer There are no open flames or hot elements Induction cooktops will start only once the appropriate cookware has been placed on the surface and stops...

Page 5: ...n with Indicator Light 3 Temperature Power Selector Button with Indicator Light 4 Display Window 5 Time Button with Indicator Light 6 On Off Button with Indicator Light 7 Adjustment Buttons and 8 Touc...

Page 6: ...eed is increased as is the wattage used While using this function the temperature of the food is not being regulated only the power being used is set Use the Power Function if a specific temperature i...

Page 7: ...s to adjust the cooking time from 1 minute up to 3 hours in increments of one minute NOTE The Button will adjust the minutes and the Button will adjust the hours You can also use the Slider Bar to set...

Page 8: ...ic copper glass or pyrex or cookware that has a concave bottom NOTE Cookware should have a diameter no less than 10 cm 4 or more than 26 cm 10 in order to work correctly If the Cookware is larger than...

Page 9: ...it Contact Salton service center See Warranty section in this instruction booklet for contact information E1 Cookware Sensor Detection Check whether or not cookware is suitable Make sure the cookware...

Page 10: ...er LIMITED WARRANTY The original sales receipt is the only acceptable proof of purchase Salton Canada warrants that this appliance shall be free from defects in material and workmanship for a period o...

Page 11: ...protection we suggest that you use an insured delivery service with tracking information when returning your product Salton Canada will not be held responsible for in transit damage or for packages th...

Reviews: