background image

65

SAILFISH 

360 CC

  |  TYPE III MSD WASTE MANAGEMENT SYSTEM

9

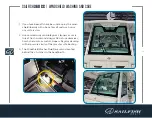
Cleaning the toilet

To maintain the toilet’s original, lustrous appearance, use Dometic

®

 Toilet Bowl Cleaner or other 

non-abrasive bathroom and toilet bowl cleaners. Please follow label directions.

Routine maintenance

MONTHLY

1. Inspect toilet, plumbing, and plumbing connections, wires, and wire connections.
2. Open and close all plumbing valves, including seacocks.
3. Check in-line water filters and vented loops for blockage.

YEARLY

Check water valve filter. Also check water valve filter if water flow into toilet becomes insufficient.

During extended periods of non-use

The macerator toilet and sanitation hoses should be protected if toilet will not be needed for an 
extended period of time (more than two weeks, especially in hot weather).
1. Flush toilet and add 4 oz. (118 ml) of liquid biodegradable laundry detergent (should NOT con-

tain bleach or environmentally harmful substances).  Note: If using sea water for flushing, shut
off power to sea water pump and add fresh water directly into the bowl during the flush cycle.

2. Flush toilet at least five times.
3. Turn off water supply to toilet.
4. Flush the toilet without water very briefly to evacuate all water. (This procedure will minimize

any remaining water in the macerator pump.)

Caution 

During water evacuation process, do not operate sea water pump very long without water. 
Pump impeller may become damaged.

5. Turn off power to the toilet.
6. After extended periods of non-use, toilet and pump may dry.  For easier re-start of toilet

system, add one quart of water to bowl and let it stand for a few minutes before use.

Maintenance and winterizing

Caution 

To avoid damaging internal seals, do not clean toilet with abrasive cleaners, caustic 
chemicals, or lubricants and cleaners that contain alcohols or petroleum distillates.

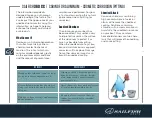
Caution – Do Not Flush Foreign Objects! 

Flush only water, bodily wastes and rapid-dissolving toilet 
tissue. Do not flush wet wipes, sanitary napkins, condoms, 
diapers, paper cups, cotton swabs, food, hair or liquids 
such as oils or solvents as clogging or damage to the toilet 
or toilet system may occur.

Note 

Make sure all guests understand toilet operation before use.

Dometic MasterFlush

Maintenance & Winterizing

Caution – Do Not Flush Foreign Objects! 


Flush only water, bodily wastes and rapid-dis-

solving toilet tissue. Do not flush wet wipes, 

sanitary napkins, condoms, diapers, paper 

cups, cotton swabs, food, hair or liquids such 

as oils or solvents as clogging or damage to 

the toilet or toilet system may occur.

Note 


Make sure all guests understand toilet opera-

tion before use.

Summary of Contents for 360 CC

Page 1: ...SAILFISH 360 CC OWNER S MANUAL...

Page 2: ...Console Top Organizer 33 Bennett Trim Tab Maintenance 34 Lewmar Pro Fish 1000 Windlass 35 Lewmar Windlass Troubleshooting Chart 36 Hard Top 37 Optional Utility Leaning Post 38 Electric Grill Refriger...

Page 3: ...4 L 40 101 6 CM 10 Yacht Certified 38 6 11 73 M 15 600 LBS 7 076 KG 34 11 2 3 4 M 30 76 2 CM 22 24 9 10 3 M Fuel Capacity Cockpit Depth Bow Battery Capacity Person Capacity Length Rigged Approx Rigged...

Page 4: ...Dash Panel on Console Adjustable Height Standing Driving Position Comfort Zone Anti Fatigue Pad Console Footrest Deluxe Walk In Console Berth Lockable w SST Port Light Digital Electric Steering Yamah...

Page 5: ...C 241CC 245DC 91 in 57 5 in 30 in 14 in 103 in 250 in 273 in 36 in 240CC 240WAC 242CC 92 in 59 in 31 in 15 in 107 in 241 in 272 in 30 in 270CC 270WAC 94 in 59 in 31 in 15 in 107 in 268 in 302 in 30 in...

Page 6: ...6 Windshield Wiper Washer 7 Under Gunwale Storage 8 Adjustable Height Standing Area 9 Power Adjustable Driver s Seat KEY DESCRIPTION 10 Rear Facing Bottom Machine 11 In Floor Fish Boxes w Pump out Pum...

Page 7: ...y for you and everyone on board as a boat owner you need to become familiar with and the locations of the Caution Warning and Danger Labels found on your boat Below are images of the labels to help yo...

Page 8: ...Continued The safety for you and everyone on board as a boat owner you need to become familiar with and the locations of the Caution Warning and Danger Labels found on your boat Below are images of th...

Page 9: ...8 SAILFISH 360 CC BOAT SAFETY WARNING LABEL LOCATIONS InsideBatterySwitchDoors...

Page 10: ...fety are unsurpassed and our feature sets reflect intentional choices born of deep expertise With our strong fishing heritage we are passionate about empowering anglers for success while recognizing t...

Page 11: ...ring the ladder pull ladder towards you by picking up the ladder by the steps release the strap deploy the four step ladder by rotating it to the down position Use your hand or foot to fully extend th...

Page 12: ...11 SAILFISH 360 CC BATTERY SELECTOR PANEL AND WIRING BackViewWithWiring FrontView...

Page 13: ...rness Battery Switch Diagram DC Breaker Panel Diagram Forward Hull Harness Hard Top Switch Panel Diagram Hard Top Wiring Harness Diagram Head Light Switch Head Liner Harness Helm Ground Block Assembly...

Page 14: ...13 SAILFISH 360 CC FUEL SYSTEM LAYOUT q y y e e e e KEY DESCRIPTION 1 Fuel Filter Access 2 Fuel Fill 3 Fuel Tank Location 4 Fuel Pickups 5 Fuel Sender 6 Primer Bulbs r r r t w...

Page 15: ...14 SAILFISH 360 CC HEAD WASTE PLUMBING DIAGRAM DownloadHiResolutionDiagram...

Page 16: ...15 SAILFISH 360 CC RAW WATER PLUMBING DIAGRAM DownloadHiResolutionDiagram...

Page 17: ...16 SAILFISH 360 CC FRESHWATER PLUMBING DIAGRAM DownloadHiResolutionDiagram...

Page 18: ...17 SAILFISH 360 CC AIR CONDITIONER PLUMBING DIAGRAM DownloadHiResolutionDiagram...

Page 19: ...o 5 Trim Tab Actuator Switches 6 Binnacle 7 Driver s Power Seat Slide Switch 8 Windlass Switch 9 Optional A C Dash Vents 10 Uflex Tilt Helm 11 Optional Remote Spot Light Control 12 Ignition Panel 13 O...

Page 20: ...cylinders are built with carbon steel pistons coupled with extra large end caps to prevent leakage All of their connection materials are 304 stainless steel that has been electro polished and passiva...

Page 21: ...20 SAILFISH 360 CC UFLEX POWER STEERING SYSTEM MERCURY...

Page 22: ...m Unlike aftermarket steering system it is digitally connected from the helm to the engine requiring no external pumps or steering fluid It offers stable and assured steering and also steering setting...

Page 23: ...d will pull out causing the en gine to shut down Make sure the lanyard is not attached to a part of your clothing that could be easily torn free caus ing the switch not to pull See your YAMAHA or MERC...

Page 24: ...cal con nections or systems Fuel WaterSeparator Sailfish installs Yamaha water fuel separators in the bilge compartment on all models rigged with Yamaha engines Each engine will have its own filter wh...

Page 25: ...r easy access to Console Compo nents 2 Breaker Panel 3 Battery Selector Panel 4 Lewmar Windlass Breaker KEY DESCRIPTION 5 Battery Storage and Ac cess Hatch 6 Fresh Water Sink w Pull Out Shower 7 Soap...

Page 26: ...ch Alternately when the system voltage drops back below 12 6 volts i e no more charging the relay opens and the batteries are separate This means that both batter ies now discharge independently HowaV...

Page 27: ...through the large lid in the floor aft of the leaning post This lid allows easy access to many of the boats components You may also access it through the access plates in the splash well The bilge ar...

Page 28: ...are wired into your boat bypassing the battery switch so that they have power at all times this allows the automatic feature to work while you are away from the boat and the batteries are turned off...

Page 29: ...sure is needed The raw water washdown pump can be accessed through the center lid in the floor aft of the leaning post To operate make sure the seacock is in the open position The hose fitting for the...

Page 30: ...ed All of the freshwater systems on the boat will operate on this system once the freshwater switch is engaged You should allow a few seconds for the sys tem to prime and pressurize before attempt ing...

Page 31: ...the aerator to pump water into the transom livewell or the leaning post livewell or both In order to fill the livewell reach in the access hatch below the livewell and close the red handle ball valve...

Page 32: ...wer Disconnect hoses and unscrew housings Check entire hose system for blockage Inspect tricuspid valves for blockage or inverted valve s If valve s are blocked remove blockage re assemble the pump an...

Page 33: ...It also includes a dual USB charging receptacle Always store the organizer with the lid in the closed position To close simply push the middle of the spring towards the front of the boat with one hand...

Page 34: ...ot affected Orange coating can be cleaned off but may eventually return NOTE This discoloration should not be confused with the pitting and corrosion of electrolysis Safetyinformation operations preca...

Page 35: ...asis because it is a high wear item The Gypsy is designed for short scopes of chain and will last longer if properly used Troubleshooting Anchor Rode pays out independently while windlass is not in us...

Page 36: ...itch is defective Yes q No u Replace Motor Sluggish Operation Troubleshoot Chart Is windlass overloaded Ease the load and ensure the battery is well charged Yes q No u Check the voltage across the mot...

Page 37: ...g Switch Panel 4 Brand Specific Motor Guage 5 Windshield Wiper w Washer 6 Optional Rear Facing Camera 7 Overhead Fully Vented Sun Roof Hatch q w e u y e r e r t The hard top is equipped with courtesy...

Page 38: ...0 CC OPTIONAL UTILITY LEANING POST Utility Leaning Post comes with 12v Fridge Electric Grill with inverter charger Corian Counter Top Tackle Storage Tackle Organizer Livewell Landing for Rear Facing B...

Page 39: ...ter right size freezer compartment allows tall bottles to stand upright in fridge interior For More information click here or check your Owner s Packet for your user manual ElectricGrillOption The Ken...

Page 40: ...gn Fully Automatic Battery Charger and Inverter Instant AC transfer switch passes AC shore station power Charges batteries when shore station power is present or switches safely into DC to AC inverter...

Page 41: ...creen controls NMEA 2000 and NMEA 0183 support for network connectivity including autopilots digital switching weather FUSION Link VHF AIS and more Garmin Marine Network support for sharing sonar incl...

Page 42: ...41 SAILFISH 360 CC OPTIONAL A C HEAT KEY DESCRIPTION 1 Heat Air Vent 2 Heat Air Control Panel 3 Location of the Heat Air Unit w e q...

Page 43: ...n shore power panel switch top center switch Switch on the A C Unit switch third rocker switch down Go to the A C control panel switch on and adjust the temperature to your comfort To end this process...

Page 44: ...43 SAILFISH 360 CC OPTIONAL REAR SHADE EXTENSION...

Page 45: ...s Wireless or Hardwired Remote Control Options Permanent or Portable Mounting Options 370 Rotation x 135 Tilt 410 000 Candela Max Beam Distance 4 200 ft 2 8 amps at 13 8V 8 Beam Angle UV Ray and Salt...

Page 46: ...45 SAILFISH 360 CC ELECTRONIC ACTUATED BOW TABLE...

Page 47: ...ESERVOIR WINDSHIELD VENT Windshield washer fluid tank can be accessed by opening up the four hatches that gives you access to the back side of the dash Washer fluid tank will be located directly under...

Page 48: ...47 SAILFISH 360 CC ADJUSTABLE HELM SEAT DRIVING PLATFORM HelmSeatSlideSwitch...

Page 49: ...0 W x 23 3 H inches Maintenance Seakeeper gyros are designed to require minimal maintenance since most of the critical components operate in a sealed enclosure pro tected from the corrosive moisture...

Page 50: ...49 SAILFISH 360 CC DIVE DOOR BOARDING LADDER...

Page 51: ...th the engine off and in the vertical or tilted position vertical position is best The water travels from the hose through the system and sent to each engine for a preset time until the last motor is...

Page 52: ...f the shore power panel Make sure that the green light is illuminated which will show you have power coming in Switch on the main shore power panel switch top center switch Switch on the battery charg...

Page 53: ...n either direction through the water using suction to draw in water from one side of the boat and push it out the other side to move the bow sideways port or starboard The bow thruster gets its voltag...

Page 54: ...r at the dock the 360CC may have the optional inverter system which allows you to enjoy AC power when underway If equipped with the optional inverter system once the shore power is plugged in at the d...

Page 55: ...OWER PANEL CAUTION To avoid electrical shock while servicing and or making repairs to your shore power system make sure that the dock side power source is unplugged and the optional inverter s battery...

Page 56: ...55 SAILFISH 360 CC OFFSHORE INVERTER SYSTEM U S...

Page 57: ...56 SAILFISH 360 CC OFFSHORE INVERTER SYSTEM EUROPEAN...

Page 58: ...box The SeaChest contains two livewell pumps that delivers clean bubble free seawater to the individual livewells It helps to remove air and prevent air locks and keeps the pumps constantly submerged...

Page 59: ...MONITOR Your standard engine monitoring gauge will be either a CL 7 for the Yamaha Outboards or the Vessel View 703 for the Mercury Outboards Please refer to your Outboard Owner s manual that was supp...

Page 60: ...59 SAILFISH 360 CC PILOT S BERTH Access to the Electric Marine Head holding tank hold tank s overboard discharge seacock and the optional A C coolant water intake seacock...

Page 61: ...battery switches circuit breakers and NMEA backbone for your electronics as well as the outboard engine s buss bar Second set of hatches allows easy access to your built in battery charger and radio A...

Page 62: ...TEM KEY DESCRIPTION 1 Battery 2 Fuse 3 Waste Management System 4 Master Switch 5 Controller for Waste Management System q w e r t KEY DESCRIPTION 1 Vent 2 Inlet 3 Toilet 4 Deck Pump Out 5 Overboard Di...

Page 63: ...packed separately for additional information Dometic MasterFlush 4 Components Installed toilet fig 1 Toilet compo 5 2 Minimum System Requirements 5 Specifications 5 1 Materials Toilet vitreous ceramic...

Page 64: ...or shorter period of time DRY BOWL OPERATION During periods of rough travel water in a toilet bowl can splash out and into the bathroom area To avoid this situation press Dry Bowl switch 3 to drain wa...

Page 65: ...ress Flush switch 1 and hold for at least 10 seconds 3 Toss several sheets of toilet paper into bowl and repeat cycle The bowl should completely clear 6 4 2 Normal toilet operation FLUSHING TOILET Pre...

Page 66: ...uring the flush cycle 2 Flush toilet at least five times 3 Turn off water supply to toilet 4 Flush the toilet without water very briefly to evacuate all water This procedure will minimize any remainin...

Page 67: ...Turn on power to toilet and flush until antifreeze is removed from toilet 7 Disconnect power to toilet and reconnect all intake and drain hoses 7 4 Winterizing At the end of each season the Dometic m...

Page 68: ...s for the boat s movement when the tank is filling and still allows an accurate reading when emptying Fail Safe Feature If no fluid movement is sensed 20 seconds after the pump is set to run the pump...

Page 69: ...evacuation pickup tube Install to dockside pump out deck plate 1 X 1 inlet port from toilet system 1 x 3 O ring sealed inspiration hatch 1 x 1 vent connect to vent outlet usually sited high on a vess...

Page 70: ...breaker a Foreign material in pump chamber a Close seacocks and clear foreign material 3 Flush cycle is not activated after pushing on flush switch a Holding tank is full and signal from tank has shu...

Page 71: ...t and wash away any salt crystals 2 Use commercially available glass cleaners or a mix ture of fresh water and vinegar Do not use abrasives harsh chemicals or metal scrapers Regular cleaning will help...

Page 72: ...warranty damage your vinyl Do s Don ts Do s Vinyl Finish Vinyl Cleaner Dish Soap Dawn Ivory Fantastik 303 Aerospace Pro tectant Don ts Formula 409 Murphy s Oil Soap Simple Green Armor All Son of a Gun...

Page 73: ...ossible from pitting When the anodized coating is bro ken and raw aluminum is exposed corrosion will take place Damage from other abrasive impacts can break the anodized coating ChemicalAttack Corrosi...

Page 74: ...ot one time solutions Metal protectors must be reapplied on a regular basis How often a protector should be used varies according to the protector you choose the types of exposure your boat is subject...

Page 75: ...Contains 16 Chromium and 10 Nickel and 2 Molybdenum The Molybdenum is added to help resist corrosion to chlorides like sea water and de icing salts CanStainlessSteelrust Not in the way steel rusts Ste...

Page 76: ...nd a thorough waxing Cleaning We recommend general washing to avoid soil build up and staining The soil to your gel coat is the result of regular use and environmental pollutants such as soot and smog...

Page 77: ...the scratch is in the gel coat surface not penetrating the fiber glass use an automotive polishing compound and rub it out Apply the compound by hand using a damp rag or by using a power buffer The s...

Page 78: ...s limited warranty described above is the sole and exclusive express warranty from Sailfish Under the laws of certain states there may be no implied warranties or conditions from Sailfish applicable t...

Page 79: ...mages which are specifically DISCLAIMED and EXCLUDED from warranty coverage U S purchasers some states do not allow the exclusion or limitation of incidental or consequential damages so the above limi...

Page 80: ...ailable at time of printing and are subject to change without notice Some accessories shown in photographs or described may not be standard equipment or even available as an option s Confirm availabil...

Reviews: