


For more help and resources call 1-800-544-1108 or visit www.safety1st.com
7
USING Y
OUR MONIT
OR
CONTROL PANEL
Video Screen
On/Off Button
Less Bright/Scroll Left
More Bright/Scroll Right
MENU BAR
LINK INDICATOR
OUT OF RANGE:
will display when out of range
IN RANGE:
will display when units are linking
Black 20% Opacity
Black 35% Opacity
1.5
1.5
8.4 mm
48.05
LCD VIEW
Scale: 200%
Scale: 100%
35.76
LCD VIEW
Model No.
Product Name
Concept
Date
08096
Baby Video Monitor
F6066
Rev 1.0
Hardlines Sketch and Rendering Template
5.21.08
Property of Dorel Juvenile Group
Volume Setting Screen
Video Display
Video Display
Video Display
Video Display
Mute Volume
Middle Volume
Full Volume
Volume Adjust –
Volume adjust is shown on a window that pops up on the bottom.
Bar goes away 3 seconds after last button press.
Touching the up or down side of the volume knob brings up the volume bar.
Initial press does not change volume but gives user indication of current volume status.
Press up or down to select 9 levels of audio. No bars lit is mute, then bars light up 1 through 8 bars.
Screen will disappear 3 seconds after last key press.
02.03.09
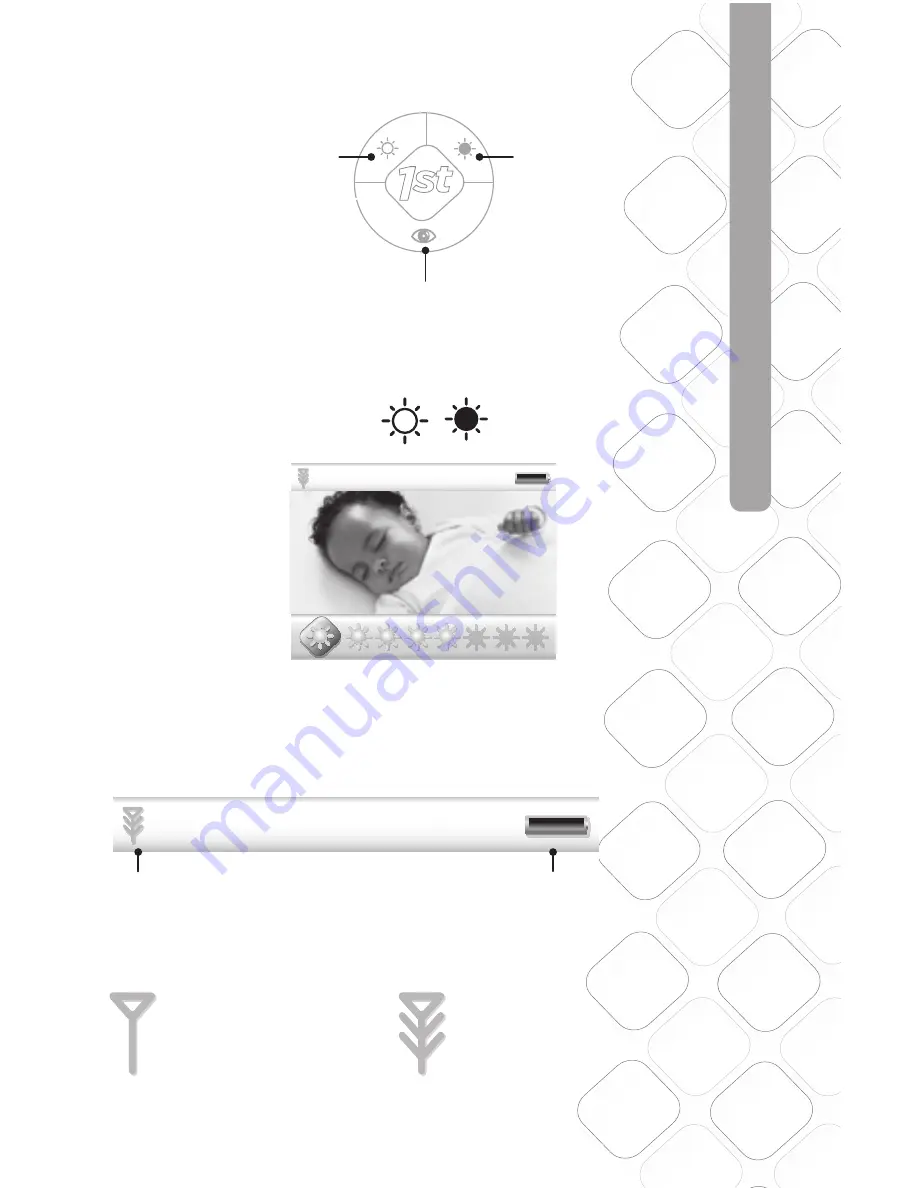
BRIGHTNESS
1-8.
1.5
1.5
8.4 mm
5.35 mm
48.05
LCD VIEW
35.76
LCD VIEW
Model No.
Product Name
Concept
Date
08096
Baby Video Monitor
F6066
Rev 1.0
Hardlines Sketch and Rendering Template
5.21.08
Property of Dorel Juvenile Group
Brightness Setting
Video Display
Video Display
Video Display
Video Display
Scale: 200%
Scale: 100%
Minimum Brightness
Brightness Mid-Level
Brightest
12/31
12:20
PM
72 F
0
2x
12/31
12:20
PM
72 F
0
2x
Brightness –
There are seven levels of brightness, default is four.
Window pops up on the bottom and shows sunburst icons. Bar goes away 3 seconds after last button press.
There are SEVEN levels of brightness on this unit. From the factory, the unit is set at medium brightness.
From the outer level (not pressing the select Key), press the side arrow or Less Bright key. Video will darken one level.
Press the side arrow or More Bright Key to return to mid brightness. Press this key again to get to MAX brightness.
Feedback should be Icon and level indicator
02.03.09
Scroll left/right for desired brightness setting.
Link
Battery
Summary of Contents for 08028
Page 11: ......


