background image

Softwarefunktionen - Software functions  -
Fonctions du logiciel

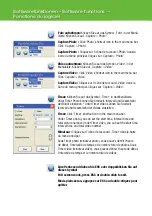
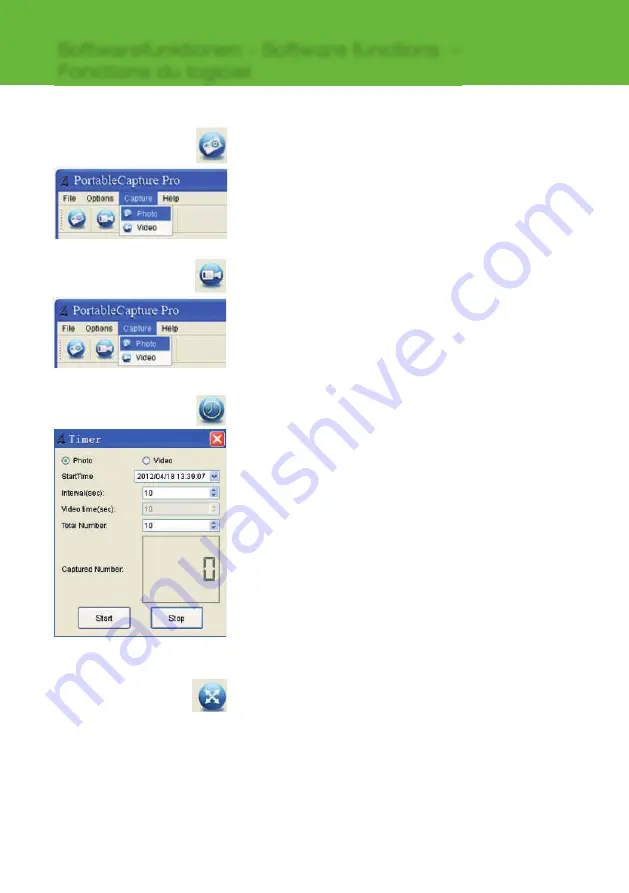
Foto aufnehmen: 

Klicken Sie auf das Symbol „Foto“ in der Menü-

leiste. Klicken Sie auf „Capture > Photo“.

Capture Photo : 

Click ‘Photo’ shortcut icon in the main menu bar. 

Click ‘Capture > Photo’.

Capture Photo :

 Cliquez sur l‘icône de raccourci ‚Photo‘ dansla 

barre du menu principal. Cliquez sur ‘Capture > Photo’.

Zum Verlassen drücken Sie ESC oder doppelklicken Sie auf 
dieses Symbol

Full screen mode, press ESC or double-click to exit.

Mode plein-écran, appuyez sur ESC ou double-cliquez pour 
quitter.

Video aufnehmen: 

Klicken Sie auf das Symbol „Video“ in der 

Menüleiste. Klicken Sie auf „Capture > Video“.

Capture Video : 

Click ‘Video’ shortcut icon in the main menu bar. 

Click ‘Capture > Video’.

Capture Vidéo :

 Cliquez sur l‘icône de raccourci ‚Vidéo‘ dans la 

barre du menu principal. Cliquez sur ‘Capture > Vidéo’.

Timer: 

Klicken Sie auf das Symbol „Timer“ in der Menüleiste.

Unter Timer Photo können Sie Startzeit, Intervall und Gesamtzahl 

der Bilder einstellen. * Unter Timer Video können Sie Startzeit, 

Intervall und Gesamtzahl der Videos einstellen.

Timer: 

Click ‘Timer’ shortcut icon in the main menu bar. 

Under Timer photo, you can set the start time, interval time and 
total picture number. Under Timer video, you can set the start time, 
interval time and total video number.

Minuteur : 

Cliquez sur l‘icône de raccourci ‚Timer’ dans la barre 

du menu principal. 
Sous Timer photo (minuteur photo), vous pouvez défi nir l‘heure 
de début, l‘intervalle de temps et le nombre total de photos. Sous 
Timer video (minuteur vidéo), vous pouvez défi nir l‘heure de début, 
l‘intervalle de temps et le nombre total de vidéos.

Summary of Contents for 9755

Page 1: ...LCD Digital Mikroskop LCD Digital Microscope Microscope numérique LCD Manual No 9755 ...

Page 2: ...fy LCD Digital Microscope in any way Keep LCD Digital Microscope away from water and other liquids Do not use LCD Digital Microscope with wet hands Never use LCD Digital Microscope in the rain or snow Moisture creates the danger of fire and electric shock If you notice smoke or a strange odor coming from LCD Digital Microscope turn the power off immediately LCD Digital Microscope may become slightl...

Page 3: ...tor Lithium Battery Microscope numérique Adaptateur secteur Pile au à écran LCD lithium USB Kabel TV Kabel CD USB cable TV cable CD Câble USB Câble téléviseur CD Kurzanleitung Reinigungstuch Kalibrierungskarte QSG Cleaning fabric Calibration chart Guide d utilisation Chiffon de nettoyage Diagramme de calibrage ...

Page 4: ...n Entrée CC 5 v 12 TV Ausgang TV out Sortie téléviseur 13 USB Port USB port Port USB 14 Batteriefach Battery compartment Compartiment de la pile 15 Akku Ladeanzeige Battery charging indicator Indicateur de charge de la pile 1 3 5 LCD Display 3 5 LCD display Écran LCD 8 9cm 2 microSD Slot MicroSD card slot Lecteur de carte MicroSD 3 Einstellrad B Wheel B Molette B 4 Mikroskopröhre Microscope tube T...

Page 5: ...tellungen Menu de configuration Confirm Bestätigung Confirmer Color Mode Up Farbmodus Pfeiltaste aufwärts Mode couleur Haut Down Pfeiltaste abwärts Bas Power on off Ein Aus Mise en marche arrêt LED Dimmer LED Helligkeit Intensité de l écran à DEL Zoom in Vergrößern Zoom avant Zoom out Verkleinern Zoom arrière Deutsch English French ...

Page 6: ... 20x 250x 500x magnification Photo Video Timer Measurement when working on computer Support MicroSD card up to 32GB Driver free to download for Windows XP SP2 Vista Win7 and Mac OS 10 5 10 7 direct plug in EN driver installation not required Rechargeable Lithium Battery Écran TFT 3 5 Capteur d images 5M de grande qualité jusqu à 12 M par interpolation Agrandissement 20x 250x 500x Photo et vidéo Com...

Page 7: ...s noch einmal Die microSD Karte muss von der Benutzung forma tiert werden Insert a MicroSD Card not included 1 Turn off the microscope 2 Insert the MicroSD card into the MicroSD card slot gently press in until card is latched Note Do not force the card into the slot forcing may damage microscope and the MicroSD memory card Align MicroSD card po sition as marked and try again The MicroSD memory car...

Page 8: ...weis Die Symbolanzeige kann ein und ausgeblendet werden drücken Sie das Vergrößerungs rad nach unten Note The icon displays can be switched on off by pressing Zoom Wheel downward vertically Remarque Vous pouvez activer et désactiver l affichage des icônes en descendant verticalement la molette de Zoom Symbole auf dem Bildschirm Display Icons Meanings Description des icônes affichées sur l écran Mikr...

Page 9: ...sch dicht an die Mikroskopröhre zu bringen Rotate Wheel A to bring the stage near to the microscope stage Tournez la molette A pour rapprocher l objet du tube du microscope Einstellrad B drehen um die Bildschärfe einzu stellen Rotate Wheel B to get a fine focus Tournez la molette B pour ajuster la mise au point Einstellrad C nach rechts drehen um den Objekttisch zu verriegeln Rotate Wheel C clockwi...

Page 10: ...nez d enregistrer Drücken Sie Wiedergabe Pfeiltaste links um den Wiedergabemodus aufzurufen Das Wiedergabesymbol wird oben links im Bild angezeigt Drücken Sie die Pfeiltas ten aufwärts abwärts um das gewünschte Bild oder den Videoclip auszuwählen Press Playback Left to enter play back mode as follows There is review icon on the left corner Press UP DOWN to select among captured pictures and video ...

Page 11: ...z la molette de zoom vers le haut Zoom arrière poussez la molette de zoom vers le bas Diashow Slide show Option Protect Verrouiller Im Wiedergabemodus drücken Sie zum Aufrufen des Untermenüs dann wählen Sie das Intervall und bestätigen Sie mit OK At play back mode press to enter sub menu as follows select interval time and then confirm by OK Depuis le mode lecture appuyez sur pour afficher le sous m...

Page 12: ...cherten Bilder und Videos anzuzeigen Connect the microscope to computer by USB cable Choose Mass Storage and then you can view stored photos videos Reliez le microscope à l ordinateur à l aide d un câble USB Choisissez Mass Storage Vous pouvez maintenant visualiser sur l ordinateur les photos et les vidéos Vorschau auf dem Computer Preview on Computer Aperçu sur l ordinateur Schließen Sie das Mikr...

Page 13: ... adaptor into a standard AC outlet The battery indicator LED at the end corner of the unit will be in red to show that the battery is charging 2 When the battery is finished charging the battery indicator LED will be in off Unplug the unit Vous devez recharger la pile avant d utiliser votre microscope pour la première fois 1 Branchez l extrémité appropriée de l adaptateur secteur sur l entrée DC du...

Page 14: ...sur les branchements et les connecteurs de votre téléviseur reportez vous au guide d utili sation de celui ci 3 Allumez le téléviseur Le cas échéant modifiez le canal d entrée sur le téléviseur Toutes les images capturées par le microscope sont affichées sur l écran du téléviseur Anschluss an Fernseher Connect to TV Branchement à un téléviseur Problem Lösungsvorschlag Das Gerät lässt sich nicht eins...

Page 15: ...is connected to a wall switch make sure that the switch is on Symptôme Suggestion L appareil ne s allume pas Rechargez la pile L écran est blanc Vérifiez que vous avez allumé votre appareil Rechargez la pile Vérifiez que l élément que vous avez placé sur la platine est correctement placé sous l objectif Des taches sont visibles sur l écran Nettoyez délicatement l écran et l objectif avec un chiffon ...

Page 16: ...haumodus Dann drücken Sie die Aufnahmetaste um die Auf nahme zu starten Während der automatischen Aufnahme wird links im Bild angezeigt Nach der Aufnahme aller Bilder kehrt das Mikroskop in den Normalmodus zurück Zur Unterbrechung der automatischen Aufnahme drücken Sie erneut die Aufnahmetaste Die Intervallaufnah me steht Ihnen nur für Standbilder zur Verfügung Interval input interval time between...

Page 17: ... Press to enter main menu I and then press LEFT to enter Main Menu II as follows Here you can setup Language Power Save Date Stamp TV Out Date and Time Format SD System Reset Version Menu principal II Appuyez sur pour accéder au menu principal I puis sur la touche GAUCHE pour accé der au menu principalII illustré ci dessous Vous y trouvez les options de configuration suivantes Language Power Save D...

Page 18: ...r TV Out From the main menu II choose TV Out and then select between NTSC and PAL the correct mode compatible with your TV Option TV Out Sortie téléviseur Depuis le menu principal II choisissez l option TV Out et sélectionnez le système de télévision que vous utilisez parmi les deux qui vous sont proposés NTSC PAL Date Time Im Hauptmenü II stellen Sie das Tagesdatum und die Uhrzeit ein Date Time F...

Page 19: ...eboot the system when asked 2 You can also browse the User manual in PDF format and the CD contents by choosing the correspon ding menus 1 Installer le logiciel PortableCapture Pro Cliquez sur PortableCapture Pro software et redémarrez votre ordinateur si un message vous y invite 2 Vous pouvez également consulter le guide d utilisation au format PDF et le contenu du CD en choisis sant les menus ap...

Page 20: ...ick Capture Video Capture Vidéo Cliquez sur l icône de raccourci Vidéo dans la barre du menu principal Cliquez sur Capture Vidéo Timer Klicken Sie auf das Symbol Timer in der Menüleiste Unter Timer Photo können Sie Startzeit Intervall und Gesamtzahl der Bilder einstellen Unter Timer Video können Sie Startzeit Intervall und Gesamtzahl der Videos einstellen Timer Click Timer shortcut icon in the mai...

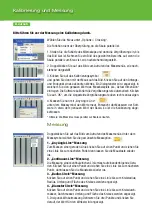
Page 21: ...cht der Messwert der Soft ware in etwa dem genauen Wert der Skala so ist die Kalibrierung abge schlossen Hinweis Die Messlinie muss parallel zur Skala verlaufen Messung Doppelklicken Sie auf das Bild zum Aufrufen des Messmenüs Unter dem Messsymbol wählen Sie die gewünschte Messoption 1 Any Angle Line Messung Zum Messen einer geraden Linie klicken Sie auf einen Punkt und ziehen Sie eine Linie bis z...

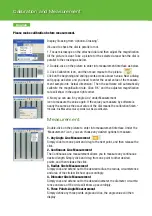
Page 22: ...the value again If the value you measure by software is nearly the same as the exact value of the dial means the calibration finish Hinweis Die Messlinie muss parallel zur Skala verlaufen Measurement Double click on the picture to enter into measurement interface Under the Measurement icon you can choose any desired options to measure 1 Any Angle Line Measurement Simply click from one point and dra...

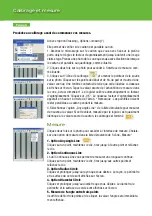
Page 23: ... Remarque Les pointillés doivent rester parallèles au cadran pendant la mesure 4 Sélectionnez l option Any angle Line de la liste déroulante pour mesurer de nouveau la valeur Si cette valeur mesurée par le logiciel est quasiment identique à la valeur exacte du cadran le calibrage est terminé Mesure Cliquez deux fois sur la photo pour accéder à l interface de mesure Choisis sez une option de mesure...

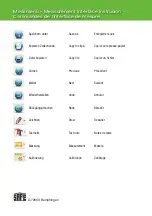
Page 24: ... sous Kopieren Zwischenab Copy to clipb Copier vers presse papier Datei kopieren Copy file Copier un fichier Zurück Previous Précédent Weiter Next Suivant Wiederherstellen Undo Annuler Rückgängigmachen Redo Rétablir Zeichnen Draw Dessiner Textnotiz Text note Notes de texte Messung Measurement Mesure Kalibrierung Calibration Calibrage ...

Reviews: