background image

24

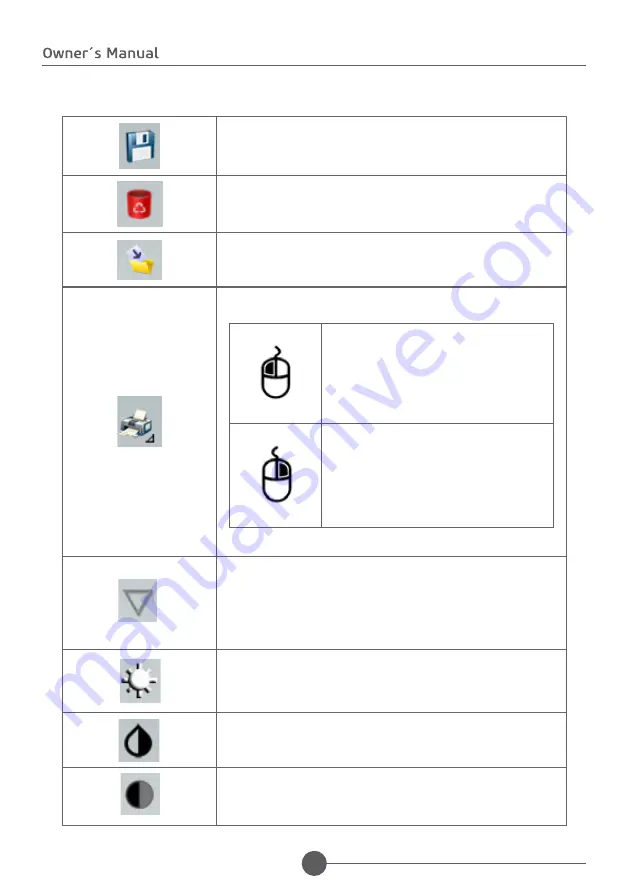
Save

Save image in patient's record

Delete image

Permanently delete the display image

Export

Allows saving a copy of the image with another name in several 

images standards.

Print

Print the image in DICOM or Conventional

Print in standard printer

Print in secondary printer

The setting of the main printer is made in the Setting menu

Edge highlight

Improve  definition  of  the  edge  of  the  image.  Available  in  4 

levels of density.

Obs: Available only for TIFF images without marking. It is re

-

commended to apply it right after the image capturing.

Brightness setting

Allows setting the brightness of the image.

Inversion of colors

Invert the color of the image.

Contrast Setting

Allows adjusting the contrast of the image.

SYSTEM DESCRIPTION

Summary of Contents for Slim

Page 1: ......

Page 2: ...ico Digital Intraoral Model Saevo Slim Brand Saevo Technical Responsible Daniel R de Camargo CREA SP 5062199650 ANVISA Register 10101139029 Document originally written in Portuguese Alliage S A Ind st...

Page 3: ...marks The use of a term in this manual must not be considered as influential over any trademark commercial trademark or service mark Saevo Slim is a commercial trademark from Alliage S A Microsoft Win...

Page 4: ...15 COMPUTER SYSTEM 15 SOFTWARE REQUIREMENTS 16 HARDWARE REQUIREMENTS 16 ELECTRICAL REQUIREMENTS 17 INSTALLATION SITE 17 SOFTWARE 17 SOFTWARE INSTALLATION 22 MAIN SCREEN 23 INTERFACE ICONS 27 SETTING S...

Page 5: ...TION 55 PREVENTIVE MAINTENANCE 55 CORRECTIVE MAINTENANCE 56 ERROR DIAGNOSIS 58 CABLE REPLACEMENT 60 AUTHORIZED SERVICE NETWORK ALLIAGE 60 WARRANTY 61 ELECTROMAGNETIC COMPATIBILITY TABLES EMC 61 GUIDAN...

Page 6: ...The Intraoral dental digital imaging sensor Saevo Slim is aimed at the acquisition of intra oral me dical images from teeth jaw and oral structure only for exclusive dental use and must be handled by...

Page 7: ...OLOGY Fragile handle with care Applied parts BF type Keep dry Equipment Class II This side up Attention Keep away from sunlight General warning Maximum stacking Mandatory action Temperature limit Temp...

Page 8: ...to the accessories Part Number IP00 This product is not protected against harmful water infiltrations and particulate matter Indicates that the product has passed an evaluation and that standards or...

Page 9: ...y precautions to avoid excessive exposure to primary and secondary radiation The Saevo Slim has three different interactions with the user They are Identification label Placed in the lower part of the...

Page 10: ...althy professionals including safeguard knowledge against excessive exposure to radiation The equipment was manufactured to resist continuous and intermittent operation therefore follow the cycles des...

Page 11: ...is not possible to solve the problem turn off the equipment and disconnect the cables PRECAUTIONS FOR THE REDUCTION OF ENVIRONMENTAL IMPACT Alliage S A aims to reach an environmental politics to promo...

Page 12: ...minate the environment To the European Economic Area EEA this product is subject to the Directive 2012 19 EU ass well as to the correspondent national laws This directive requires that the product mus...

Page 13: ...ANY THE PRODUCT 01 Sensor Saevo Slim 02 Saevo Slim holder 03 Installation flash drive Software Drivers and Manuals 04 Capa de silicone 01 02 03 04 The Saevo Slim Sensor can be marketed in white or bla...

Page 14: ...14 ACCESSORIES THAT DON T ACCOMPANY THE PRODUCT SYSTEM DESCRIPTION 01 Positioning kit 02 Protective plastic cover Optional items 02 01...

Page 15: ...ly the support can be glued to a uniform surface for example using the required double sided adhesive tape COMPUTER SYSTEM The captured digital images are transferred to a computer system via a USB po...

Page 16: ...tested so that you do not influence the image acquisition software after installation Don t use USB ports available in keyboards or in the front or lateral side of the computer These connections are...

Page 17: ...tions don t operate non medical equipment like personal computers inside the patient area Outside the patient area it s ac ceptable the presence of non medical equipment as long as it s used computer...

Page 18: ...click on OK Read and understand the End User License Agreement and if you accept click on I accept the terms of the Contract Click Next Select the dialog box if you want to create an icon on Desktop...

Page 19: ...lick Install to begin the installation process Setup will install NET 4 5 1 Setup will install the necessary tools to generate reports Click I Agree to accept the terms of the software SYSTEM DESCRIPT...

Page 20: ...20 Click Install Wait for the end of installation and click Close Setup will install the USB driver Press Install to begin the installation process SYSTEM DESCRIPTION...

Page 21: ...21 Click Finish to end installation SYSTEM DESCRIPTION...

Page 22: ...ghtness setting 22 Invert colors 23 Contrast setting 24 Histogram 25 Gamma setting 26 Insert Text 27 Insert Arrow 28 Insert circle 29 Insert drawing 30 Select 31 Cropping 32 Angular measurement 33 Cal...

Page 23: ...the folder record showed on the interface and open previously saved files Browse up Allows sliding images showed in the vertical library Browse down Allows to slide images showed in the vertical libra...

Page 24: ...y printer The setting of the main printer is made in the Setting menu Edge highlight Improve definition of the edge of the image Available in 4 levels of density Obs Available only for TIFF images wit...

Page 25: ...rt a circle in the image The definition of color and width is made in the Settings menu Insert Freehand drawing Insert a freehand drawing in the image The definition of color and width is made in the...

Page 26: ...Show hide toolbar Show hide toolbar with marking resources association of the image Odontogram Access to Odontogram mode Histogram window Automatically opens when loading or capturing an image configu...

Page 27: ...lor and width of the arrow 08 Color and width of free hand drawing 09 Color width and filling of the circle 10 Distance measurement Color and size of the text font 11 Angular measurement Color and siz...

Page 28: ...ge record to each tooth and generating reports of the treatments It s possible to view the image records or start the capture of a new image by clicking the right button of the mouse on the desired to...

Page 29: ...ogram Perform an image capturing Select numbering of the tooth you want to associate with the image If you want insert diagnosis information in the text field Click on to associate the image with the...

Page 30: ...30 The tooth whose image is associated will be pointed in YELLOW b Capture through odontogram To start a capture click the right button of the mouse and after that on start capture SYSTEM DESCRIPTION...

Page 31: ...e odontogram with the right button of the mouse Select the day and time of the image you want to open Click with right button to open an image d Help odontogram The icon opens a window with an illustr...

Page 32: ...e f h i j c b a a Print report b Send by email c Save report on pdf d Delete report e Preview report f Selection of report model with images or without images g Select the image to be inserted in the...

Page 33: ...he items listed below Always use protective plastic covers manufactured with non cytotoxic non irritant and non sensitizing polyethylene film in accordance with ISO 10993 1 Always use products for exc...

Page 34: ...ABEL DEMONSTRATIVE PICTURE REAL DIMENSIONS 100 x 63 mm SAFETY LABEL DEMONSTRATIVE PICTURE REAL DIMENSIONS 50 x 23 mm CONSULTATION LABEL AND INSTRUCTION MANUAL DEMONSTRATIVE PICTURE REAL DIMENSIONS DIA...

Page 35: ...3 Recreio Anhanguera Ribeir o Preto SP Brazil CEP 14097 500 Name Intraoral Dental Digital Imaging Sensor Model Saevo Slim Equipment Classification Classification class according to ANVISA Class I Clas...

Page 36: ...12 bits 12 bits 12 bits Image format TIFF JPG PNG BMP DICOM TIFF JPG PNG BMP DICOM TIFF JPG PNG BMP DICOM Optical Fiber 1 1 1 Weight 60 g 65 g 70 g Connection USB2 High speed USB2 High speed USB2 High...

Page 37: ...instructions included in this manual PREPARATION FOR USE To prevent cross contamination use hygienic covers that must be disposed of for each new patient always observing if they are not damaged Cove...

Page 38: ...he correct positioning of the intraoral sensor in an easy practical and precise way Its use is not mandatory and depends on the technique used by the operator When it s used with the Intraoral dental...

Page 39: ...the positioner being careful to not bite the sensor cable Place the x ray tube parallel to the arm and centered with the ring The positioners are usually made in different colors that represent the ex...

Page 40: ...raoral dental digital imaging sensor Saevo Slim start the computer and verify if it s on Start the software of image capturing clicking on the shortcut icon on the Desktop or Start All programs Saevo...

Page 41: ...REGISTRATION OF PATIENT Click on icon the next screen will be shown Next click on icon Fill the fields to do the registration of the new patient Name and Last name are obligatory fields Next click OK...

Page 42: ...t the patient directory that you want to open Click on to confirm or click on to go back to the initial interface CHANGING A PATIENT REGISTRATION Click on the icon Select the patient directory that yo...

Page 43: ...setting verify if they are all appropriate The setting depends on multiple variables such as the X Ray tube patient anatomy distance between the sensor font and location of the sensor in the oral cavi...

Page 44: ...nerator to capture the image After the exposure the image will appear on the screen of the application If the captured image is suitable for diagnosis click the icon to save it in the patient folder o...

Page 45: ...a patient open the register of him clicking on the icon the following screen will appear Select the patient folder and after click on the icon The following screen will be displayed All images with d...

Page 46: ...ation depends on the radiographic technique used The metric technique must be performed every time the technique is changed The intraoral calibration is unique for any device and it depends on the rad...

Page 47: ...the focal point of the X Ray generator must be placed at a distance of appro ximately 20cm of the sensor This technique produces radiographs with distortion regardless of the technique and precision...

Page 48: ...click on Calibration icon Draw a line between the two points that will be measured later The system will show a standard distance in pixel and mm Perform the physical measurement of the x rayed objec...

Page 49: ...49 Type the distance measured in mm After entering the distance click on PRECISION OF THE MEASUREMENT Parameter Range Precision Distance 0 to 99 9 mm 0 1mm Angle 0 00 to 179 99 0 01 SYSTEM OPERATION...

Page 50: ...ete intraoral radiography exam from the mouth is preferable when the patient has clinical evidence of generalized oral disease or an extensive record of dental treatment Individualizes radiography exa...

Page 51: ...demonstrated Non appli cable Patient New and Return for growth monitoring and dentofa cial develop ment and or evaluation of the dental skeletal rela tions A clinical judgment about the need and type...

Page 52: ...judgment and is not appli cable to every patient It is the dentist responsibility to follow the ALARA principle as low as rea sonably possible to minimize the exposure of the patient a History of pos...

Page 53: ...23 Peri implanting The factors that increase the risk for caries can be available using the ADA forms for caries risk assessment 0 6 years old and older than 6 years old 1 U S Department of Health an...

Page 54: ...lim and the first 30cm of the USB cable For the cleaning use a clean and soft cloth damp with neutral soap and then perform the drying with a clean and soft cloth or with a paper towel For the disinfe...

Page 55: ...damage Intraoral sensor Communication Operation Overheating Physical Damage Accessories General damage that can cause risk In case are detected problems during the inspections contact us with the Alli...

Page 56: ...t appear Patient folder was not selected Blue status of the sensor and there s no image Make sure the sensor is activated button Start capture before the X Ray shots Verify the correct performance of...

Page 57: ...arning Error To run this application it is ne cessary to install one of the following versions of NET Framework v4 0 Fail to install NET 4 5 1 Install Microsoft NET 4 5 1 or reinstall software Very cl...

Page 58: ...g sensor Saevo Slim are susceptible to electrostatic discharge ESD During the cable repla cement measures must be taken to protect the device against possible damage by ESD With the help of a screwdri...

Page 59: ...ure there s no space between the plastic parts It is recommended the use of a torquemeter adjusted for 10 N cm Place the cover of the screws available in the kit and press them until they fit in the p...

Page 60: ...ponents specifications that are not declared in the user manual use the Alliage Customer Attendance Service to make the request Telephone 55 16 3512 1212 E mail imagem eagle alliage global com Address...

Page 61: ...on on compliance of the equipment according to the standard EN 60601 1 2 2015 ELECTROMAGNETIC COMPATIBILITY TABLES EMC GUIDANCE AND DECLARATION FOR ELECTROMAGNETIC EMISSIONS Emission Essays Conformity...

Page 62: ...mity fields from RF wireless communications equipment IEC 61000 4 3 See table See table Electrical Fast Transients bursts IEC 61000 4 4 1 kV 100 kHz repetition frequency 1 kV 100 kHz repetition freque...

Page 63: ...990 GSM 1800 CDMA 1900 GSM 1900 DECT Band LTE 1 3 4 25 UMTS Pulse modula tion 217 Hz 2 0 3 28 1845 1970 2450 2400 2570 B l u e t o o th WLAN 8 0 2 1 1 b g n RFID 2450 Band LTE 7 Pulse modula tion 217...

Page 64: ...emission or decreased electromagnetic immunity and result in improper operation Portable RF communications equipment including peripherals such as an tenna cables and external antennas should be used...

Page 65: ...65...

Page 66: ...66...

Page 67: ...67...

Page 68: ......

Reviews: