Saelig SAE106S Manual Download Page 3

Saelig Company Inc.  71 Perinton Pkwy  Fairport  NY 14450  USA  

www.saelig.com


[email protected]

          Page 3 

SAE106S Digital Microscope Users Guide 

Read this manual carefully, as most of the questions are answered on the following pages. 
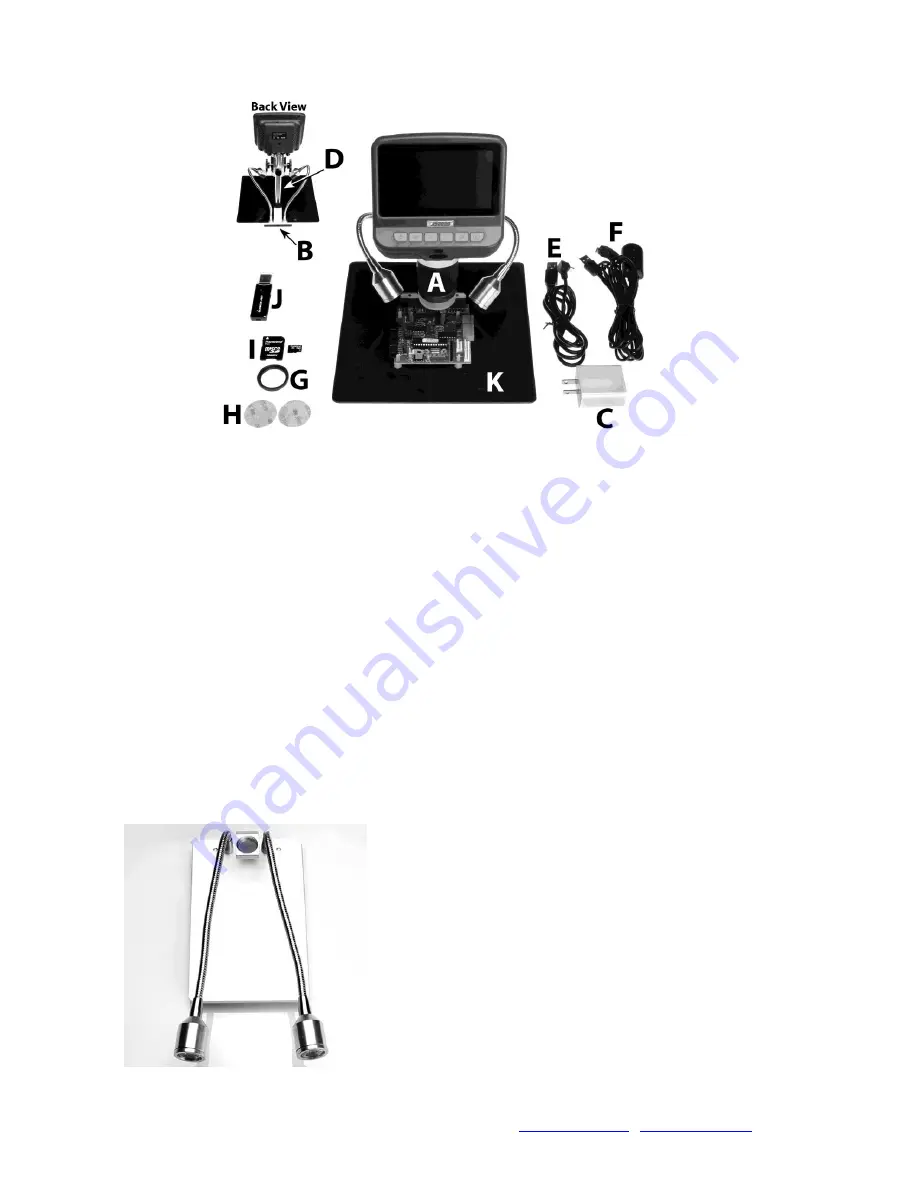
What’s in the Box?


A.


Optical stack 

B.


Base, including 2 LED spotlights 

C.


Power block adapter 

D.


Post for mounting optical stack to Base including distance adjuster, locking ring and fastening mechanism. 

E.


USB to micro USB cable, Used to display microscope image on computer screen 

F.


USB to micro USB cable with tethered remote 

G.


UV filter 

H.


3M adhesive patches for attaching filter 

I.


2Gb MicroSD card and adapter 

J.


Micro/SD card USB 3.0 Reader 

K.


ABS plastic base 


Locate the base with the LED spotlights. Carefully bend both LED spotlights down flat on the base.


1.


Locate the post that attaches to the base.  Screw the post onto the base, turning the locking ring counter 
clockwise until it locks against the base. 

Summary of Contents for SAE106S

Page 1: ...knob Built in UV filter protects the lens reduces unwanted reflections 8 x LED ring illuminator plus two movable LED lights with adjustable intensity for optimal illumination Adjustable object distanc...

Page 2: ...d by design If the problem is a short there may even be burned spots on the printed circuit board They can be quite small but will be dramatically discolored brown instead of the normal green solder m...

Page 3: ...ng distance adjuster locking ring and fastening mechanism E USB to micro USB cable Used to display microscope image on computer screen F USB to micro USB cable with tethered remote G UV filter H 3M ad...

Page 4: ...ar hole on the front of the post Do not tighten thumbscrews 3 While holding the post centered on the base tighten the locking ring clockwise until the post no longer moves 4 Center the optical stack w...

Page 5: ...n the slot Push down on the card until it clicks The SD Icon will appear in the upper right hand corner of the display when the card is correctly inserted 2 On tethered remote depress the power button...

Page 6: ...e monitor cross net 2 lines ultra cross net 4 lines F Language ENG CN JP KRN RUS FRN DUT G Flicker 50Hz 60Hz H Format No Yes I Reset System No Yes reset back to factory values Adjusting Magnification...

Page 7: ...ce for viewing 1 Insert the MicroSD card into the slot at the top rear of the optical stack 2 Use the Mode Button to select from the following three image display modes A Video B Still Image C Review...

Page 8: ...ed to provide additional options while reviewing a still image or video Refer to the SETTINGS section Delete Deletes current image or video Delete All Deletes All unprotected images and video Lock Thi...

Reviews: