background image

3

Contents

IMPORTANT SAFETY INFORMATION  . . . . . . . . . . . . . . . . . . . . . . . . . . . . . . . .

4

RF Exposure Statement  . . . . . . . . . . . . . . . . . . . . . . . . . . . . . . . . . . . . . . . . . . . . . . . . .

5

IC Statement. . . . . . . . . . . . . . . . . . . . . . . . . . . . . . . . . . . . . . . . . . . . . . . . . . . . . . . . . . . . .

5

FCC WARNING . . . . . . . . . . . . . . . . . . . . . . . . . . . . . . . . . . . . . . . . . . . . . . . . . . . . . . . . .

5

Electrical Ratings . . . . . . . . . . . . . . . . . . . . . . . . . . . . . . . . . . . . . . . . . . . . . . . . . . . . . . . .

6

Recommended Tools and Supplies  . . . . . . . . . . . . . . . . . . . . . . . . . . . . . . . . . . . . . .

6

INSTALLATION INSTRUCTIONS. . . . . . . . . . . . . . . . . . . . . . . . . . . . . . . . . . . . . . .

7

Enclosure mounting . . . . . . . . . . . . . . . . . . . . . . . . . . . . . . . . . . . . . . . . . . . . . . . . . . . . .

7

Input / Supply Line Voltage . . . . . . . . . . . . . . . . . . . . . . . . . . . . . . . . . . . . . . . . . . . . . .

9

Output Wiring for Lights and Light Sources. . . . . . . . . . . . . . . . . . . . . . . . . . .

10

OPERATING INSTRUCTIONS . . . . . . . . . . . . . . . . . . . . . . . . . . . . . . . . . . . . . . . .

12

Manual Rocker Switch Operation . . . . . . . . . . . . . . . . . . . . . . . . . . . . . . . . . . . . .

12

Wireless Remote Operation. . . . . . . . . . . . . . . . . . . . . . . . . . . . . . . . . . . . . . . . . . .

13

WIRING DIAGRAM . . . . . . . . . . . . . . . . . . . . . . . . . . . . . . . . . . . . . . . . . . . . . . . . . . .

14

REPLACEMENT PARTS . . . . . . . . . . . . . . . . . . . . . . . . . . . . . . . . . . . . . . . . . . . . . . .

15

Summary of Contents for poolLUX Plus pLX-PL60

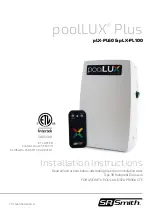
Page 1: ...on Instructions Read all instructions before attempting to perform installation work Type 3R Rainproof Enclosure FOR USE WITH POOL AND SPA PRODUCTS 5005508 ETL LISTED Conforms to UL STD 379 Certified...

Page 2: ...2...

Page 3: ...rical Ratings 6 Recommended Tools and Supplies 6 INSTALLATION INSTRUCTIONS 7 Enclosure mounting 7 Input Supply Line Voltage 9 Output Wiring for Lights and Light Sources 10 OPERATING INSTRUCTIONS 12 Ma...

Page 4: ...l of the pool unless separated from the pool by a solid fence wall or other permanent barrier 3 CAUTION THE EQUIPMENT AND CONTROLS SHALL BE LOCATED NOT LESS THAN 1 M HORIZONTALLY FROM THE SPA OR HOT T...

Page 5: ...nterference and 2 this device must accept any interference received including interference that may cause undesired operation 2 Changes or modifications not expressly approved by S R Smith LLC will vo...

Page 6: ...ernal Current Fuse and is designed to blow first in the event of a short and helps reduce whole transformer replacement due to field induced shorts sparking wires as well as other abnormal electrical...

Page 7: ...X Plus p n pLX PL60 PL100 in an appropriate area that meets the following requirements a Must be mounted on a flat vertical surface b Must be a minimum of 4 inches above the ground level pool deck or...

Page 8: ...y from the wall to allow the unit to be mounted correctly 4 Place the mounting tab of the poolLUX Plus p n pLX PL60 PL100 over the 10 screw and let it hang in place Level the unit and mark the remaini...

Page 9: ...conduits are connected replace the metal input voltage isolation barrier and mounting screw Tighten until the mounting screw is secure 2 Bring the supply power conduit to one of the four lower right...

Page 10: ...that the input wiring screw terminals are secure 12VAC 13VAC POWER INPUT NEUTRAL POWER INPUT POWER INPUT GROUND COM GROUND GND N H Input Wiring Locations O u t p u t W i r i n g f o r L i g h t s a n...

Page 11: ...tors to the electrical taps output terminals Most installations will utilize the terminal configuration of 12VAC terminal and low voltage common terminal In some cases additional voltage may be requir...

Page 12: ...ition To turn OFF the 12VAC connected lights flip the rocker switch to the DOWN to the OFF position To enable wireless control flip the rocker switch to the REMOTE position Color Changing Operation To...

Page 13: ...ent to the control panel To Turn On Using the Wireless Remote Wake the remote out of Sleep Mode press the 1 button to turn the system ON OFF Note The rocker switch on the poolLUX Plus must be set to R...

Page 14: ...BK BLACK B BLUE Y YELLOW G GROUND 2 ELECTRICAL CONNECTIONS LEGEND 12V 12VAC L V LOW VOLTAGE COMMON 13V 13VAC GND GROUND N POWER INPUT NEUTRAL H POWER INPUT 12VAC 13VAC POWER INPUT NEUTRAL POWER INPUT...

Page 15: ...15002 01 Isolation Barrier 02 15342 00 Isolation Barrier mounting screw 8 32 10 15078 05 Fuse Holder 36 15016 00 Fuse pLX PL60 36 15017 00 Fuse pLX PL100 36 15018 00 RF Receiver PCB 94 15262 00 RF Rem...

Page 16: ...P O Box 400 Canby OR 97013 P 503 266 2231 TF 800 824 4387 srsmith com 79 15264 00 REV6 18 Questions Contact One of Our Dedicated Lighting Specialists 1 800 824 4387 x4012 or x2282 2018 S R Smith All...

Reviews: