3
Russound ALTx-2 Installation Manual
Rev. 2
PRODUCT OVERVIEW
Introduction
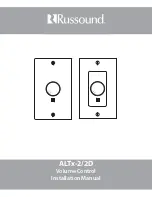
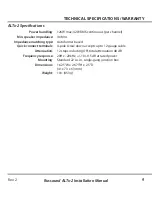
The ALTx-2 (2D) UltraMatch™ Volume Control is a wall-mounted standard or Decora® style
stereo speaker-level 12-step attenuator. It connects between the speaker outputs of an amplifier/
receiver and a pair (or multiple pairs) of speakers. The ALTx-2 adjusts volume level by attenuating
the amplifier signal output of the ALTx-2 to the speakers. It is manufactured using a high-quality
autoformer design for long life, excellent frequency response, no heat build-up, and maximum
power transfer from the amplifier to the speakers.
The UltraMatch™ designation means the ALTx-2 can match the minimum output impedance of
the amplifier/receiver, in addition to adjusting volume. It eliminates the need for a speaker selector
or other impedance matching equipment. The 1X jumper setting allows the volume control to
be used as a standard control. The 2X, 4X, and 8X settings allow it to be used as an UltraMatch™
control.
Considerations
Amplifier power rating
- Make sure the amplifier has 20 watts per channel for each pair of
speakers to be connected.
How many ALTx-2s
- An UltraMatch™ volume control should be used for each pair of speakers
(however, up to 2 pairs of speakers can be used on each control).
Speaker rating
- A minimum 4-ohm speaker load can be connected to the Output of each
UltraMatch™ volume control.
Jumper setting
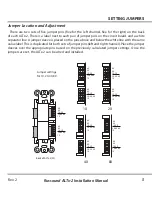
- Each ALTx-2 in the system must have the same jumper setting (1X, 2X, etc.).
Jumper settings must be set BEFORE the ALTx-2 is installed.
Installation location
- Typical locations for ALTx-2 installation include proximity to other wall
controls, near a desk or next to entrances.
Proper Jumper Settings for UltraMatch™ Impedance Matching
- ALTx-2 jumper settings must
be set to correctly multiply the impedance of the system to a level that equals or exceeds the
minimum impedance of the amplifier.
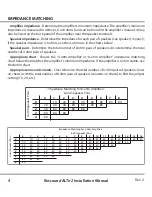
By determining the impedance capability of the amplifier with a few simple calculations, you can
determine the number of speakers the system can safely operate. The jumper settings can then be
determined by using the charts on the next pages.

