

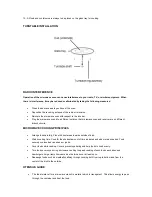


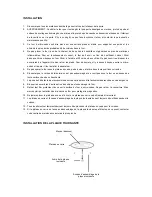


PARTS DIAGRAM
OPERATING INSTRUCTIONS
POWER LEVEL
11 power levels are available.
Level
10
9
8
7
6
5
4
3
2
1
0
Power
100%
90%
80%
70%
60%
50%
40%
30%
20%
10%
0%
Display
PL10
PL9
PL8
PL7
PL6
PL5
PL4
PL3
PL2
PL1
PL0
CLOCK SETTING
1.
Press "CLOCK ", "00:00" will display.
2.
Press the number keys and enter the current time. For example, time is 12:10 now, press "1, 2, 1, 0" in that
order.
3.
Press "CLOCK “ to finish clock setting. ":" will flash and the clock will be displayed.
4.
If the numbers you have used are not within the range of 1:00--12:59, the setting will be invalid until valid
numbers are inputted.
5.
Note: (1) In the process of clock setting, if the "STOP/CANCEL" button is pressed or if there is no operation
within 1 minute, the oven will go back to the former setting automatically.
6.
If the clock needs to be reset, please repeat step 1 to step 3.
KITCHEN TIMER
1.
Press "KITCHEN TIMER ", LED will display 00:00.
2.
Press the number keys and enter the timer time. (The maximum cooking time is 99 minutes and 99 seconds)
3.
Press " START/+30SEC. " to confirm setting.
4.
When the timer time arrives, the buzzer will ring 5 times.
5.
If the clock has been set (12-hour system), LED will display the current time.
Note: 1) The kitchen time is different from 12-hour system. Kitchen Timer is a timer.
2) During kitchen timer, no other program can be set.


