background image

For Customer Services & Spare Parts please call

0345 208 8750

Opening times: Monday - Friday 8am – 8pm & Saturday 9am – 1pm

or visit us at 

www.productcareuk.com

11


Never use sharp metal tools as it may damage the appliance.

Never use an electrical heater, this may cause an electric shock.

Note: Care must be taken when performing the following procedure.

Defrost twice a year or when a frost layer of approximately 7 mm (1/4”) has 
formed. 

6 hours before the defrosting process, set the thermostat knob at the “6” 
position to make sure the food is at the lowest temperature before removing 
the frozen foods. All food should be wrapped in several layers of newspaper 
and stored in a cool place (e.g. fridge or larder).

Switch off the appliance at the socket outlet and pull out the mains plug.

Remove the freezer basket. Leave the lid open. Containers of warm water (not 
hot) may be placed carefully in the freezer to speed up the defrosting process.

Never use hairdryers, electrical heaters or other such electrical appliances for 
defrosting. 

When the ice has melted, drain the water in the bottom of the freezer by 
removing the plastic tap in the bottom of the appliance (this is inside the 
appliance)

NOTES: PLEASE KEEP THE RUBBER COVER SAFE DURING THE DEFROSTING 
PROCESS AND PUT IT BACK AFTER THE DEFROSTING PROCESS IS COMPLETE

Situated at the front left bottom corner of the appliance (this is on the outside 
of the appliance), is a small plastic drain cap. Place a container under the drain 
tap to catch the defrosted water. Unscrew the tap slowly so the drips out at 
first, once the tap is completely unscrewed the water will flow in to the 
container. This may take several attempts to drain all the water. After the 
draining has been completed, replace the tap in the appliance and rotate the 
drainage cap on the outside of the appliance. 

Wipe up any spillages that may have occurred.

Defrosting

Summary of Contents for RHCF142B

Page 1: ...CF142B For Customer Services Spare Parts please call 0345 208 8750 Opening times Monday Friday 8am 8pm Saturday 9am 1pm or visit us at www productcareuk com IMPORTANT RETAIN FOR FUTURE REFERENCE Chest Freezer Instruction Manual ...

Page 2: ...ctrical Safety 4 Before switching on 5 Unit Spare Parts 5 Transportation Handling 6 Positioning 6 Product Overview 7 Installation 8 How to use 9 Temperature selection 9 Power Failure 10 Storage Advice 10 Defrosting 11 Internal Cleaning 12 External Cleaning 12 When not in Use 12 Trouble shooting 13 14 Important notes 15 Connection to the mains 16 Guarantee 17 Technical specification 18 ...

Page 3: ...ised to ensure that they do not play with the appliance If the supply lead is damaged it must be replaced by a qualified person using the correct lead available from 0345 208 8750 Do not store chemicals or liquids such as methanol or petrol etc which are easy to evaporate burn or explode Do not store heavy objects on top of the appliance and do not allow the refrigerator to become wet The circuitr...

Page 4: ...refrigeration circuit components become damaged In the event of damage avoid any naked flames or any sources of ignition and ventilate the room in which the unit is placed for a few minutes Warning Keep the ventilation openings in the appliance enclosure clear of obstruction Electrical Safety THIS APPLIANCE MUST BE PLUGGED INTO AN EARTHED SOCKET Before switching on make sure that the voltage of yo...

Page 5: ...u first switch on the appliance it will disappear when the appliance starts to cool To save energy you should minimize the frequency and duration of door opening Unit Parts Before installation check that all parts listed below are present If any parts are missing please contact the product care service team on 0345 208 8750 Important Information Unit Spare Parts For the following spares please con...

Page 6: ...e appliance on a flat level surface tilt it slightly backwards onto the two rear rollers and push backwards This unit is heavy and could cause injury ensure there is sufficient person power to move the appliance Positioning This appliance should only be placed on a flat firm surface Choose a dry and well ventilated space No less than 10cm must be left around the sides and at the back to allow effi...

Page 7: ...0345 208 8750 Opening times Monday Friday 8am 8pm Saturday 9am 1pm or visit us at www productcareuk com 7 Product overview 1 2 3 4 5 6 1 Handle 2 Wire basket 3 Temperature control dial indicator lights 4 Adjustable feet 5 Power cord 6 Drainage hole ...

Page 8: ...he unit Remove all transport tapes and foam protection pieces Clean the interior of the freezer with a cloth dampened in lukewarm soap and water Wipe with clean water and wipe dry When the appliance has been positioned adjust the two side feet to ensure the unit is stable This is essential to ensure quiet running and proper door opening closing See below Once the appliance has been standing for 3 ...

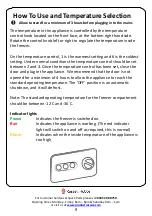
Page 9: ...normal conditions the temperature control should be set between 2 and 3 Once the temperature control has been set close the door and plug in the appliance We recommend that the door is not opened for a minimum of 4 hours to allow the appliance to reach the standard operating temperature The OFF position is an automatic shutdown and it will defrost Note The standard operating temperature for the fr...

Page 10: ...out danger Shellfish Should be refrigerated and used up quickly Cooked Dishes i e casseroles should be refrigerated and used up Large Pieces of Meat Should be refrigerated and used up quickly Small Joints Should be refrigerated and used up quickly Chicken Should be refrigerated and used up quickly Storage Advice Store fresh food in airtight boxes or wrap in bags or foil which is suitable for freez...

Page 11: ...rm water not hot may be placed carefully in the freezer to speed up the defrosting process Never use hairdryers electrical heaters or other such electrical appliances for defrosting When the ice has melted drain the water in the bottom of the freezer by removing the plastic tap in the bottom of the appliance this is inside the appliance NOTES PLEASE KEEP THE RUBBER COVER SAFE DURING THE DEFROSTING...
Page 12: ...ater Do not put them in the dishwasher Do not use abrasive products detergents or soaps After washing rinse with clean water and dry carefully When the cleaning operations are complete reconnect the plug with dry hands External Cleaning Wash the outer cabinet with warm soapy water Do NOT use abrasive products There are sharp edges on the underside of the product so care should be taken when cleani...

Page 13: ...our freezer opened frequently and do they remain open for long periods of time If so reduce the frequency and length of time the doors are open for Ensure the door is fully shut and the seal is making complete contact to the cabinet Is your appliance over filled If the appliance is operating noisily compressor noise This is normal This noise indicates that the compressor is operating normally As t...

Page 14: ...he refrigerator Check all food is covered and sealed Check wet containers have not been placed in the appliance Are the doors of the appliance opened frequently Once the door is opened the humidity found in the air in the room enters the appliance especially if the humidity levels in the room are very high The more frequently the door is opened in humid conditions the more chance of the build up o...

Page 15: ...trical socket the compressor protective thermal element will be opened as the pressure of the gas in the cooling system of your refrigerator has not yet been balanced 4 or 5 minutes later your refrigerator will start to operate this is normal If you won t be using your refrigerator for a long time disconnect the plug from the socket Clean your refrigerator as per the cleaning instructions and leav...

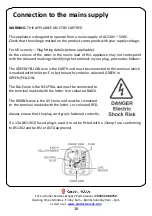
Page 16: ...nd with the coloured markings identifying the terminals in your plug proceed as follows The GREEN YELLOW wire is the EARTH and must be connected to the terminal which is marked with the letter E or by the earth symbol or coloured GREEN or GREEN YELLOW The BLUE wire is the NEUTRAL and must be connected to the terminal marked with the letter N or coloured BLACK The BROWN wire is the LIVE wire and mu...

Page 17: ...nd can be arranged Refund or replacement is at the discretion of Product Care The following conditions apply Product Care will require a valid proof of purchase at the point of replacement or refund The product must be installed and used in accordance with the instructions contained in this instruction guide and any other instructions for use which has been supplied It must be used for domestic pu...

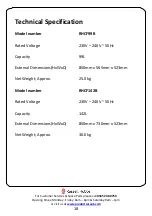
Page 18: ...at www productcareuk com 18 Technical Specification Model number RHCF99B Rated Voltage 230V 240V 50Hz Capacity 99L External Dimensions HxWxD 850mm x 565mm x 523mm Net Weight Approx 25 0 kg Model number RHCF142B Rated Voltage 230V 240V 50Hz Capacity 142L External Dimensions HxWxD 850mm x 730mm x 523mm Net Weight Approx 30 0 kg ...

Page 19: ... not be disposed of with your general household waste Only discard electrical electronic battery items in separate collection schemes which cater for the recovery and recycling of materials contained within Your co operation is vital to make sure the success of these schemes and for the protection of the environment For your nearest disposal facility visit www recycle more co uk or ask in store fo...

Reviews: