Copyright © 2017 Ruckus Wireless, Inc.
Page 3 of 3
Published May 2017, Part Number 800-71062-001 Rev E
2
Using the four 1” 6-32 Phillips mounting screws, attach
the C110 mounting bracket to a single-gang wall outlet
box.
3
Pull the coaxial cable for the C110 through the wall out-
let box.
4
Pull the power cable from the adapter through the wall
outlet box.
5
Pull any bypass cables (up to two) through the wall out-
let box.
Note:
The bypass cables can be Ethernet, coax,
or any other type of cable, as required.
S
TEP
7: A
TTACHING
THE
C110
TO
THE
M
OUNTING
B
RACKET
1
Make sure that the mounting bracket is securely fas-
tened as described in
Step 6: Attaching the Mounting Bracket to an
2
If you are installing a USB device (such as a BLE bea-
con), then plug it securely into the USB jack on the bot-
tom of the C110.
3
Pull the uplink coaxial cable from your network through
the outlet box, and plug it into the back of the C110.
4
Connect the power adapter cable to the 12VDC in port
on the back of the C110.
5
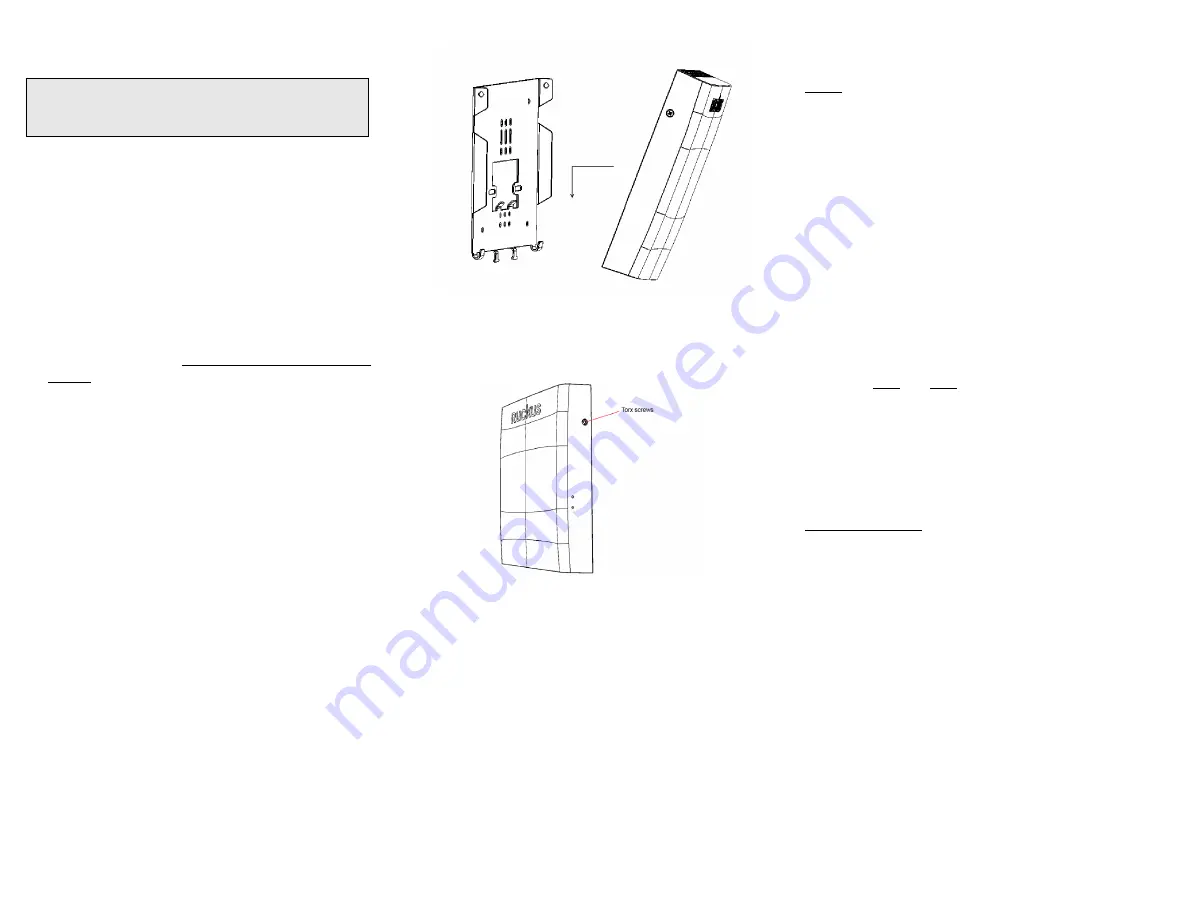
The mounting bracket has two lower hooks that fit into
slots on the bottom of the C110. Rest the bottom of the
C110 on those hooks, and then tilt the C110 toward the
wall until it is up against the mounting bracket. Any
optional bypass cable(s) should slide smoothly into the
slots on the bottom panel of the C110.
Figure 4: Attaching the C110 to the Mounting Bracket
6
Use a T10 Torx driver to screw the two white torx
machine screws through the C110 screw holes into the
threaded inserts on the sides of the mounting bracket.
Figure 5: Insert the torx screws to lock the AP to the bracket
S
TEP
8: T
ESTING
THE
C110 O
PERATION
After a short pause to re-establish the Internet connection,
you can test the C110.
NOTE
: As Ruckus does not provide the CMTS side of the
connection, the installer must first ensure that the cable
modem connection to the CMTS is resolved prior to calling
Ruckus Support.
1
Check that the cable modem LEDs are lit. Cable
modem LEDs are labeled DS (downstream), US
(upstream) and ONLINE.
2
Using any wireless-enabled computer or mobile device,
search for and select the wireless network you previ-
ously configured (or auto-configured by CMTS).
3
If you can connect, open a browser and navigate to any
public website.
4
Using any wired computer or other device and an Ether-
net cable, plug into an Ethernet port on the bottom of
the C110.
5
Open a browser and navigate to any public website.
6
and
for the rest of the Ethernet ports
on the bottom of the C110.
7
Verify that any connected USB devices are working cor-
rectly, if applicable.
Congratulations!
Your C110 is active and ready for use.
For more information on AP configuration, maintenance
and administration, refer to the
Ruckus Wireless Indoor
Access Point User Guide
, available from
support.ruckuswireless.com
.
NOTE:
The mounting bracket has two hooks that face
UP. Make sure that the hooks are facing up when
attaching the mounting bracket to the wall outlet box.


