Innovating the Future of Global Communications
Installation Instructions
1
ROAMEO AP-1800
Access Point
RF (Radio Frequency) Considerations
When placing an access point, the antennas should be
placed in such a way as to have great visibility over the
area of desired coverage. This means mounting the access
point to a high point, such as a ceiling or wall above most of
the clutter and traffic of an area. If the access point has to
be mounted in a tight space, keep the antennas at least 12
inches (30cm) from any metal.
Survey Implementation
Site Survey is a system feature used to plan and design the
ROAMEO system. It provides crucial information such as
wireless coverage and roaming coverage.
Using the Site Survey mode of the ROAMEO system, you
are able to find access point coverage areas, even when
obstacles are encountered, such as metal walls, reinforced
concrete, metal-coated glass, etc.
Mounting the Access Point
Reference View
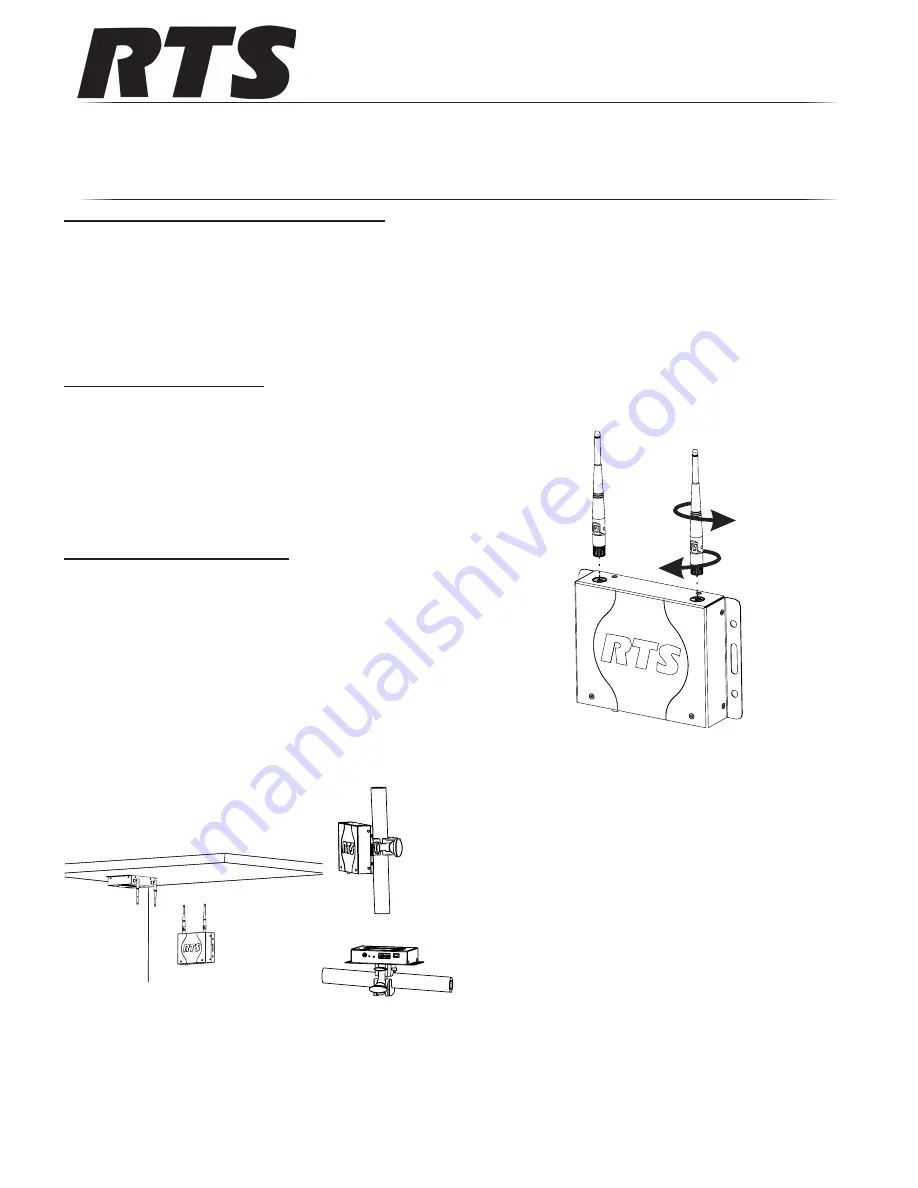
There are four (4) recommended ways to mount the
ROAMEO AP-1800 access point unit: ceiling or wall-
mounting, pole mounting, rail mounting, or as a free-standing
installation (such as a table or shelf).
IMPORTANT
: The mounting clamp kit is an optionally sold
item.
Antenna connection and placement
Antennas should be in the upright-most position for the best
reception of signal. The antenna has a joint so you can adjust
the angle, if needed.
To
attach the antennas to the ROAMEO AP-1800
, do the
following:
1. Gently push the
antenna into the antenna connector
on the ROAMEO AP-1800. Take care to align the
connector pin with the antenna pin hole.
2. Turn the
antenna clockwise to tighten
in place.
NOTE
: For permanent antenna installation, it is
recommended to tighten the antennas so
they cannot come loose from vibration or if
bumped.
Hand-tighten the antenna, and then using
needle-nose pliers, grasp the serrated metal
collar of the antenna and tighten about
1/16th inch (1.6 mm) more in the clockwise
direction. This tightens the connector
to about 5 lbf-in (0.56 Nm), which is the
specification for a solid connection.
Rail-Mounted
Pole-Mounted
Ceiling or Wall-Mounted
Rotate the antenna
clockwise to tighten
Rotate the antenna
counter-clockwise to loosen
Carefully align
the antenna with
the antenna connector


