


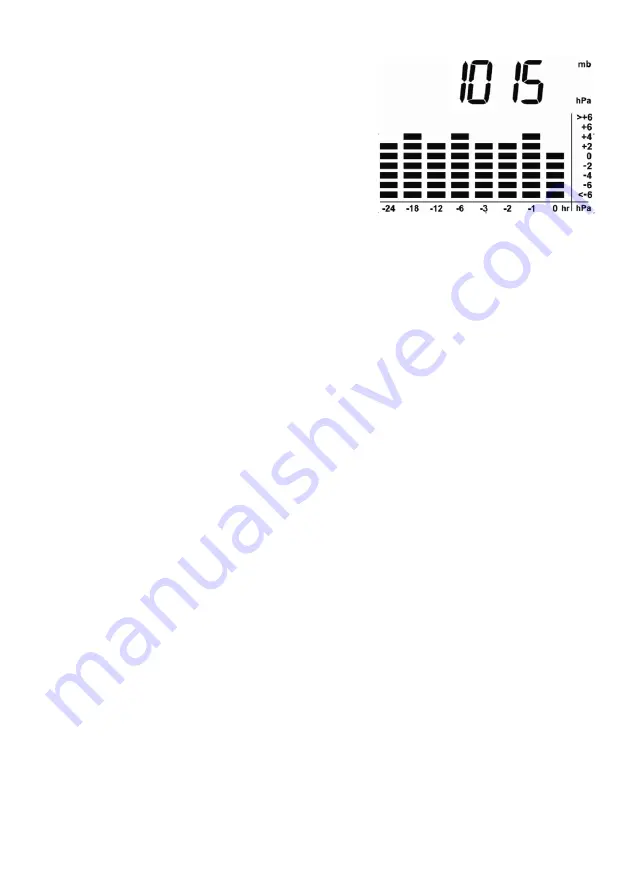
HOW TO CHECK THE BAROMETRIC PRESSURE
The current and historical barometric pressure is shown on
the atmospheric pressure window.
For monitoring the Sea Level barometric pressure reading
at certain altitude, the user needs to select the local alti-
tude (-100 to 2500 meter or -330 to 8200 foot) for the alti-
tude setting. Our weather station requires entry of elevation
in meter and in foot separately. Therefore, to convert foot
to meter, multiply foot by 0.3048. To determine your loca-
tion elevation, please either contact your local library,
TV/radio weather forecaster, or via Internet at
http://www.worldatlas.com/aatlas/infopage/elva-
tion.htm.
1.
To enter the altitude compensation setting mode, press and hold [
HISTORY
] button for 2 seconds
to switch from Barometric Pressure to Altitude adjust mode for 10 seconds and the meter icon
flashes.
2.
During Altitude adjust mode, press [
UNIT
] button to toggle between meter and foot unit. Then
press [
HISTORY
] button to confirm.
3.
Last altitude reading will flash, press [
UNIT
] button to increase the value by 10. Hold down the
button to have fast stepping. Press [
HISTORY
] button once to confirm and exit setting.
The atmospheric pressure can be displayed in mb/hPa, inHg. Press [
UNIT
] to select the pressure
unit.
Our weather station is equipped with barometer reading for 24hr history. If you want to check the
pressure history for a particular hour during the past 24 hours, press [
HISTORY
] button, each press
on the button will go back by an hour.
Note: If the weather station was just installed with batteries and past data was not yet measured, it
will display ‘----‘.
The recorded barometric changes for the past 24 hours are displayed in a bar chart below the baro-
metric pressure window.
SET BACKLIGHT COLOR
Make sure the backlight switch is not on ‘OFF’ position, press & hold [
MODE
] for 2 seconds to enter
the backlight color setting and the barometric chart displays a “C” pattern to prompt the user to set
the color, the alternate backlight indicates the backlight is set to auto mode and its color is changed
according to the weather condition (see more details in ‘BACKLIGHT COLOR CHANGE ACCORDING
TO FORECAST WEATHER CONDITION’), press [
UNIT
] button to select fix backlight color in the
sequence, ‘AMBER’ ?
‘BLUE’ ?‘PURPLE’ and then cycle back to 'auto mode'. Press [
MODE
] button to confirm the setting
or auto exit after 10 second.
Note: The combination of the backlight color is subject to change in final product.
BACKLIGHT COLOR CHANGE ACCORDING TO FORECAST WEATHER CONDITION
While the backlight is set to auto mode, the color of the backlight will change according to the fore-
cast weather condition to acknowledge the user for the forecast weather.
Sunny - amber color
Slight Cloudy & Cloudy - purple color
Rainy & Stormy (or Snowing) - blue color
19
Summary of Contents for 02876
Page 1: ...1 RST02876 Every degree is under control...
Page 2: ...RST02876 RST RST02876 5 RST02870 433 75 A 6 8 B 3 C D E F E G 5 75 H I G J K 24 2...
Page 4: ...7 2 8 city 2 9 clock 10 mode 2 backlight 1 2 3 75 RST02870 A 1 2 4 AA 3 B 220 1 6 2 C 220 A 4...
Page 6: ...1 2 clock 10 2 3 2 clock 4 clock 5 clock 6 SNOOZE 5 alarm stop 8 5 W E 6...
Page 9: ...Rh rel Rh 40 70 20 25 25 95 Rh 0 70 20 Rh 0 oC 20 Rh 2 mode C color units mode 10 9...
Page 12: ...12...
Page 21: ...21...
Page 22: ...22...
Page 23: ...23...
Page 24: ...www rusmeteo ru...


