ORACLE
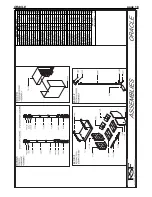
1. Note the location of floor and roof joists. Choose a
location which does not require cutting the joists.
Note the location of doors and windows in relation to
the fireplace and chimney on all floors of the house.
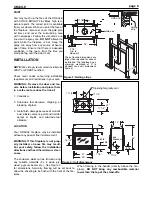
2. Frame an area to fit the ORACLE. Follow the fram-
ing dimensions on Figure 4.
3. Prepare the unit for installation. Be sure that the top
and side stand-offs are placed correctly for your par-
ticular installation. The holes in the side stand-offs
have been elongated to allow easy alignment of the
framing and the fireplace sides. The end of the L-
shaped part of the standoff should be flush with the
face of the fireplace so the fireplace does not appear
recessed when the wall facing is put in place.
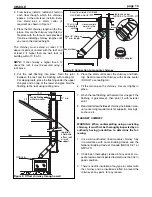
4. Push the ORACLE into the pre-framed area. Then
hammer nails through all of the holes in the stand-
offs to secure the fireplace in that position.
WARNING: No insulation or other materials are
allowed between the framing and the fireplace.
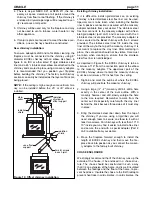
CEILING CLEARANCE
Ceiling Clearance is the distance from the top of the
fireplace to the ceiling.
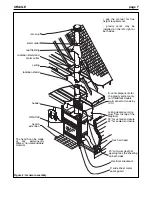
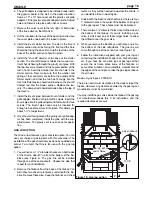
If the space between the top of the fireplace and the
ceiling joists is less than 44 inches, the enclosure
around the fireplace MUST be vented. Place a mini-
mum 3" X 10" vent grille into holes cut within one foot of
both the floor and ceiling levels, to allow room air to cir-
culate through the fireplace enclosure and reduce heat
build-up. These vent grilles may be placed vertically or
horizontally. Under no circumstances is the distance
between the first firestop and the top of the unit to be
less than 32 inches (See Figure 2).
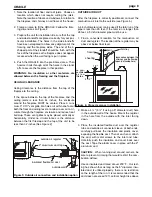
OUTSIDE AIR DUCT
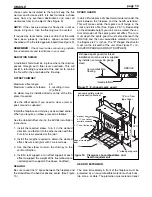
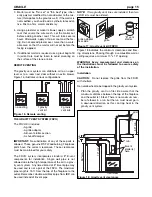
After the fireplace is correctly positioned, connect the
combustion air inlet to the outside (see Figure 5).
A 4 inch diameter duct can be used if the total run of the
pipe is less than 25 feet. If the total run is longer than
25 feet, a 5 inch diameter pipe must be use.
1. Find a convenient location for the combustion air
duct and register. The location of the register may be
above or below floor level.
2. Make a 4 ¼" (5 ¼" if using a 5" diameter duct) hole
in the outside wall of the house. Mount the register
in the hole from the outside with the inlet facing
down.
3. Place the insulated flexible duct over the register
tube and outside air connector sleeve. At both ends,
carefully pull back the insulation and plastic cover,
exposing the flexible duct. Then at each end, attach
the duct with metal screws to the inlet and tube.
Carefully push the insulation and cover back over
the duct. Tape the plastic cover in place with the 2"
aluminum duct.
CAUTION:
When running duct around corners, be
sure to prevent crimping that would restrict the com-
bustion airflow.
Use an insulated duct rated at over 200° F. Our test-
ing has shown that as long as the 5" diameter insu-
lated duct is utilized properly, there is no restriction
on the length of the run. It is recommended that the
duct does not exceed 12 ft. vertical height rise above
page 8
Figure 5: Outside air connection and installation option
insulated flexible air duct
outside wall
2” aluminium duct tape
ORACLE
outside air register
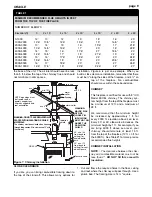
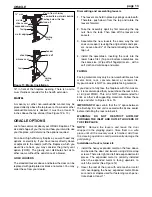
Figure 6: Close clearance installation
leave space between the
chimney and the framing
open (no firestop here)
chimney
2" min.
framing
sheeting
4 1/2"
no com-
bustibles
b e l o w
this line
1/2"


