


7
Go-Go
PRE-RIDE SAFETY CHECK
Get to know the feel of your scooter and its capabilities. Pride recommends that you perform a safety check before
each use to make sure your scooter operates smoothly and safely. For details on how to perform these necessary
inspections, see XI. Care and Maintenance.
Perform the following inspections prior to using your scooter:
n
Check all electrical connections. Make sure they are tight and not corroded.
n
Check the brakes.
n
Check battery charge.
If you discover a problem, contact your authorised Pride Provider for assistance.
WEIGHT LIMITATIONS
Your Go-Go is rated for a 113 kg (250-lb.) maximum weight limit.
I I . S A F E T Y
WARNING! Exceeding the weight limit voids your warranty and may result in personal injury and
damage to your scooter. Pride will not be held responsible for injuries and/or property damage
resulting from failure to observe weight limitations.
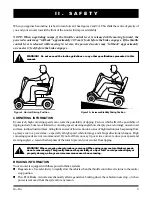
WARNING! Do not carry passengers on your scooter. Carrying passengers may result in personal
injury and/or property damage.
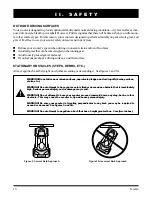
GETTING ONTO AND OFF OF YOUR SCOOTER
Getting onto and off of your scooter requires a good sense of balance. Please observe the following safety tips
when getting onto and off of your scooter:
n
Power down your scooter. See VI. Operation.
n
Ensure that your scooter is not in freewheel mode. See IV. Your Go-Go.
n
Make certain that the seat is locked into place and the key is removed from the key switch.
WARNING! Position yourself as far back as possible in the scooter seat to prevent the scooter from
tipping and causing injury.
WARNING! If you have the optional seat upgrade with armrests, avoid using your armrests for
weight bearing purposes. Such use may cause your Go-Go to tip and cause personal injury.
WARNING! Avoid putting all of your weight on the floorboard. Such use may cause the scooter to tip
and cause personal injury.
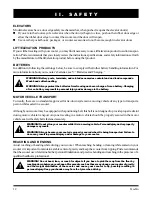
POSITIONING BELTS
Your authorised Pride Provider, therapist(s), and other healthcare professionals are responsible for determining
your requirement for a positioning belt in order to operate your scooter safely.
WARNING! If you require a positioning belt to safely operate your scooter, make sure it is fastened
securely. Serious personal injury may result if you fall from the scooter.


