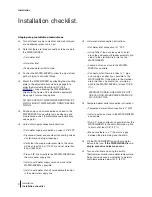
Turn off steam supply to sterilizer and wait until jack-
et and chamber pressure is 0 psi.
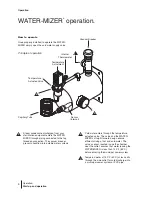
Note that there are three connections to be made to
the WATER-MIZER:
• Cold water inlet
• Hot water inlet
• Tempered water outlet to drain
Position the WATER-MIZER to allow the most direct
path of piping to minimize fittings.
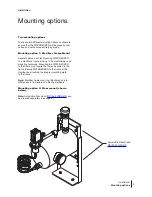
Mount the WATER-MIZER by attaching the mounting
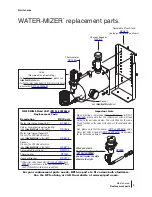
plate to the adjustable floor stand (see page 8 to
order the Adjustable Floor Stand, RPI Part
#RPH470), or by attaching the WATER-MIZER
directly to the frame of the sterilization equipment.
See page 4 for mounting options.
DO NOT SUPPORT WATER-MIZER ENTIRELY BY
PIPING. MOUNT WATER-MIZER FIRMLY BEFORE
PIPING.
Position unions on all connections as close to the
WATER-MIZER as possible to make cleaning and
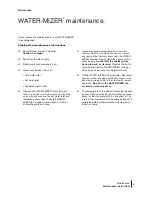
maintenance easier. (For Maintenance Instructions,
see page 6.)
Cold water supply connection instructions:
• Cold water supply connection on valve is 3/8" FPT.
• Disconnect jacket and chamber trap cooling valves
on sterilizer and plug all openings.
• Verify that the supply water pressure to the valve
will be at least 25 psi (172 kPa) and not more than
80 psi (552 kPa).
• Pipe a 3/8" line directly to the WATER-MIZER from
the main water supply line.
• Install a cold water supply union as close to the
WATER-MIZER as possible.
• Install a cold water shut-off valve before the union
in the cold water supply line.
Installation checklist.
Installation
Hot water inlet connection instructions:
• Hot water inlet connection is 1" FPT.
• Using Teflon
®
tape or pipe sealant, install
brass tee and vacuum breaker assembly pro-
vided, to the sterilizer drain inlet on the
WATER-MIZER.
• Locate a union as close to the WATER-
MIZER as possible
• Connect all sterilizer drain lines to 1" pipe
and run pipe as directly as possible to the
WATER-MIZER. If the piping to the sterilizer
drain inlet has a horizontal run, maintain a
pitch to the WATER-MIZER of at least 1/8"/ft
(1%).
STERILIZER DRAIN LINES MAY BE HOT!
USE CAUTION. MAKE SURE STEAM SUP-
PLY IS SHUT OFF.
Tempered water outlet connection instructions:
• Tempered water outlet connection is 2" MPT.
• Install a union as close to the WATER-MIZER
as possible.
• Run a 2" pipe as directly as possible from the
WATER-MIZER to the drain. Maintain a pitch
to drain of at least 1/8"/ft (1%).
• Make sure there is a 1" (25 mm) air gap
between the drain piping and the drain.
Fill the WATER-MIZER tank with cold water
before initial use.
If the WATER-MIZER is run
empty, excessive noise may occur.
Turn on sterilizer and using the built-in
thermometer, monitor drain water temperature.
Adjust valve on case as indicated to maintain
drain temperature below 140°F (60°C).
Installation
:
Installation checklist
3
Step-by-step installation instructions


